

So, you sculpted a doll head and want to write company and mold name on the surface of some piece.
Here is a step-by-step process.
Add text.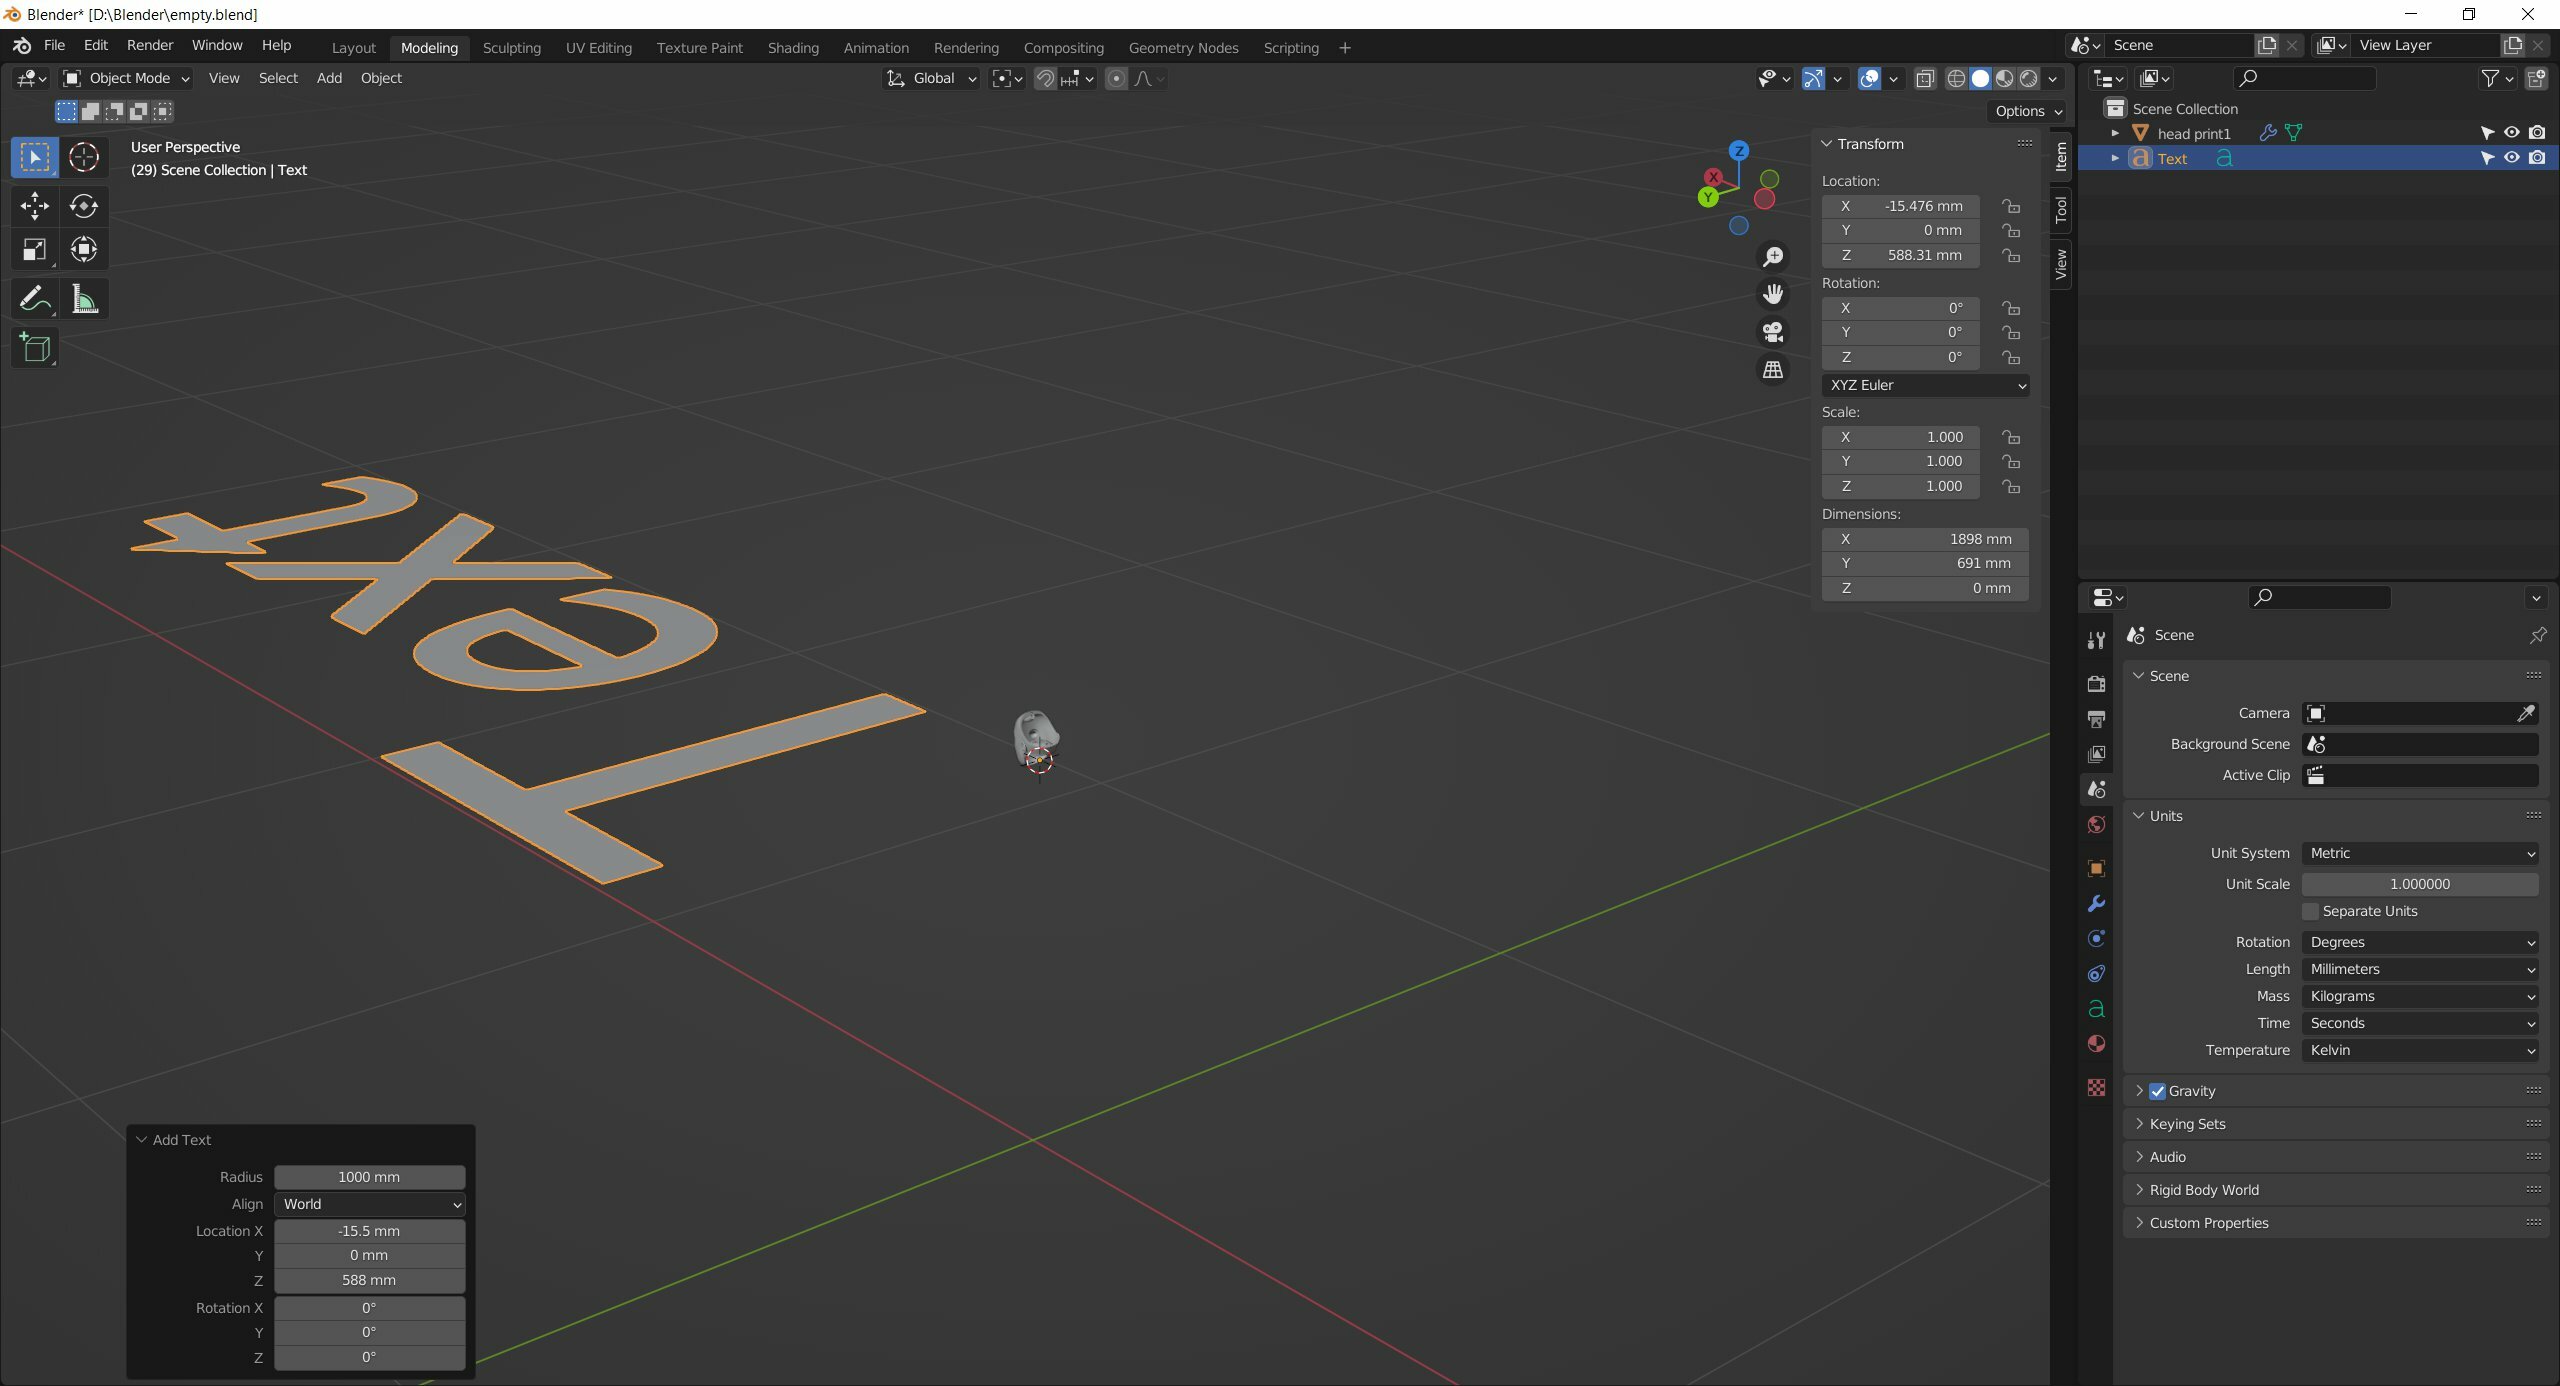
It appears very big and lays flat, so:
- scale it down,
- rotate it to 90 degrees by X,
- rotate it to -90 degrees by Z (in my case, because my doll is symmetrical not by X but by Y).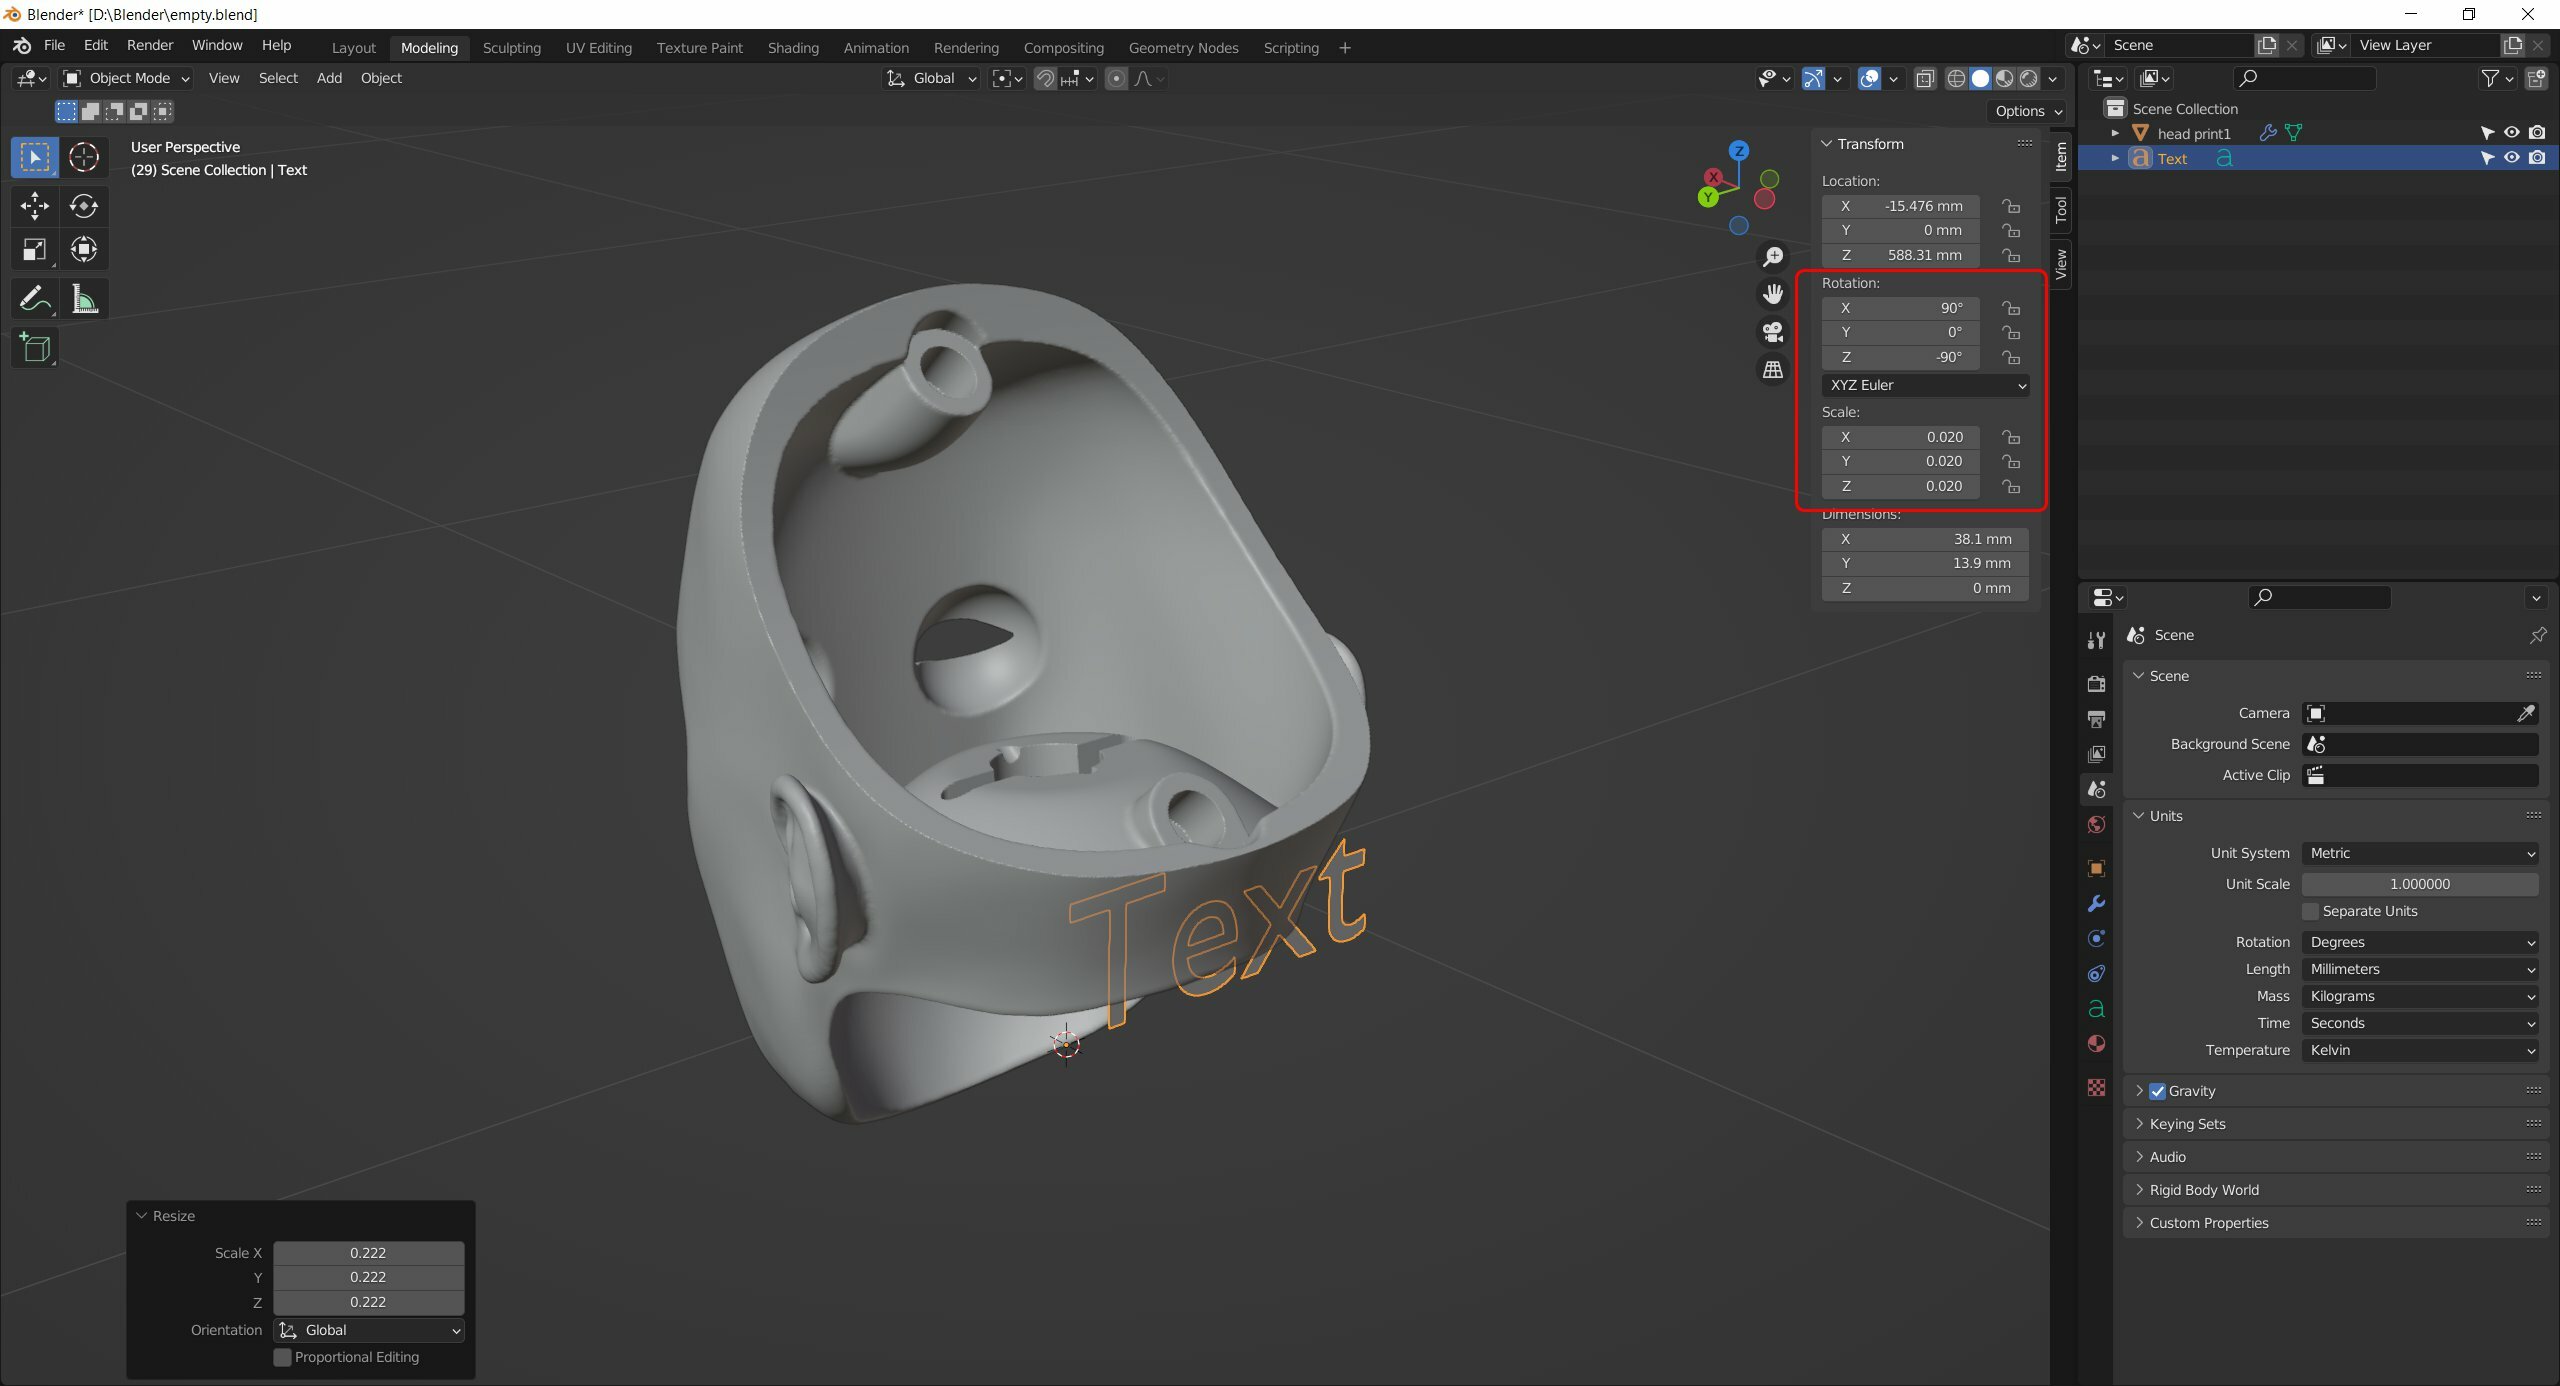
Open text editing tab. Select a font that you like.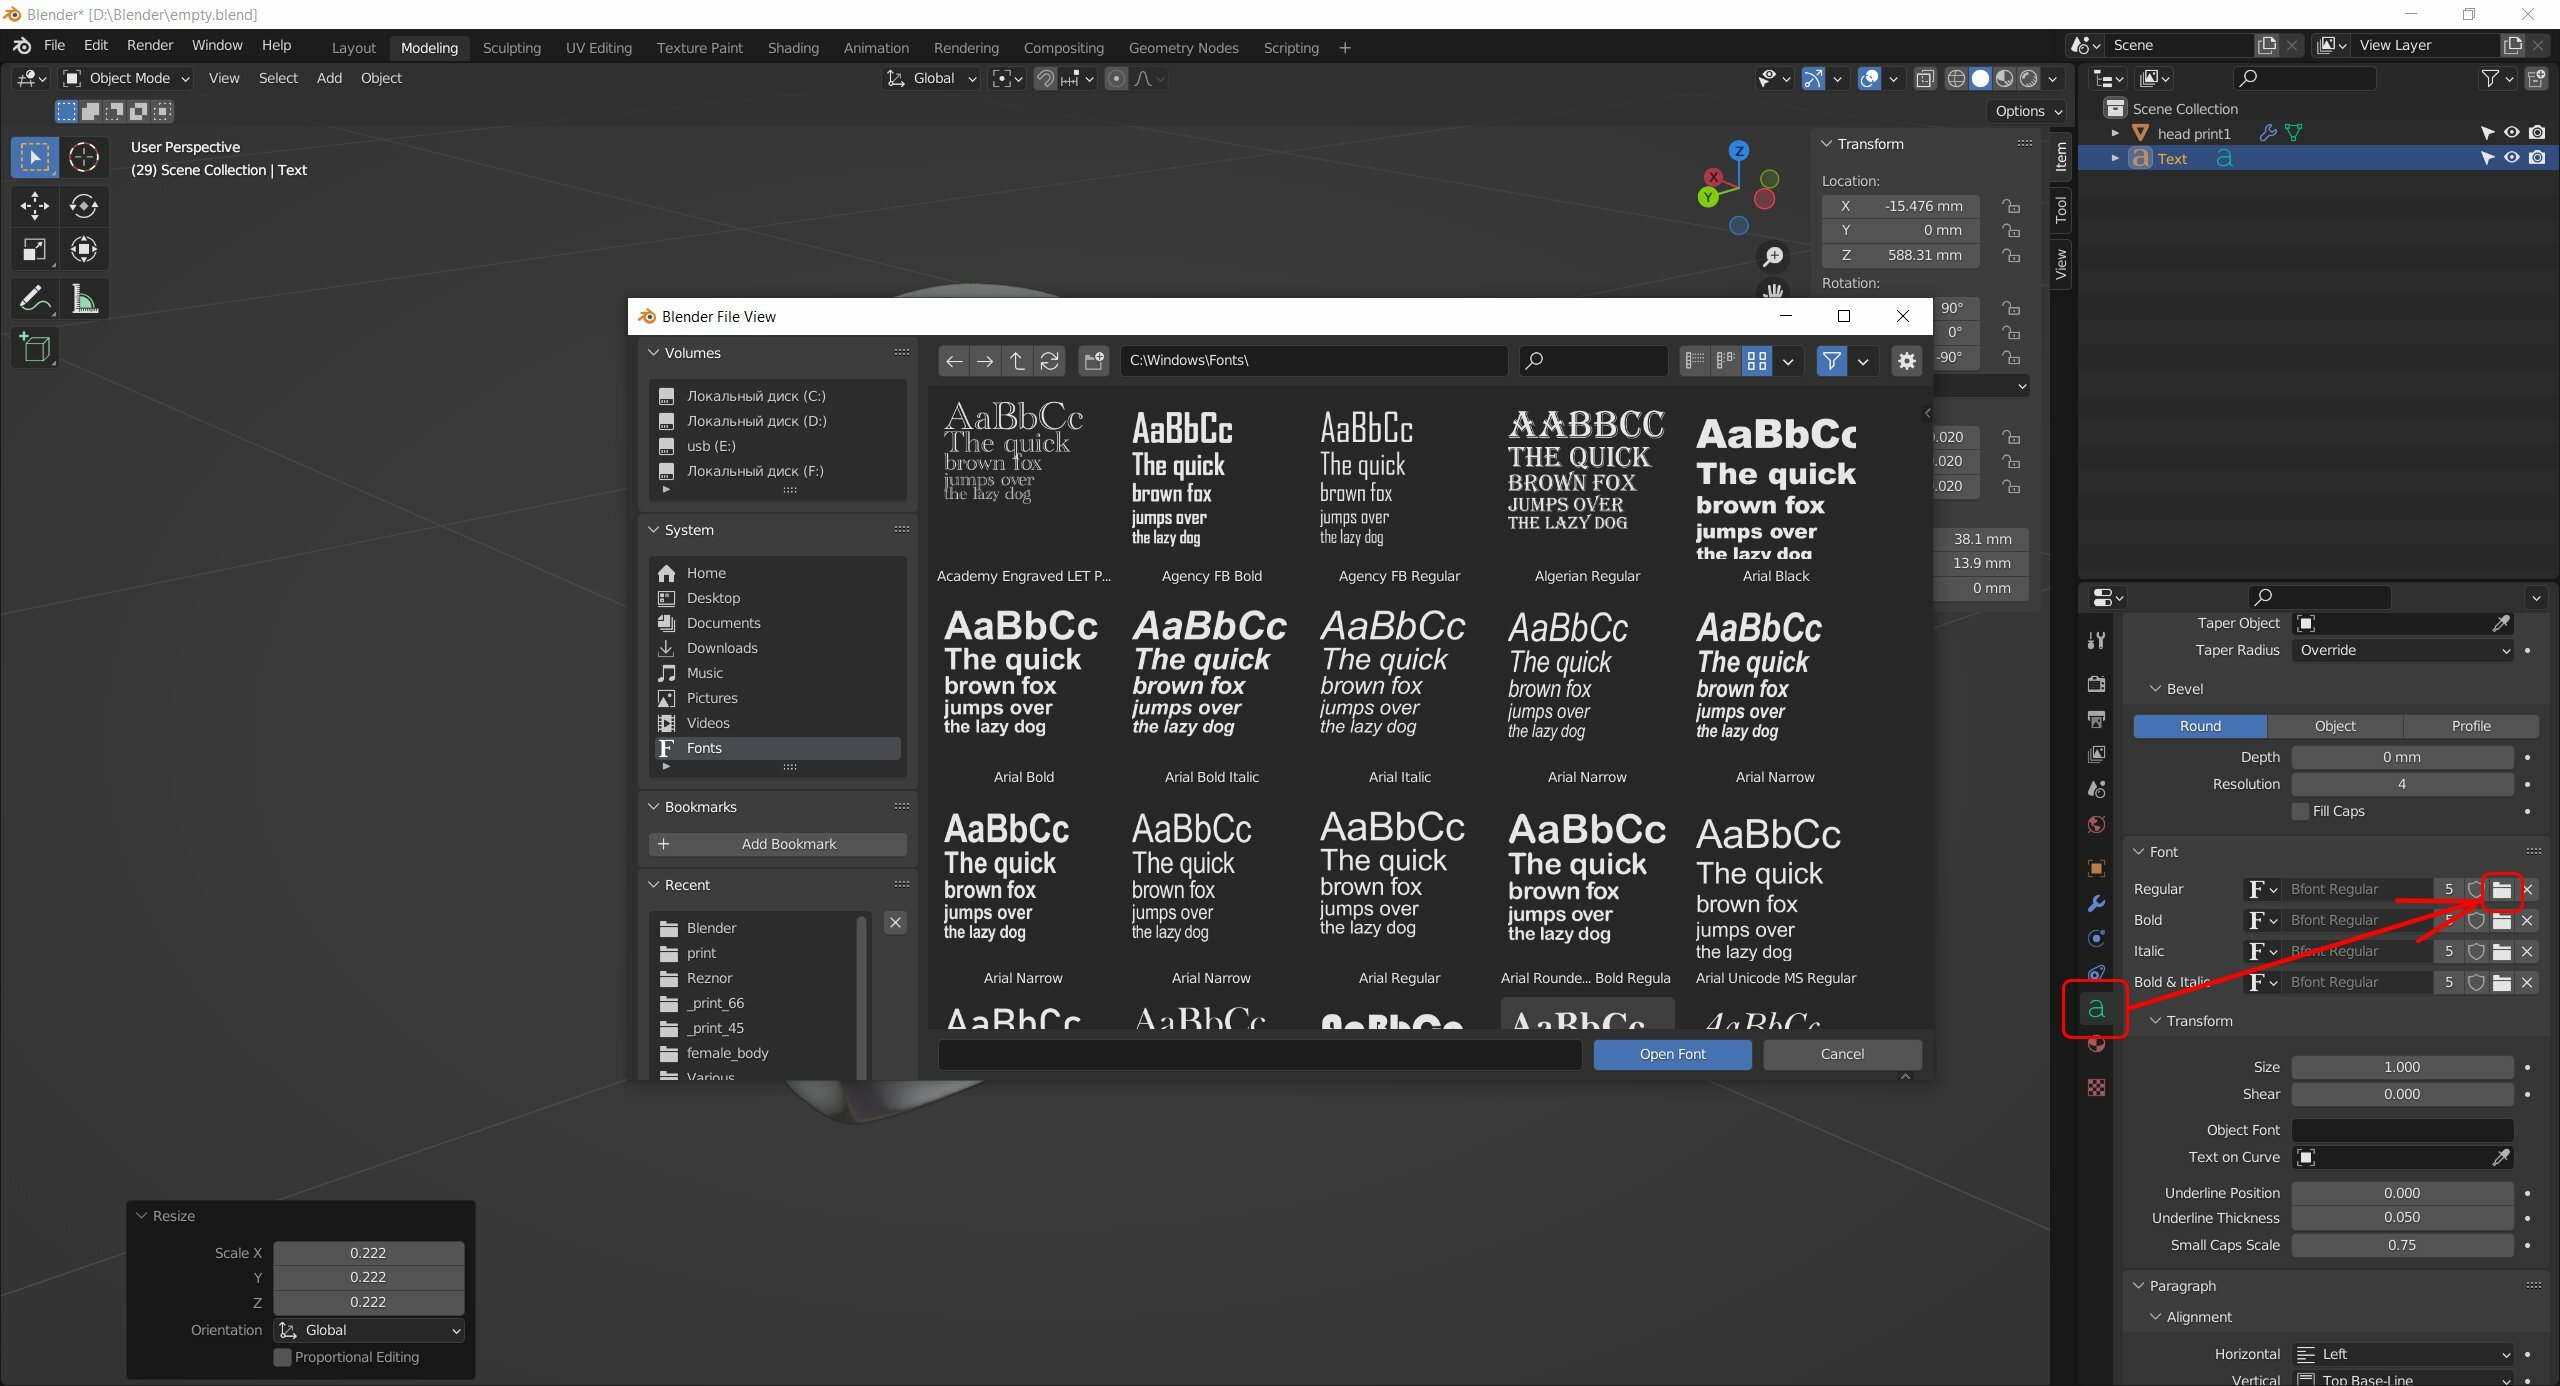
The font is selected.
Set both alignments to Center.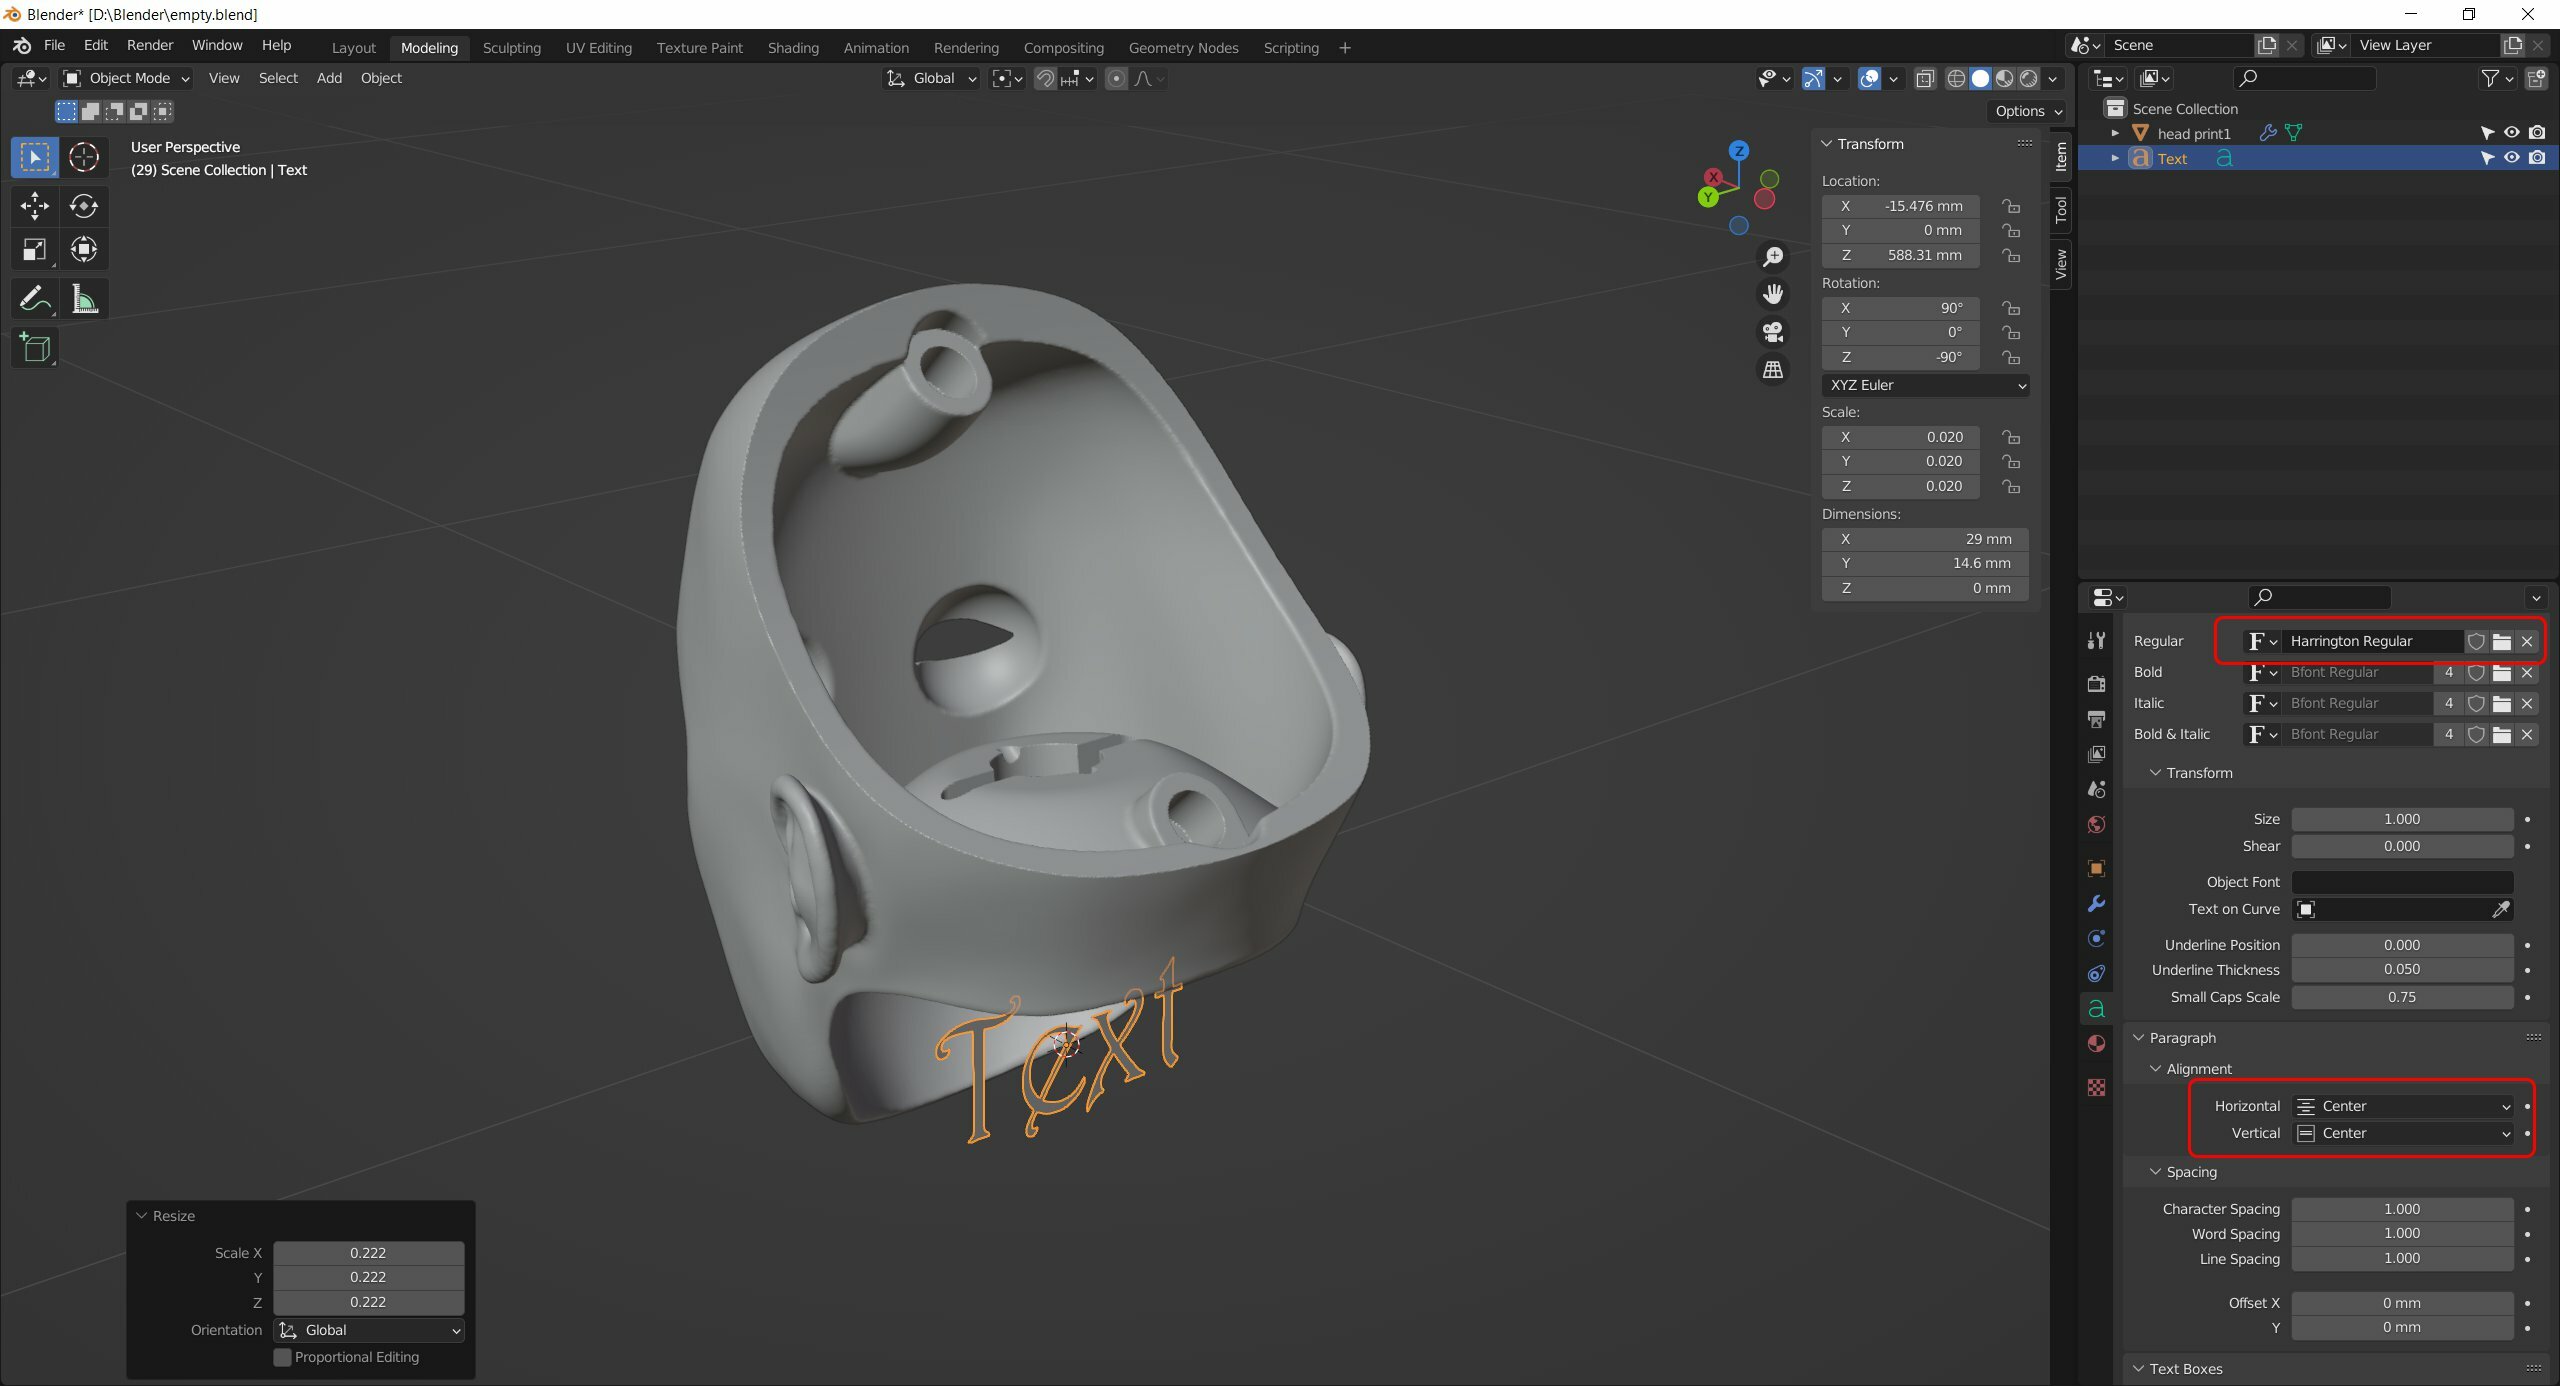
In Edit mode change the text to anything you like.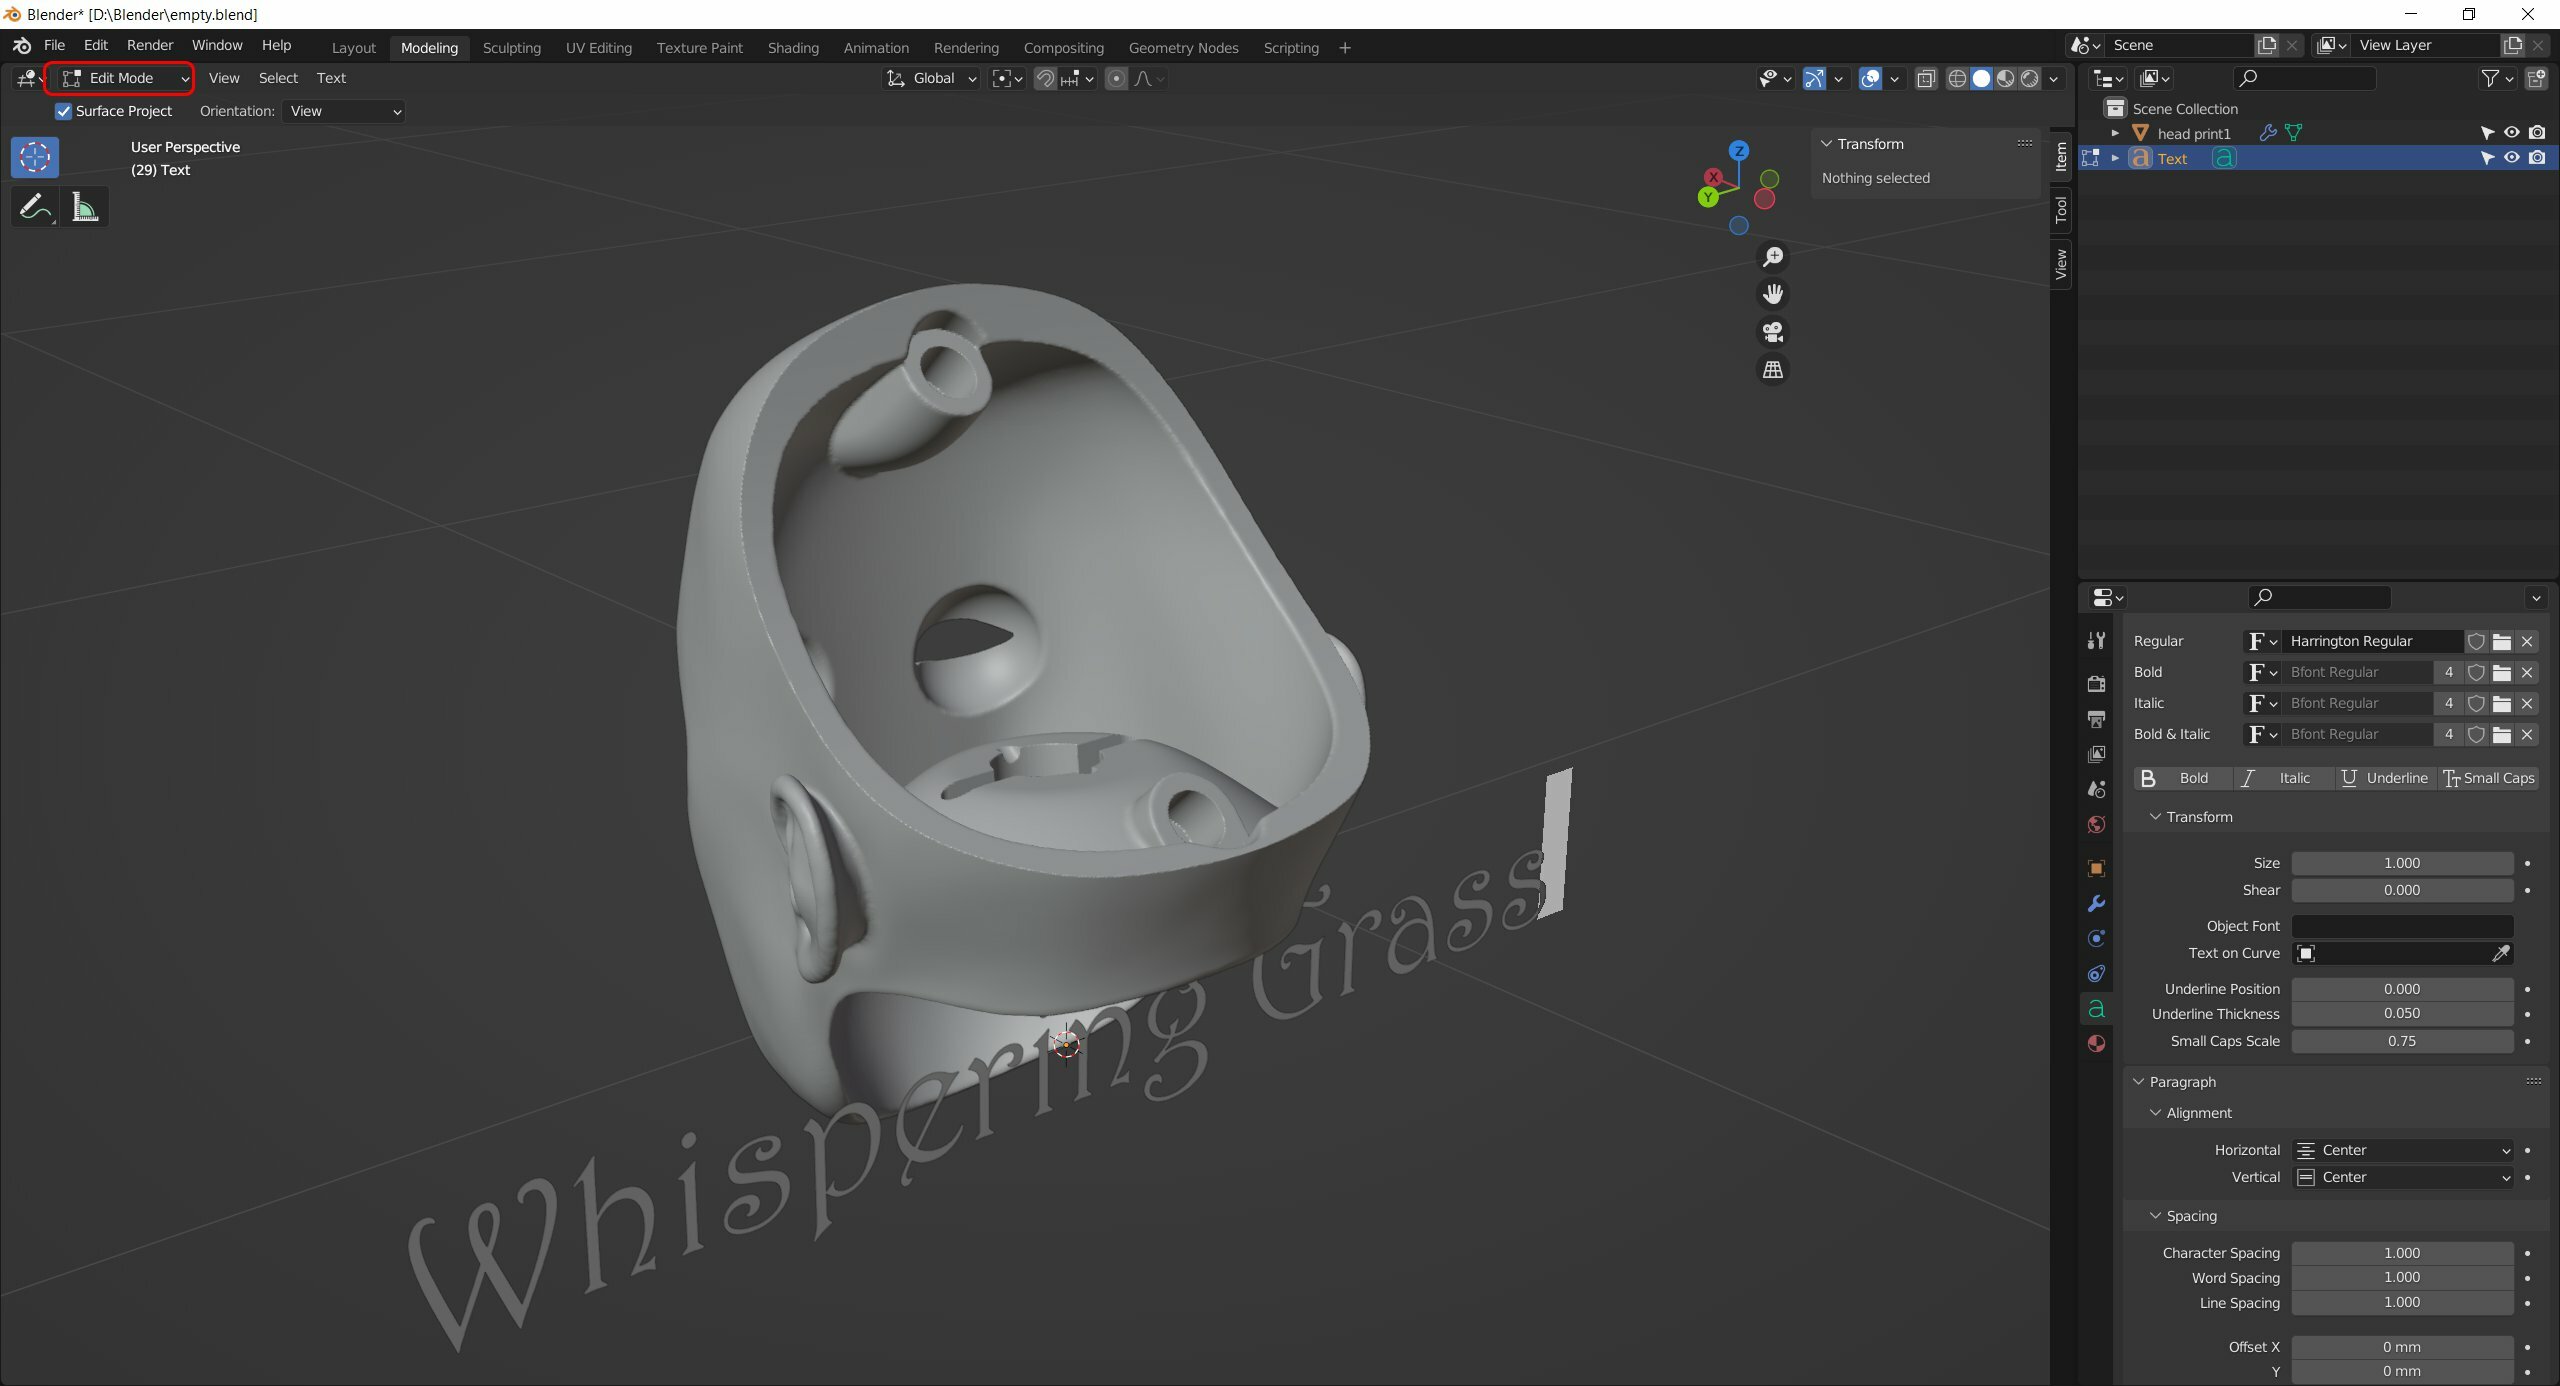
Switch back to Object mode.
Transform the text to desired size and move it to the position close to the place you want it to be.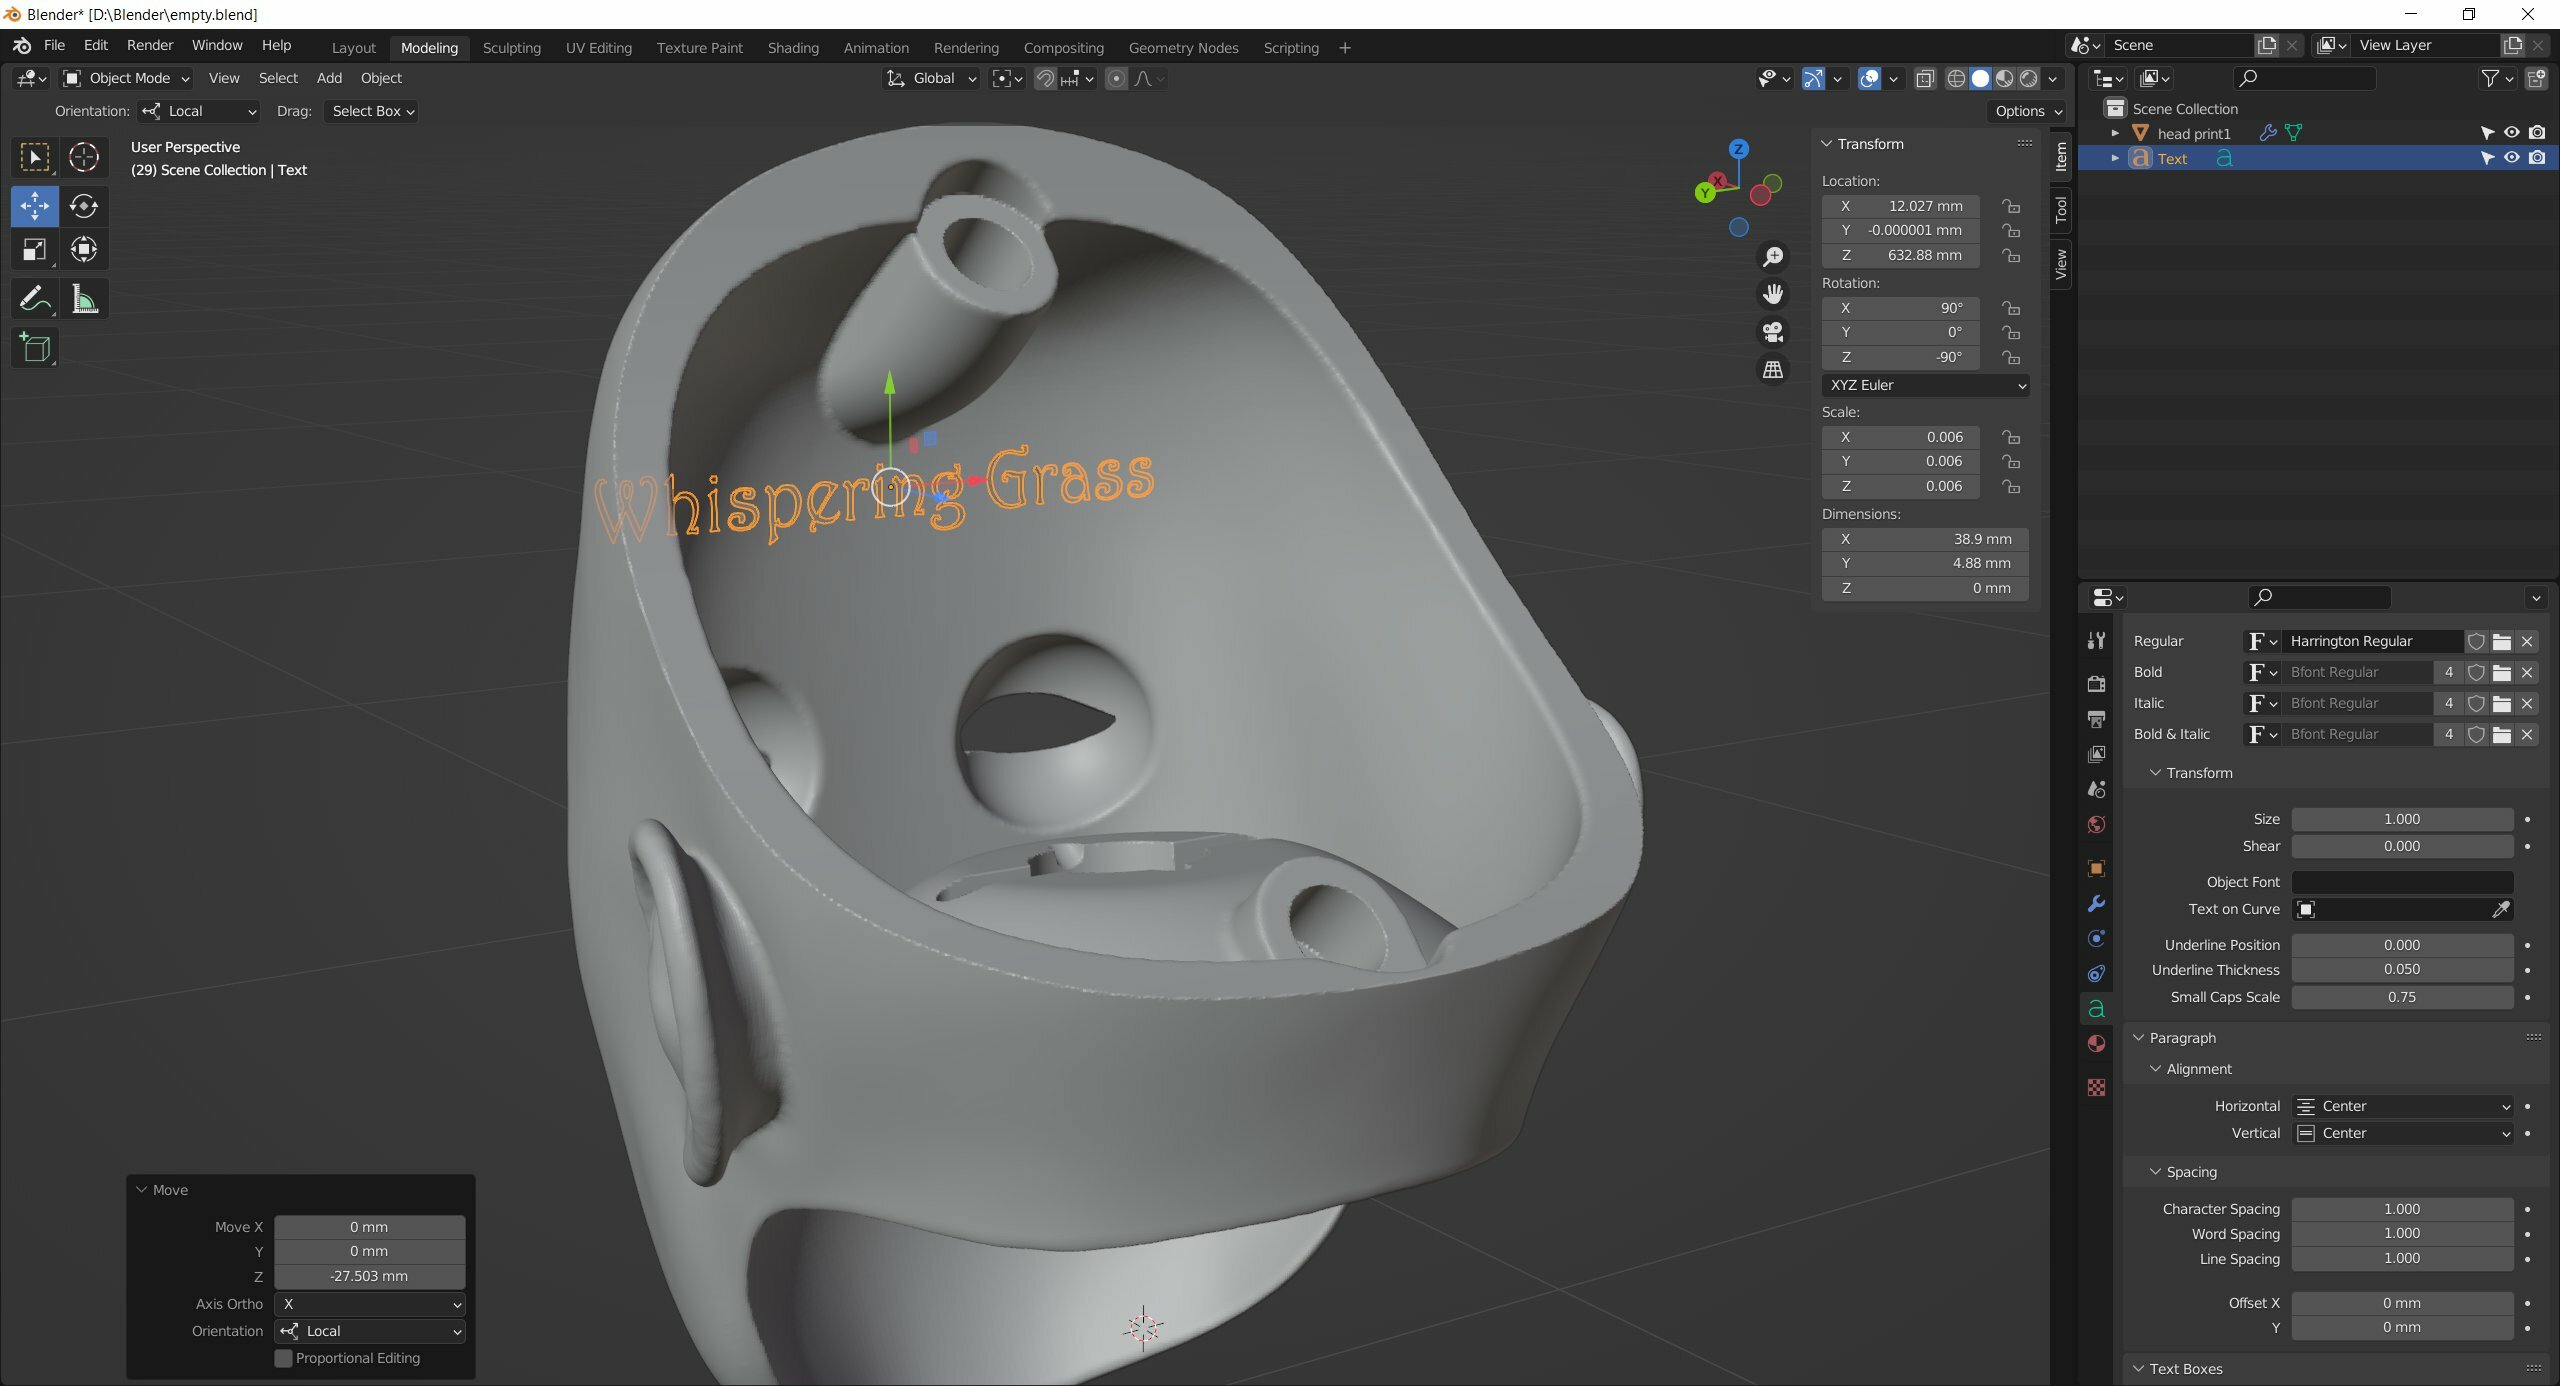
Prior to bending the text add Decimate modifier. Otherwise there will be a lot of distortions.
Select Planar, 5 degrees, or less if this one creates too rough shapes.
Don't apply the modifier, and you can fine tune that setting later.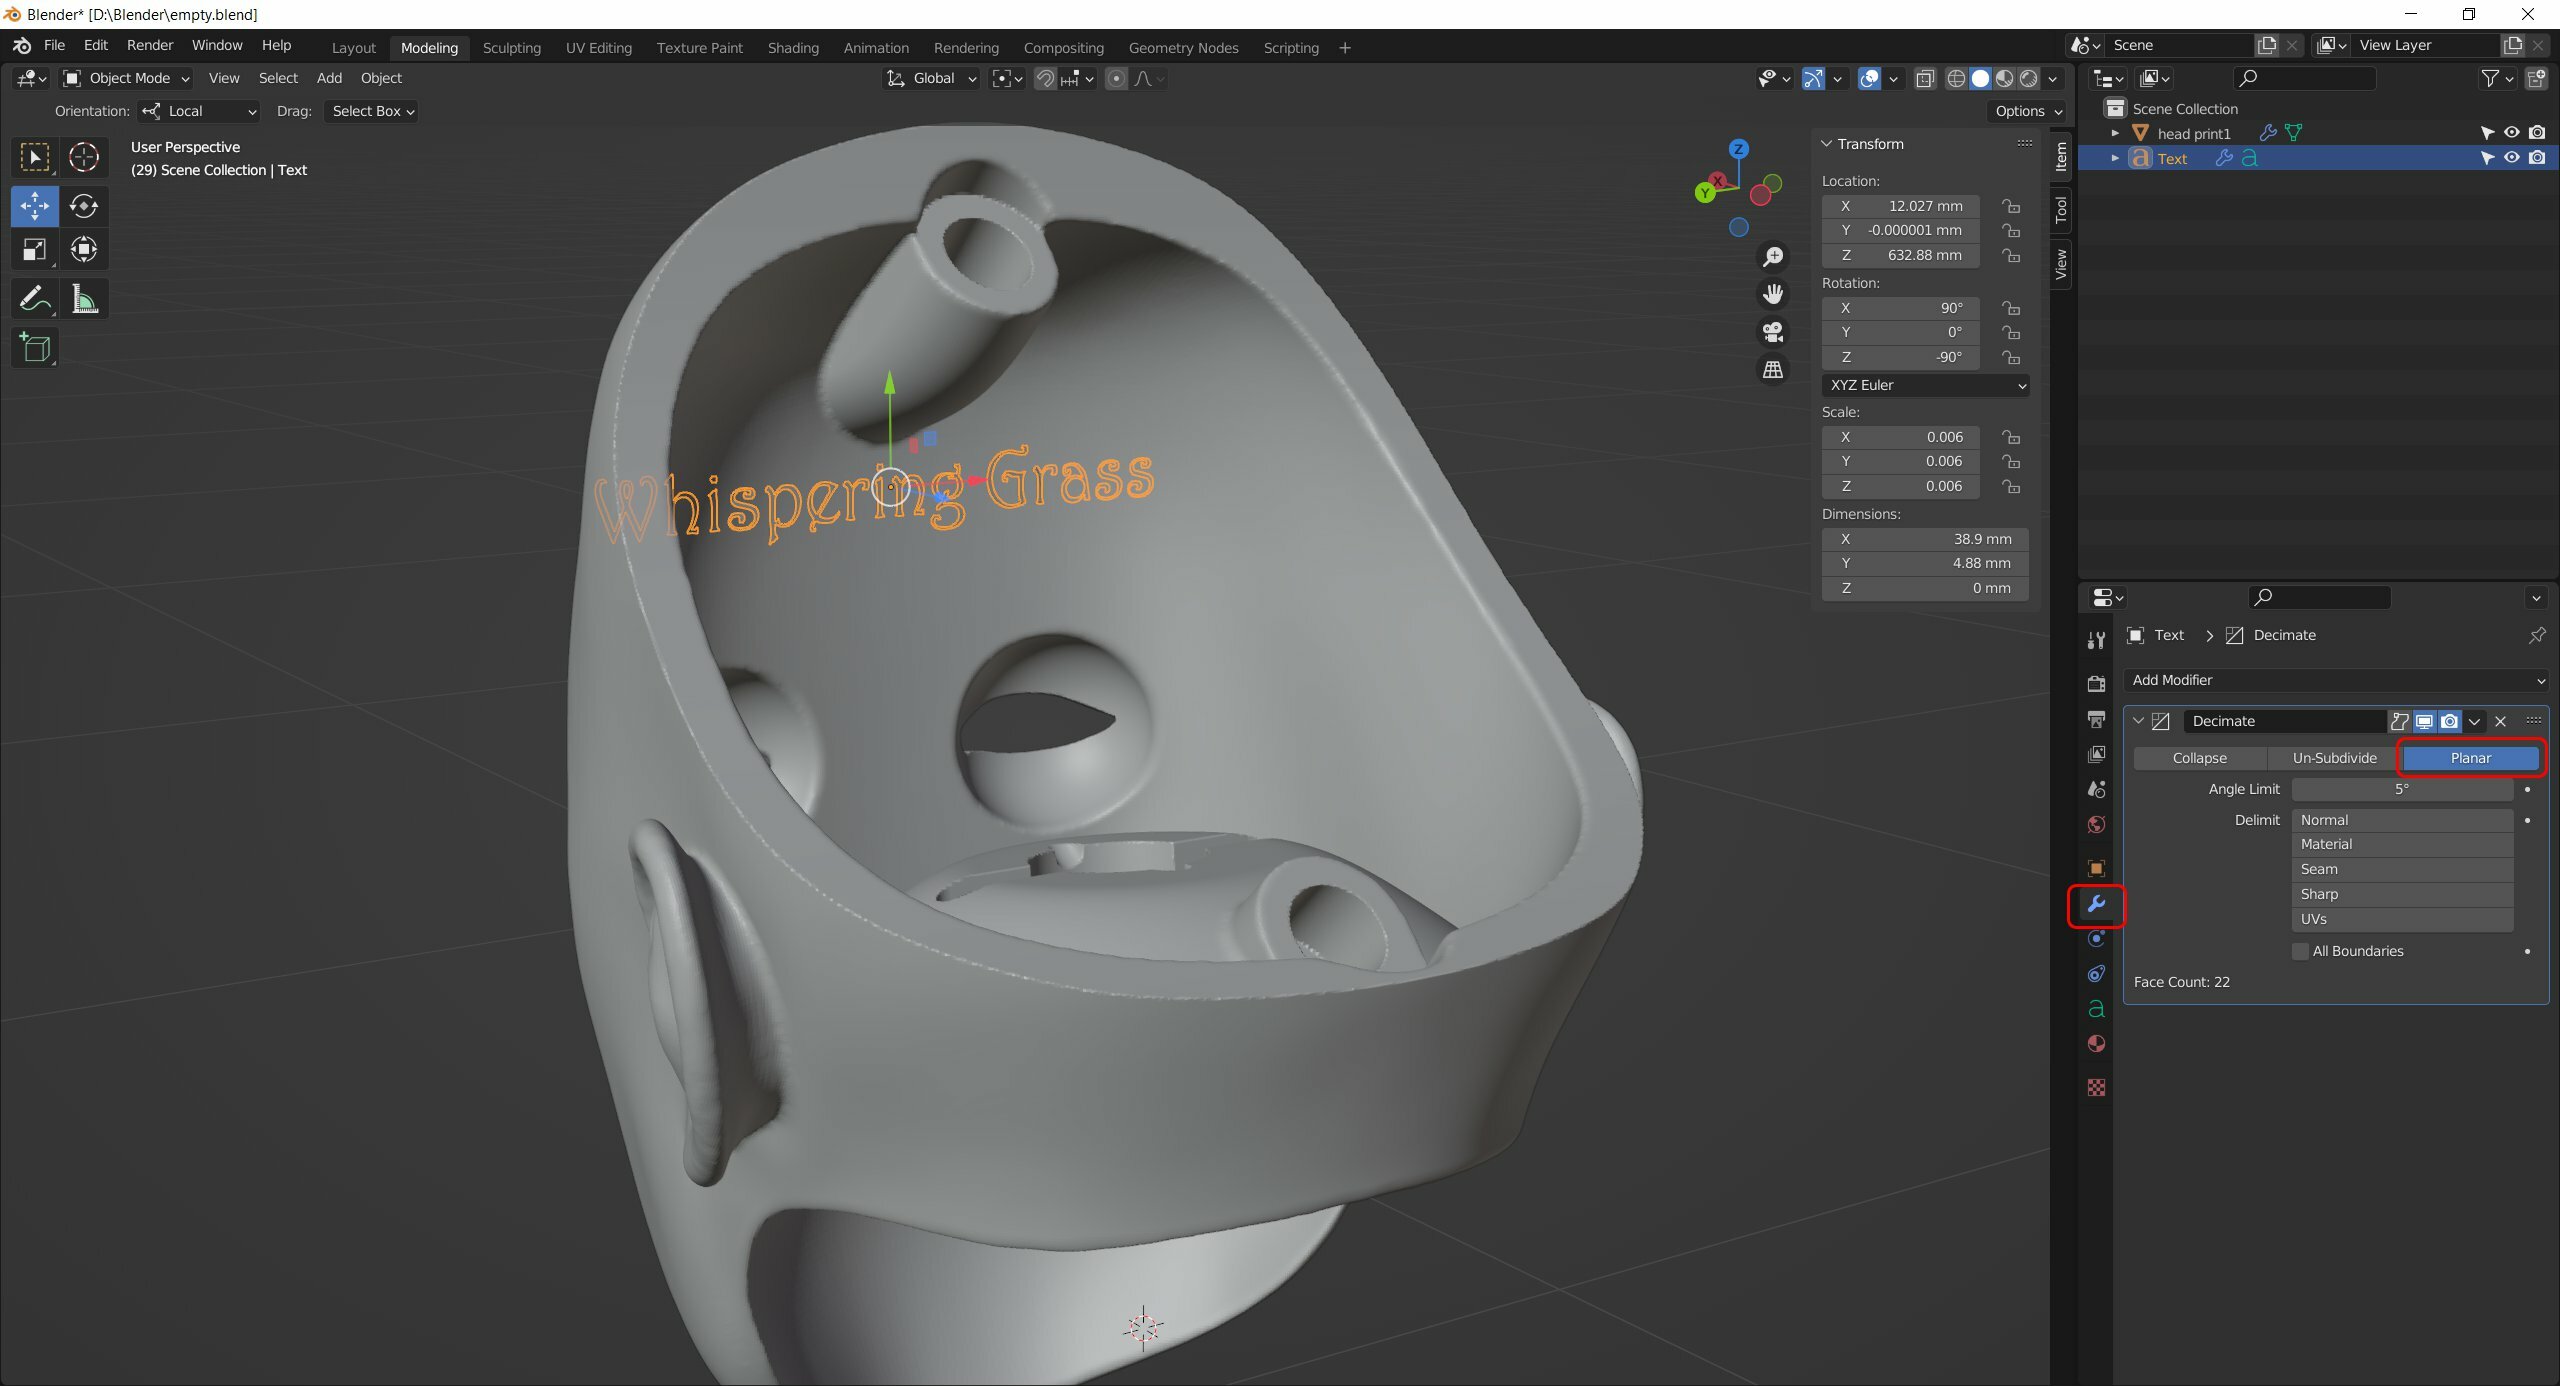
Now, in order to bend the text, add object - Empty. Cube is just fine.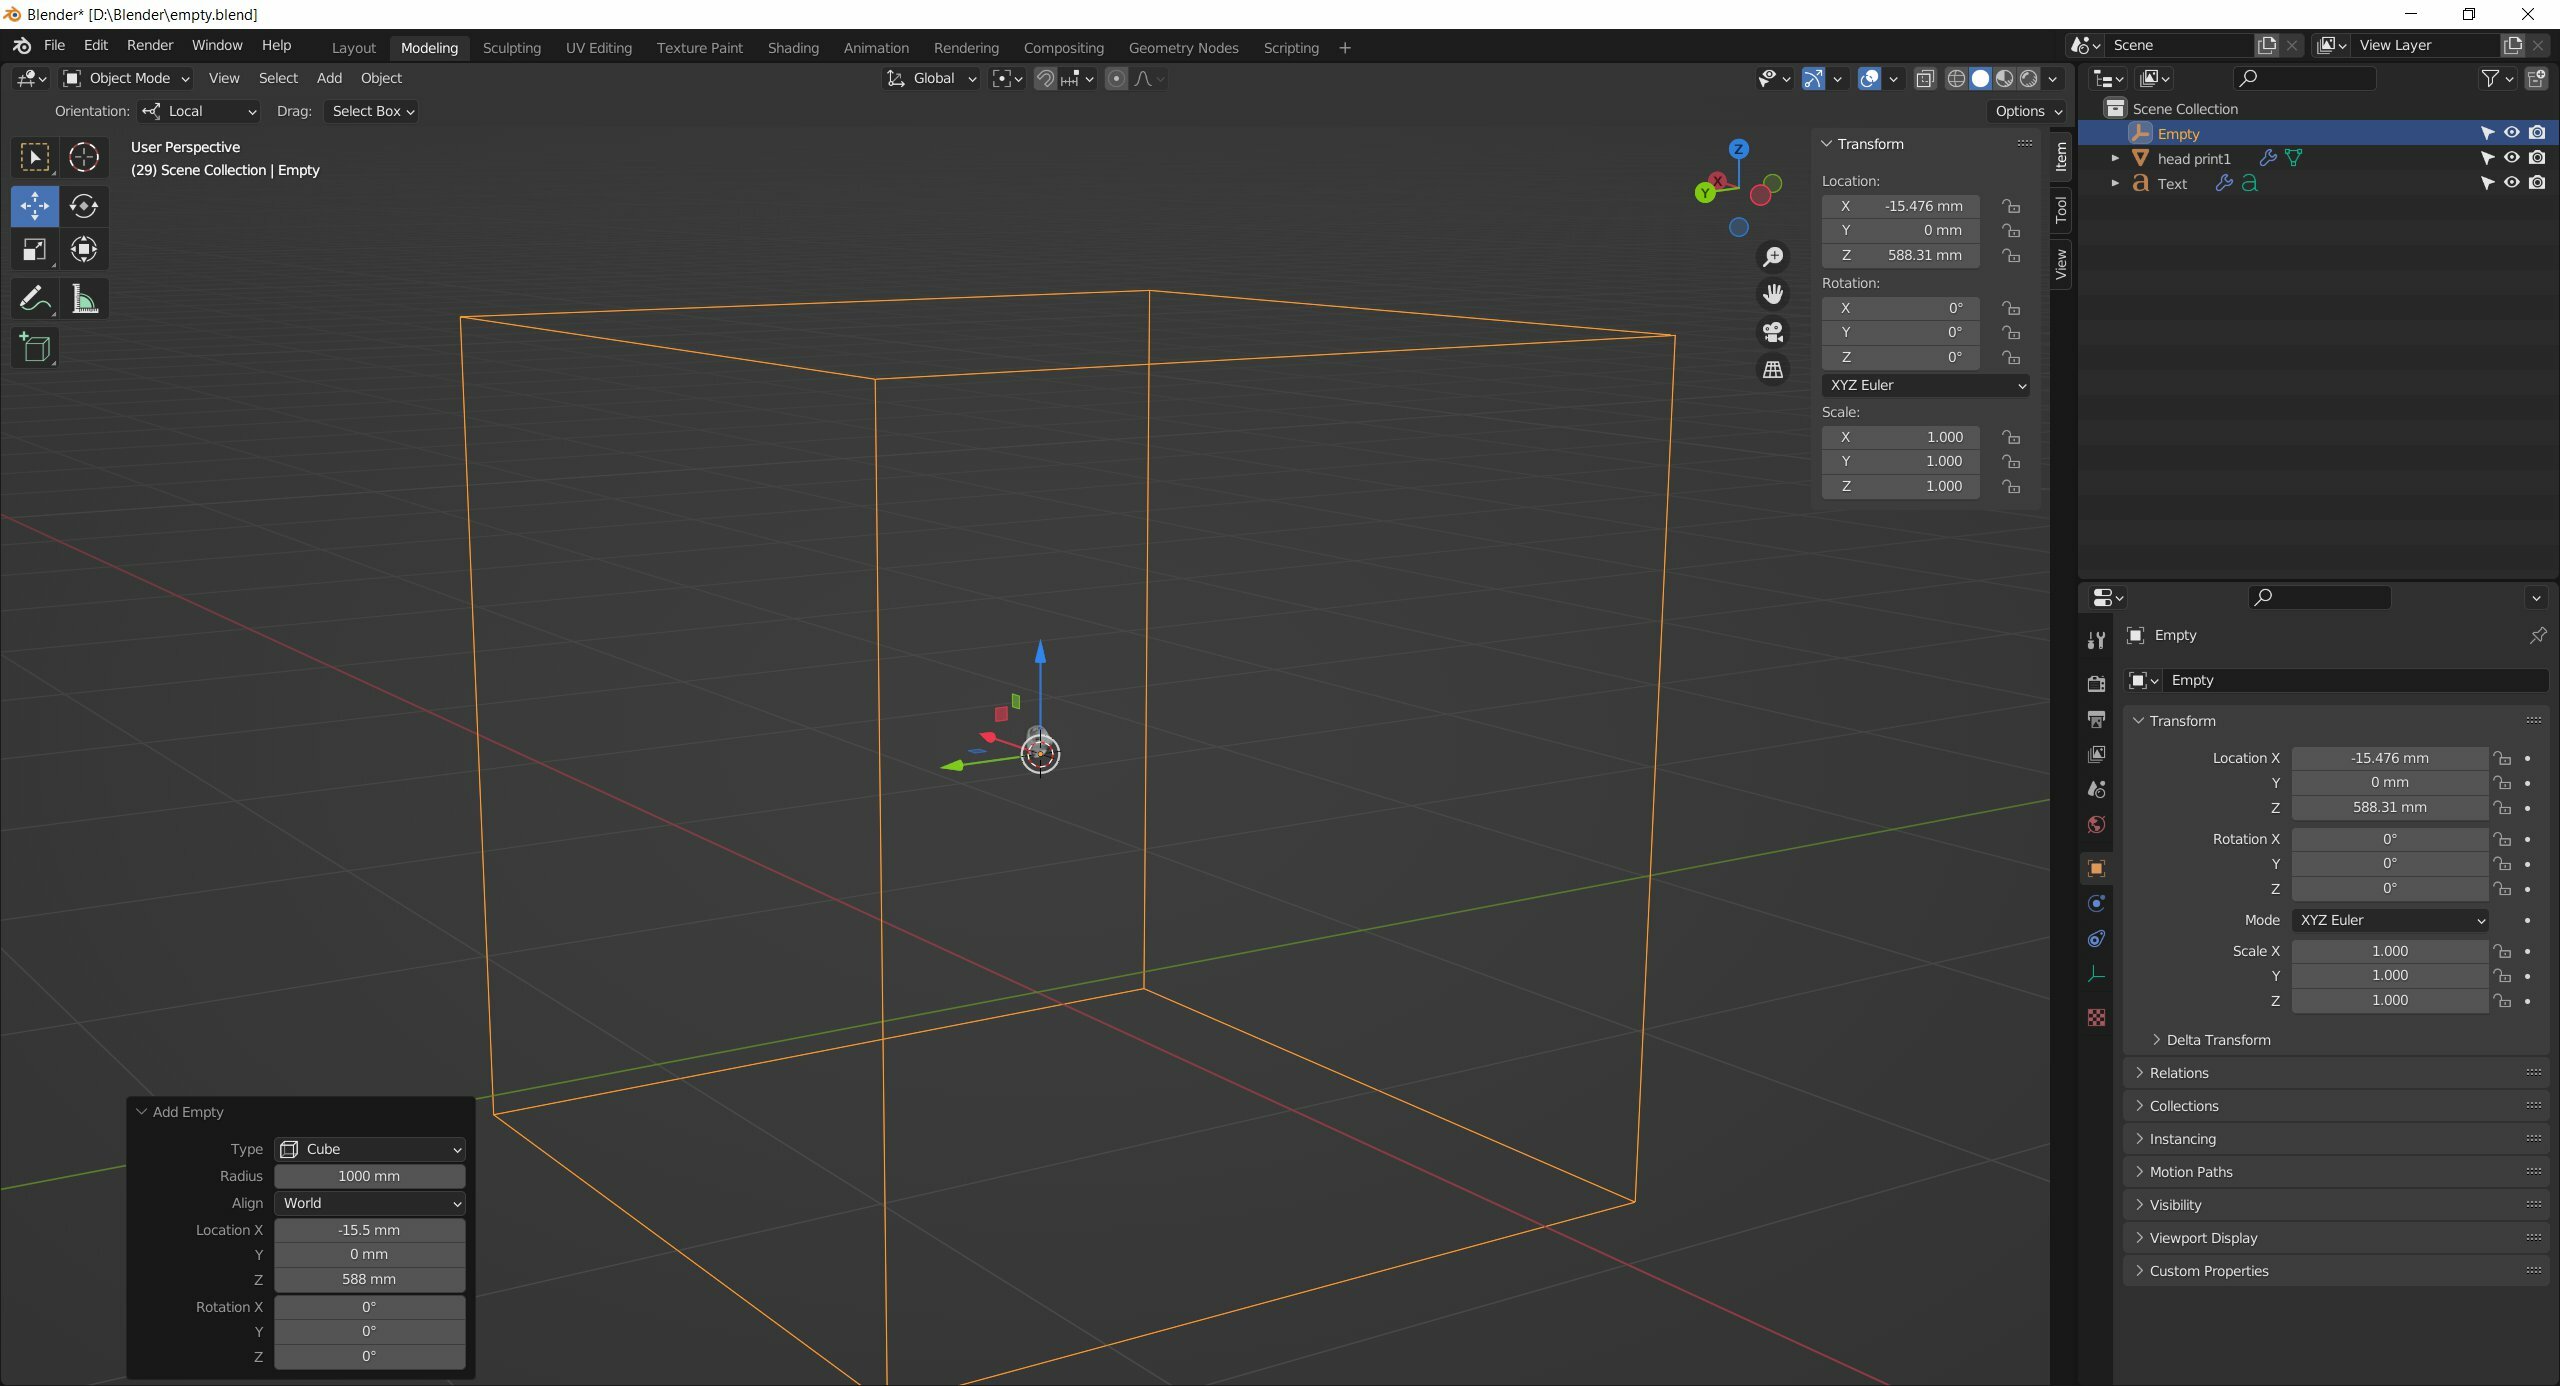
It's too big, so scale it down. 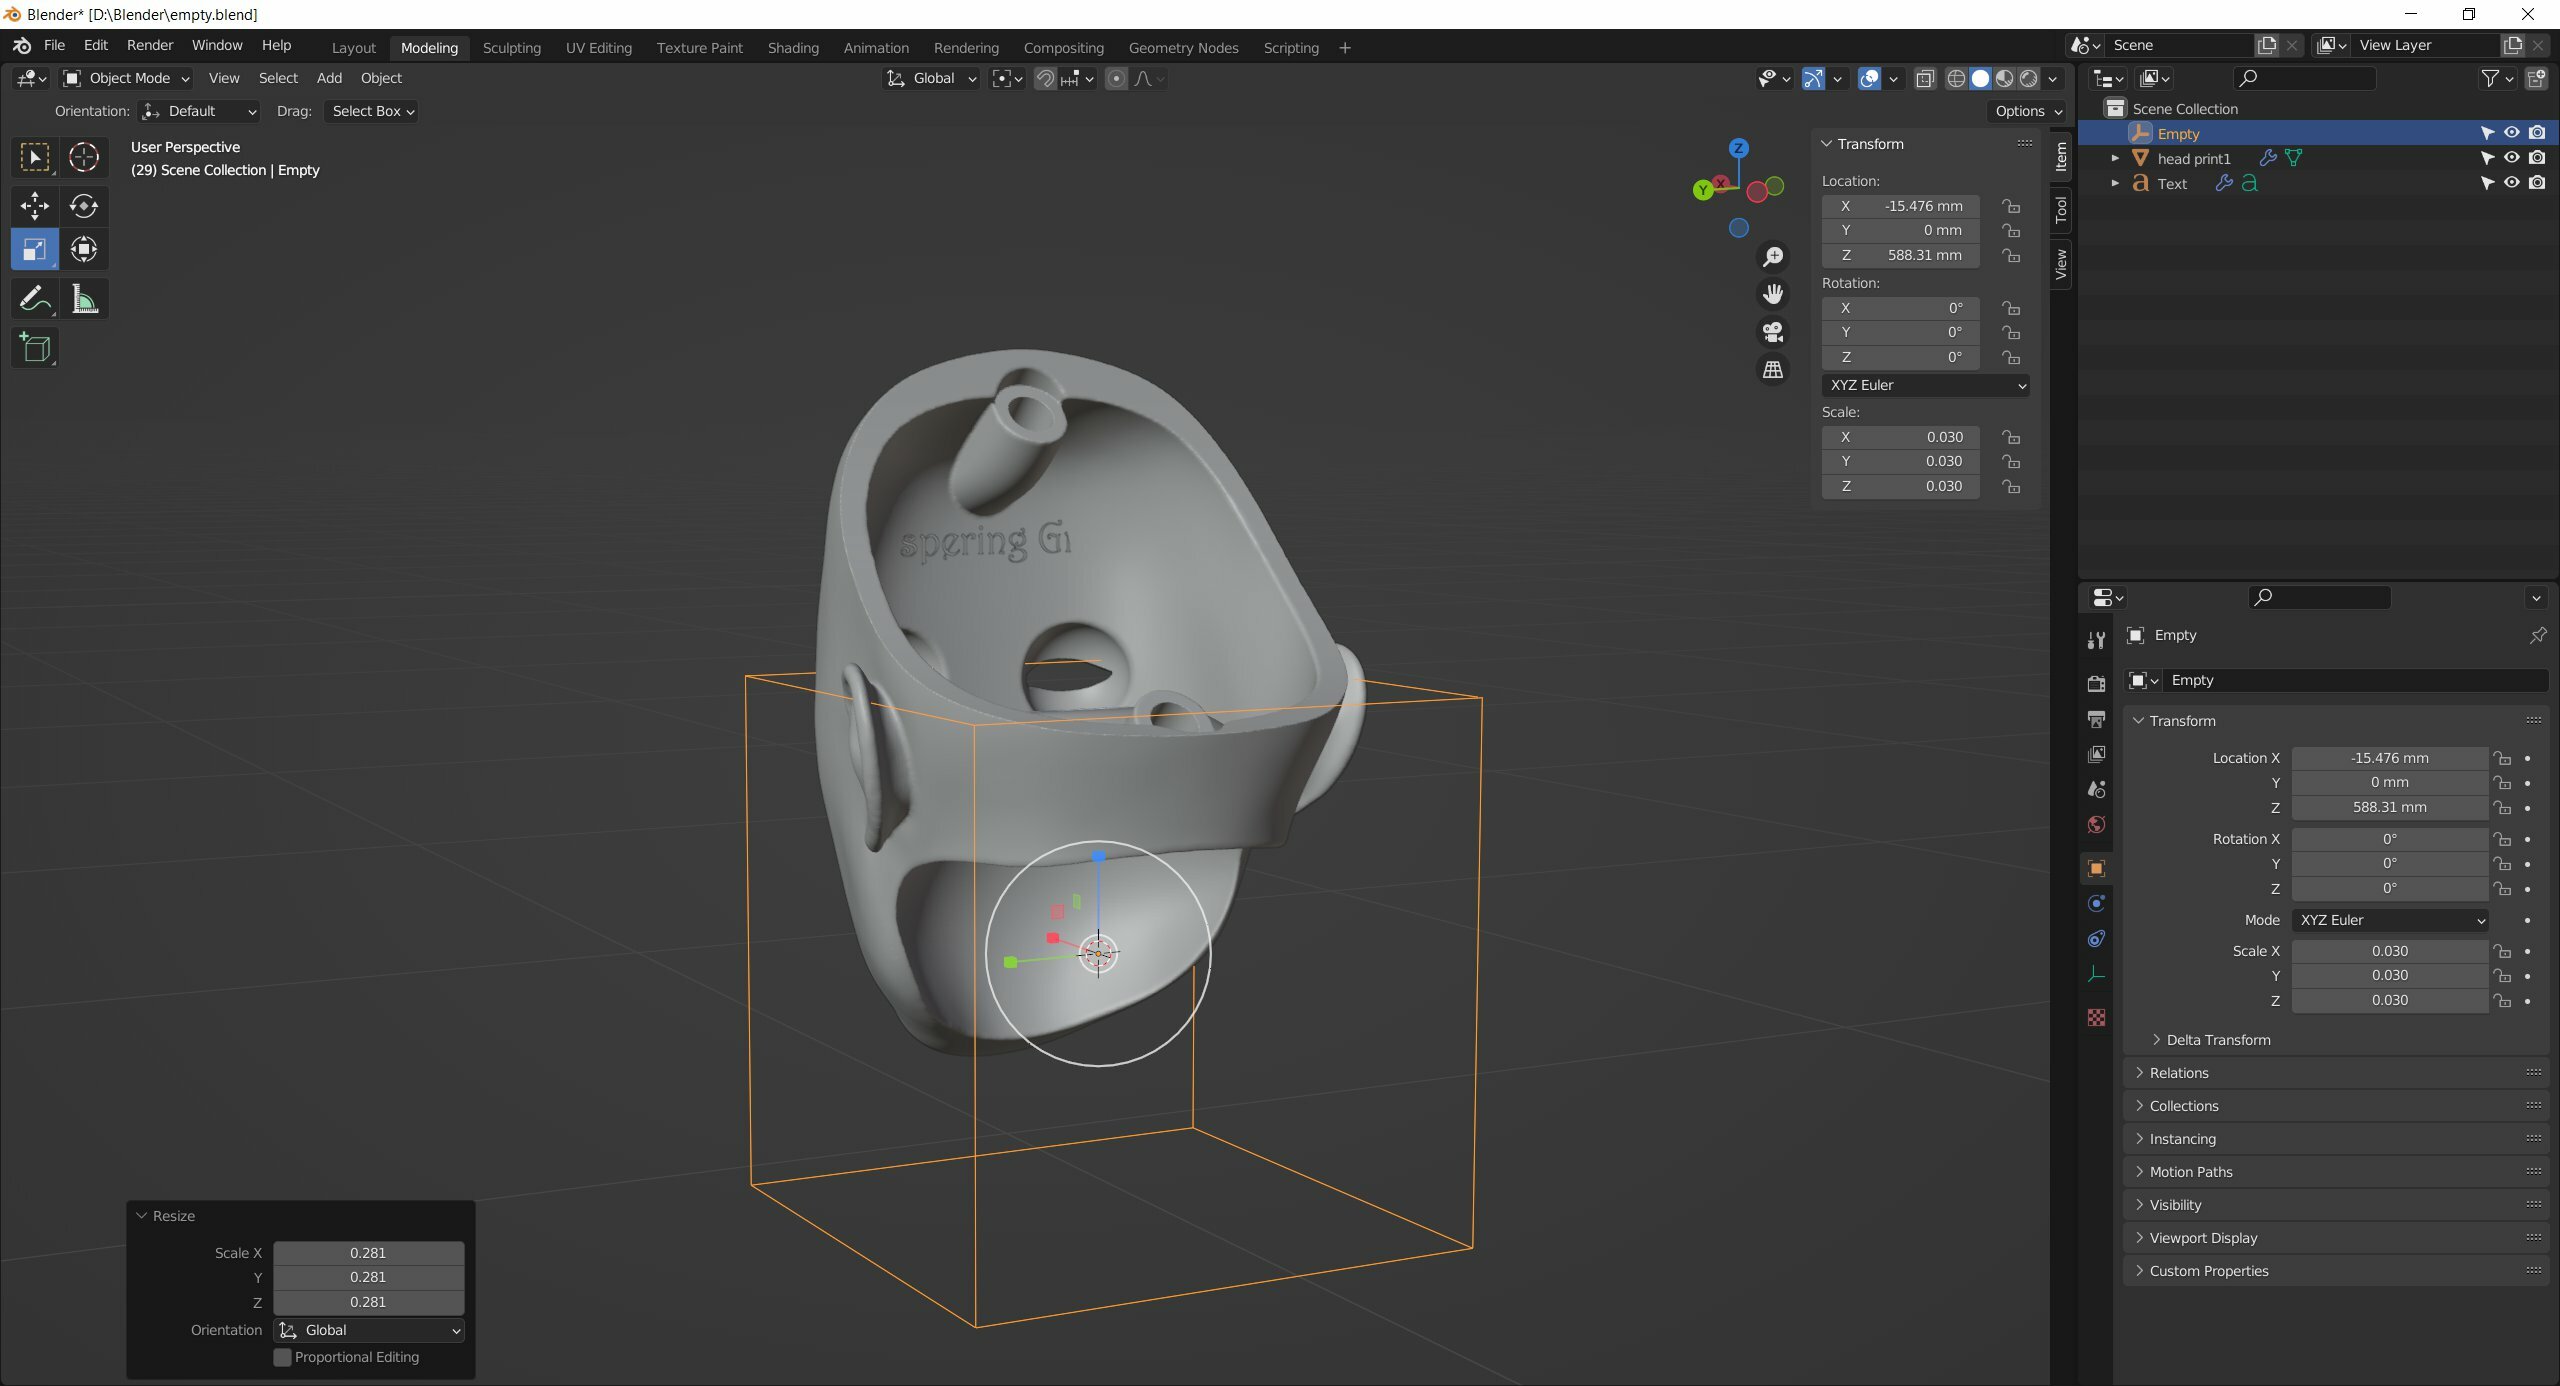
Now you have to transform the Empty so as it's aligned with the text.
Important: not all parameters should be the same, but a certain ones only, so it's the trickiest part.
Select your text and look at the Item tab. 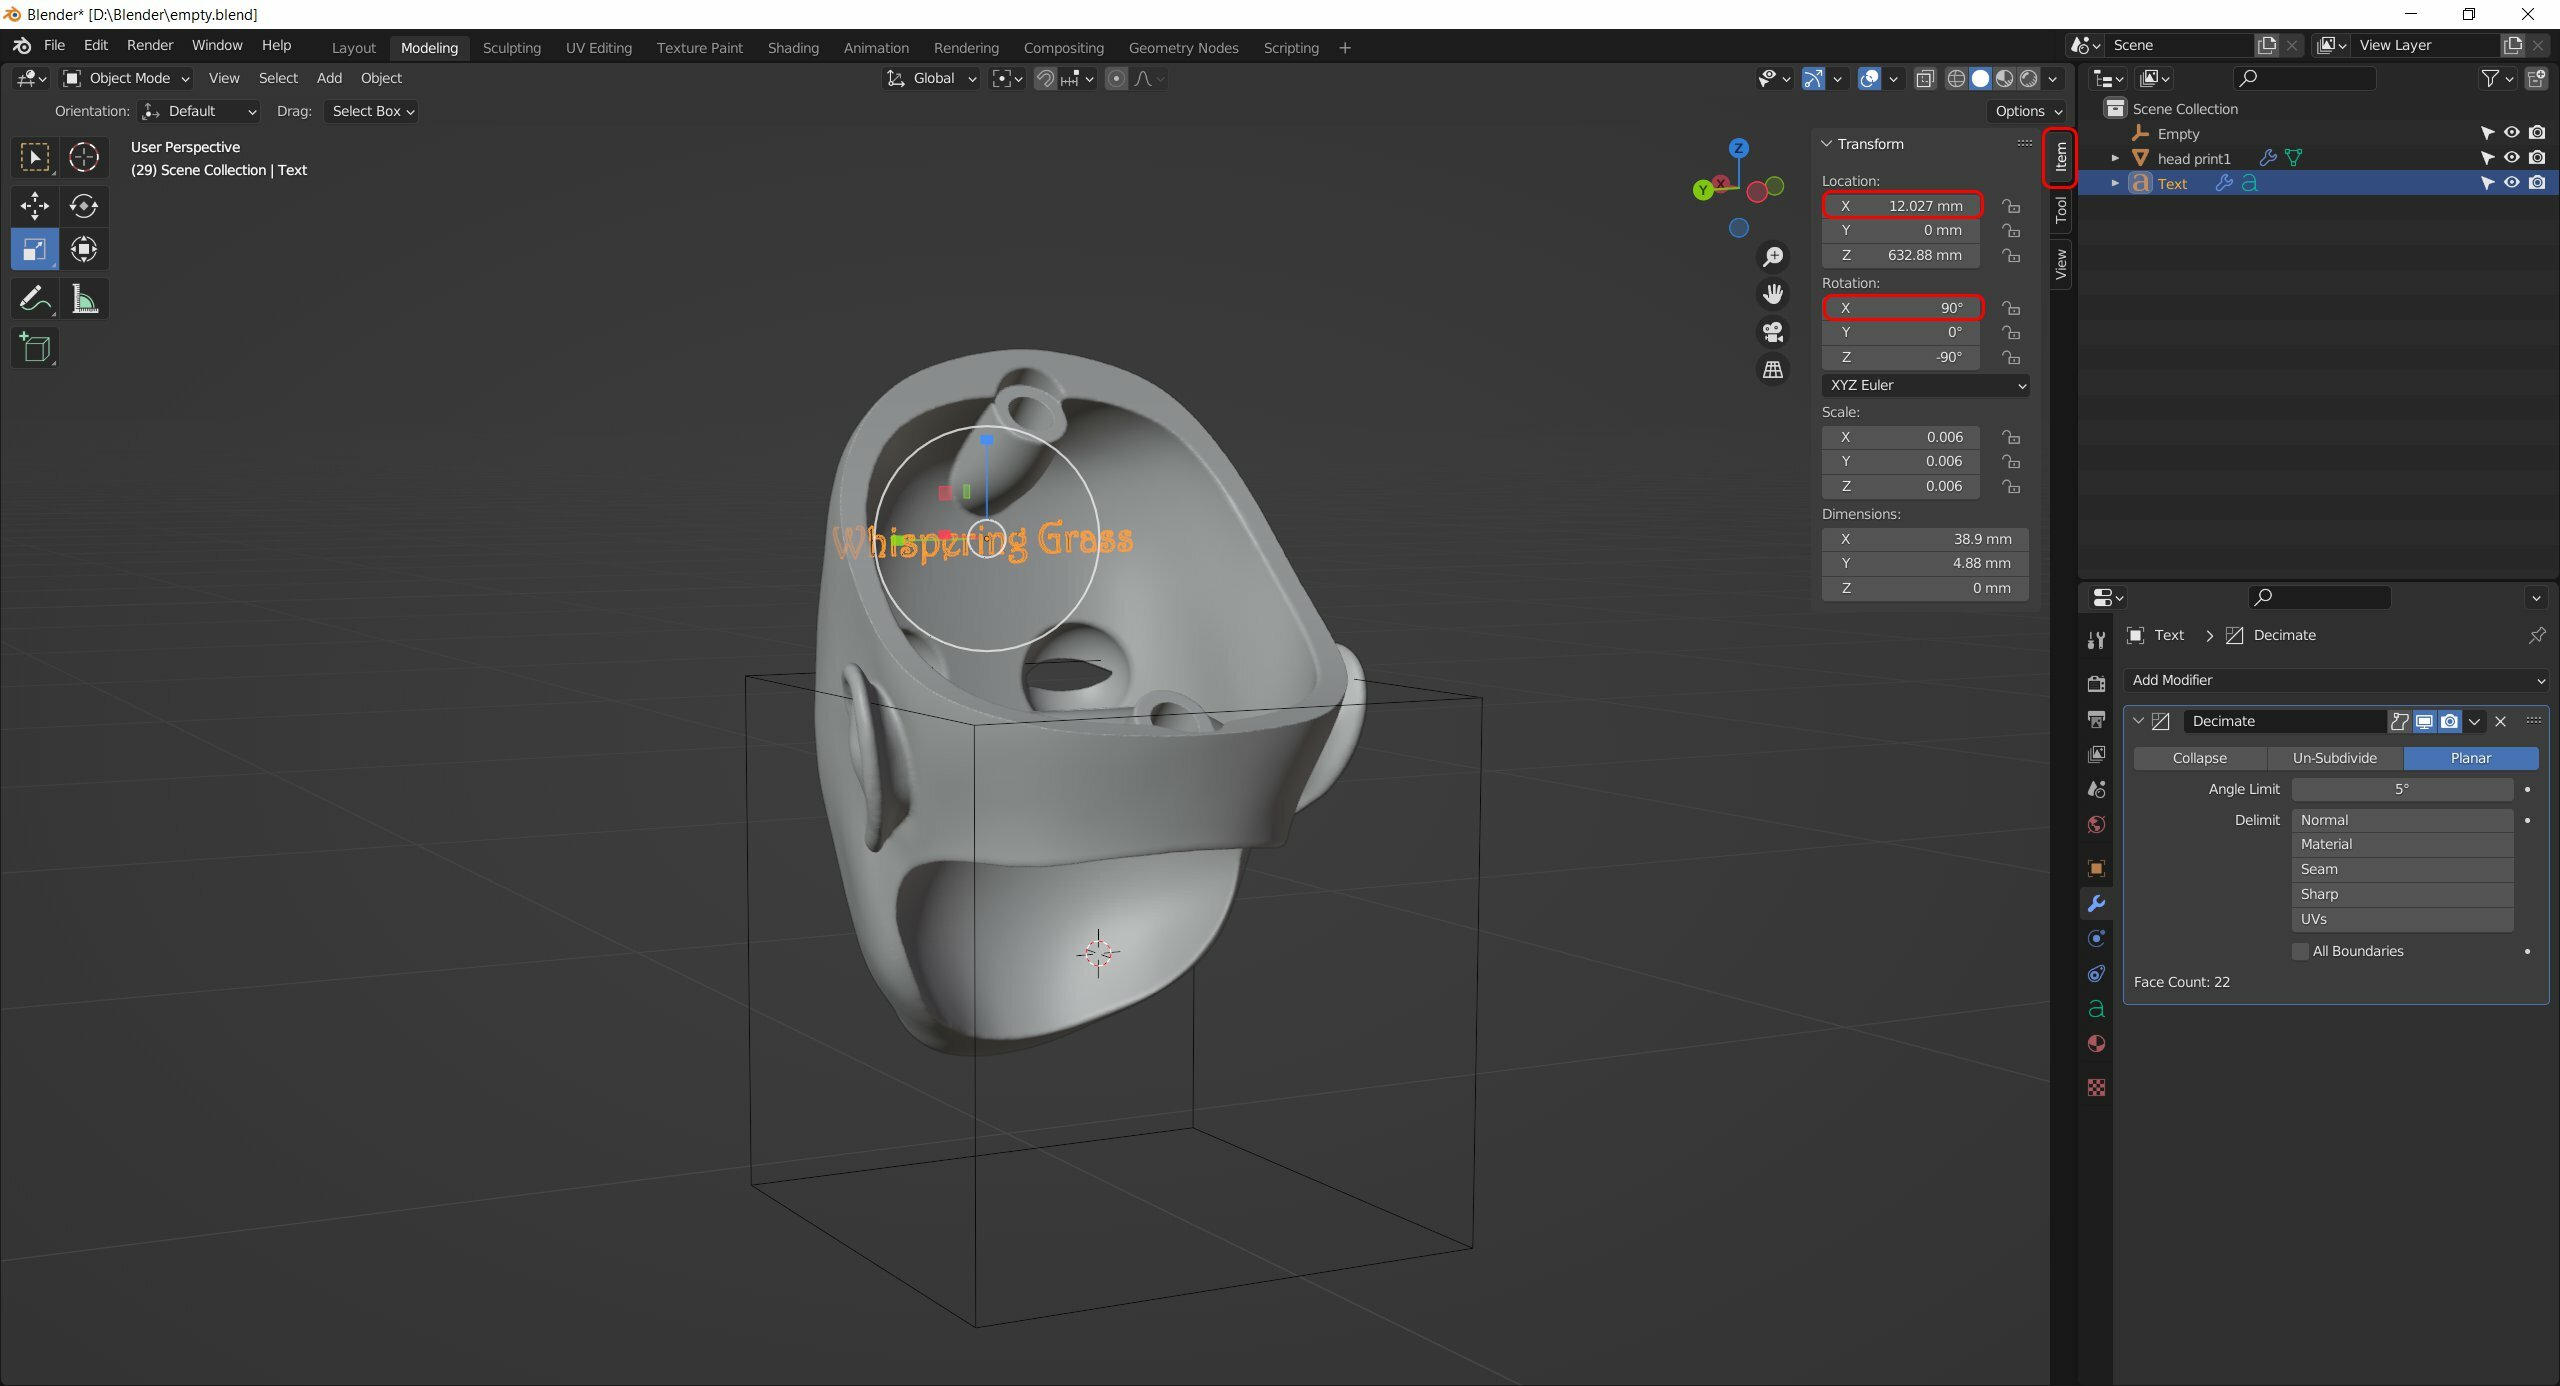 These ones have to be copied and pasted into the corresponding areas of your Empty.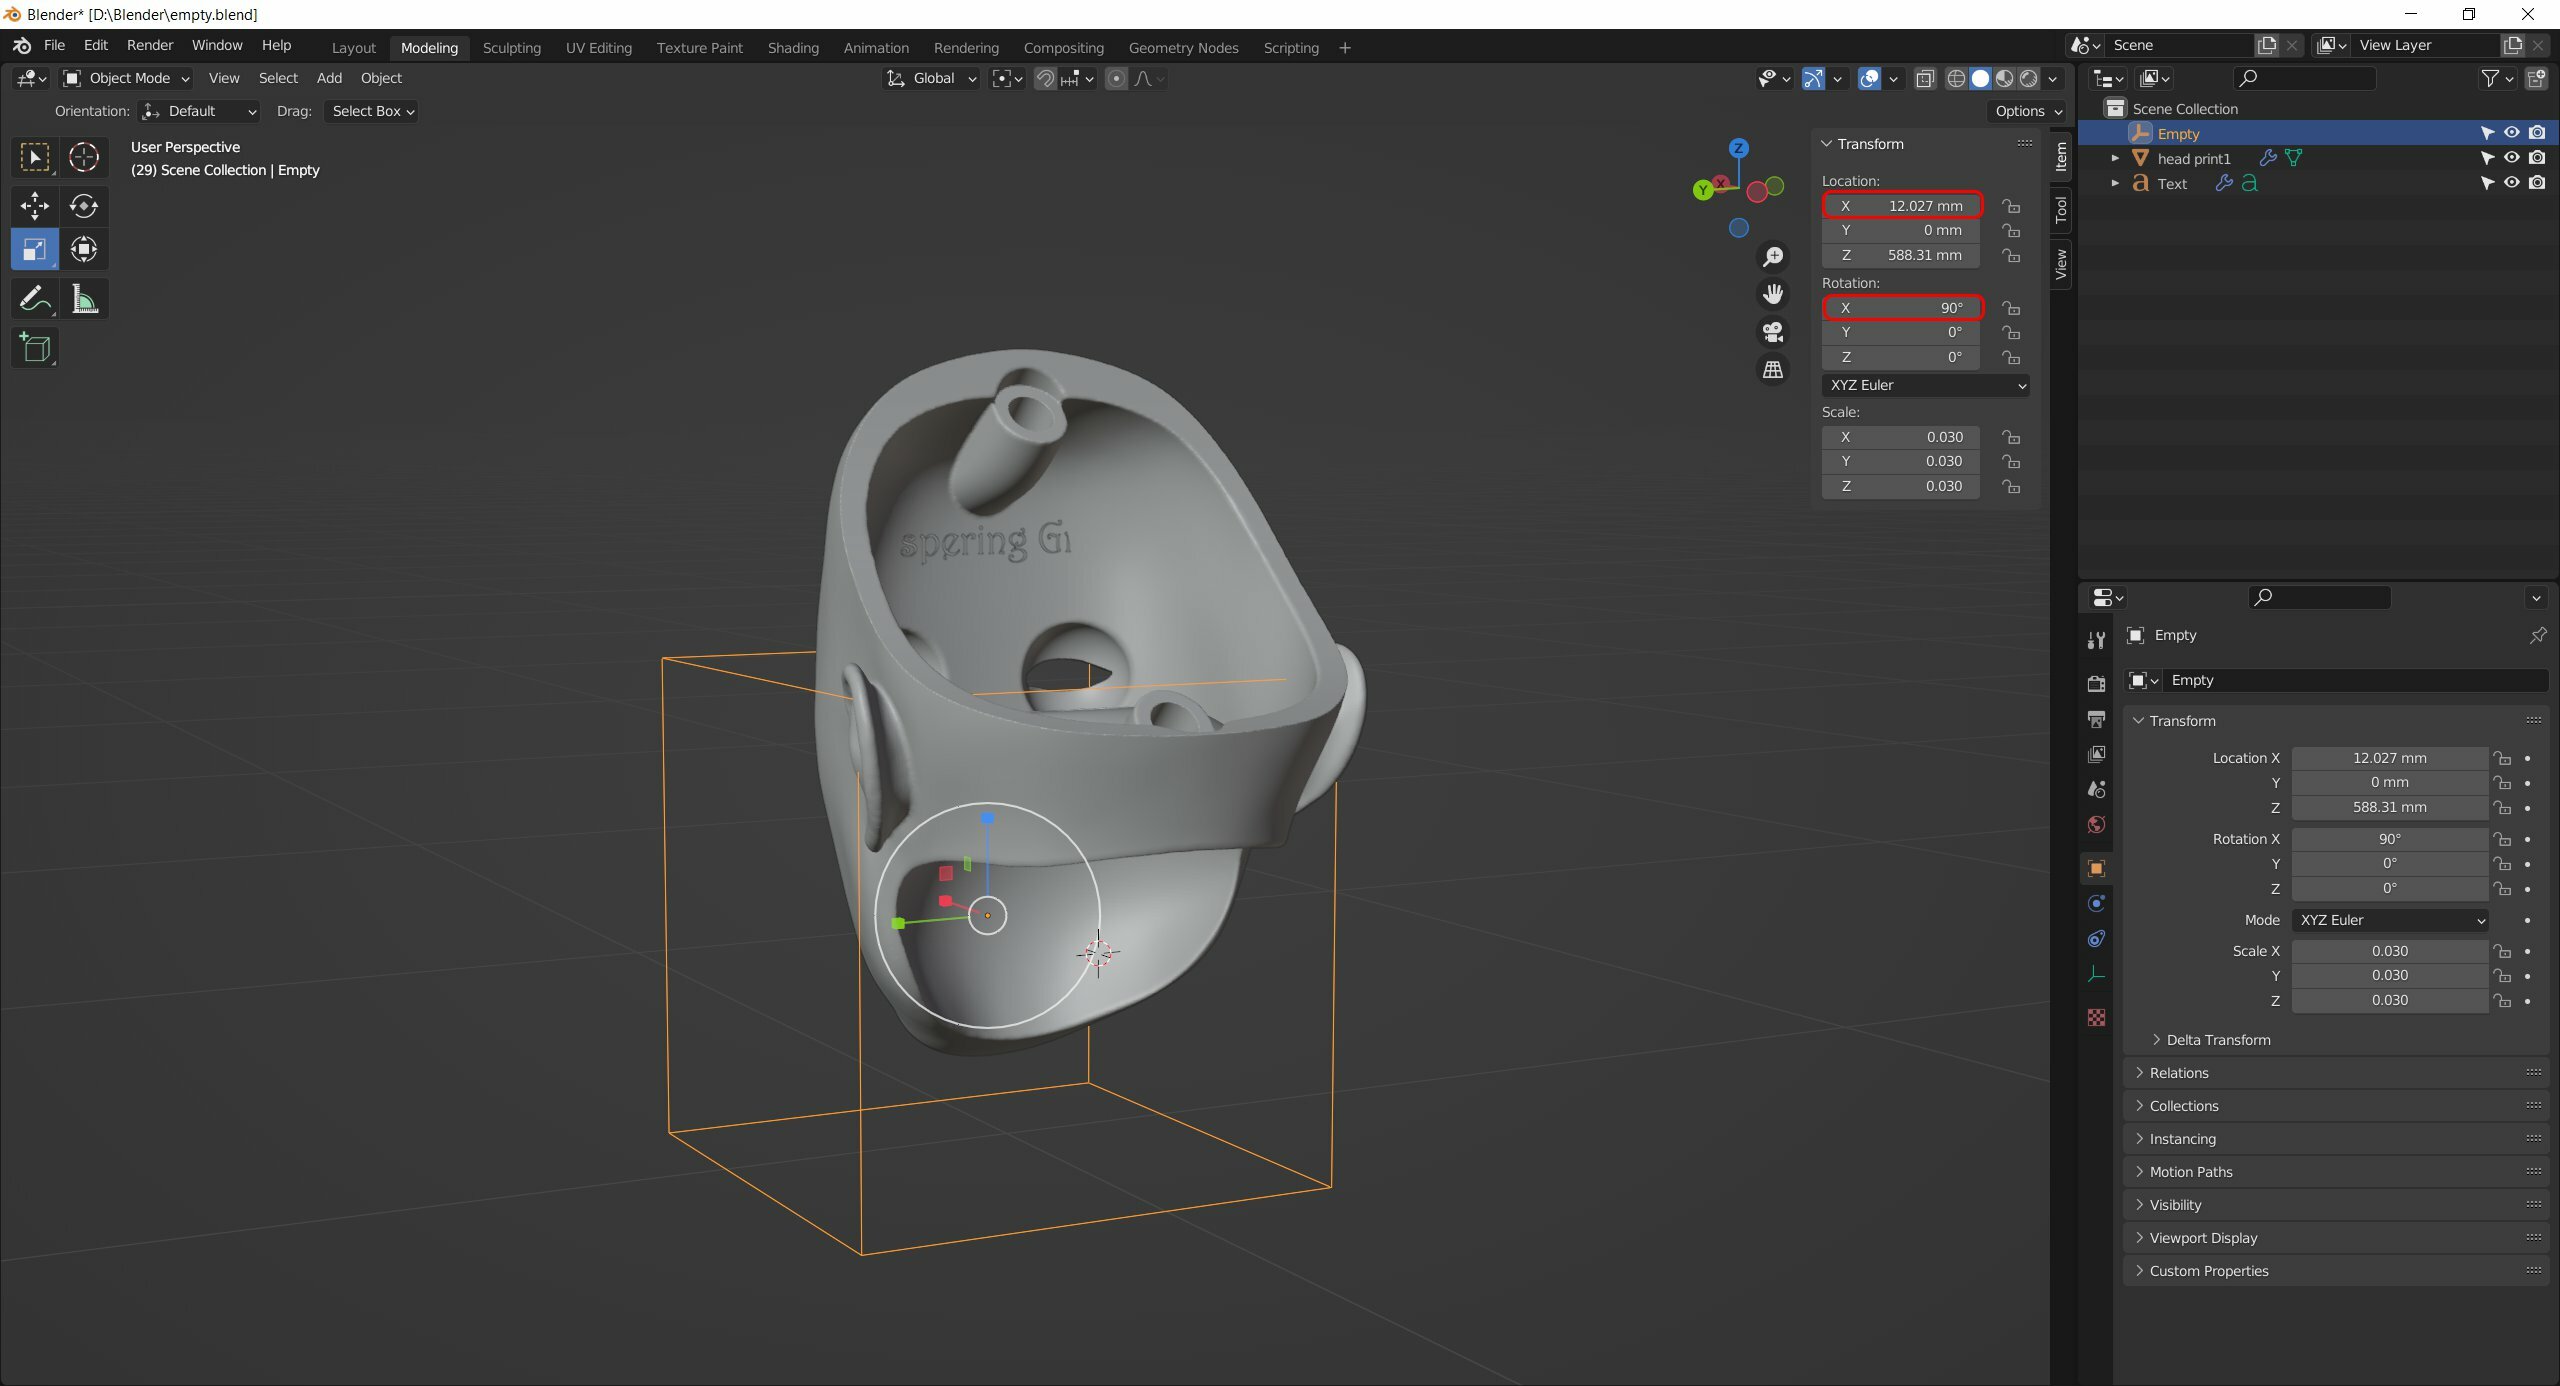
Select your text.
Add Simple Deform modifier > Bend.
Select Origin: Empty object.
As my object is symmetrical by Y, I also have to select Y axis.
And you can bend the text changing the degrees value.
Make it roughly aligned with the surface of your doll piece.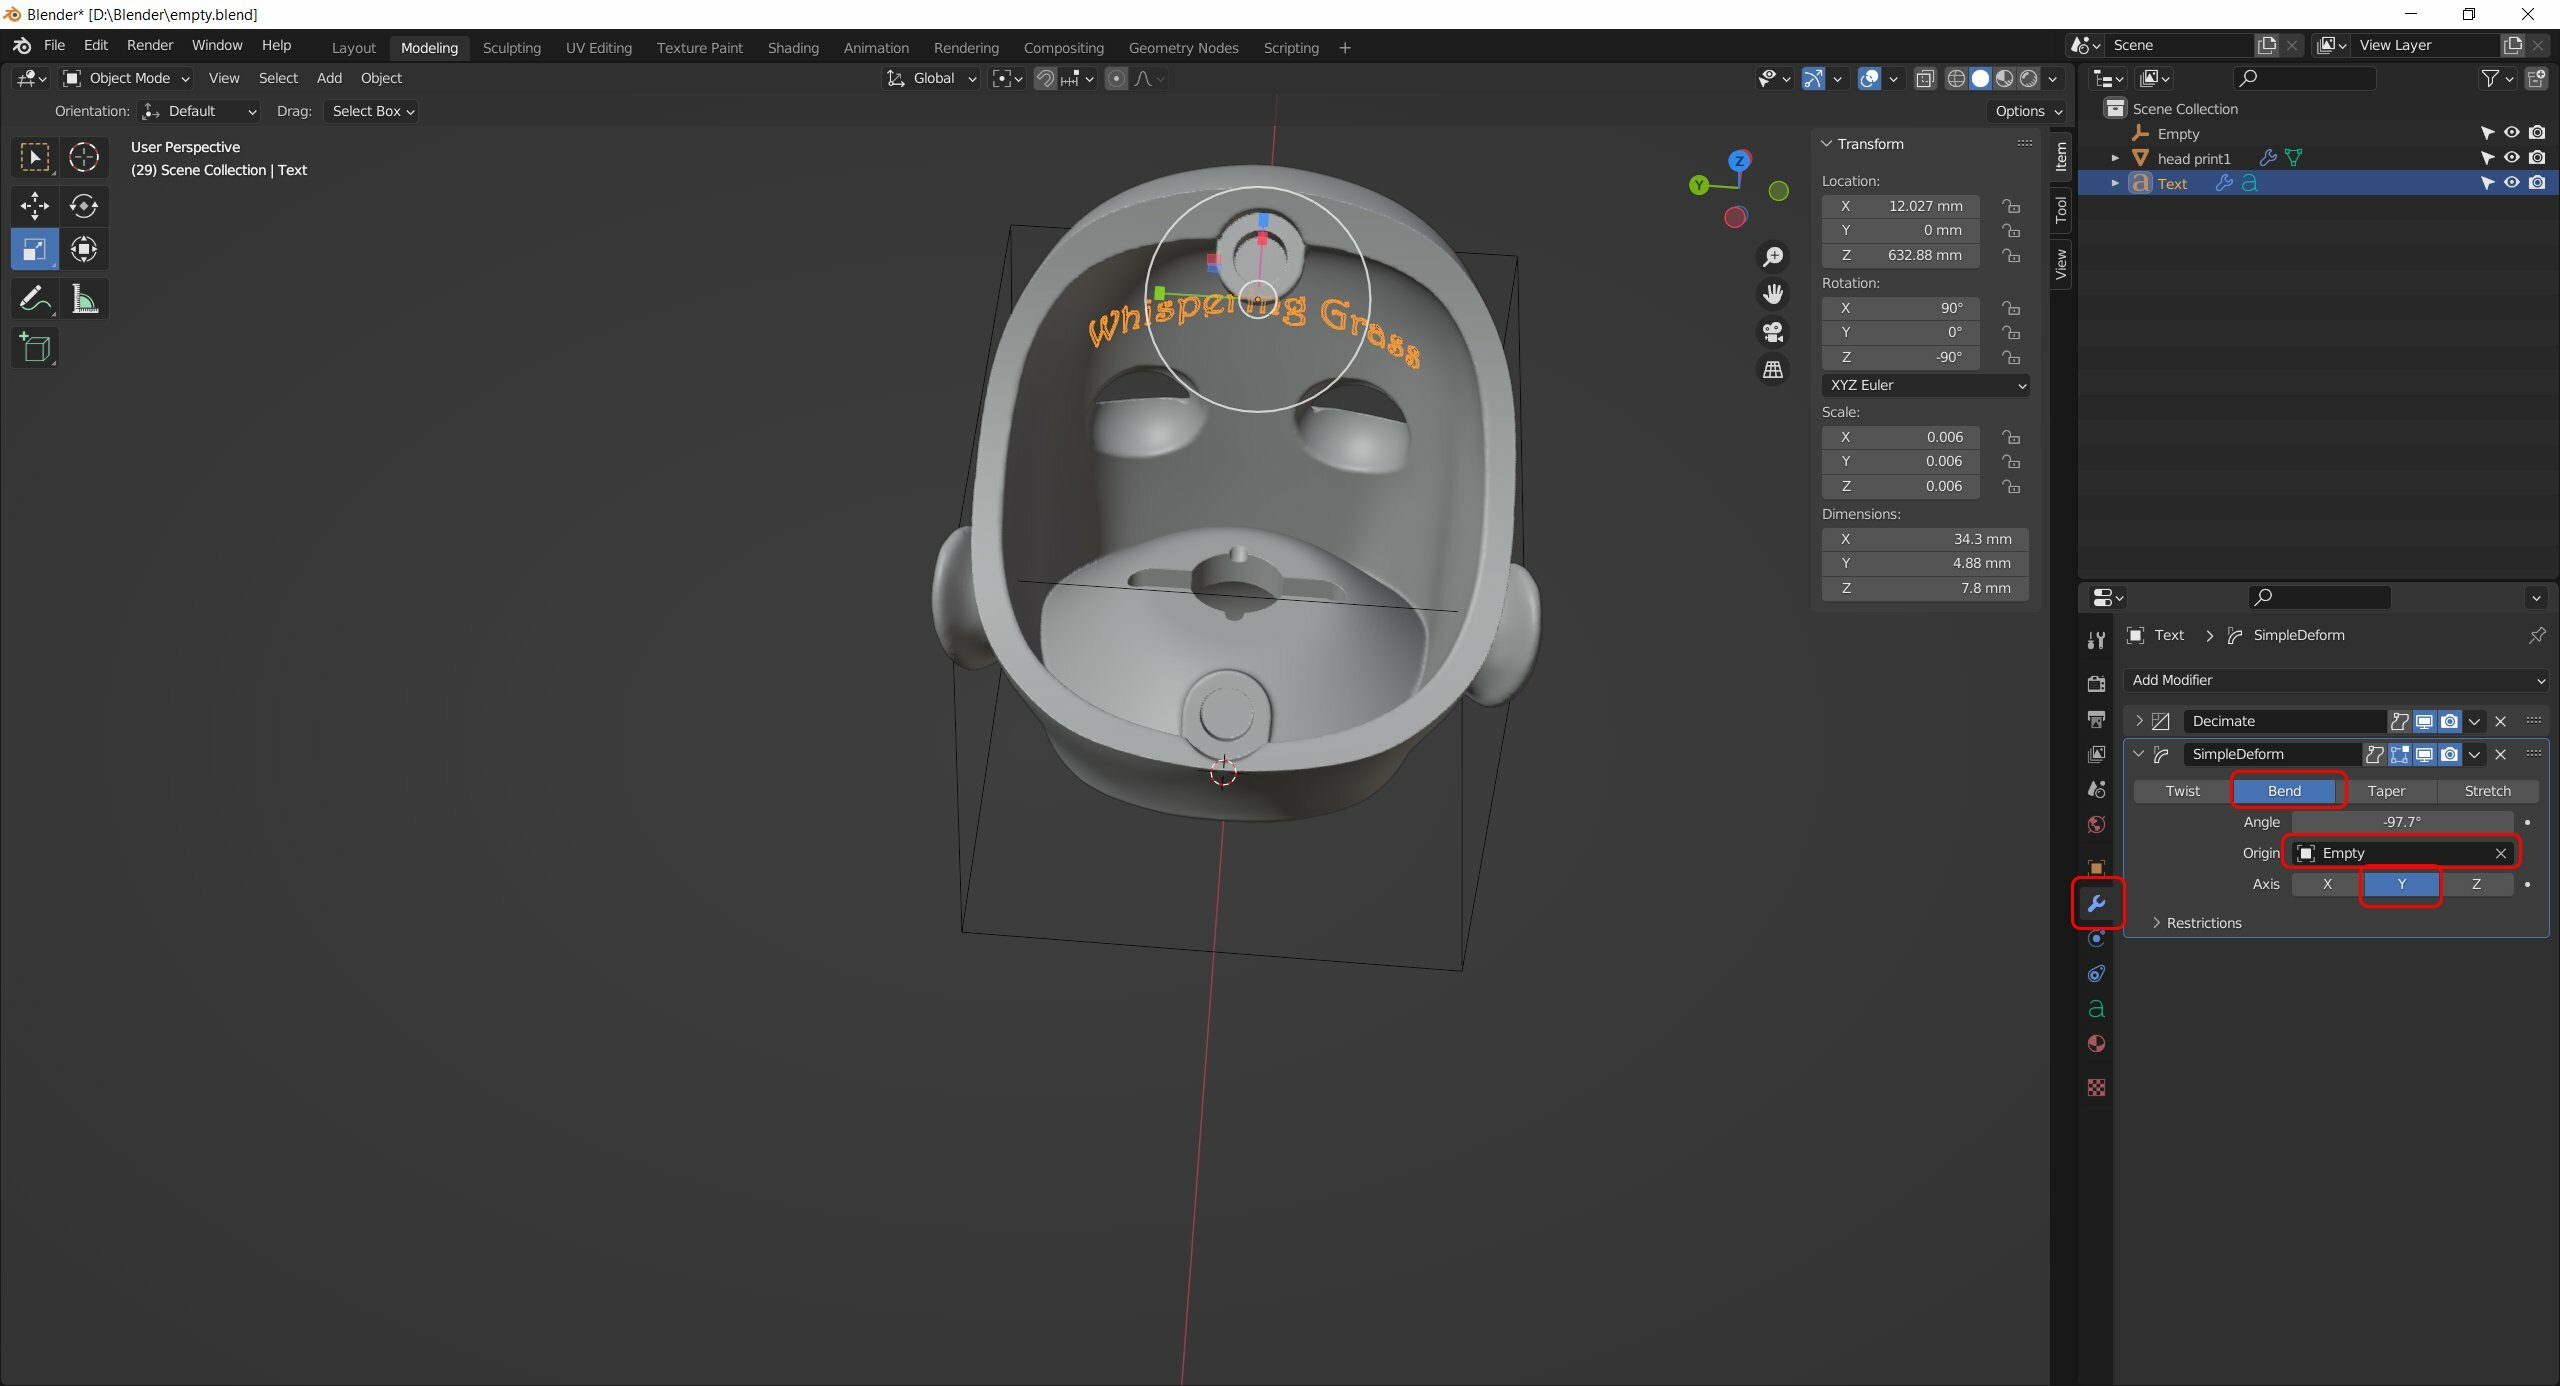
Add another modifier: Shrinkwrap.
Select your doll piece as Target.
The text snaps to the insides of your doll head.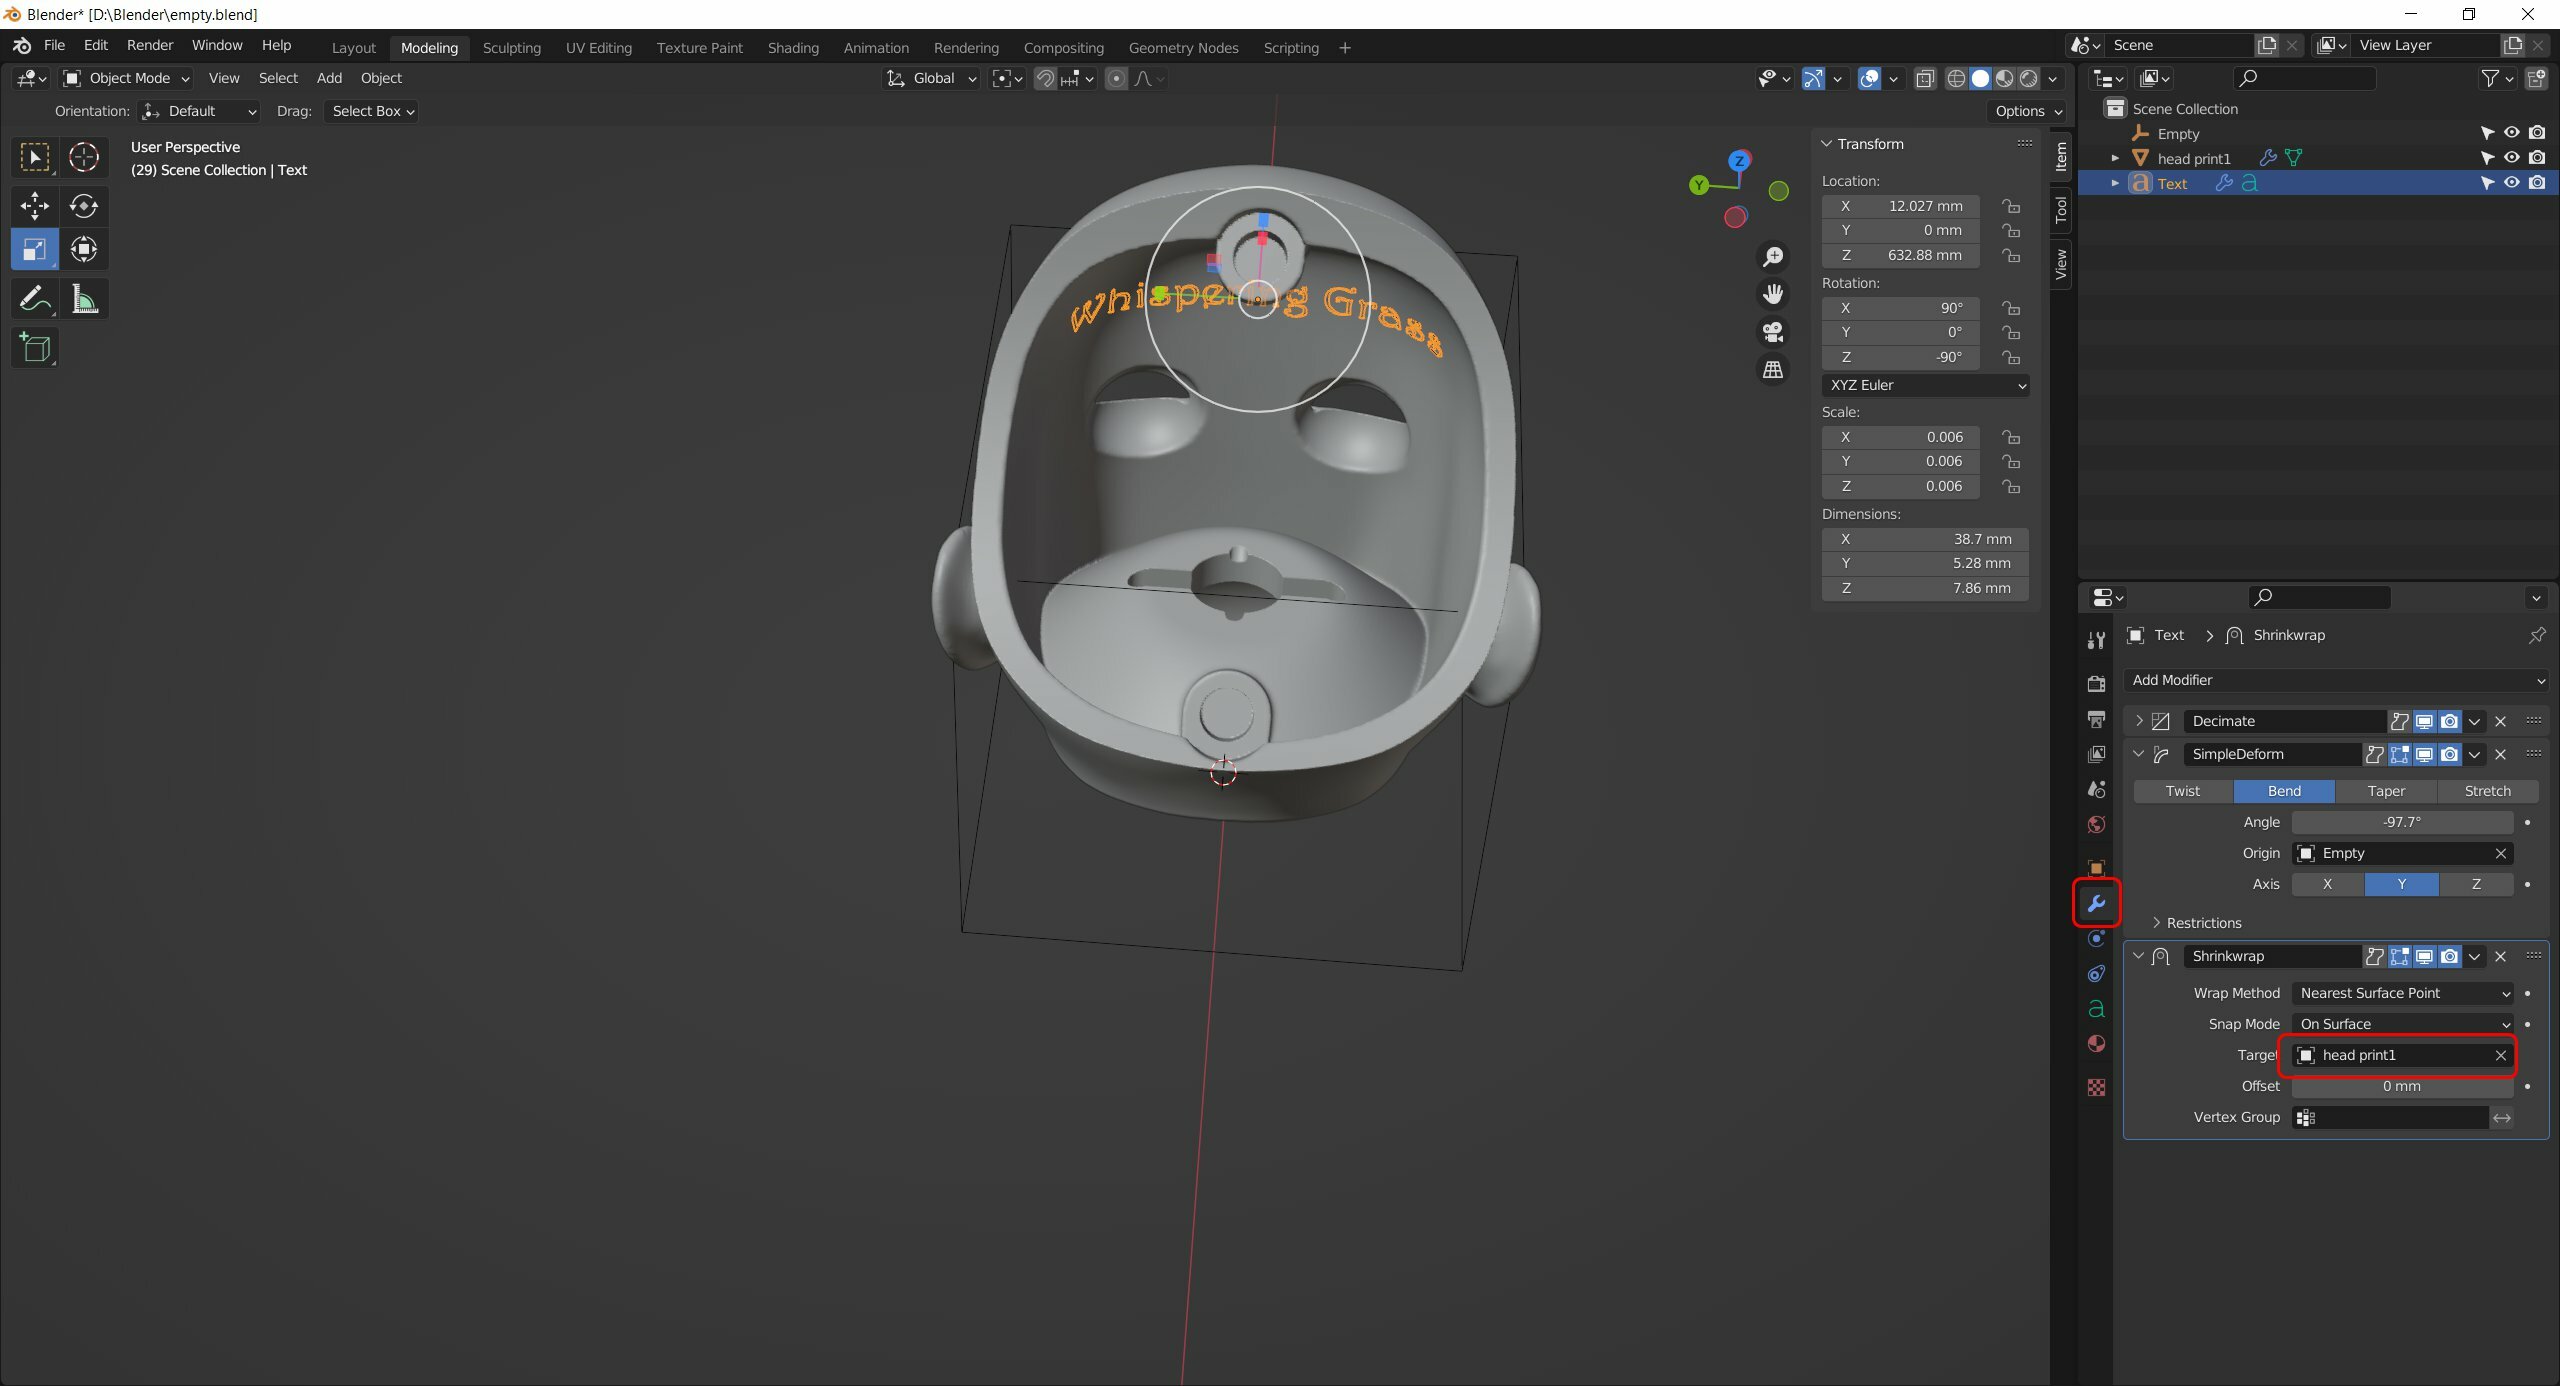
As the text has no thickness, add Solidify modifier.
Set offset to 0, and add thickness. Half of your text is buried inside, and half sticks out. 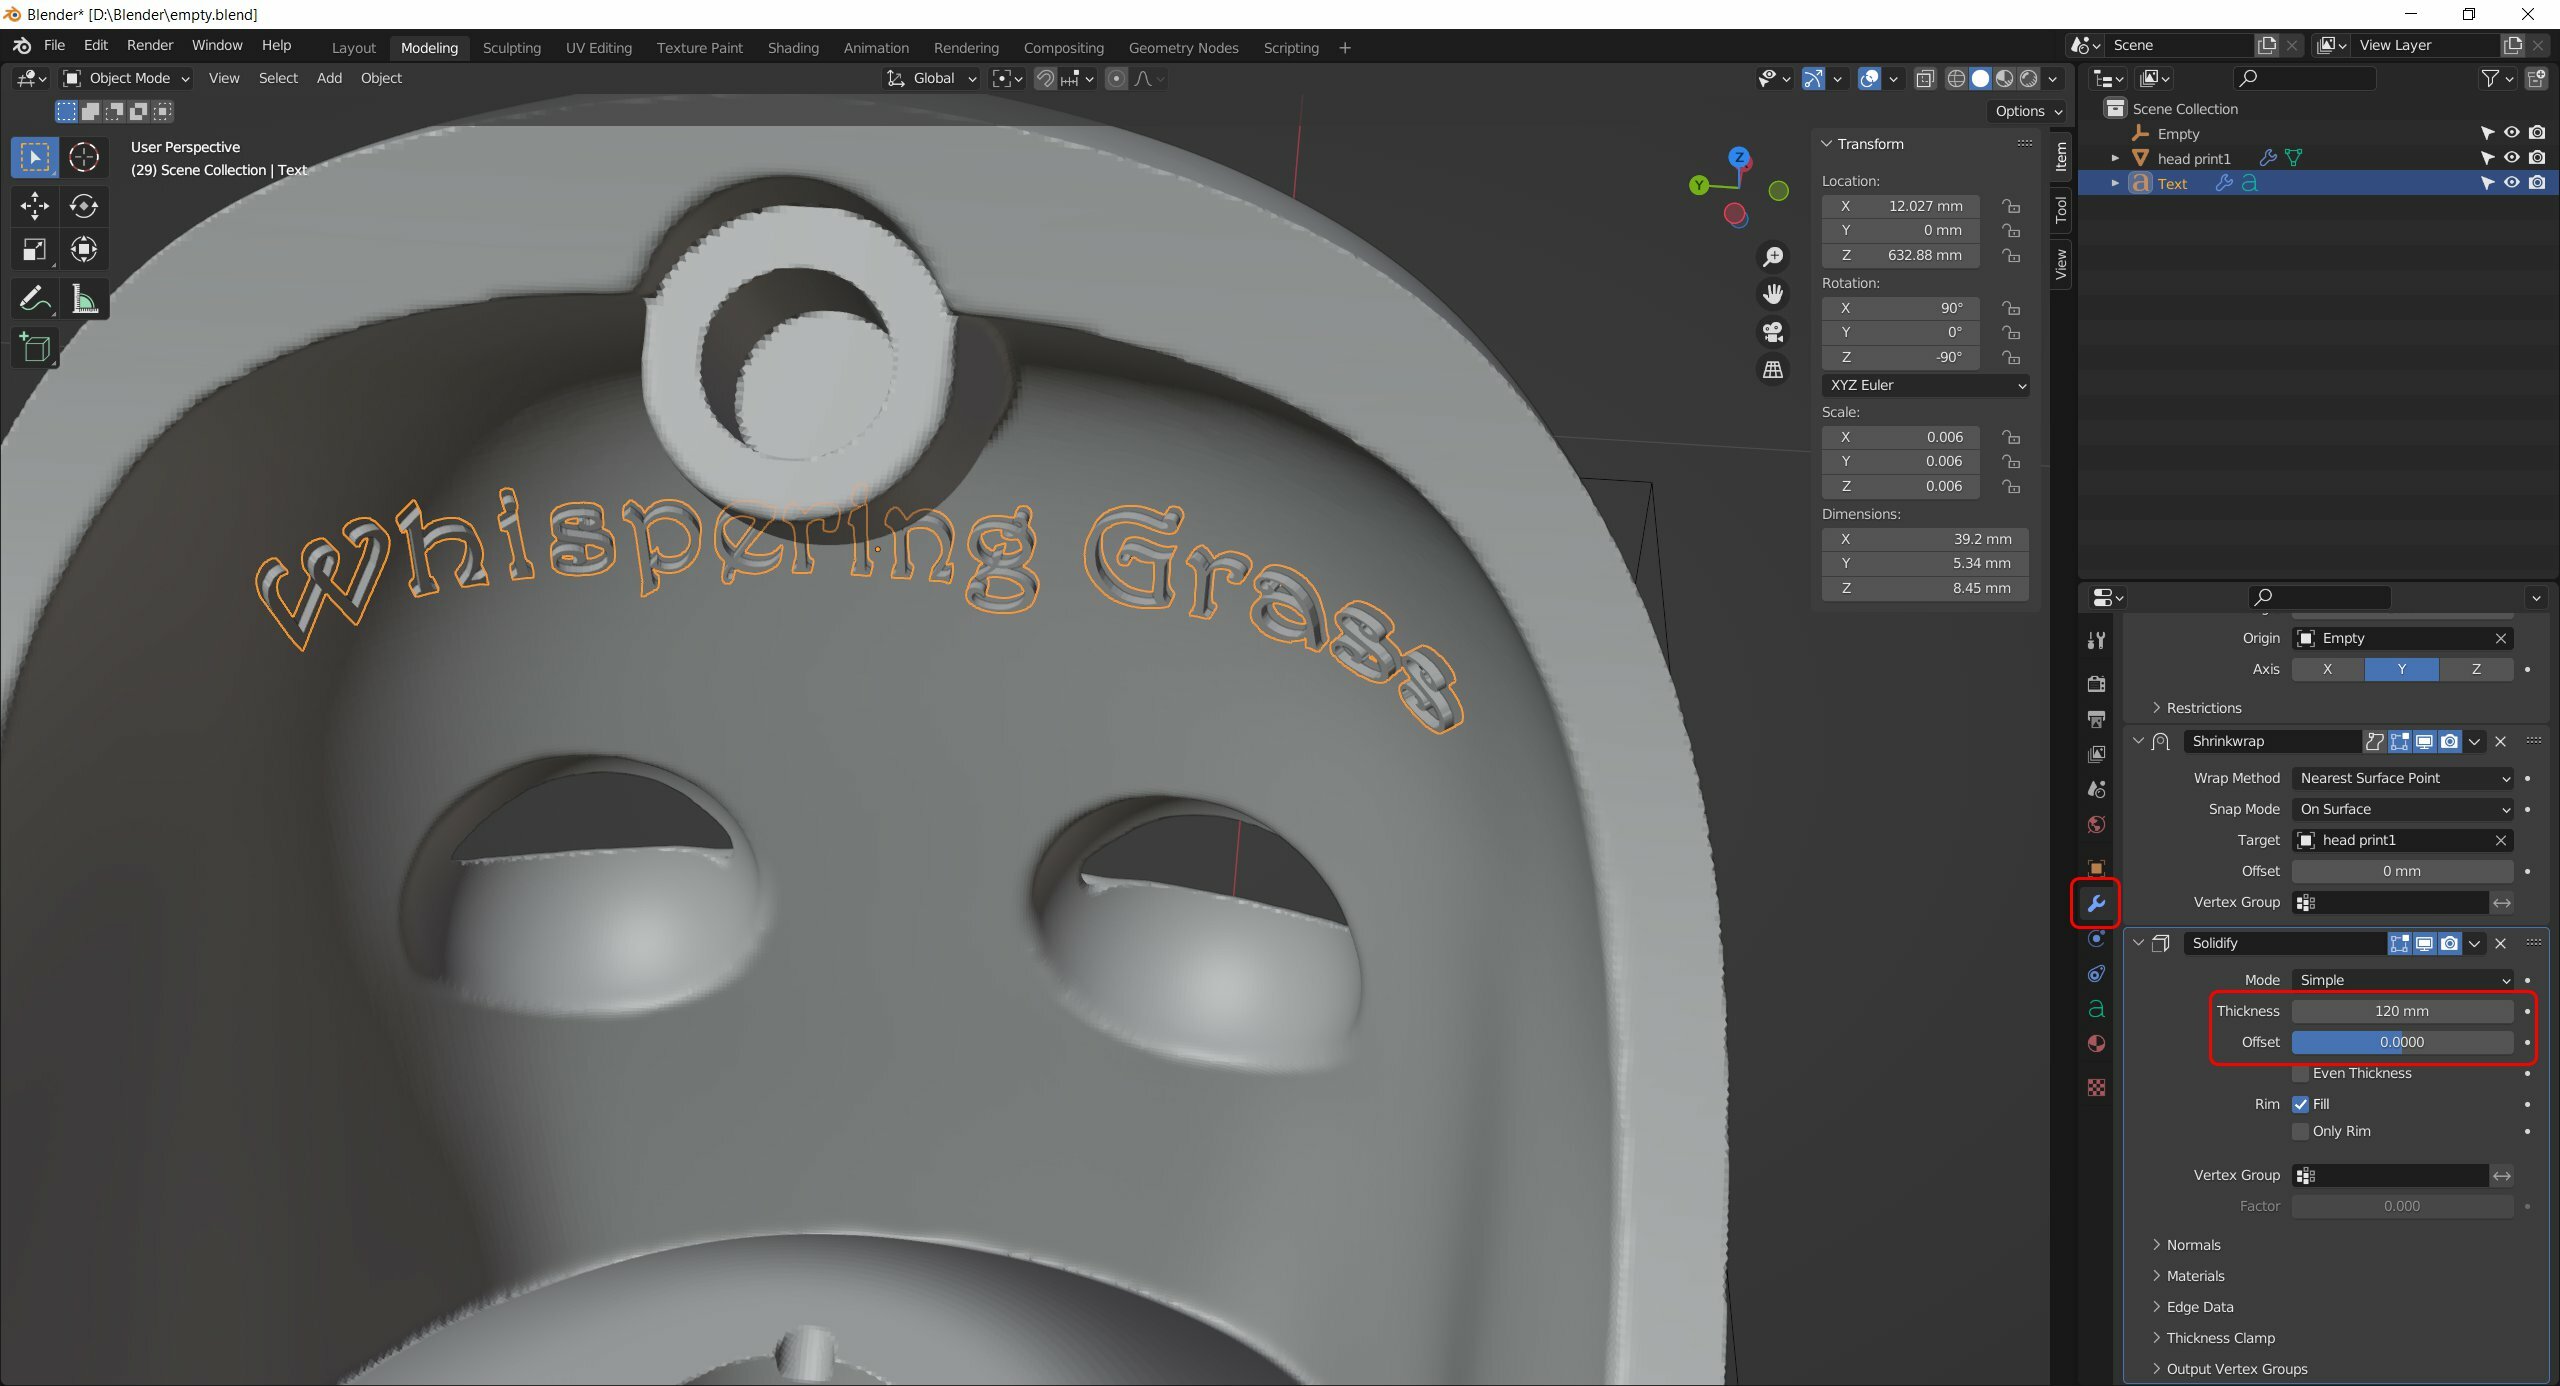
If you need a precise thickness of the text, do Object > Apply > Scale, because now it's 0.006 of its original size. Then scale the offset to 1 mm or whatever thickness you want.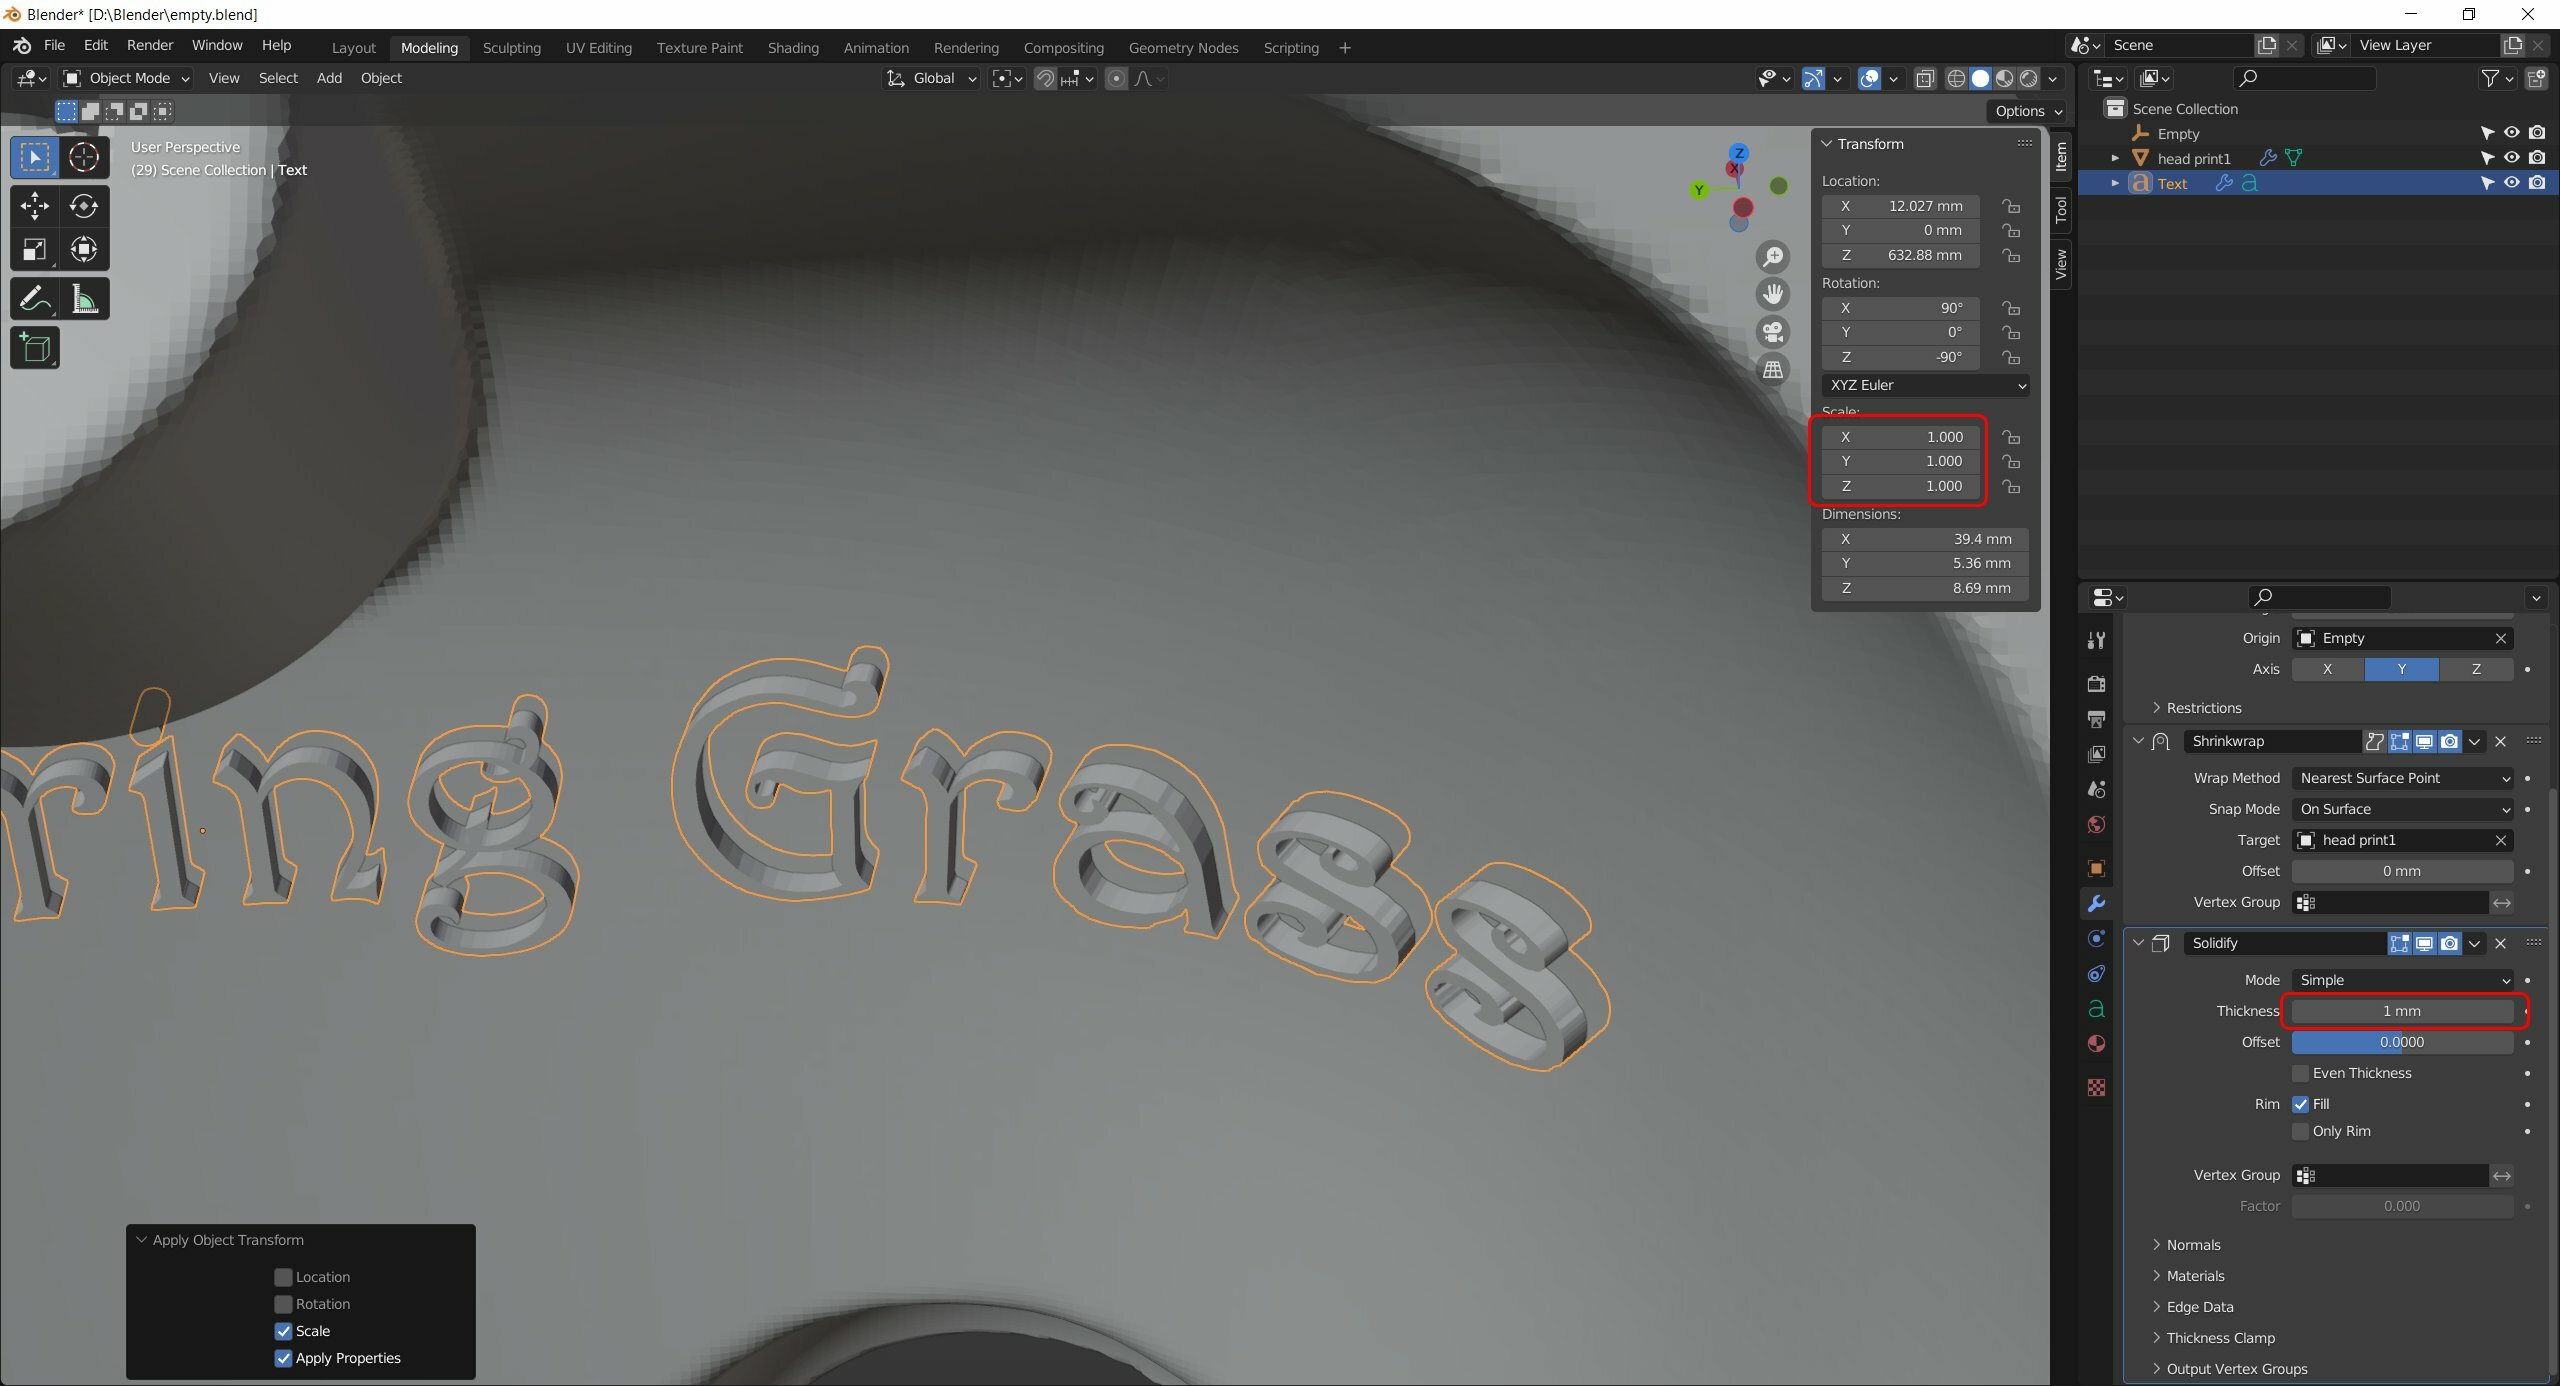
You can't do Boolean to the Text type object, so you have to convert it to a mesh.
Right click on the Text, Convert To > Mesh.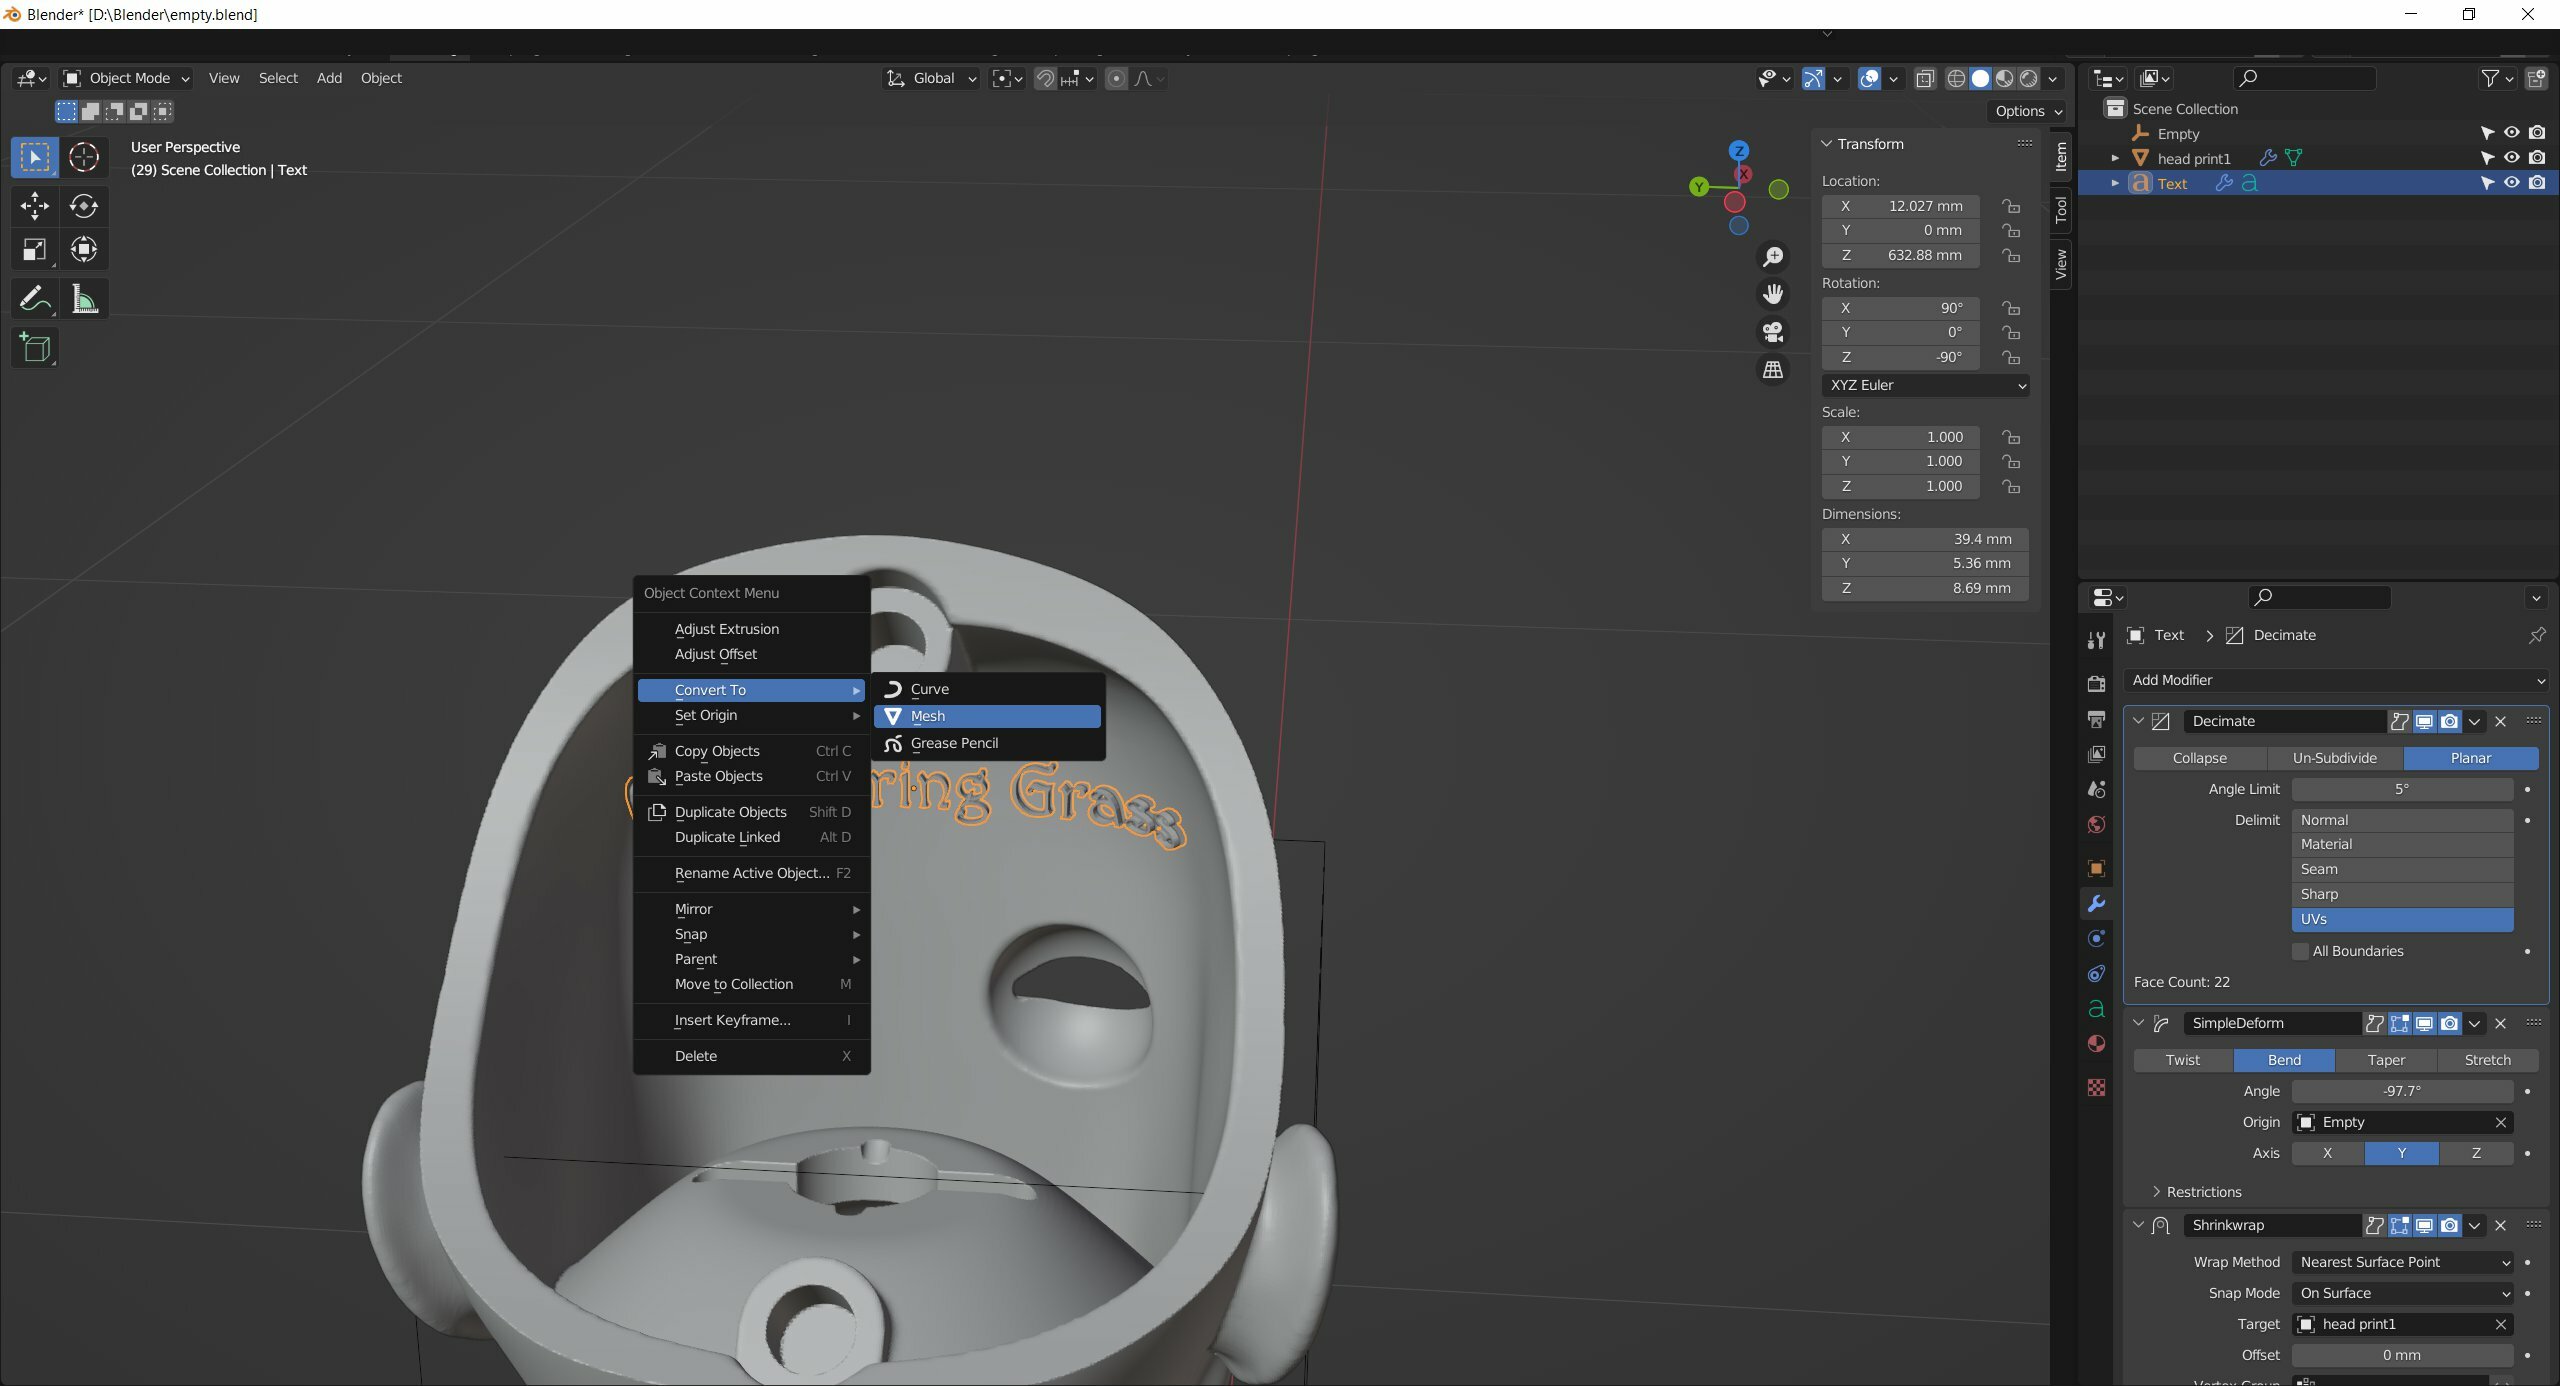
Select your doll head, add Boolean modifier.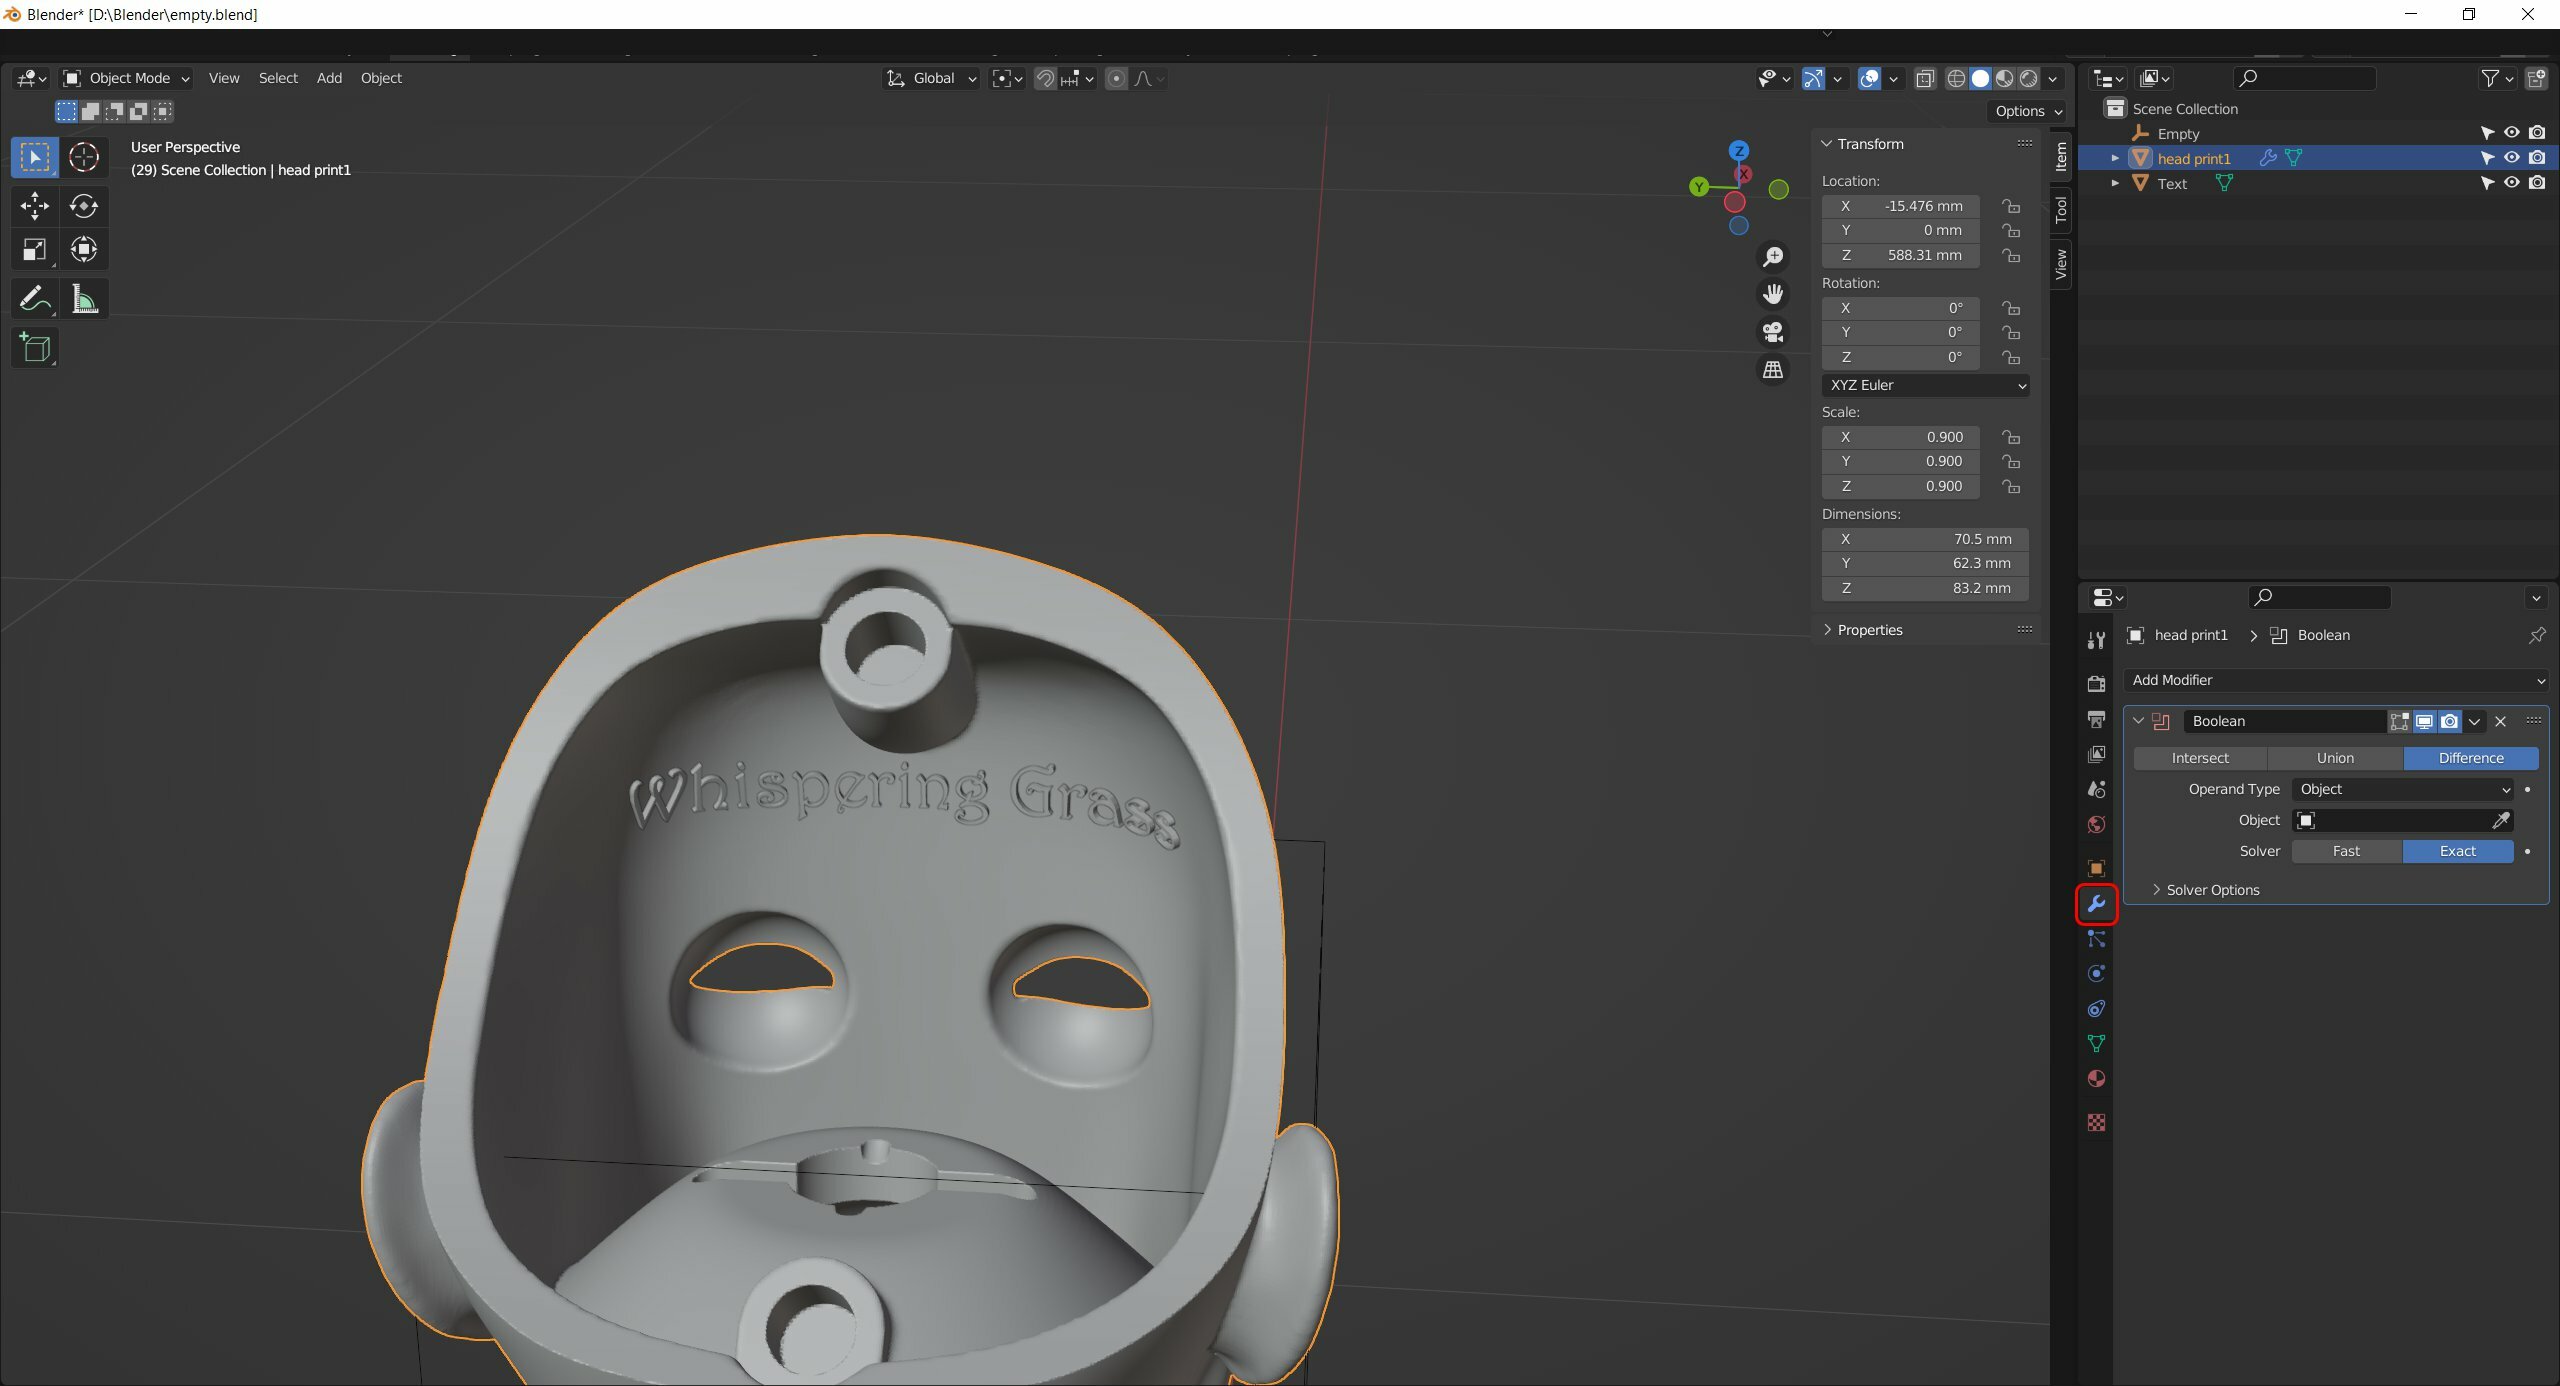
It's up to you if you want to make the text rising above the surface or imprinted. Do Union in the 1st case or Difference in the 2nd one.
I did Difference.
You can hide the Text object from the view. And you see the imprinted text.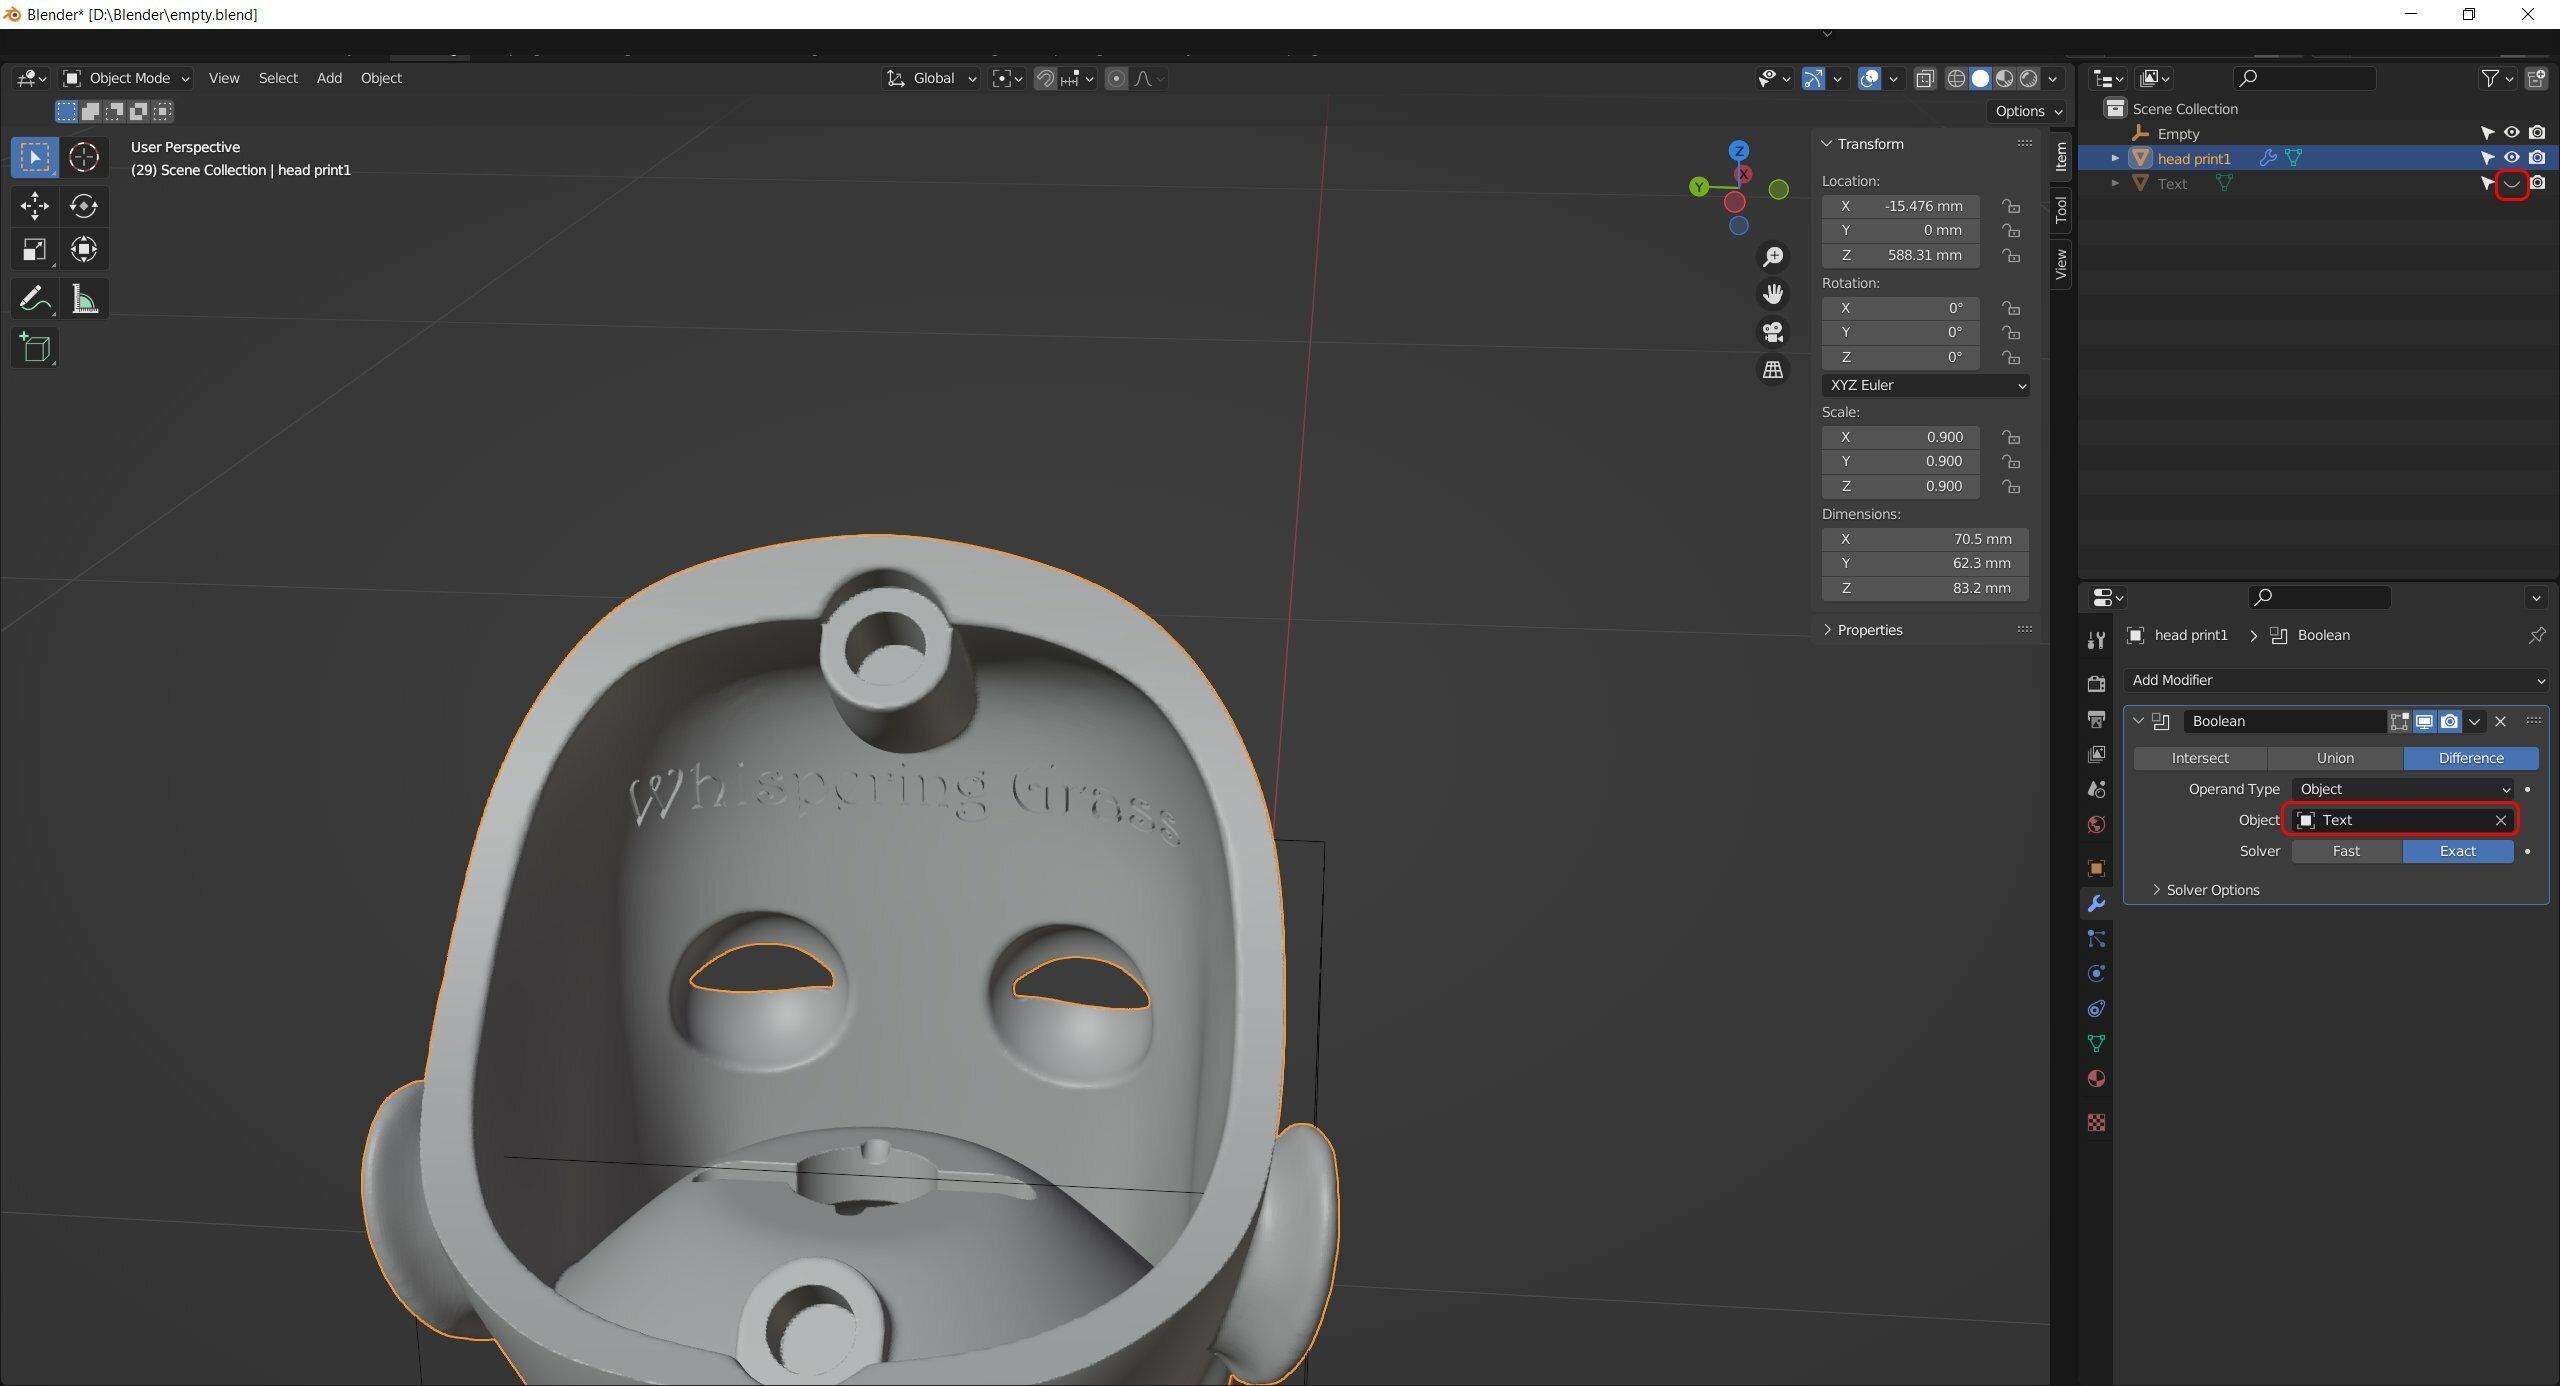
Don't forget to Apply the modifier before exporting to STL and printing!
You don't need Empty object now, so you can delete it.
After printing: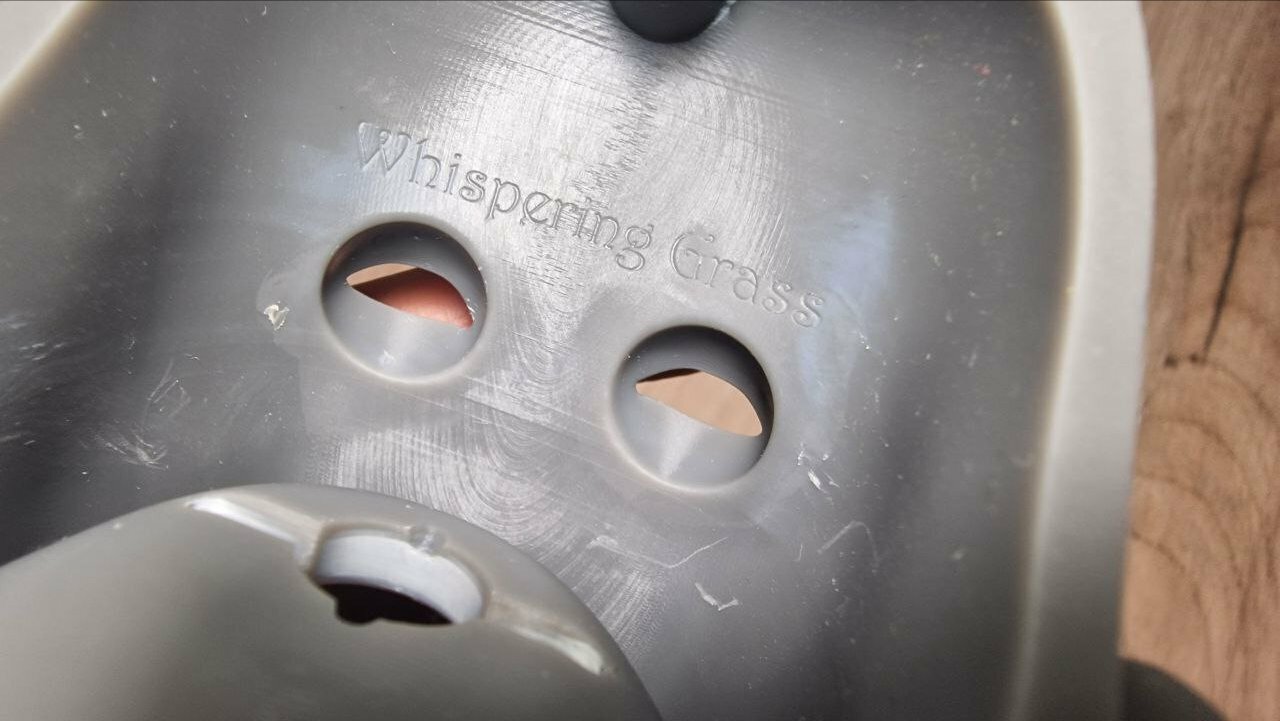
I highly recommend to add a logo at the latest stage before the export, and after any other Booleans and Remeshing, because Remesh done after adding logo can result in a losing a lot of detail in the letters. It's inevitable if your mesh isn't super tight. Mine is usually as tight as 0.2-0.1 mm depending on the level of details I want.
That's how it would look if you'll do Remesh after adding a logo to a 70 cm doll head with 0.2 mm mesh: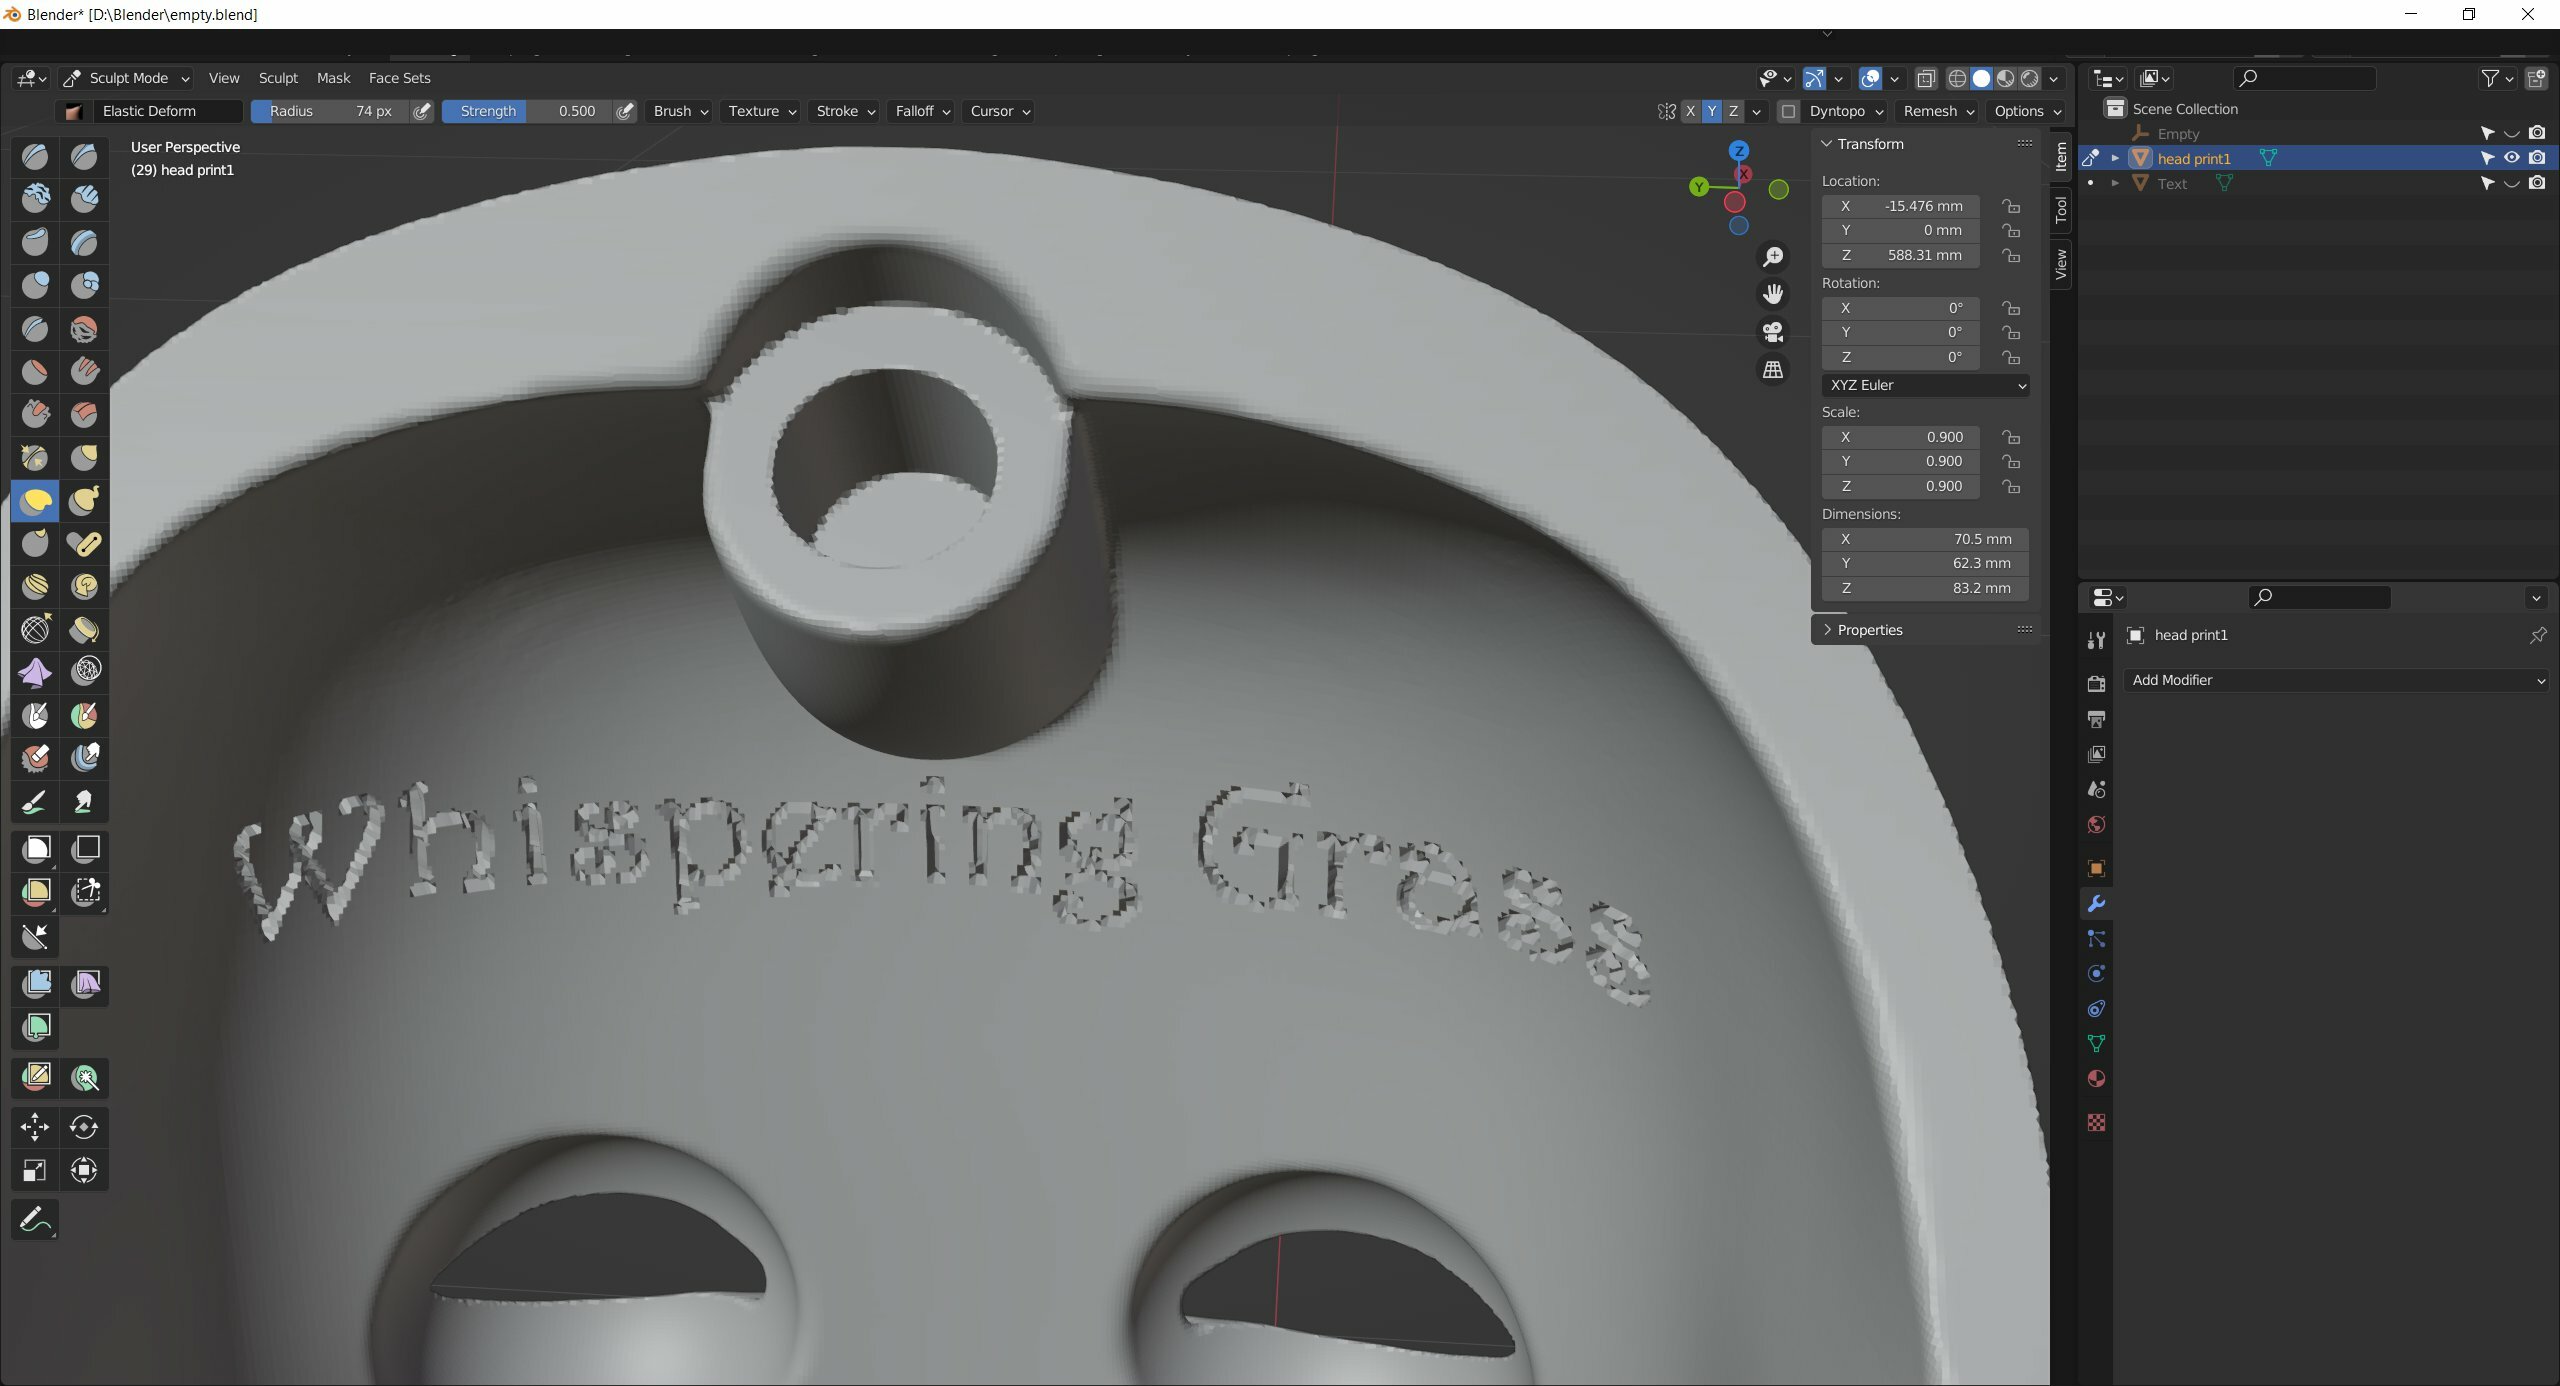
It's a bit better with 0.1 mm mesh, but still nothing decent: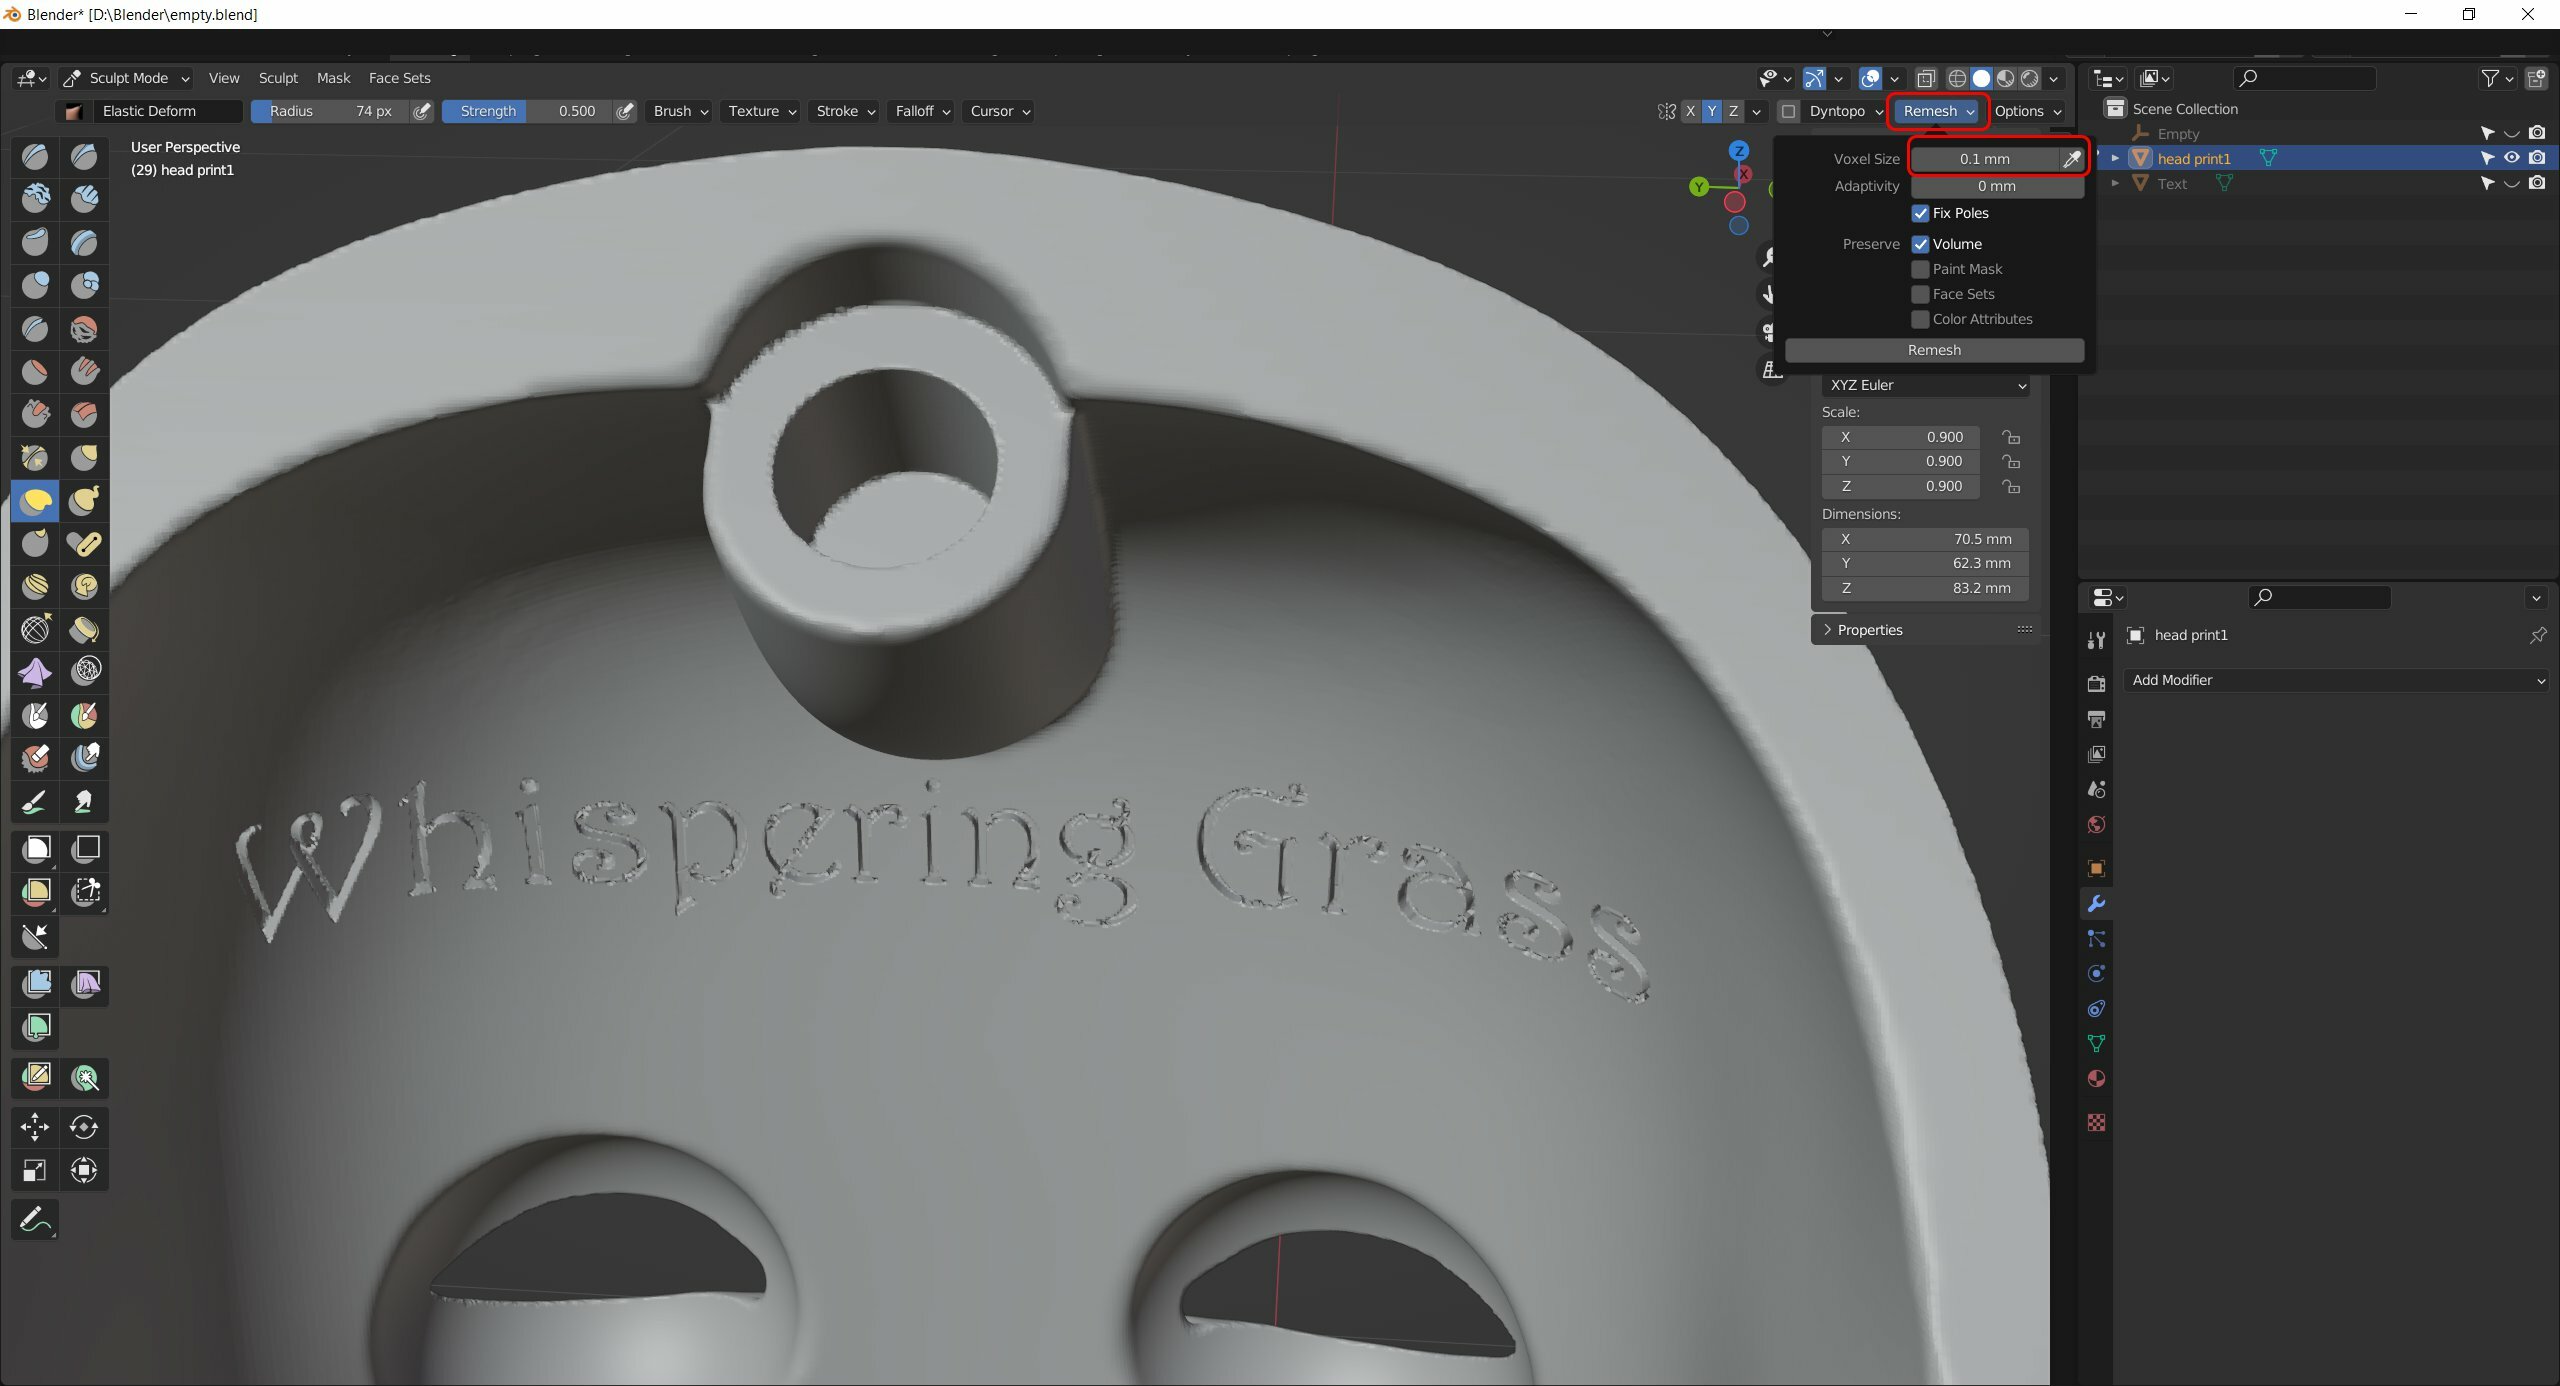
So that's why it's so important to add logo at the latest stage. This way you'll have a nice, sharp letters.
That's all!
How to add a textual logo to the curved surface
Apr 24, 2024
Vous aimez cette publication ?