
Intro
If anyone has been paying attention to the show you know that I am a very keen Linux amateur. No, really, I am. It's just that for my work I need to be able to use desktop versions of M365 apps, so am stuck on Windows. But, I really enjoy spinning up a new Linux distro within a VM and giving it a spin. And right now, the flavour of the month is Fedora with KDE Plasma Desktop.
So, what am I doing here, and what is Kate? Kate is another code editor (i.e. an alternative to VSCode) which is offered from the developers of KDE. It didn't come pre-installed with the DE. That honour belongs to KWrite, a lighter text editor which is based on Kate. You could equate KWrite to Microsoft's Notepad, but with the additional capability of syntax highlighting and saving source code files.
Enough of that. Back to the main topic. I like to do my technical writing in Markdown and I do this within VSCodium (VSCode minus the telemetry). You got that right. I don't use WYSIWYG editors. At all. The point is to not get distracted in how the doc looks. Yes, there's AsciiDoc, but let's not get bogged down into a lengthy discussion, and appreciate my use case for my Fedora KDE VM to create and publish docs from Kate.
Why Kate
When it comes to writing Markdown, most tutorials point straight at heavyweight IDEs such as VSCode, Sublime Text, or lightweight editors like Geany. Those tools are certainly capable, but they also bring a set of trade‑offs that don’t always line up with a minimalist, privacy‑first workflow on a Fedora KDE desktop.
Here’s why I decided to stay with the editor that already ships with my system (Kate) instead of pulling in another program:
Resource usage: Editors like VScode and Atom are Electron based, and consumes CPU when idle. Whereas, Kate is a native Qt/KDE application lightweight, fast start‑up, and modest memory consumption.
Privacy & telemetry: Kate respects the KDE privacy model; there’s no built‑in telemetry, and all data stays on your machine. With VSCode... 🤣🤣. Ahem.
System integration: Kate inherits KDE’s look‑and‑feel, integrates with the plasma file manager, and respects system‑wide shortcuts. While you can extend VSCode's theming is does feel a little detached from the overall desktop experience.
Built‑in extensibility: Probably debatable, but I like Kate's External Tools plugin which lets you bind any CLI utility (e.g., Pandoc) with a single click or shortcut, whereas you have to hunt down extensions for tasks like “run external command” in the alternative.
Installation footprint: As mentioned before, VScode is based on Electron, which pulls in a very large runtime, and can get way bigger as you activate more extensions. Kate is typically part of the KDE Plasma base, so there's no extra packages beyond what the desktop already provides.
It is important to note that, while you can get VSCodium as a private alternative to VSCode, extensions from the Visual Studio Market are not available to you. Compatible extensions are listed in the Open VSX Registry.
First Steps
Before we dive into the workflow. There's a few things to setup.
In Kate, head over to Settings > Configure Kate
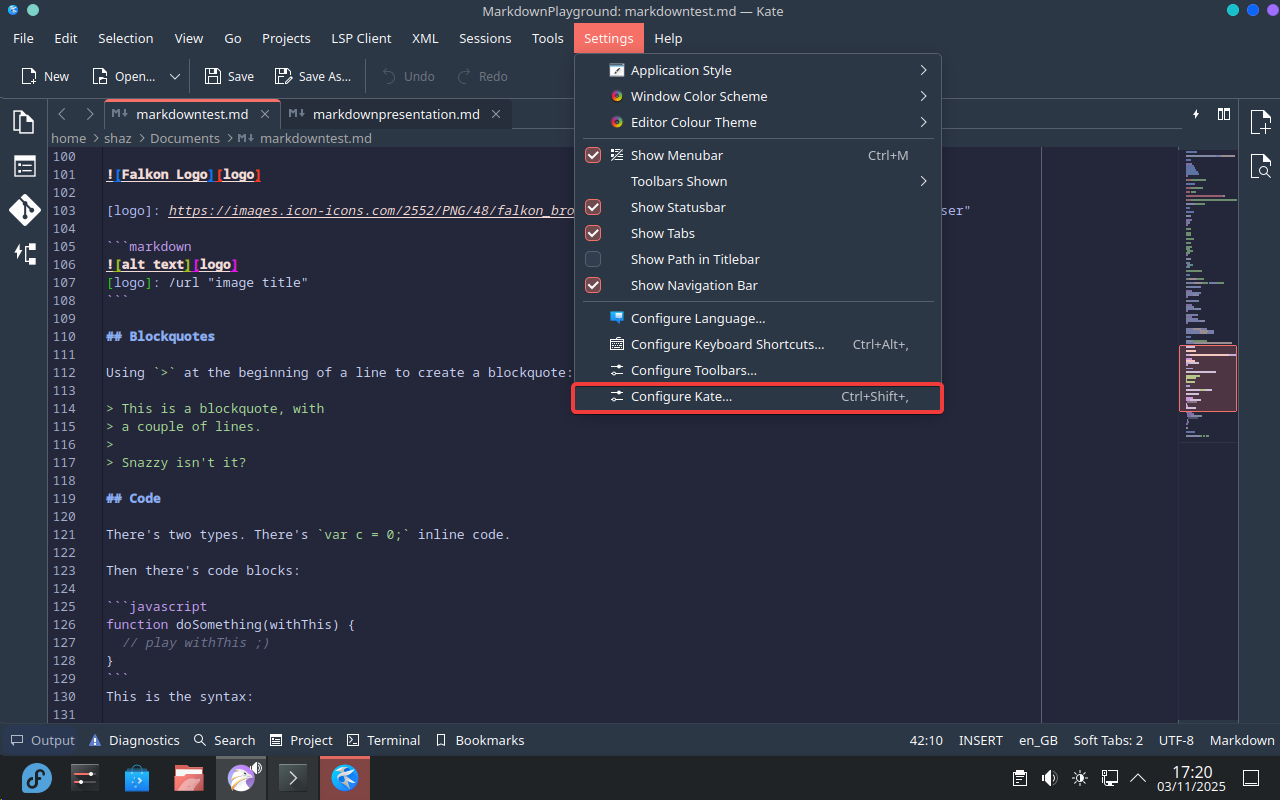 Then in the Configure panel, look for and click on Plugins in the left-hand pane, then enable the Document Preview plugin:
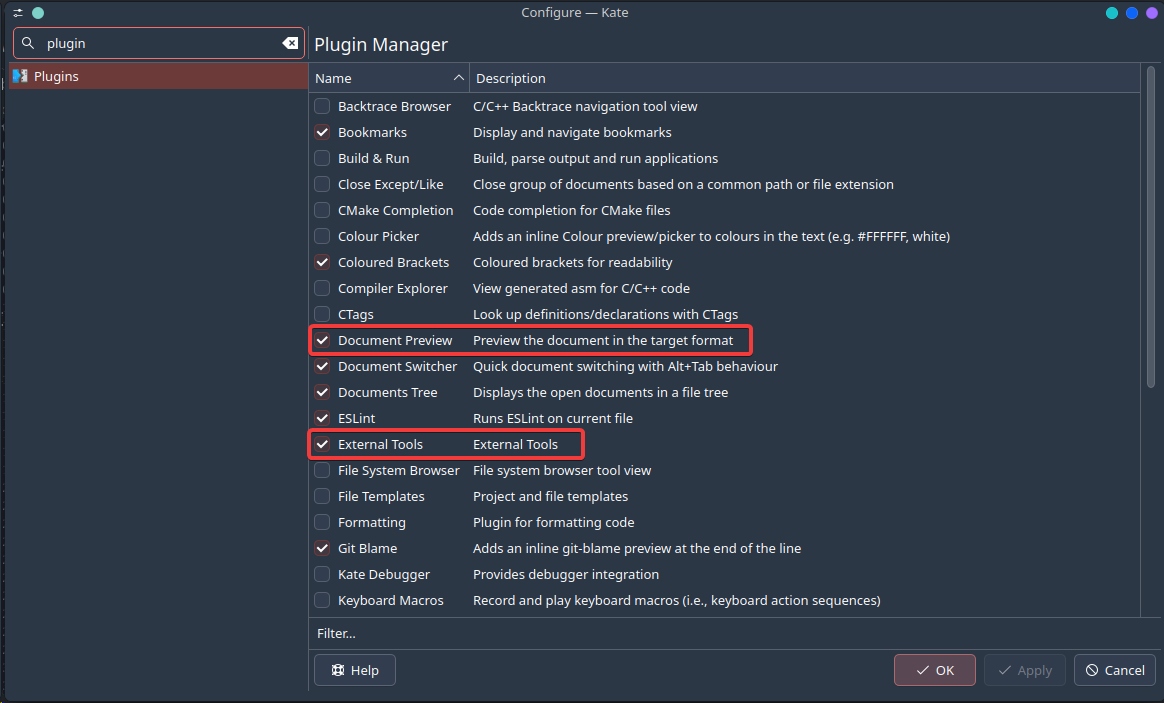 While you're there, let's enable the External Tools plugin, too. Will be covering that later. Click on OK to return to the editor and you will see a new icon.
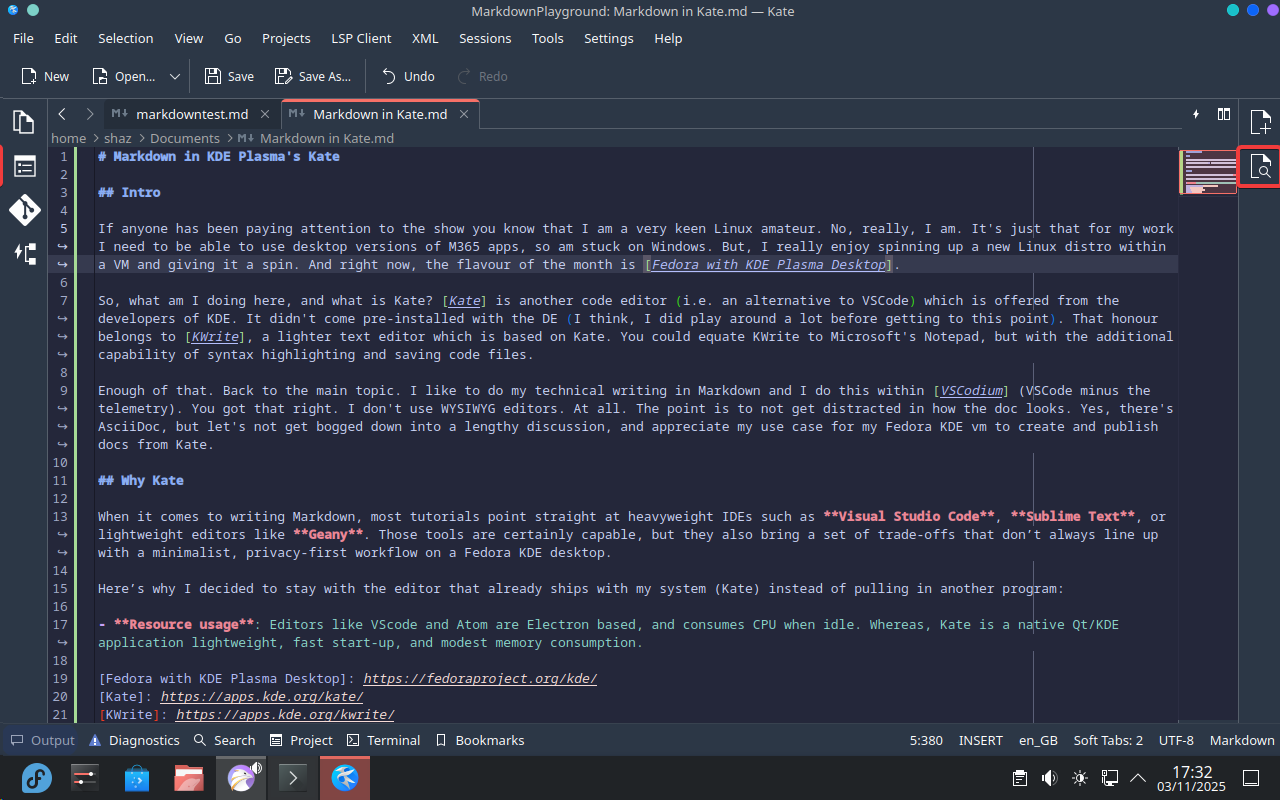 So, let's start a new document in Kate.
Begin your document using Markdown conventions
Save your document with a
.mdextensionClick on the preview icon
Now you have a Markdown setup. Well done.
The Workflow
Now we're getting somewhere. But we're not quite done. How do we get from a Markdown .md doc to, say, a Word .docx doc? This is where Pandoc comes in - a very powerful universal document converter.
So let's get that up and running. Let's head into the Terminal (in my case Konsole) and run the command to install Pandoc:
sudo dnf install pandocIf you're ever going to export to PDF we also LaTeX, there's another command to run:
sudo dnf install texlive-scheme-basicThen you can run pandoc --version to verify it's installed and, with that, we're now ready to put this to some use. Let's go back into Kate and open up your test document that you created earlier. Then at the bottom of the screen click on Terminal to bring up Kate's built-in terminal.
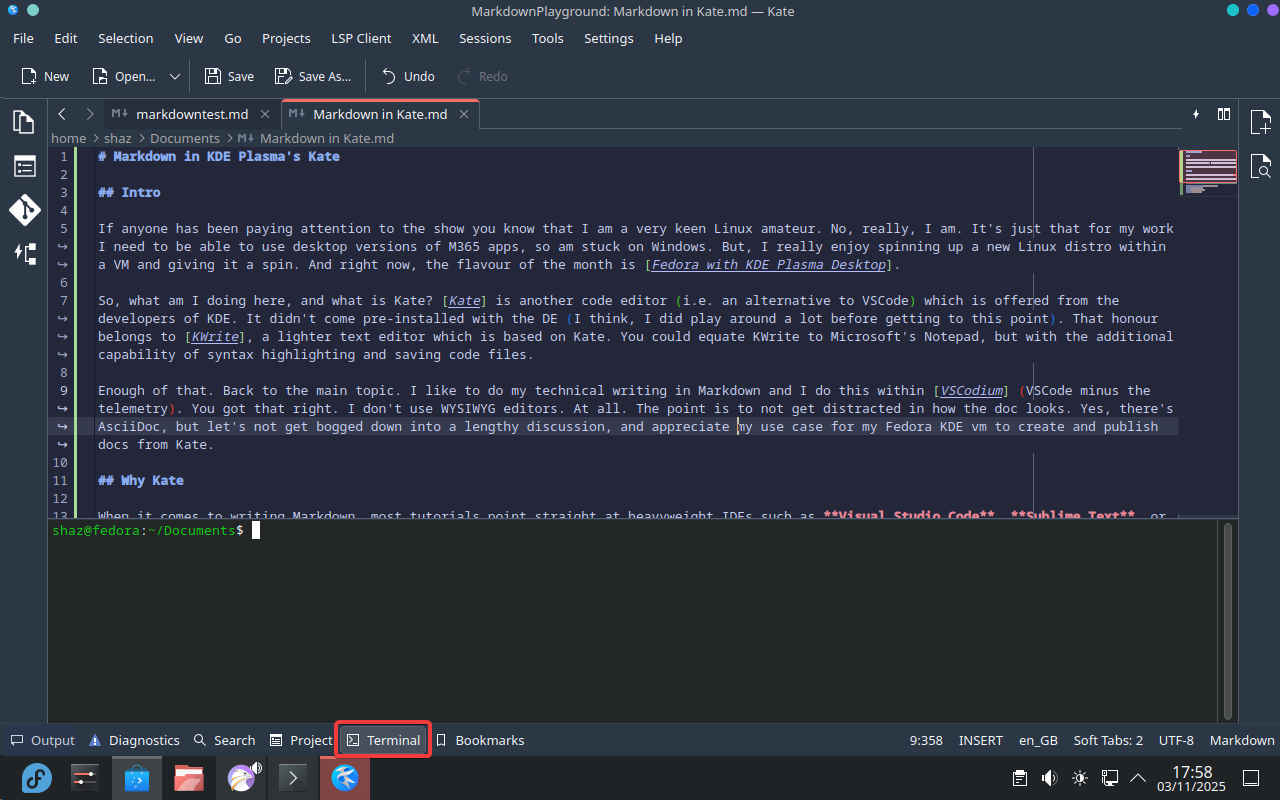 Use the cd command to navigate to where your document is stored to type in the relevant command to run Pandoc and convert your document to the target format. Here's what I typed in for my doc
pandoc Markdown\ in\ Kate.md -f commonmark -t docx -o markdown-in-kate.docxSome notes here to help you understand the command:
-fis the format of the source doc. Pandoc defaults to "markdown" but I prefer to use the CommonMark standard.-tis the format to write to, so "docx" for Word-ois the name you want for the doc that would be created output
So I headed into the desktop environment, used the file manager and navigated to where my Markdown doc is, the Word is there and loaded up as expected. And hey presto!
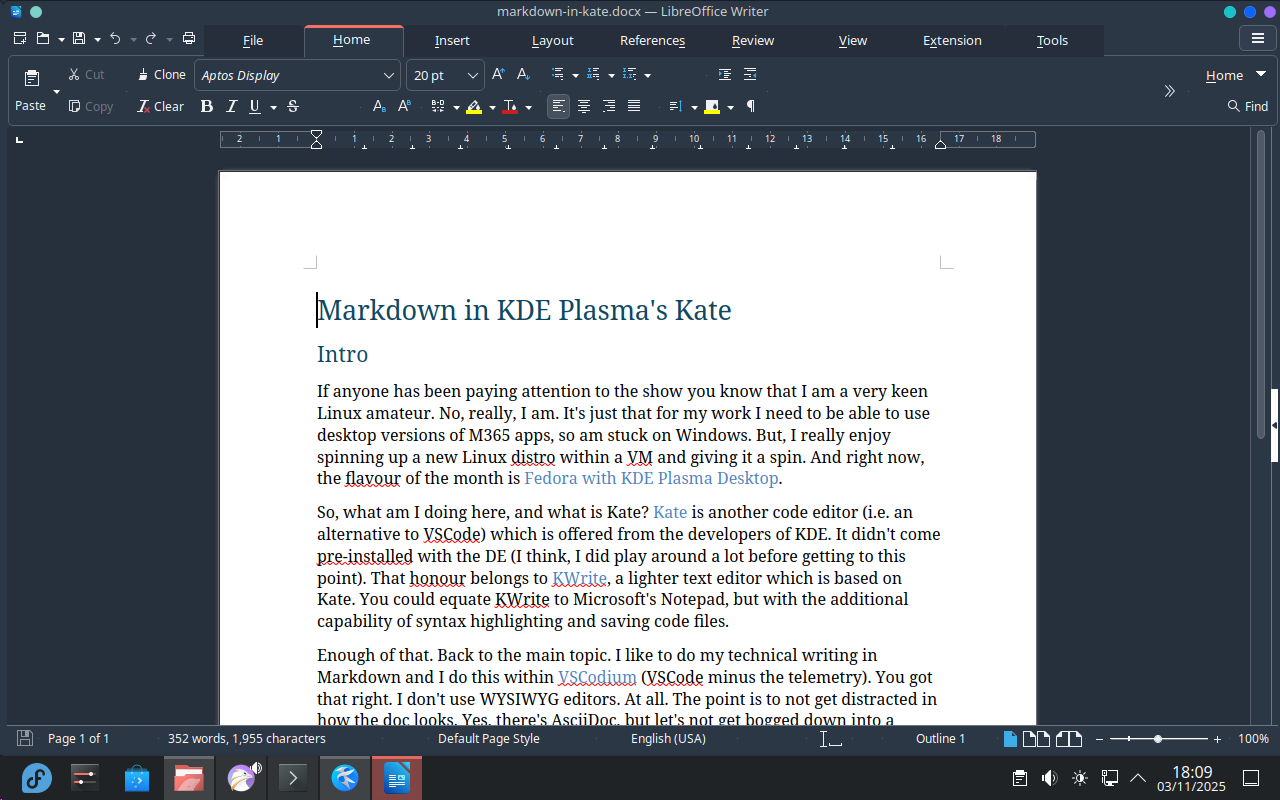 Improving the Workflow
We're making progress but it's not really a good experience to use Terminal. This is where Kate's External Tools help improve the flow. There's two ways to get to the configuration:
In the main editor window, click on Tools > External Tools > Configure...
As before, from the main editor, click on Settings > Configure Kate and look for "External Tools" from the left pane
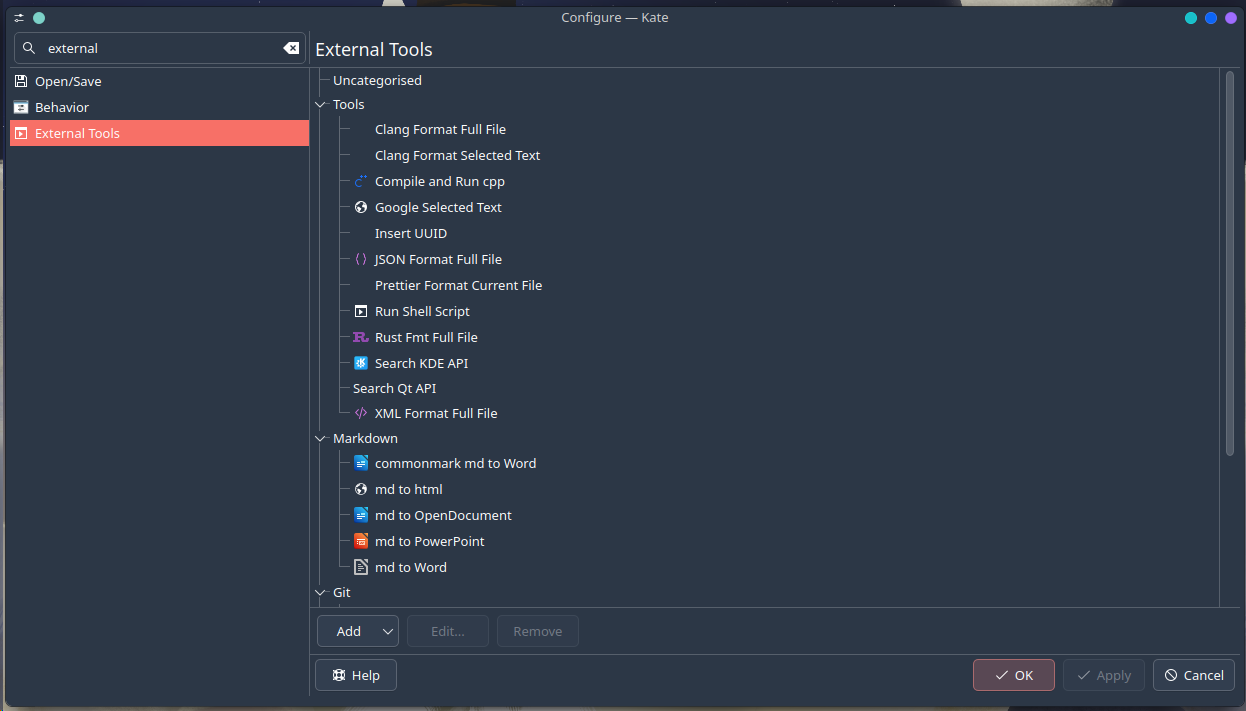 You will see I have already created my set of tools. For different purposes. But for now let's stick to making an external tool to convert your Markdown document to Word. But first let's organise ourselves. Click on Add, then Add Category, and call it "Markdown".
While your category is selected, click on Add again, but this time click on Add Tool....
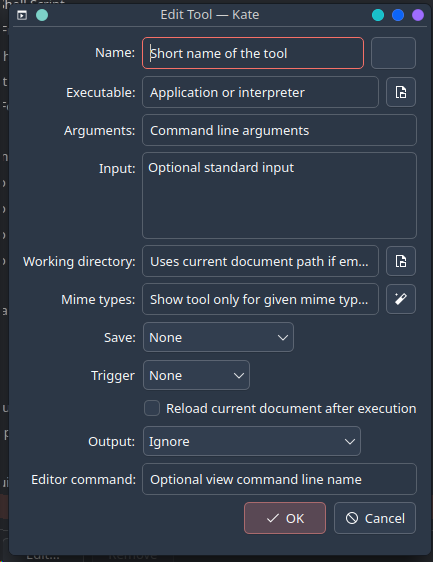 Don't worry. It may look scary, but it really isn't. Let's make our first external tool:
Name: Give it any name to help you identify it, for example "md to Word"
Executable: pandoc
Arguments: "%{Document:FileName}" -f commonmark -t docx -o "%{Document:FileBaseName}.docx"
Working directory: %{Document:Path}
Here's what my config looks like
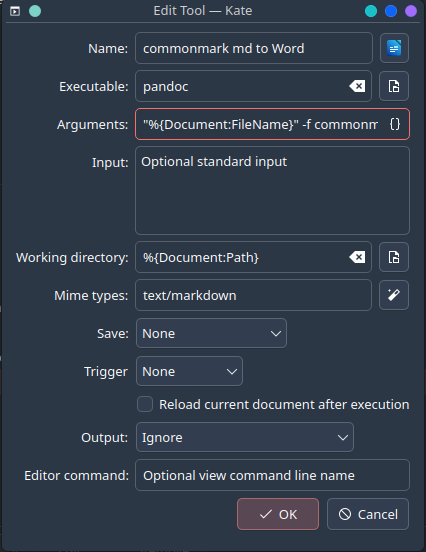
As you can see, Kate provides really useful variables to help build up your tools. The usage of %{Document:FileName} gives you the full file name of the current document open in the editor including the extension (e.g., "Markdown in Kate.md"). Then %{Document:FileBaseName} gives you the file name without the extension. Setting the Working directory helps make sure the external tool starts from the folder where your current document is, making it easier and cleaner to set the arguments without needing to set the paths for the input and output.
Note: To give the tool an icon, click the empty square and select something that makes sense. As I'm on a Linux-based environment, I used LibreOffice Write's icon.
To put this into use, head back into the editor to your Markdown doc. Navigate to Tools > External Tools > [Category] > [Name of your tool].
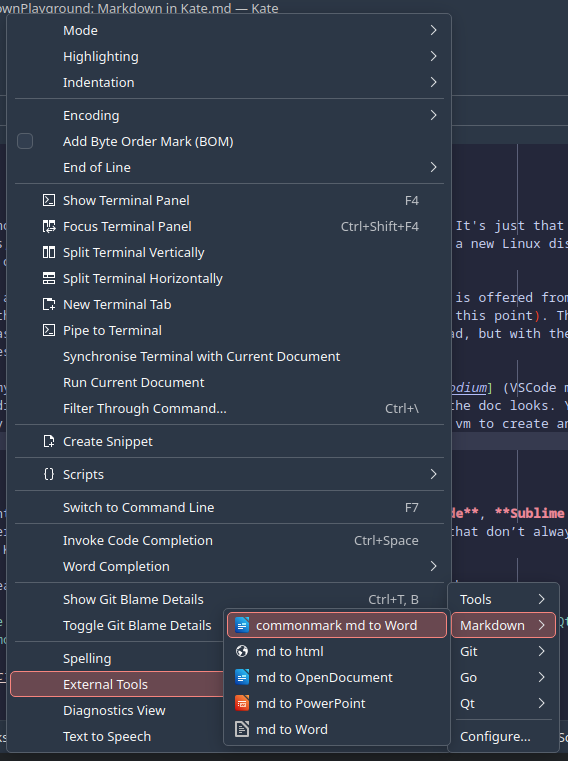 And there you have it. You have now configured Kate towards being a document publishing work space without having to install other apps or tools onto your system.
Limitations
There's some things that I wish worked well or better to improve further on this experience.
First, I'm not sure what standards or Markdown parser is used for the Document Preview plugin, as it may not necessarily match what you get in the target document. As a result, you may end up playing around with setting the -t parameter to "markdown" and "commonmark", for the desired output. It also doesn't show images loaded from a URL.