

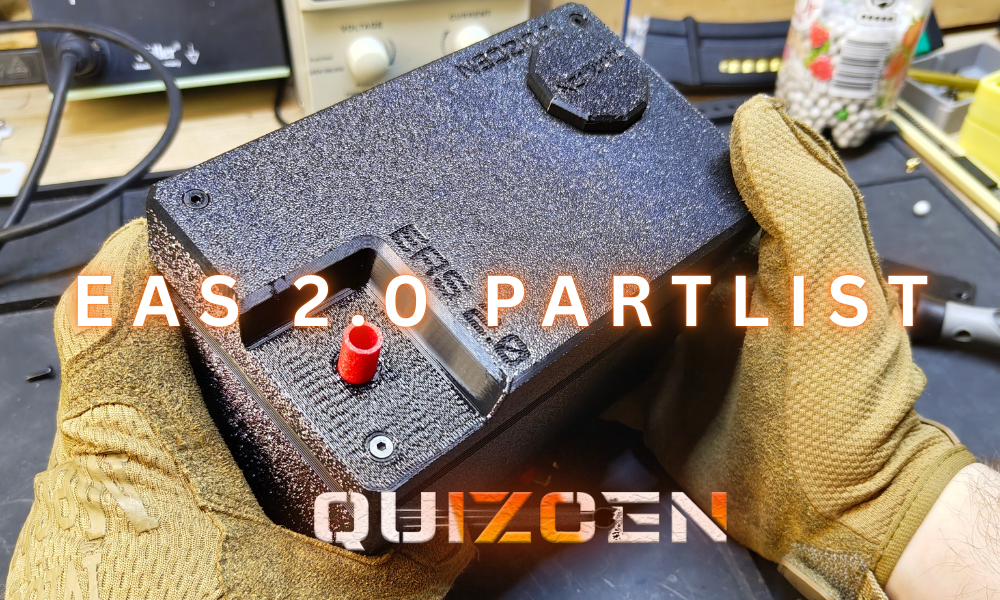
The EAS 2.0 uses different components from V1.0. Everything has been made waaaaay better and is well tested and designed this time. Find the full list of components below or buy the complete kit from my store.
Hardware list:
I don’t include links for the items below because sellers change all the time—and the correct bolts are easy to find locally or online. For the fasteners, the exact brand isn’t important; as long as the size and length match, it’ll work.
Round Head Bolts (RH):
1 PCS RH M3x8mm
6 PCS RH M3x10mm
2 PCS RH M2x8mm
4 PCS RH M3x6 (For Metal bracket, userlly comes together when you buy it)
Counter sunk Bolts (CS):
4 PCS CS M3x6
4 PCS CS M3x10
3 PCS CS M3x22
Note: You can in theory also use RH bolts if you only have thoes, but the overall design will be nicer with CS.
Thread Inserts individual bags: ALIEXPRESS LINK
5 PCS: Length 3mm M3(OD4.5mm) (50/bag)
12 PCS: Length 6mm M3(OD4.5mm) (30/bag)
2 PCS: Length 3mm M2(OD3.5mm) (50/bag)
You can also buy a full inersts kit. Just make sure there is the right sizes: ALIEXPRESS LINK - Color: M2 M3 M4 (330pcs)
Brass rod and springs (Both is the same from EAS V1.0) (Length 32mm)
Brass rod: OD8 - ID7: ALIEXPRESS LINK
Spring: OD10 - Length 20mm - Wire 0,5 - 0,7mm (where 0,5 is a light spring and 0,7 needs a bit more pressure depending on your prefrance) ALIEXPRESSLINK
Nice to have:
Threadlock or a gluestick if you dont have acces to threadlock.
Electronics:
40 kg Servo Motor: Its important to say that the servo motor needs a tiny mod, you have to remove the internal PCB and solder wires to the motor inputs (See further down this page for more info): ALIEXPRESS LINK Model: DS3240-270
Metal Servo bracket: ALIEXPRESS LINK
Limit switch (Bent Handle): ALIEXPRESS LINK
32 cm 24 AWG Wire: ALIEXPRESS LINK
Deans connector MALE: ALIEXPRESS LINK
JST Connectors (JST 2Pin): ALIEXPRESS LINK
If you’d rather skip the hassle of modifying the servo, sourcing connectors, and assembling the electronics, you can grab the complete kit from my webstore—includes a pre-modded servo and a fully built electronics setup:
BUY THE MODDED SERVO, FASTNERS ON MY WEBSITE: WWW.QUIZCEN.COM
Just note: EAS 2.0 Advance uses different wiring. If you plan to upgrade later, you’ll either need to do some soldering yourself or pick up the conversion kit to make the upgrade plug-and-play.
DIY the electronics.
Most hobby servos are mechanically/electronically limited to about 270° of rotation, which isn’t what we want here—we need continuous rotation.
Inside the servo you’ll find two main parts:
a small PCB (the servo control electronics)
a DC motor with a gearbox (the part we actually want)
If you remove the PCB and wire directly to the motor, the servo effectively becomes a geared DC motor, which will spin continuously as long as it has power.
What to do
Open the servo housing and locate the PCB and motor leads.
Desolder the motor wires from the PCB and remove the PCB from the case.
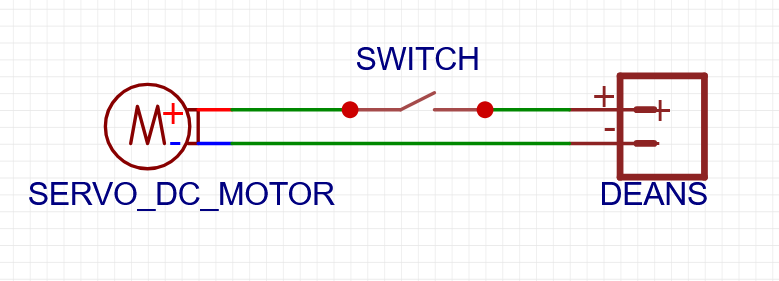
Wire the motor directly using the schematic: the battery, switch, and motor must be in series.
How the switch works (simple analogy)
Think of the switch like a valve on a water hose:
Switch open → current can flow → motor spins
Switch closed → no current → motor stops
So the switch needs to sit in line between the battery and the motor. Simple stuff.
You can also see the video below showing how to mod the motor, use it for reference!
Safety & liability notice (LiPo batteries)
Warning: Working with LiPo batteries can be extremely dangerous. If you short a LiPo, damage it, charge it incorrectly, or wire something wrong, it can overheat, catch fire, and burn your house down… ask me how I almost know.
By following any of the schematics or instructions above, you accept full responsibility for what you build and how you use it. You are fully liable for any damage, injury, or loss that may occur. The schematics and instructions provided are for reference only and come with no warranty or guarantee of safety.
You should only attempt this if you understand basic electronics (polarity, shorts, insulation, current draw, safe charging/handling of LiPos). If you’re not 100% comfortable doing this yourself, the safest option is to get the complete kit from my website: www.quizcen.com.