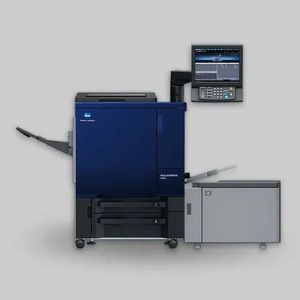

Konica Minolta C 3501/C 3505/C 3901 Error Solutions
Error Codes Overview
These three error codes represent fusing belt central section high temperature abnormalities in Konica Minolta printers:
C 3501 & C 3505: Fusing belt central section high temperature abnormality (180-240°C range)
C 3901: Very high temperature abnormality (more critical)
These errors apply to various Konica Minolta models, including the C 1060, 1070, 2060, 2070, 3070, 3080, and their respective HC variants (71HC, 73HC).
Root Cause
All three errors are related to fusing temperature detection problems, specifically involving Temperature Sensor 1 (TH1), which is a non-contact infrared sensor that detects fusing belt central section temperature. The sensor is reading excessively high temperature values, triggering the error code.
Probable Suspected Parts
The following components may cause these errors:
Temperature Sensor 1 (TH1) - Main culprit (non-contact sensor)
PRCB (Power and Relay Control Board)
Fusing Unit - In rare cases
DC Power Source - Very rare
Troubleshooting Steps
Step 1: Attempt DIP Switch Reset (For C 3501 and C 3505 Only)
Before replacing parts, you can try resetting the DIP switch settings for error codes 3501 or 3505:
Power off the machine completely
Press and hold the Utility or Counter button until the machine powers back on
The machine will enter Service Mode automatically
Navigate to Option 3 (System Settings)
Select Option 1 (Software DIP Settings)
Change the first value from 01 to 03
Change the middle value from 0 to 1
Press Return and exit Service Mode
Reboot the machine
Important Notes:
This step may temporarily resolve the error for C 3501/3505, but only if the sensor is functioning marginally
Do not repeatedly reset the DIP switch multiple times as this can cause damage to the fusing belt and fusing lamps
If the error returns after reset, you must replace Temperature Sensor TH1
Step 2: Replace Temperature Sensor 1 (TH1)
If the DIP reset does not resolve the error, or if you receive the C 3901 error (do not attempt DIP reset for this code), replace Temperature Sensor 1:
Accessing the Fusing Unit:
Open the front door
Remove the IDU (Image Drum Unit) and dryer unit
You will see the fusing unit mounted horizontally
Remove the top cover and connectors cover by unscrewing four screws (two on top, two around the fusing unit)
Remove the fusing unit completely from the machine by unscrewing additional screws on the sides
Temperature Sensor Locations:
Once the fusing unit is removed, you will see five temperature-related components:
Left side: Temperature Sensor 3 (contact sensor - touches the belt)
Middle-left: Temperature Sensor 2 (non-contact sensor)
Right side: Temperature Sensor 1 (non-contact sensor) - TH1 to replace
Thermostat stations on both sides (do not remove these - they are pre-calibrated)
Replacing TH1:
Remove one screw holding Temperature Sensor 1
Carefully disconnect the wiring from the routing (work slowly to avoid damage)
Extract the sensor from its mount
Install the new TH1 sensor in reverse order
Ensure wiring is properly routed back through the connectors on the fusing unit cover
Critical Warning: Temperature Sensor 3 (contact sensor) contacts the belt directly. Clean it carefully to avoid belt damage. Never remove thermostats from their mounting brackets, as they are pre-calibrated and adjustment cannot be restored.
Connector and Part Compatibility:
The three temperature sensors have different connector configurations:
Contact sensor (TH3): White wiring with 2-pin connector
Non-contact sensors (TH1 and TH2): Different pin configurations (2-pin and 3-pin)
Do not interchange sensors - request the exact part number for replacement
Step 3: Reset DIP Switch After Sensor Replacement
After replacing Temperature Sensor TH1, you must reset the DIP switch to clear the error code:
Enter Service Mode (press and hold Utility/Counter button while powering on)
Navigate to System Settings (Option 3) > Software DIP Settings (Option 1)
Change the value to 03 in the first position and 1 in the middle position (making it 03-1-0)
Press Return and exit
Reboot the machine
Error-Specific Guidance
Error Code Recommended Action C 3501 or C 3505Try DIP reset first. If error returns, replace TH1 sensorC 3901Do NOT attempt DIP reset. Replace Temperature Sensor TH1 immediately
Important Warnings
Do not repeatedly reset DIP switches - excessive resets can damage the fusing belt and fusing lamps
C 3901 errors indicate a more critical temperature condition - part replacement is strongly recommended over repeated DIP resets
Always request the correct part number - non-contact sensors cannot be interchanged due to different pin configurations
Thermostats should never be removed from their original mounting - they are factory-calibrated and cannot be readjusted
Comparison: TH1 vs TH2 Sensors
Temperature Sensor 1 (TH1)Temperature Sensor 2 (TH2)Error Codes C 3501, C 3505, C 3901C 3502, C 3506, C 3903Location Right side of fusing unitMiddle of fusing unitFunction Detects central section temperature Detects belt edge temperatureType Non-contact infrared sensorNon-contact infrared sensorTemperature Range180-240°C typicalSimilar range
Applicable Models
This troubleshooting guide covers the following Konica Minolta models:
C series: 1060, 1070, 2060, 2070, 3070, 3080
HC series: 71HC, 73HC
Summary
C 3501/3505/3901 errors are primarily caused by faulty Temperature Sensor TH1 (central section). For C 3501/3505, attempt a DIP switch reset first, but replace the sensor if the error persists. For C 3901, proceed directly to sensor replacement. Always reset the DIP switch after component replacement and avoid excessive DIP resets to prevent additional fusing unit damage.