

Objectives
This chapter will discuss the flame sensor, a module designed to detect radiation emitted from fire.
Prerequisites
Setup
Flame Sensor
Arduino Uno board
Jumper Wires
About Radiations
Radiation is the energy that comes from sources like the sun, x-rays, microwaves, or radioactive substances such as uranium, radium, and plutonium. While there is much to discuss regarding radiation, this topic will be brief and concentrate on Infrared Radiation (IR), which is pertinent to the functioning of flame sensors. Infrared Radiation is found at the red end of the visible light spectrum and is commonly associated with heat. Objects or events like fire that give off heat also emit Infrared Radiation.
The IR Flame Sensor
A flame sensor is a device designed to detect flames, operating by sensing the infrared radiation that flames emit. The heat detected by the sensor is transformed into electrical signals (e.g. analog or digital), providing Arduino programmers with the opportunity to creatively utilize this data. This allows for the development of various applications, including fire detection systems and safety monitoring devices, among others.
The flame sensor typically has either 3 or 4 pins. For this demonstration, the version with 4 pins will be used, which includes:
VCC (Voltage Supply Collector): Should connect to a 5v power source to power up the sensor,
A0 (Analog 0): Allows to read analog value from the sensor,
D0 (Digital, State 0): Allows to read digital value from the sensor, and
GND (Ground): The ground reference where current exits in the circuit.
The distinction between 4-pin and 3-pin flame sensors lies in the exclusion of either the A0 or D0 pin.
Building the Circuit
Now we do a hands-on exercise by building a circuit that includes a flame sensor. To simplify this exercise, we'll skip the breadboard and directly connect the jumper wires from the Arduino board to the flame sensor. Nevertheless, a breadboard can always be utilized as a separate exercise.
Grab a jumper wire and pin one end to Arduino Uno's "5v" (Power supply). Pin the other end to the flame sensor's "VCC".
Grab a jumper wire and pin one end to Arduino Uno's "GND" (Ground). Pin the other end to the flame sensor's "GND".
Grab a jumper wire and pin one end to Arduino Uno's pinhole number 2. Pin the other end to the flame sensor's "D0".
Grab a jumper wire and pin one end to Arduino Uno's "A0". Pin the other end to the flame sensor's "A0".
It's important to note the digital and analog pinhole numbers used as they will be referenced later in the source code.
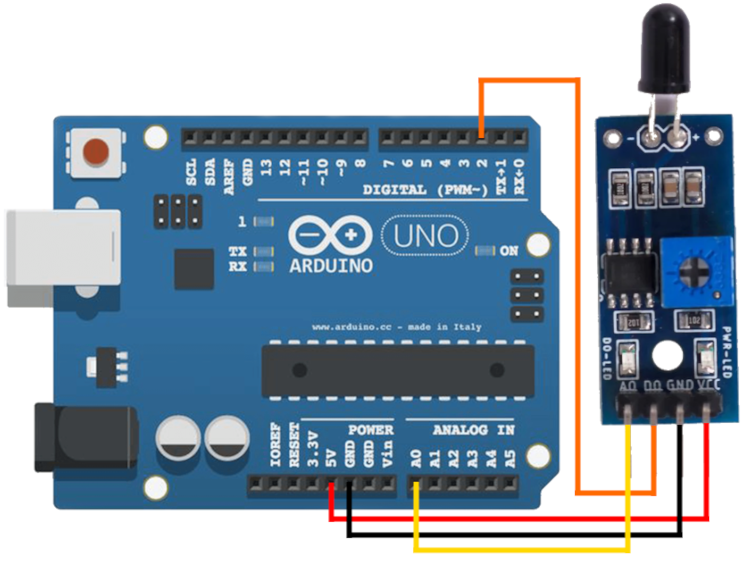
Certain flame sensor modules are equipped with integrated LEDs. According to the diagram provided, there are two LEDs: the D0-LED, which activates upon flame detection, and the power LED, which turns on when the Arduino project is powered.
The D0-LED allows for testing the flame sensor's functionality without requiring source code. Simply use a lighter to ignite a flame and bring it near the photodiode (the black, semi-oval component resembling an LED). Observe how the D0-LED turns on when the flame is near the photodiode and turns off as the flame is moved away.
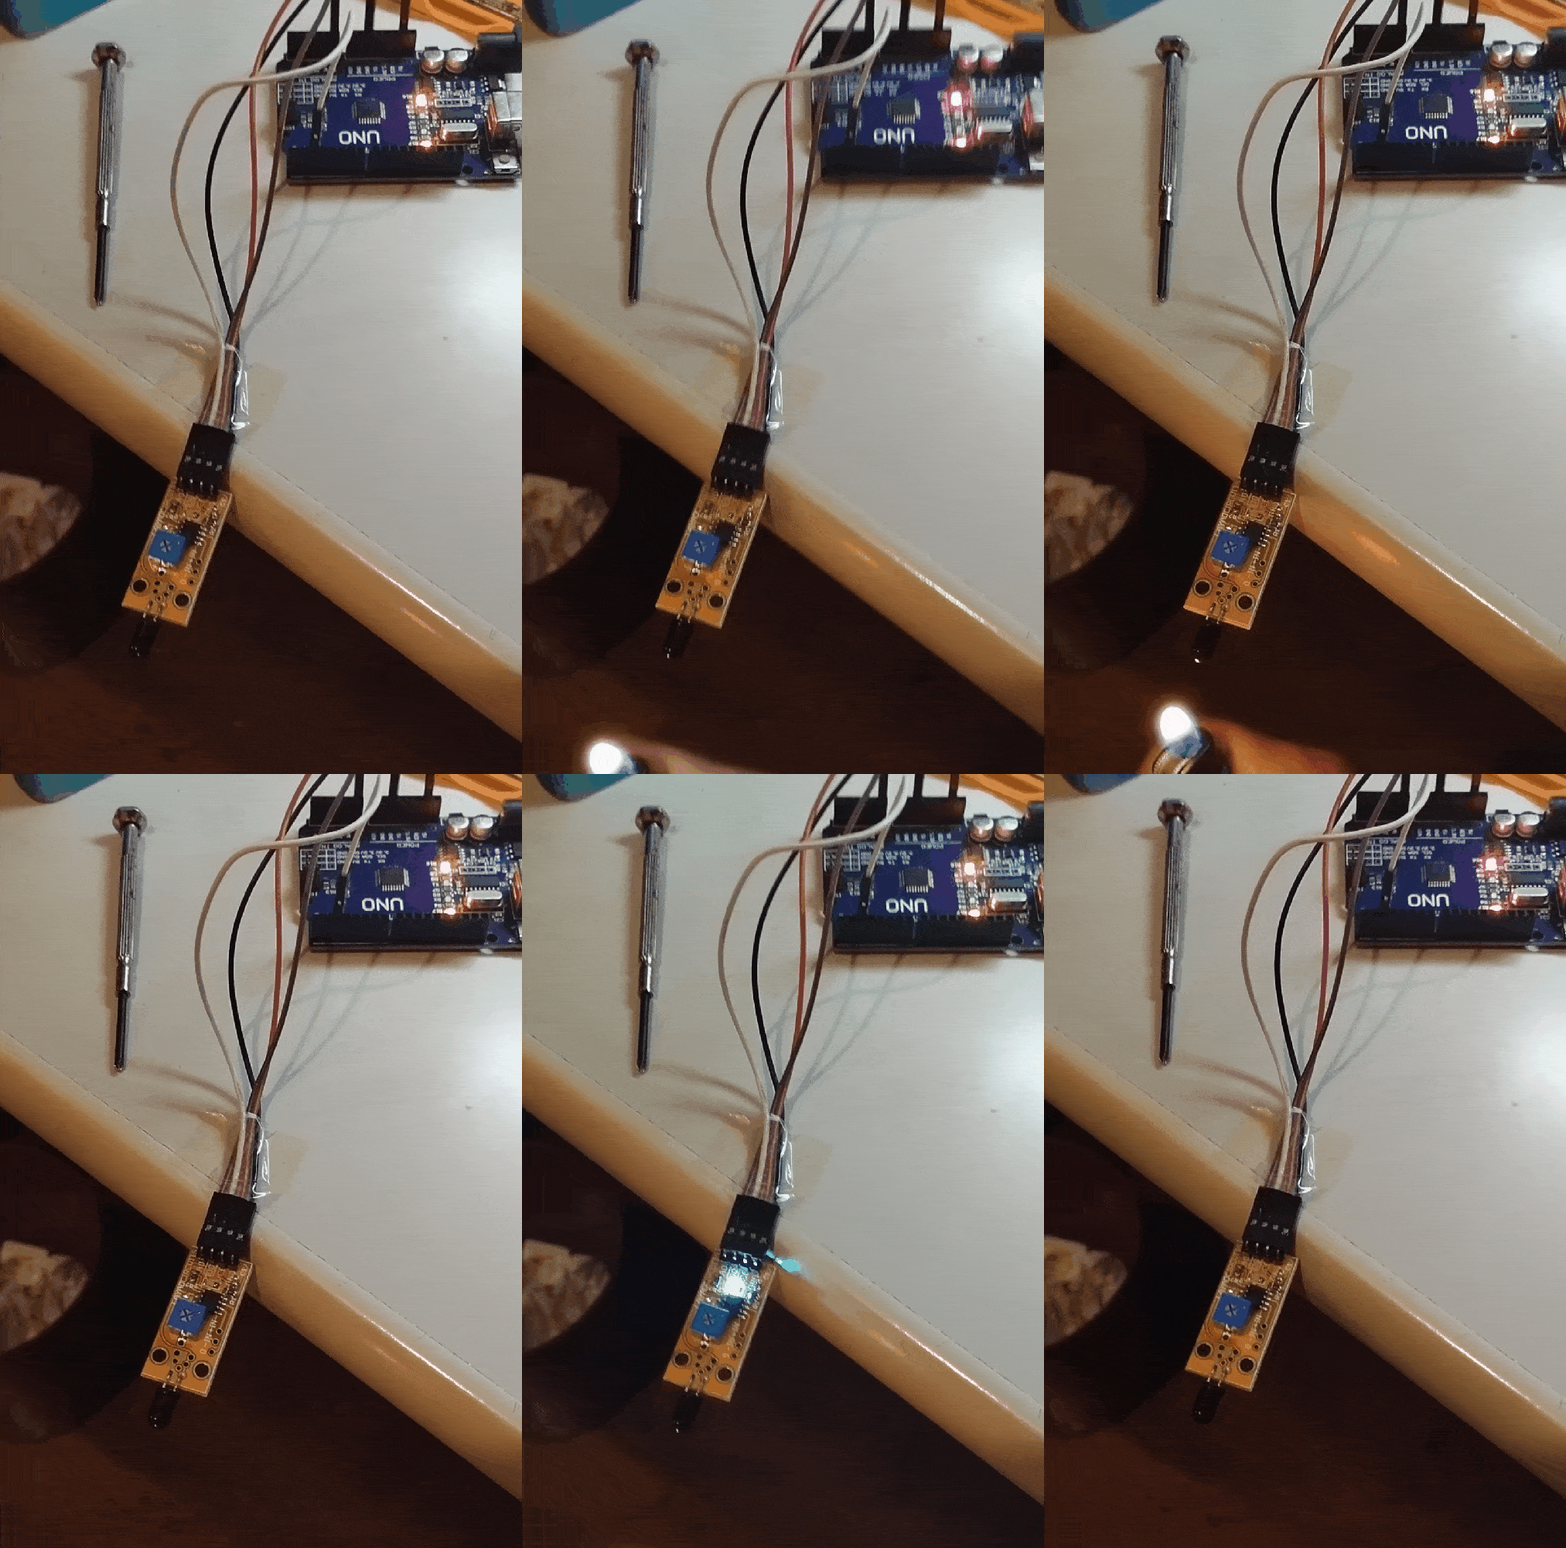
Notice the flame sensor, and observe the blue rectangular shape with a cross marked on its surface. This represents our potentiometer, which can be rotated either counterclockwise or clockwise using a small head Phillips screwdriver. The potentiometer can be utilized to fine-tune the sensor's detection sensitivity.
The Source Code
Next, we will write the source code to retrieve values from the sensor and display them on the Serial Monitor panel.
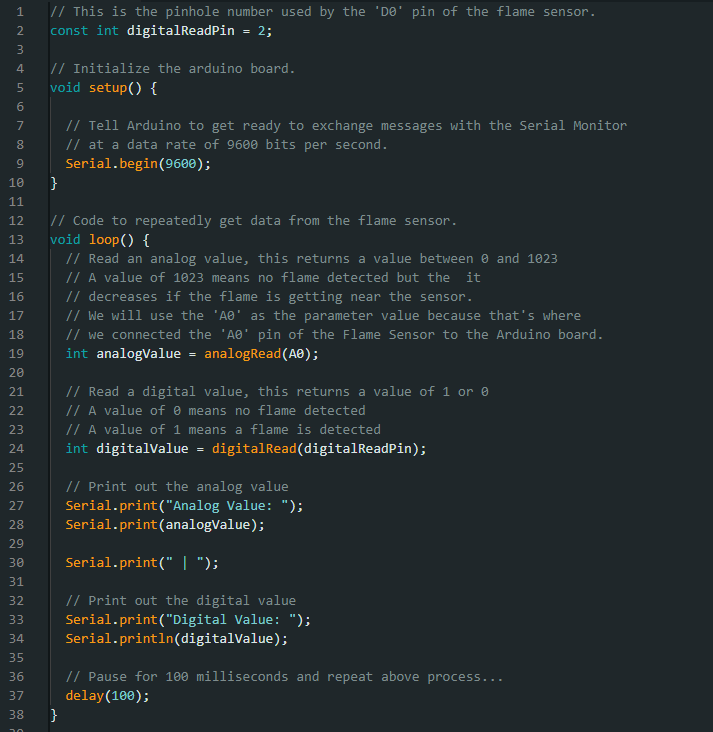
Once you have written the code, verify it and upload it to the Arduino board. Next, open the Serial Monitor panel to monitor the output.
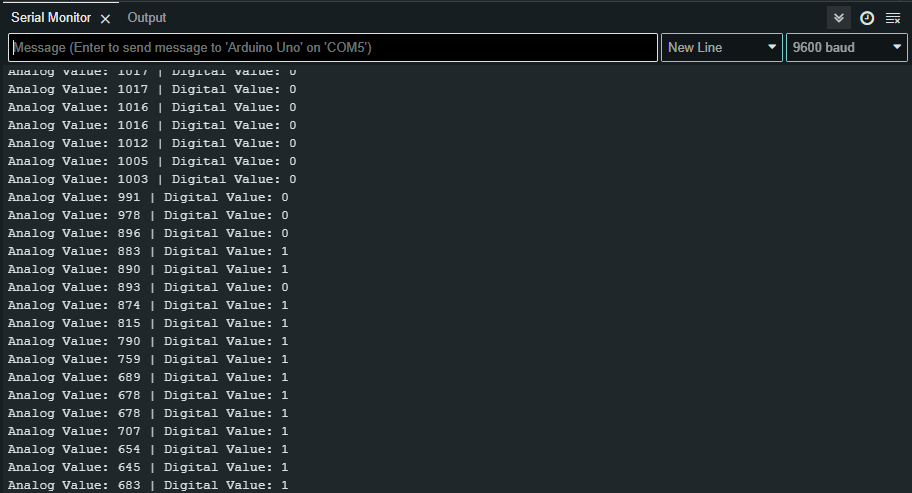
An analog value of 1023 indicates that no flame has been detected; however, the value will decrease as the flame approaches the flame sensor. Meanwhile, a digital value of 0 indicates that no flame has been detected, while a value of 1 signifies that a flame is present. The choice between analog and digital data depends on the project a developer is working on. Certainly, analog values can offer more precise measurements.