
Objectives
This chapter will discuss how to wire a water sensor for an Arduino project. A water sensor is a device that detects the presence or absence of water and can be utilized for various applications, including water level monitoring, leak detection, automatic watering systems, and flood detection.
Prerequisites
Setup
Water Sensor
Arduino Uno board
Jumper Wires
About the Water Sensor
The water sensor, typically rectangular, is composed of a material that detects water levels. As more of the sensor becomes submerged, it generates a stronger electrical signal. This signal can be captured and applied in our Arduino projects for various purposes.
The water sensor requires three pins to function and they are:
+ (Voltage Supply Collector): Should connect to a 5v power source to power up the sensor,
- (Ground): The ground reference where current exits in the circuit, and
S (Signal): Allows the Arduino to obtain water level data.
Building the Circuit
We will now do a hands-on exercise to build a circuit using a water sensor. For simplicity, we will forgo the breadboard and connect the jumper wires directly from the Arduino board to the water sensor. However, a breadboard may be used for an additional exercise.
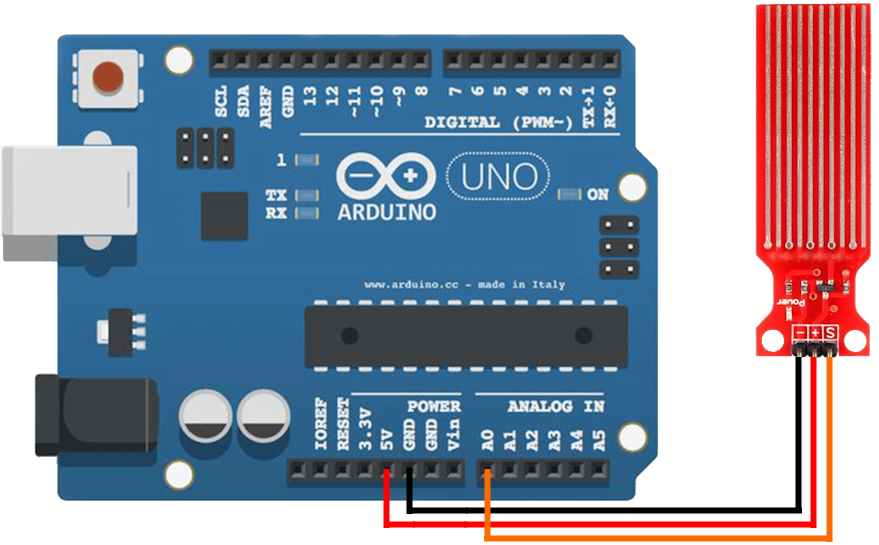
Grab a jumper wire and pin one end to Arduino Uno's "5v" (Power supply). Pin the other end to the water sensor's "+".
Grab a jumper wire and pin one end to Arduino Uno's "GND" (Ground). Pin the other end to the water sensor's "-".
Grab a jumper wire and pin one end to Arduino Uno's pinhole "A0". Pin the other end to the water sensor's "S".
In this demonstration, we utilized pinhole "A0" for "S". While other analog pinholes are technically viable, it's crucial to note the specific ones in use, as we will need to specify pinhole "A0" later in the code.
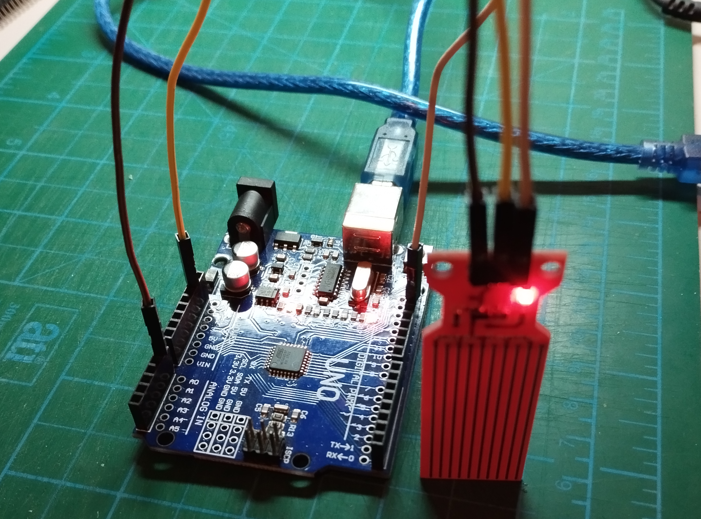
Water sensors typically feature an integrated LED that turns on upon being powered.
Writing the Source Code
Next, we will write code that checks if the water sensor reads the water level and then displays it on the Serial Monitor.
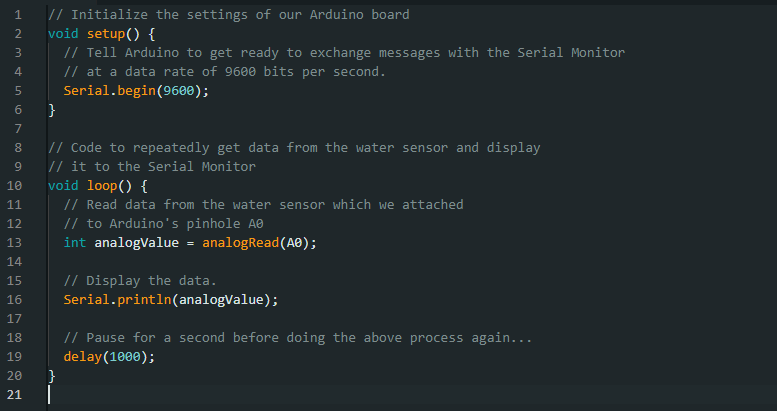
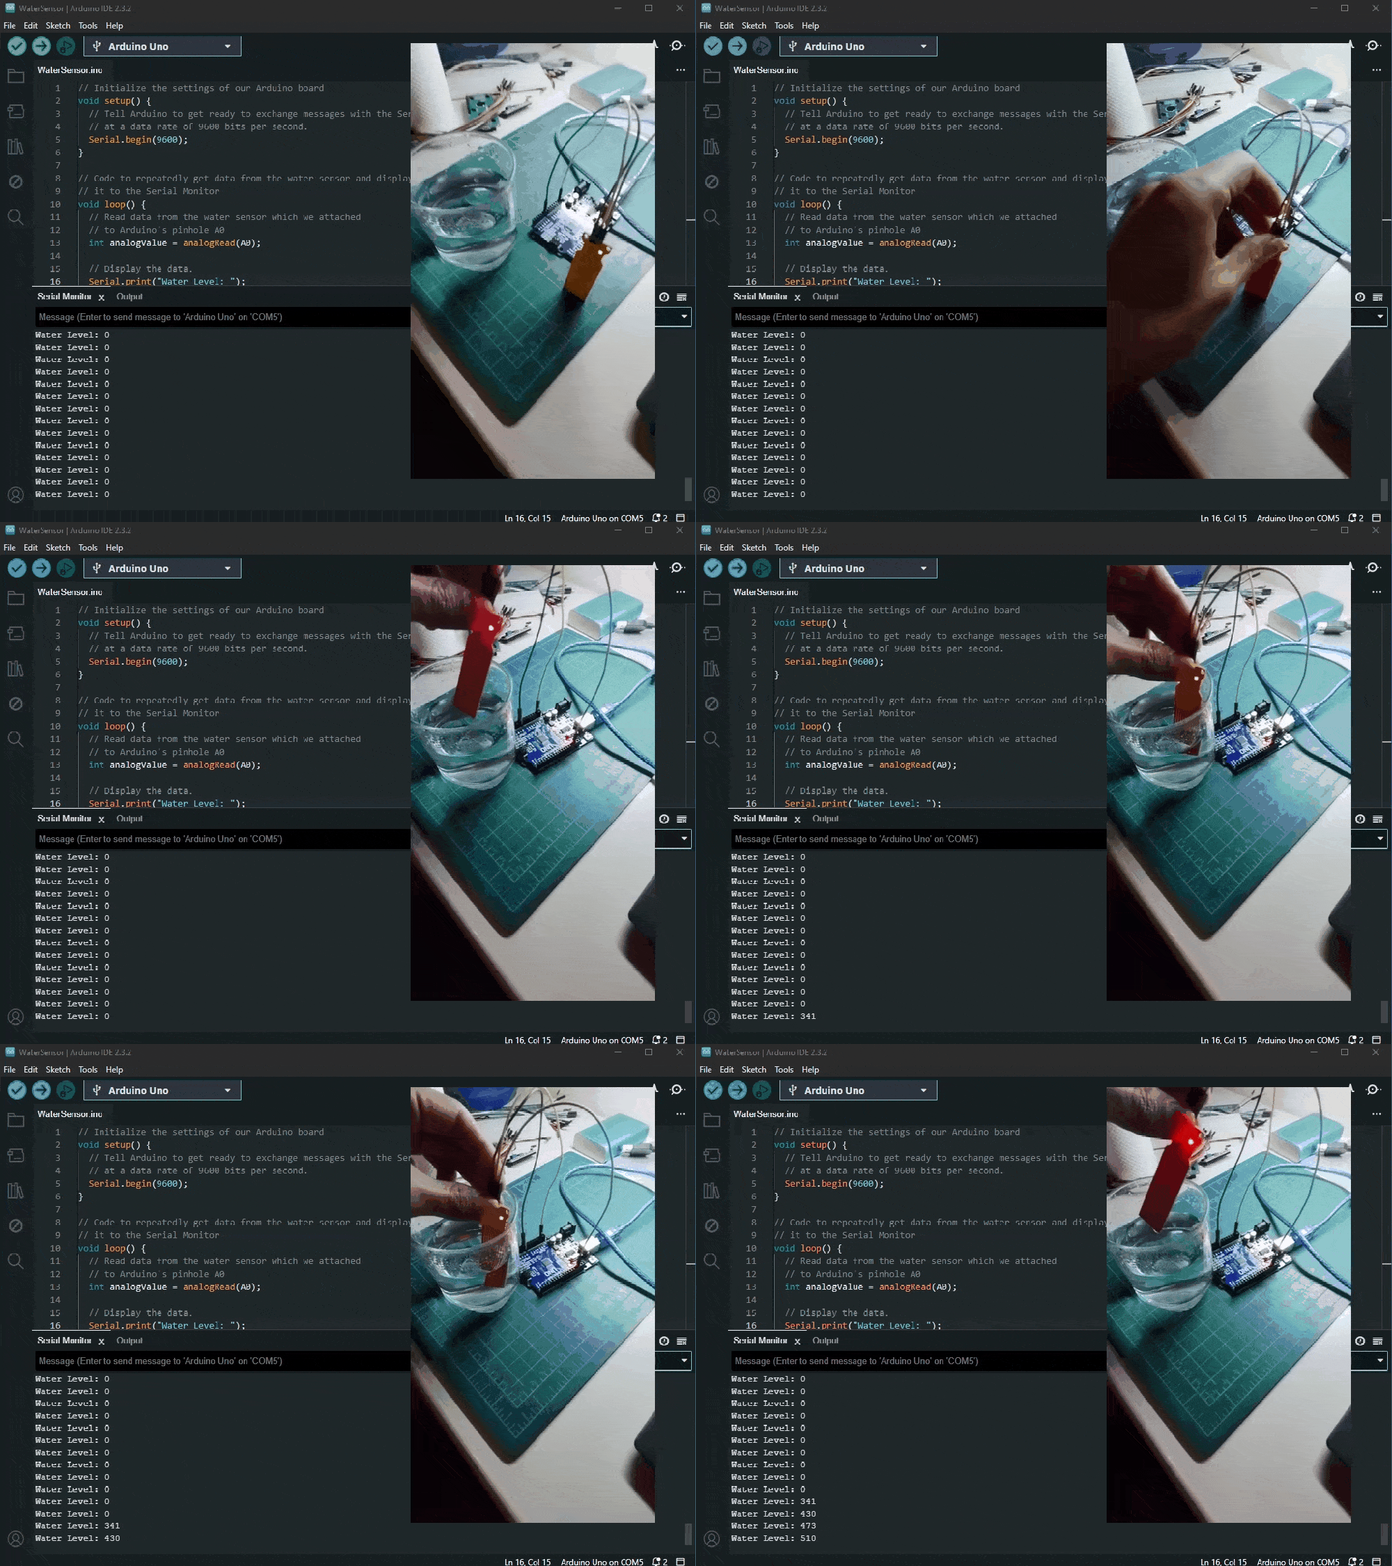
Once the code is verified and uploaded to the Arduino board, the Serial Monitor is expected to show an output ranging from 0 to 1023. As the water sensor is submerged further, the analog output value will increase accordingly.