

Your Shopify store's navigation isn't just about guiding visitors; it's a powerful tool to enhance user experience and boost conversions. In this guide, we'll walk you through the ins and outs of creating, editing and optimizing your online store menus.

Menu items are essentially links to various pages, which may or may not belong to your store. A menu item can be a link to:
collections
blogs or blog posts
webpages
products
store policies
external websites
email links
Edit or Create New Menu from Shopify Admin
You can access all of your menus by navigating to Online Store > Navigation. From this page, you have the option to either create new menus or edit existing ones. Click the menu title you wish to edit or click 'Add Menu' to create a new one. Now you will see this page.
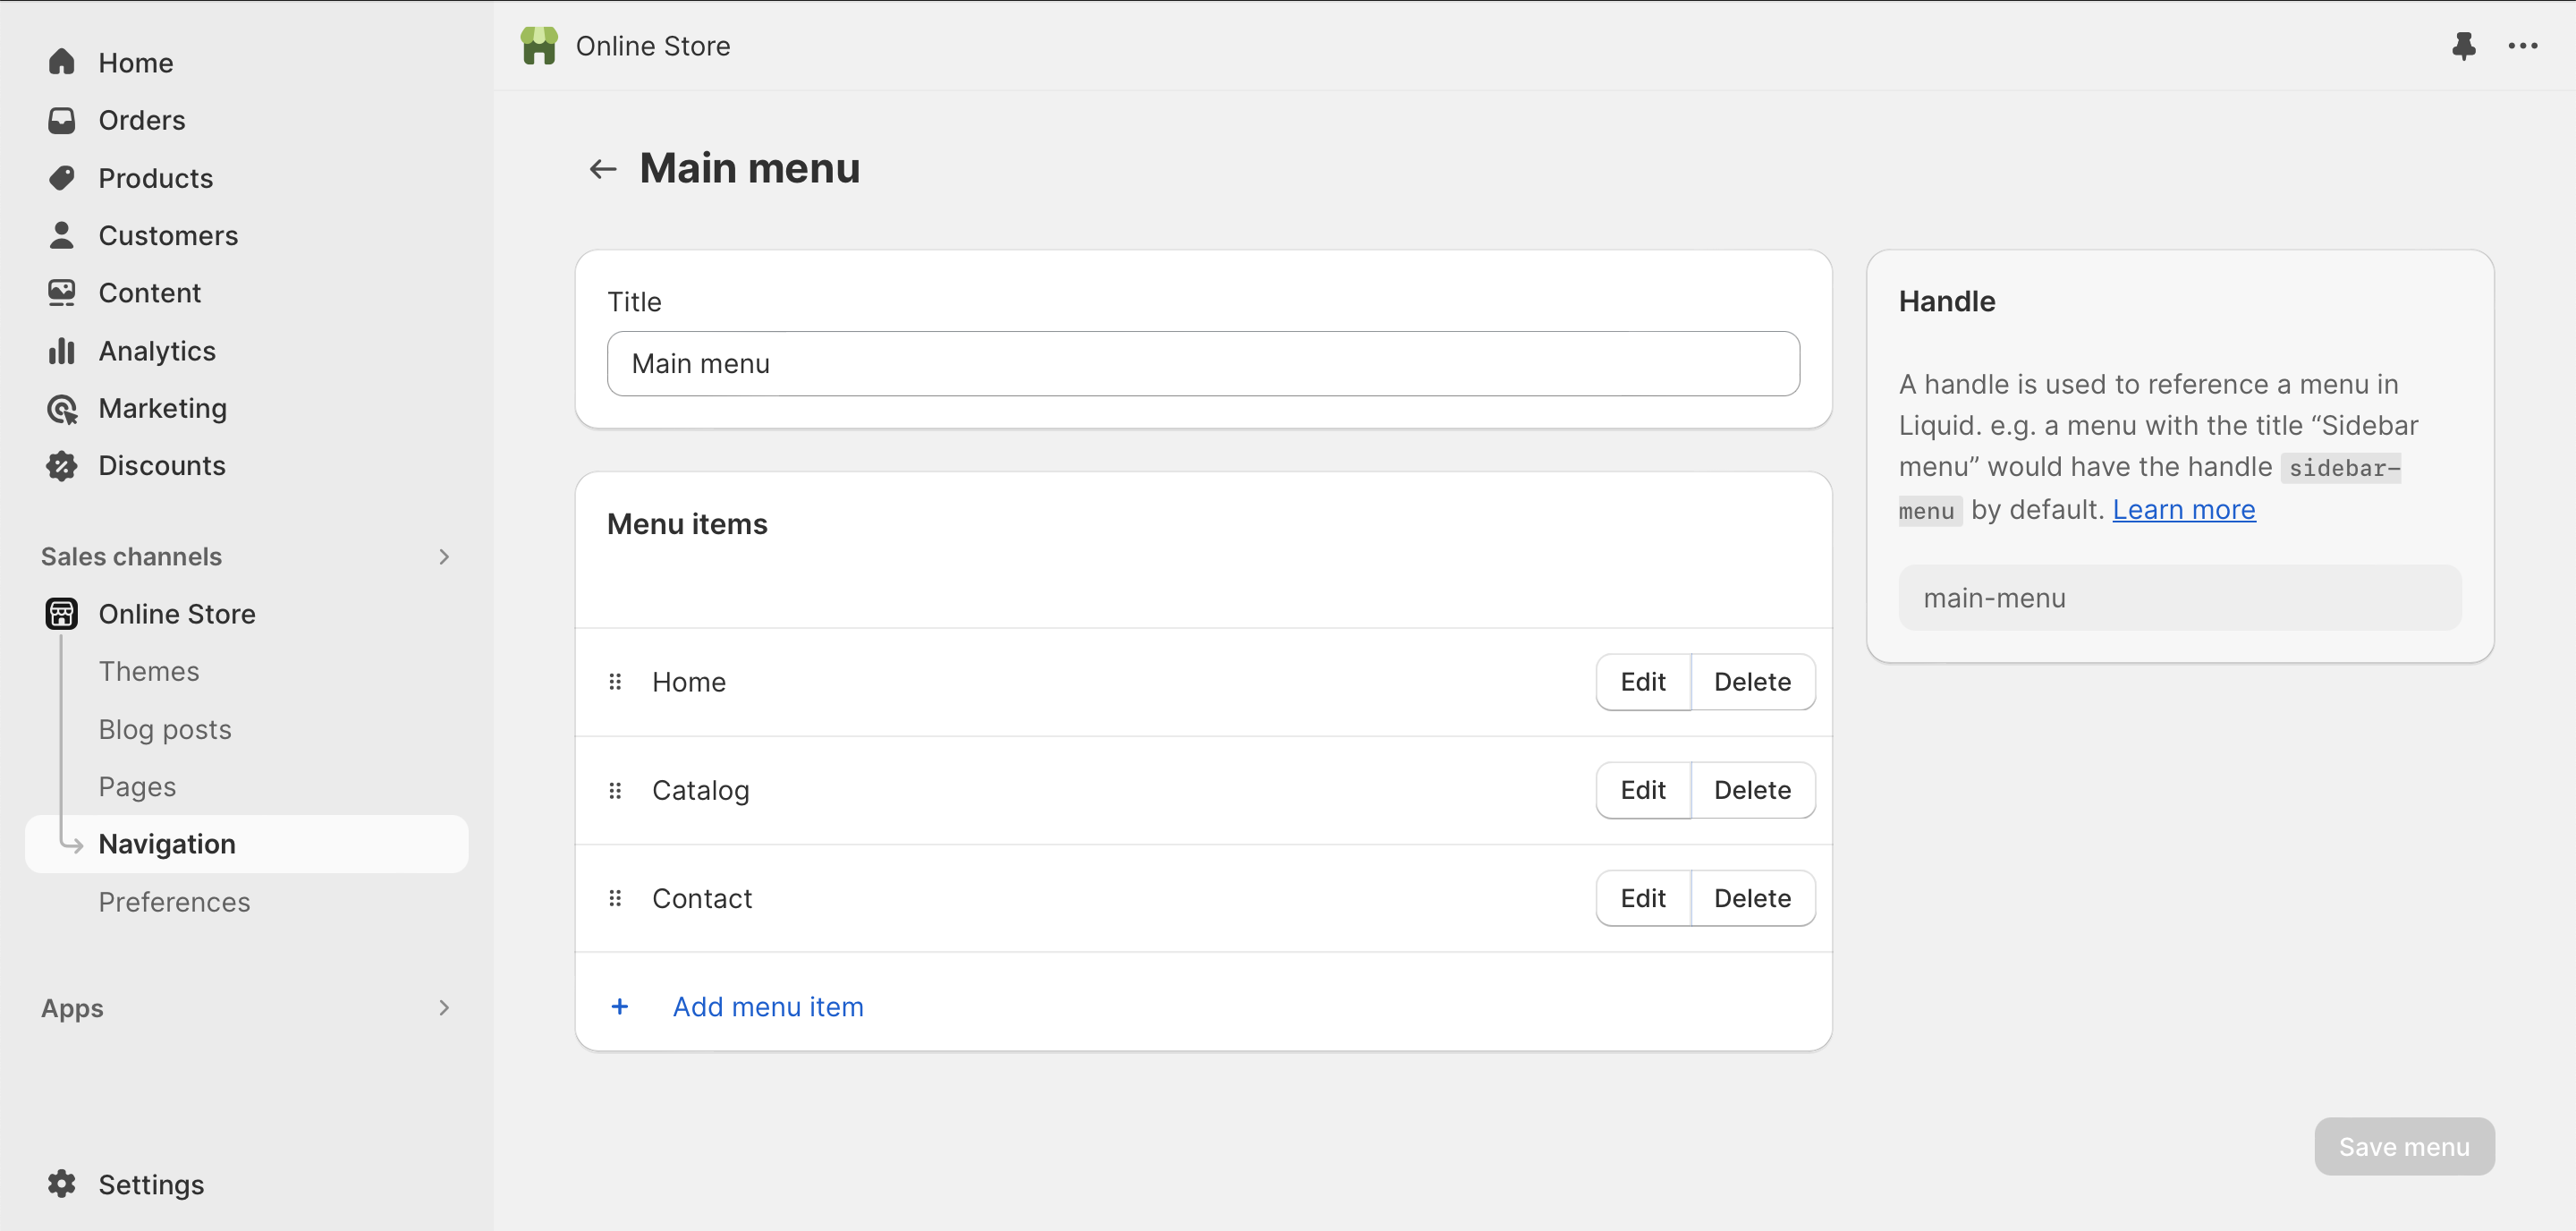
Here, you'll have access to the menu's title, its handle, and the list of items it contains. You have the flexibility to edit both the title and handle and edit or remove items, and even create new items in this menu. It's your complete control center for menu customization.
In Shopify, a "handle" of a menu refers to a unique and user-friendly identifier for that specific menu. They're often derived from the menu's title, but they're transformed into a format that's web-friendly, typically in lowercase and with hyphens instead of spaces. Handles play a crucial role in enhancing a website's SEO and ensuring that menu links are accessible and easy to understand for both humans and search engines.
Code for Menu
To traverse the items of any menu, you'll typically need to use the Liquid templating language. Here's a general outline of the steps involved:
Access the Menu by Handle: First, you need to access the menu by its handle. You can use the
{{ linklists }}object in Liquid, like this:{% assign myMenu = linklists[handle] %}Replace
handlewith the actual handle of the menu you want to access.Loop Through Menu Items: Once you have the menu object, you can loop through its items using a
forloop. For example:<ul> {% for item in myMenu.items %} <li><a href="{{ item.url }}">{{ item.title }}</a></li> {% endfor %} </ul>This code will create an unordered list (
<ul>) with list items (<li>) containing links to the menu items. It accesses the URL and title of each menu item using{{ item.url }}and{{ item.title }}, respectively.Customize as Needed: You can customize the code further to suit your specific requirements. For instance, you can add additional HTML markup or apply conditional logic to control how menu items are displayed.
Insert Code in Your Theme: Finally, you'll need to insert this code into your Shopify theme where you want the menu to appear. Place the following code in the
Sections/header.liquidfile, or wherever you wish the nested navigation to appear.Nested Navigation: In the same manner, we have the capability to generate a nested menu consisting of links within an unordered list structure, extending to a depth of up to three levels.
<ul>
    {%- for link in linklists.main-menu.links -%}
        <li>
            <a href="{{ link.url }}">
                {{ link.title }}
            </a>
            {%- if link.links != blank -%}
                <ul>
                    {%- for child_link in link.links -%}
                        <li>
                            <a href="{{ child_link.url }}">
                                {{ child_link.title }}
                            </a>
                            {%- if child_link.links != blank -%}
                                <ul>
                                    {%- for grandchild_link in child_link.links -%}
                                        <li>
                                            <a href="{{ grandchild_link.url }}">
                                                {{ grandchild_link.title }}
                                            </a>
                                        </li>
                                    {%- endfor -%}
                                </ul>
                            {%- endif -%}
                        </li>
                    {%- endfor -%}
                </ul>
            {%- endif -%}
        </li>
    {%- endfor -%}
</ul>
If you have any questions or concerns, feel free to watch me demonstrate the same process in this video. Additionally, you can reach out to me on Facebook or Instagram for assistance.