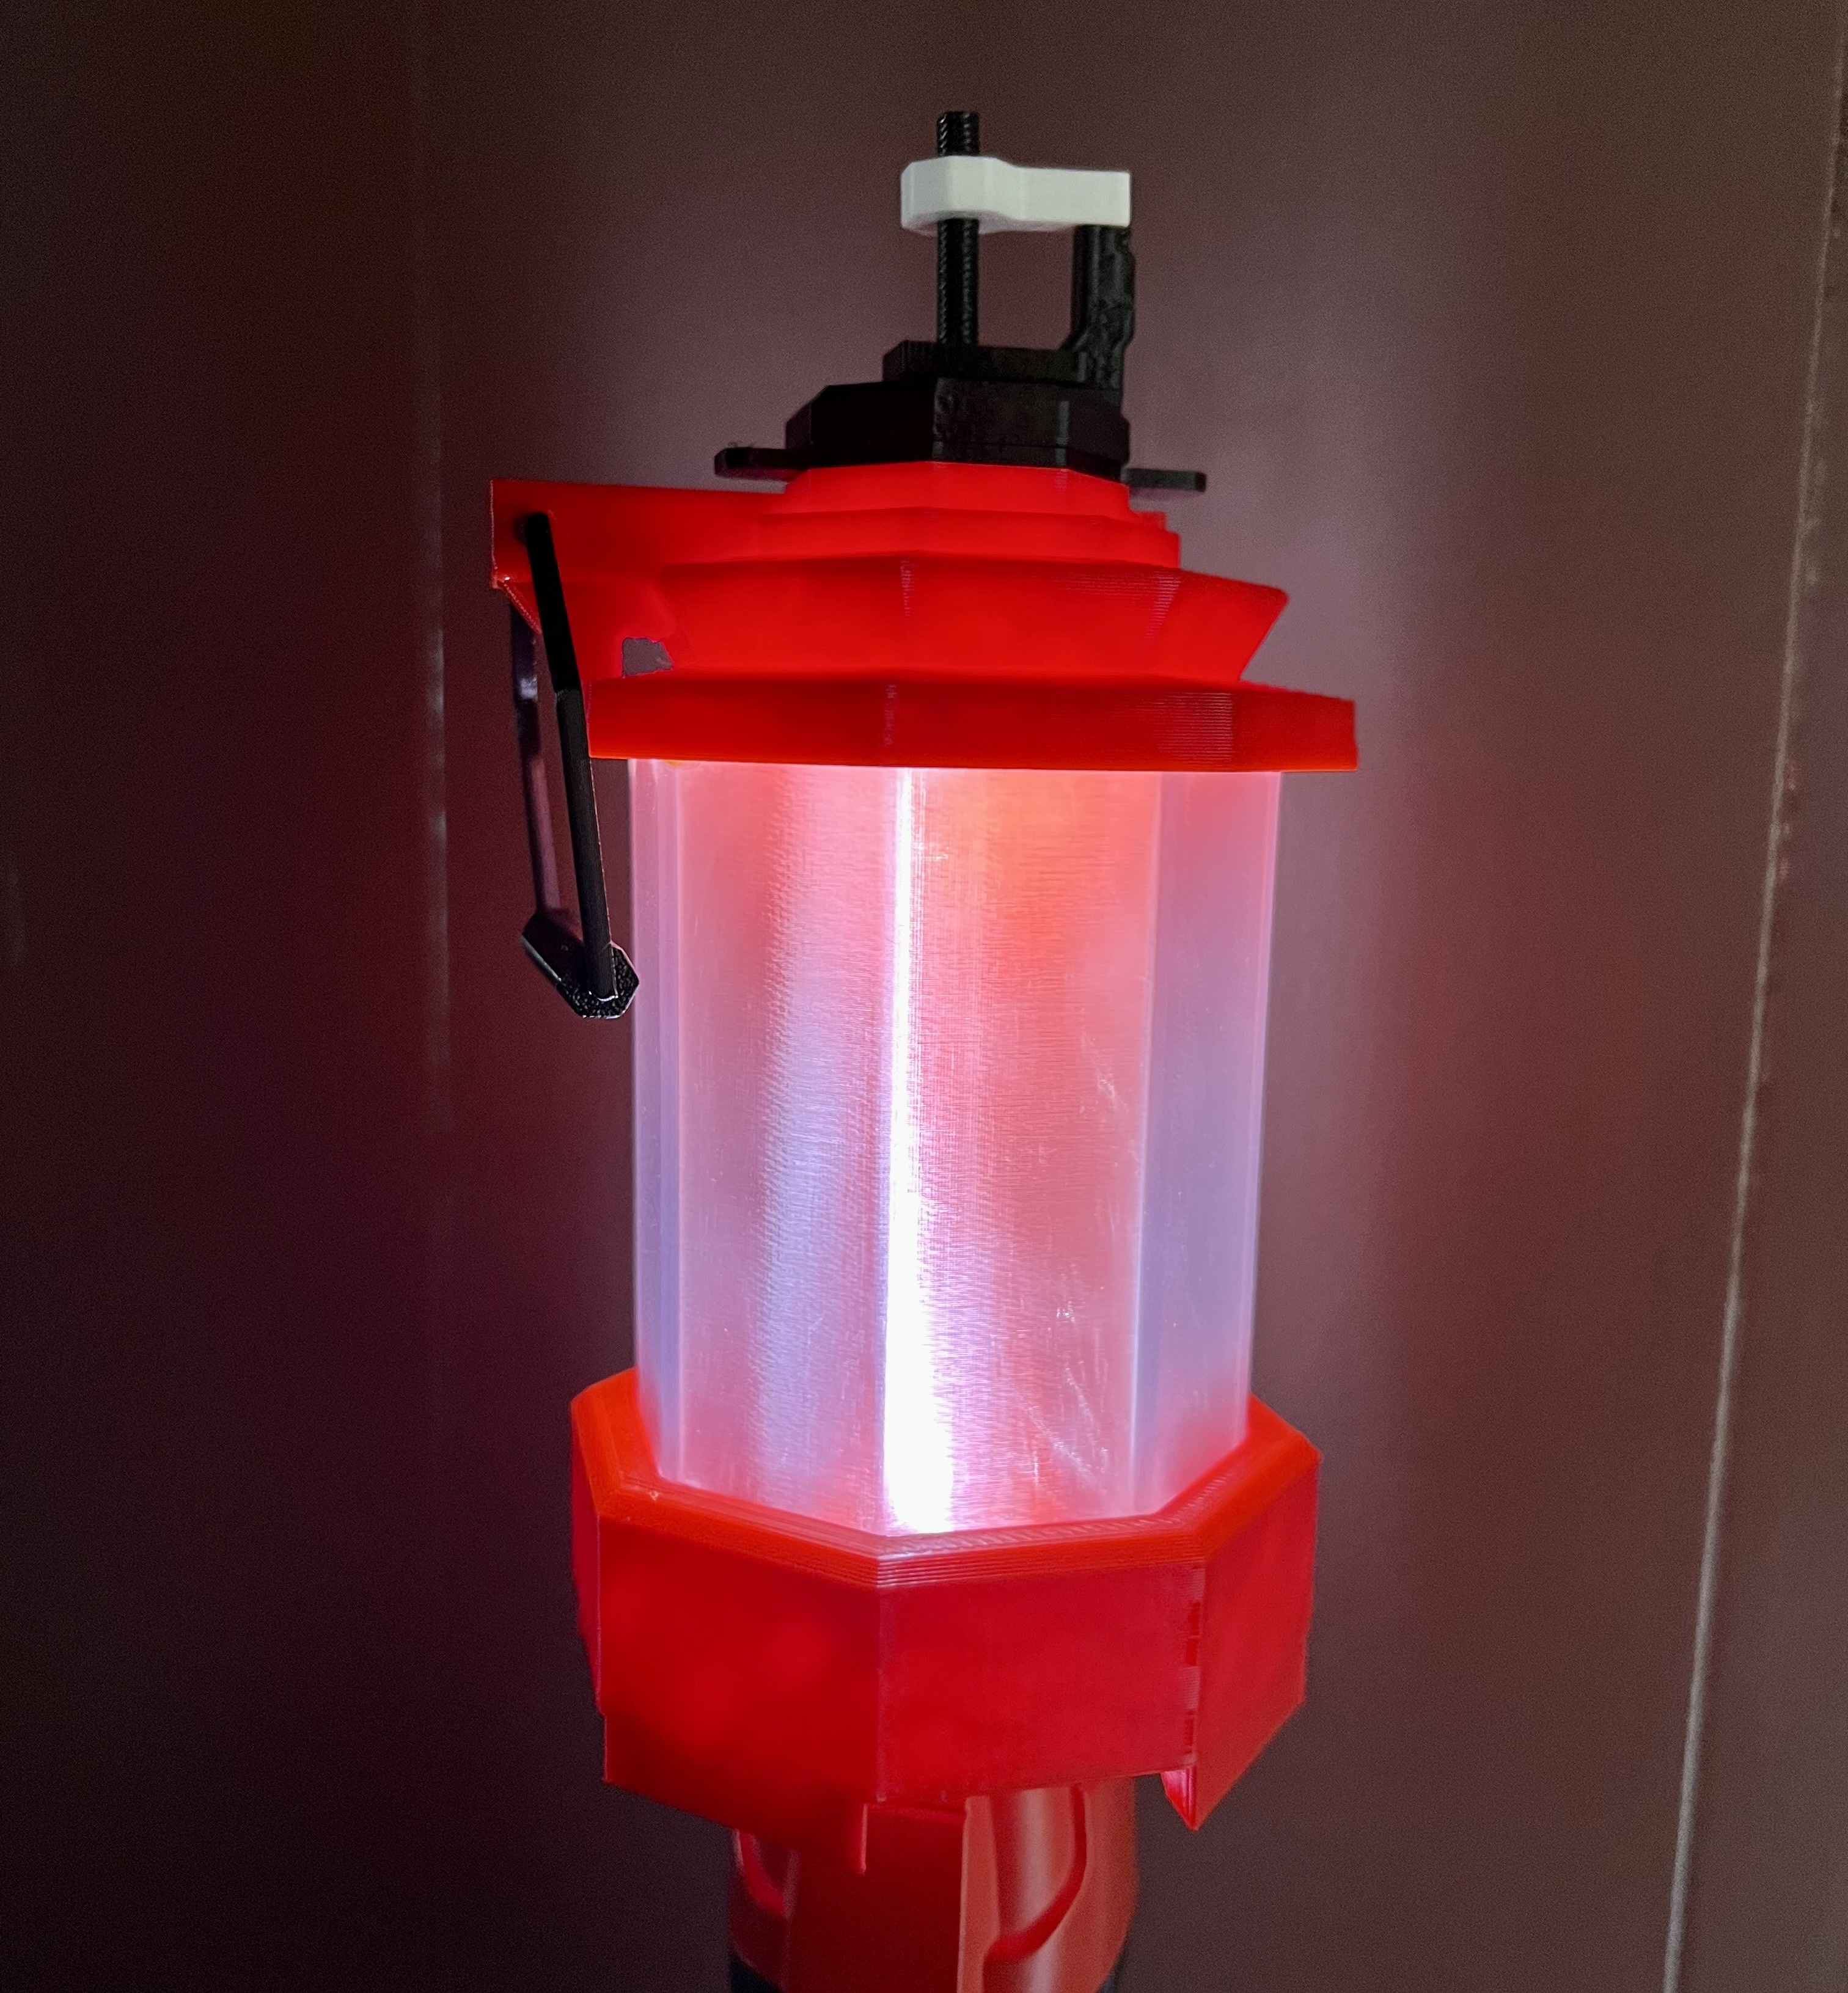

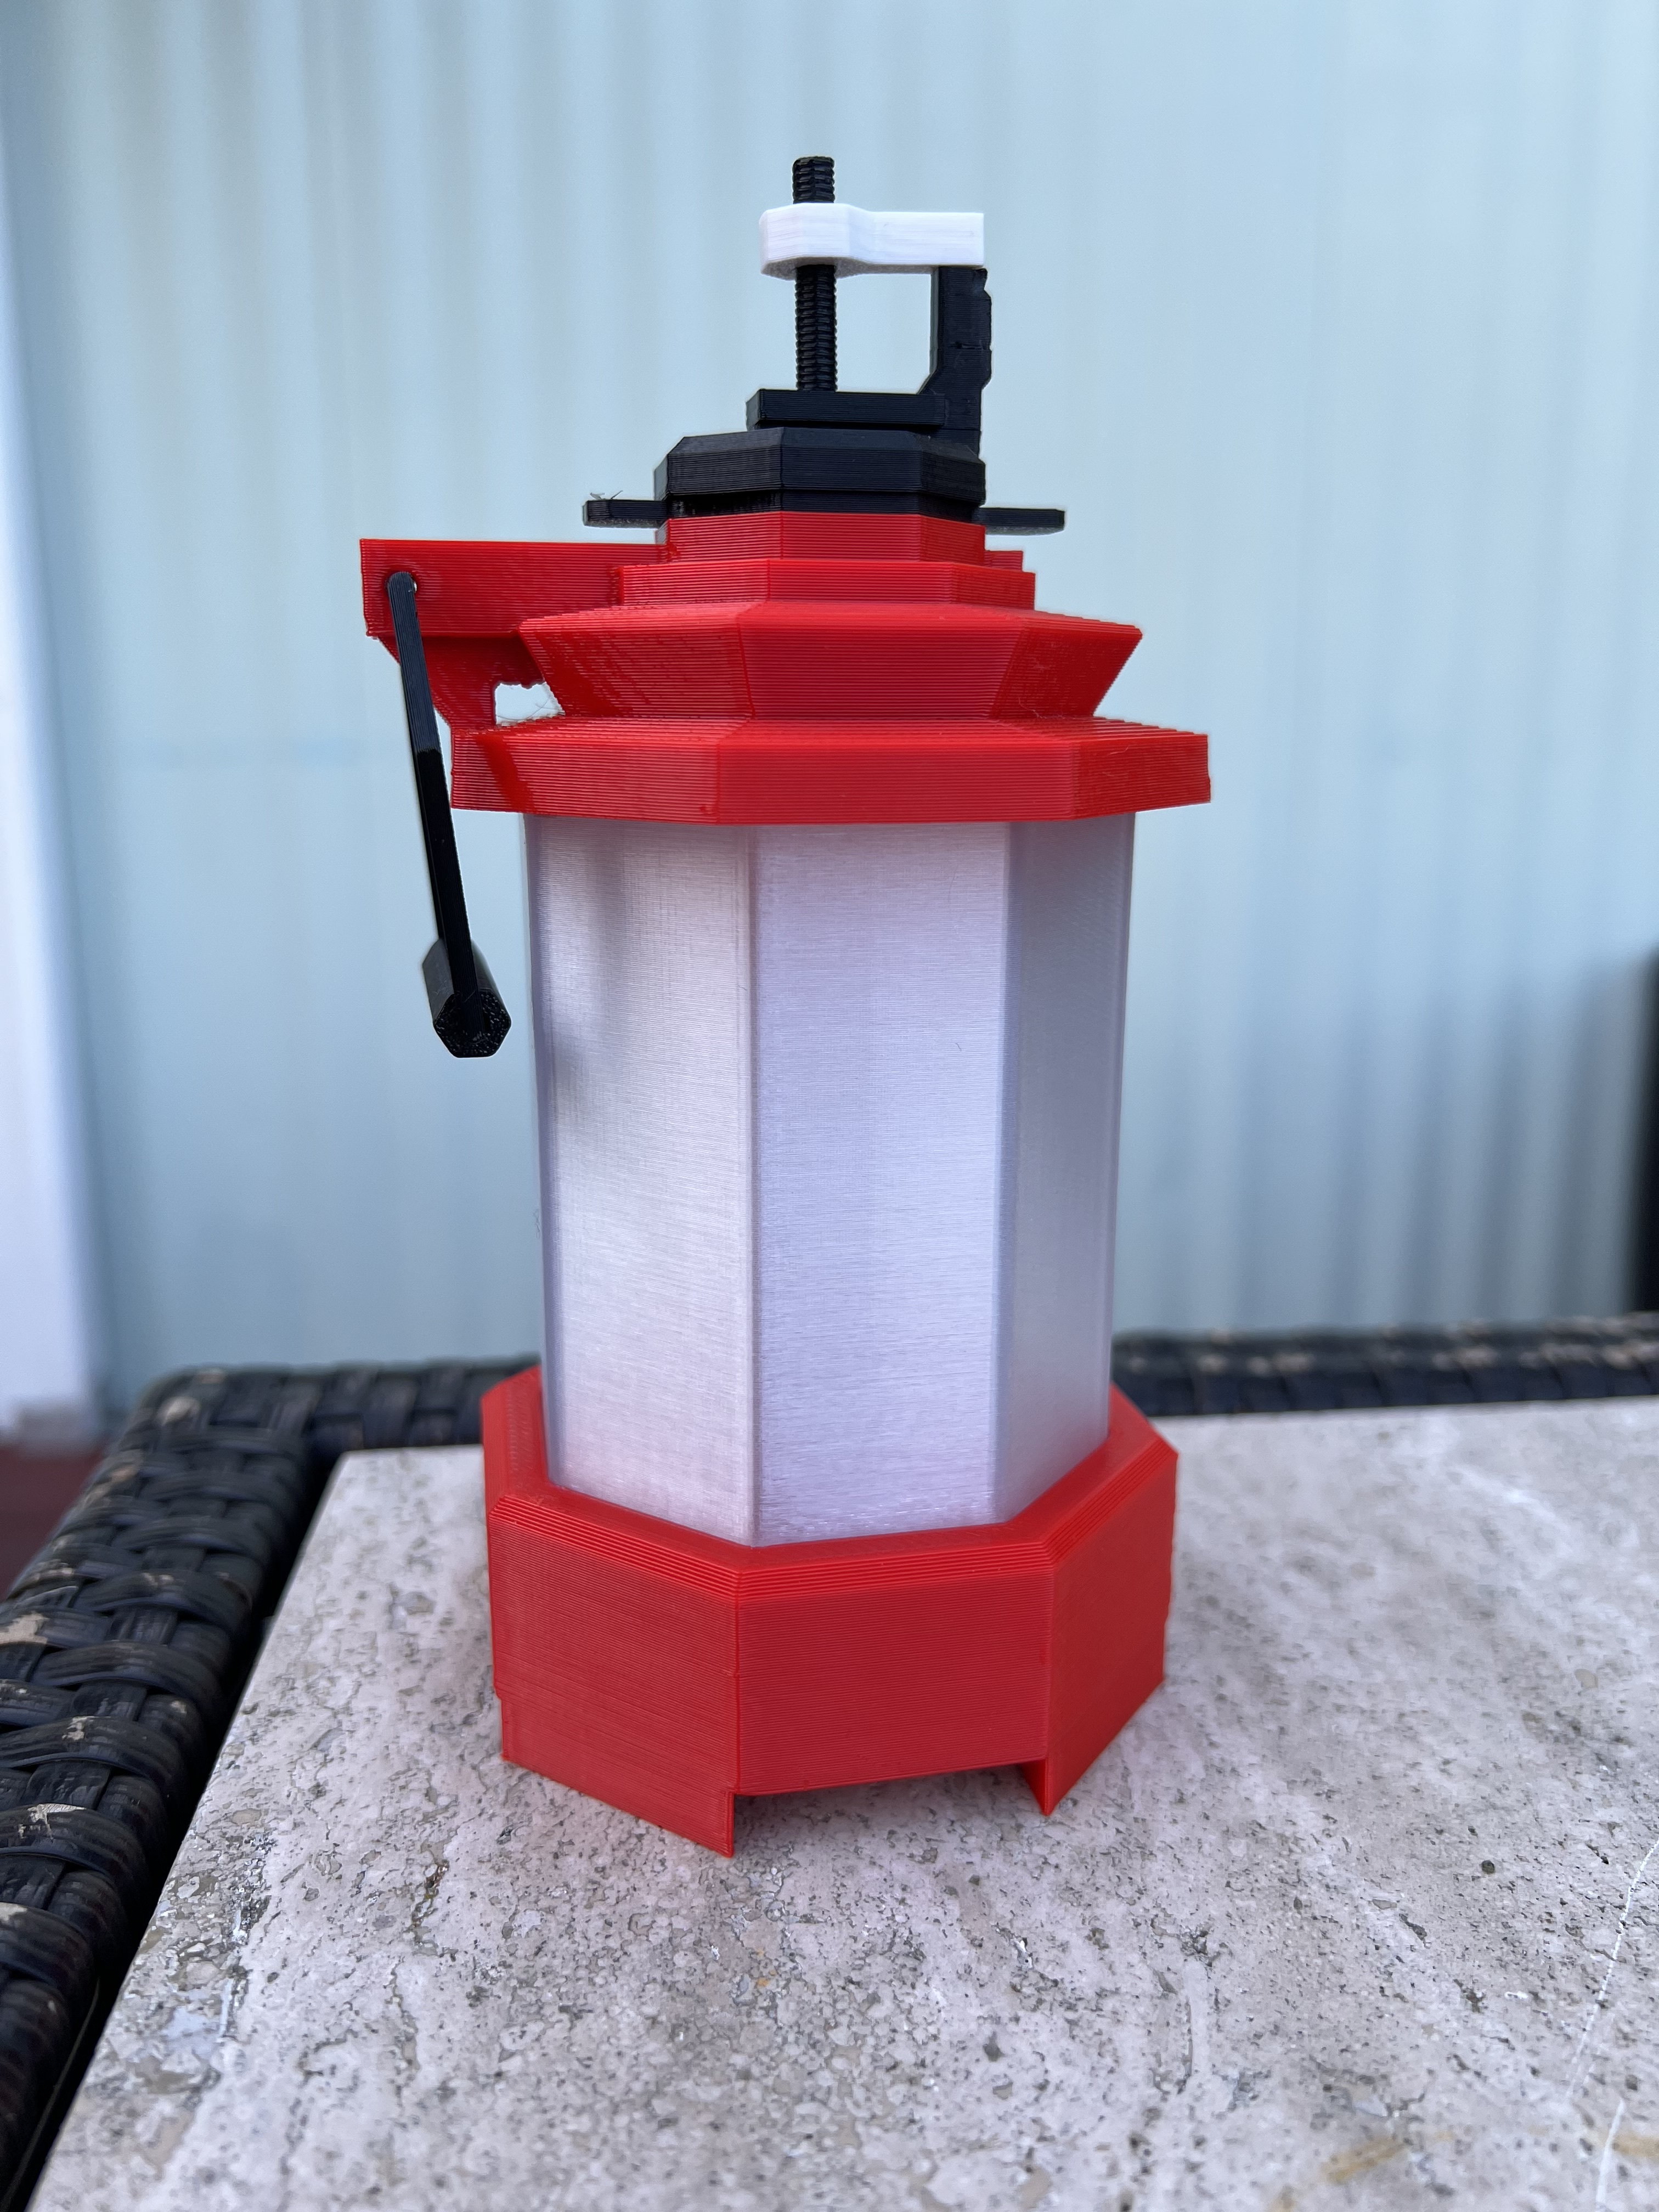
This cool model was made available by Catja. However, I created my own remix of the original due to some issues with geometry. And of course, my 3MF files contain all the appropriate settings you will need like supports, ironing, etc.
All the parts that need to be printed are shown below (not too many thankfully). The boxes indicate the color of the parts. Only the "glass" portion is non-colored.
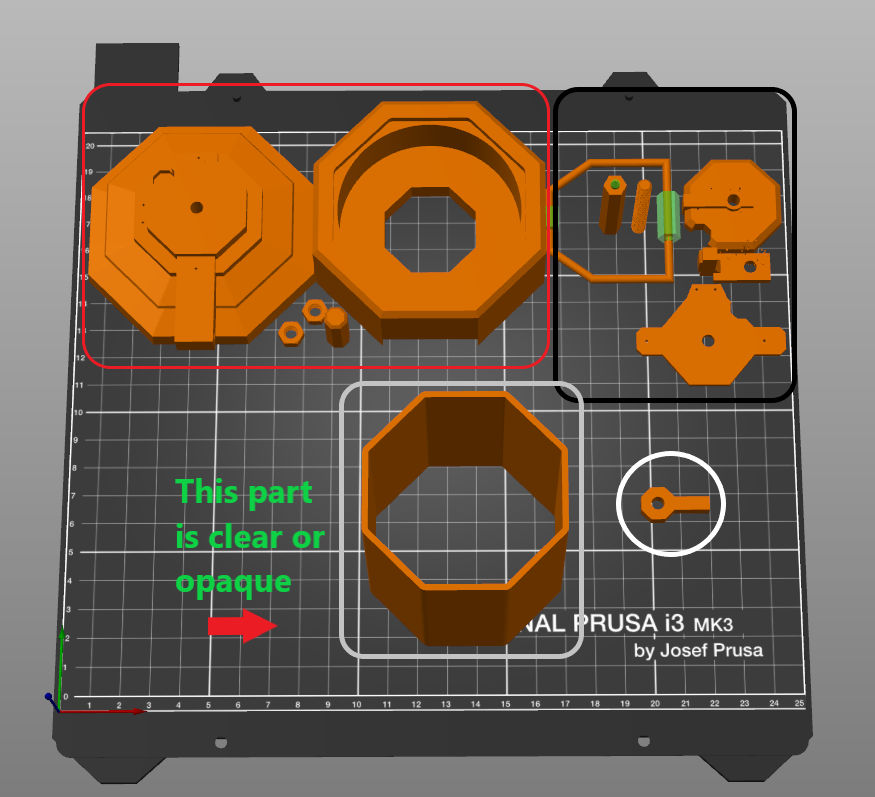
Only the red parts need supports, which has been taken care of for you already in my files. Make sure you are using PrusaSlicer to transfer the data properly. The supports should look like this:
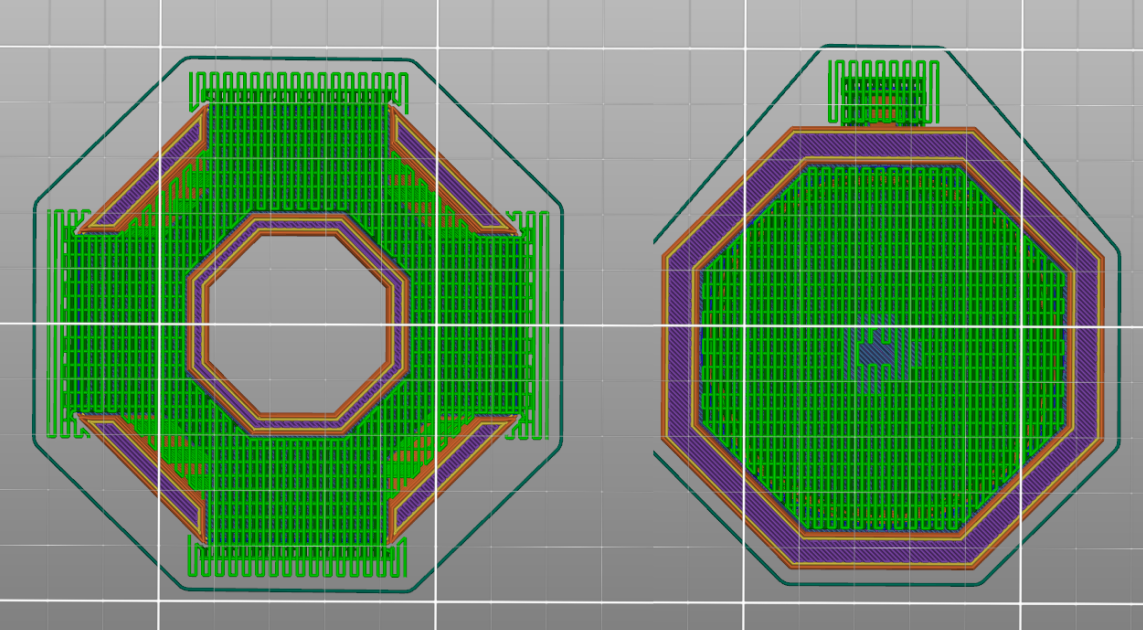
The parts were all printed in PETG using separate layer heights. The above supports might not be necessary with PLA, but since PETG is more viscous, supports are necessary (and because I used a 0.6mm nozzle). But not to worry, the supports are easy to remove. I got some great undersides thanks to the supports I used. On the "top-cover" part, I suggest using a spatula or craft knife to get under the supports from the sides in addition to your pliers.
Now onto the artifacts that I changed from the original model...
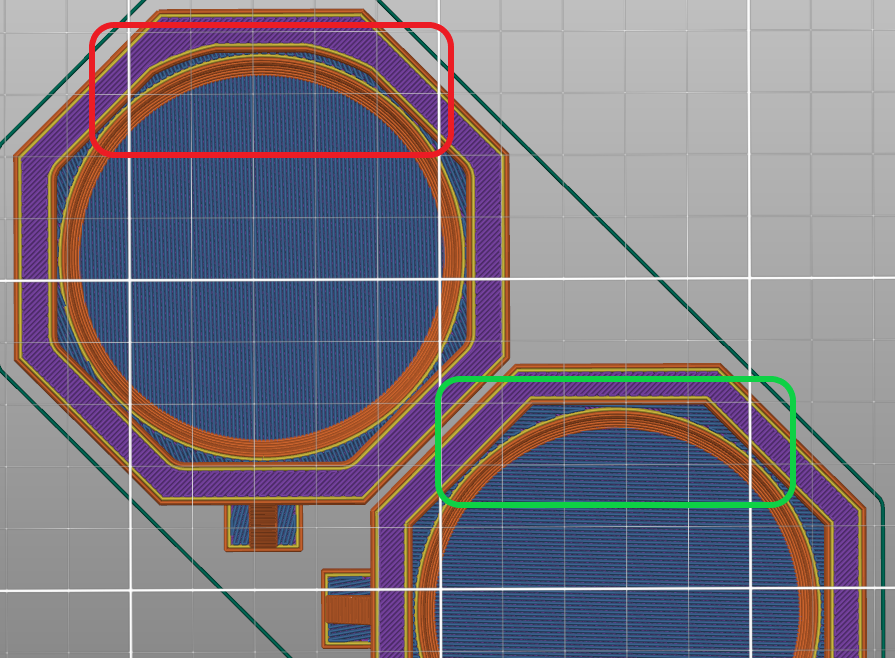
The original "top-cover" bottom where the glass should slide right in was not octagonal (see image below). I increased the octagon a bit too just to minimize the possibility of being too tight of a fit.
The original post didn't include any prints of the screws and nuts to go along with the tank. So I added both an M5x40 screw and two M5 nuts. I had issues with the nuts not fitting properly, so I excluded them from my print, but I believe real M5 nuts should eliminate this issue.
The part above the plate was separated into 3 pieces to eliminate the need for supports. You can fixate these parts either by superglue or using the M5 screw. I used the latter in my print and they do not fall off. Ironing is a must on the topmost surfaces to make mating better. Also, the hole sizes were slightly increased to loosen the friction fit between them and the 3D printed M5 screw.
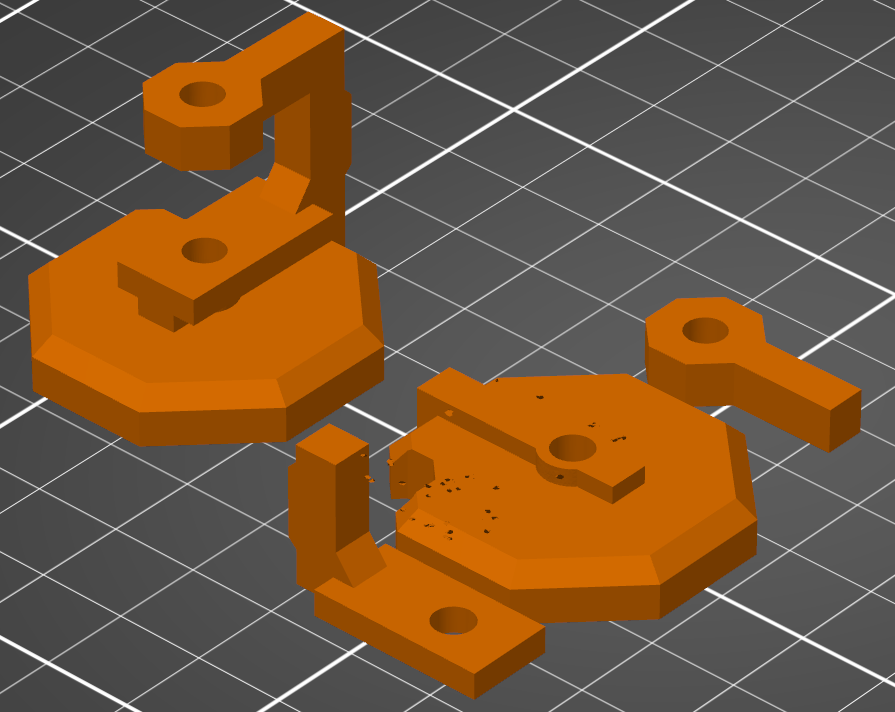
The handle was also fixed because the orientation called for a flat base. So roughly 50% of the bottom was cut. And two openings were made via modifiers to allow attaching to the grip easier. Likewise, the hexagonal grip/rod had its inner diameter increased via modifiers. The OG fit was too tight for the handle
To glue the "glass" to the top and bottom simply put a dab of superglue on each corner of the red prints (not on the glass itself). Fixate one at a time. Then once one dries, glue the other on.
And that pretty much sums up this print showcase. I did not bother adjusting the hole at the bottom of the base, since it is mainly reserved for inserting a light of some sort. But if you rather paint on the glow effect of the tank, then it does not matter either way. Some of the screws/inserts of the original model were left out because the holes to insert them were too small and got over extruded. A quick fix would be to heat up a screw or screwdriver and insert it into the hole to place the remaining screws. You can consider mine to be a minimalist's Whale Oil Tank. 😄
Let me know if you decide to print one out or remix mine even more. I'd be more than happy to see.
As always, happy printing! 🎲