

Hey all, decided to make a video on some tips on properly choosing a tripod.
This blogpost serves to accompany the video, I know the video isnt the best but im still learning and figuring out everything. Would certainly love feedback and improvement suggestions, do feel free to leave a comment!
View the video here :)
My Horrifying Past Experience
Tripods are what hold your expensive gear up and honestly it is very important to get the right tripod. Personally I have had my first camera break on me due to a tripod mishap a few years back. Was an awful experience I will never forget.
Personally, you should never cheap out on tripods, and get a proper tripod from a reputable brand. Hence I have borrowed some Leofoto tripods from Photosphere.sg to show you some key things you should look out for so that you can have peace of mind knowing you made a solid purchase. Many thanks for their kind support in allowing me to create such content :)
I am not compensated in any way shape or form for this video or article (as of publishing).
Additionally, I do note there are hydraulic tripods which are cool. However I have not used them and given how new the technology is, it is not as repairable and weather resistant compared to the traditional tripods. If I ever do try one, I might do a review and share my thoughts on them, but for now let's just talk about traditional tripods.
Part 0: Why Use a Tripod

Nowadays, with advanced IBIS and lens stabilisation systems, one might question the need for a tripod. Surely, with all this new technology, you wouldn’t need to use a tripod to get steady shots, right? While that might be true for most normal use cases, there are some situations where the tripod still reigns supreme, and is the only way to reliably achieve these shots.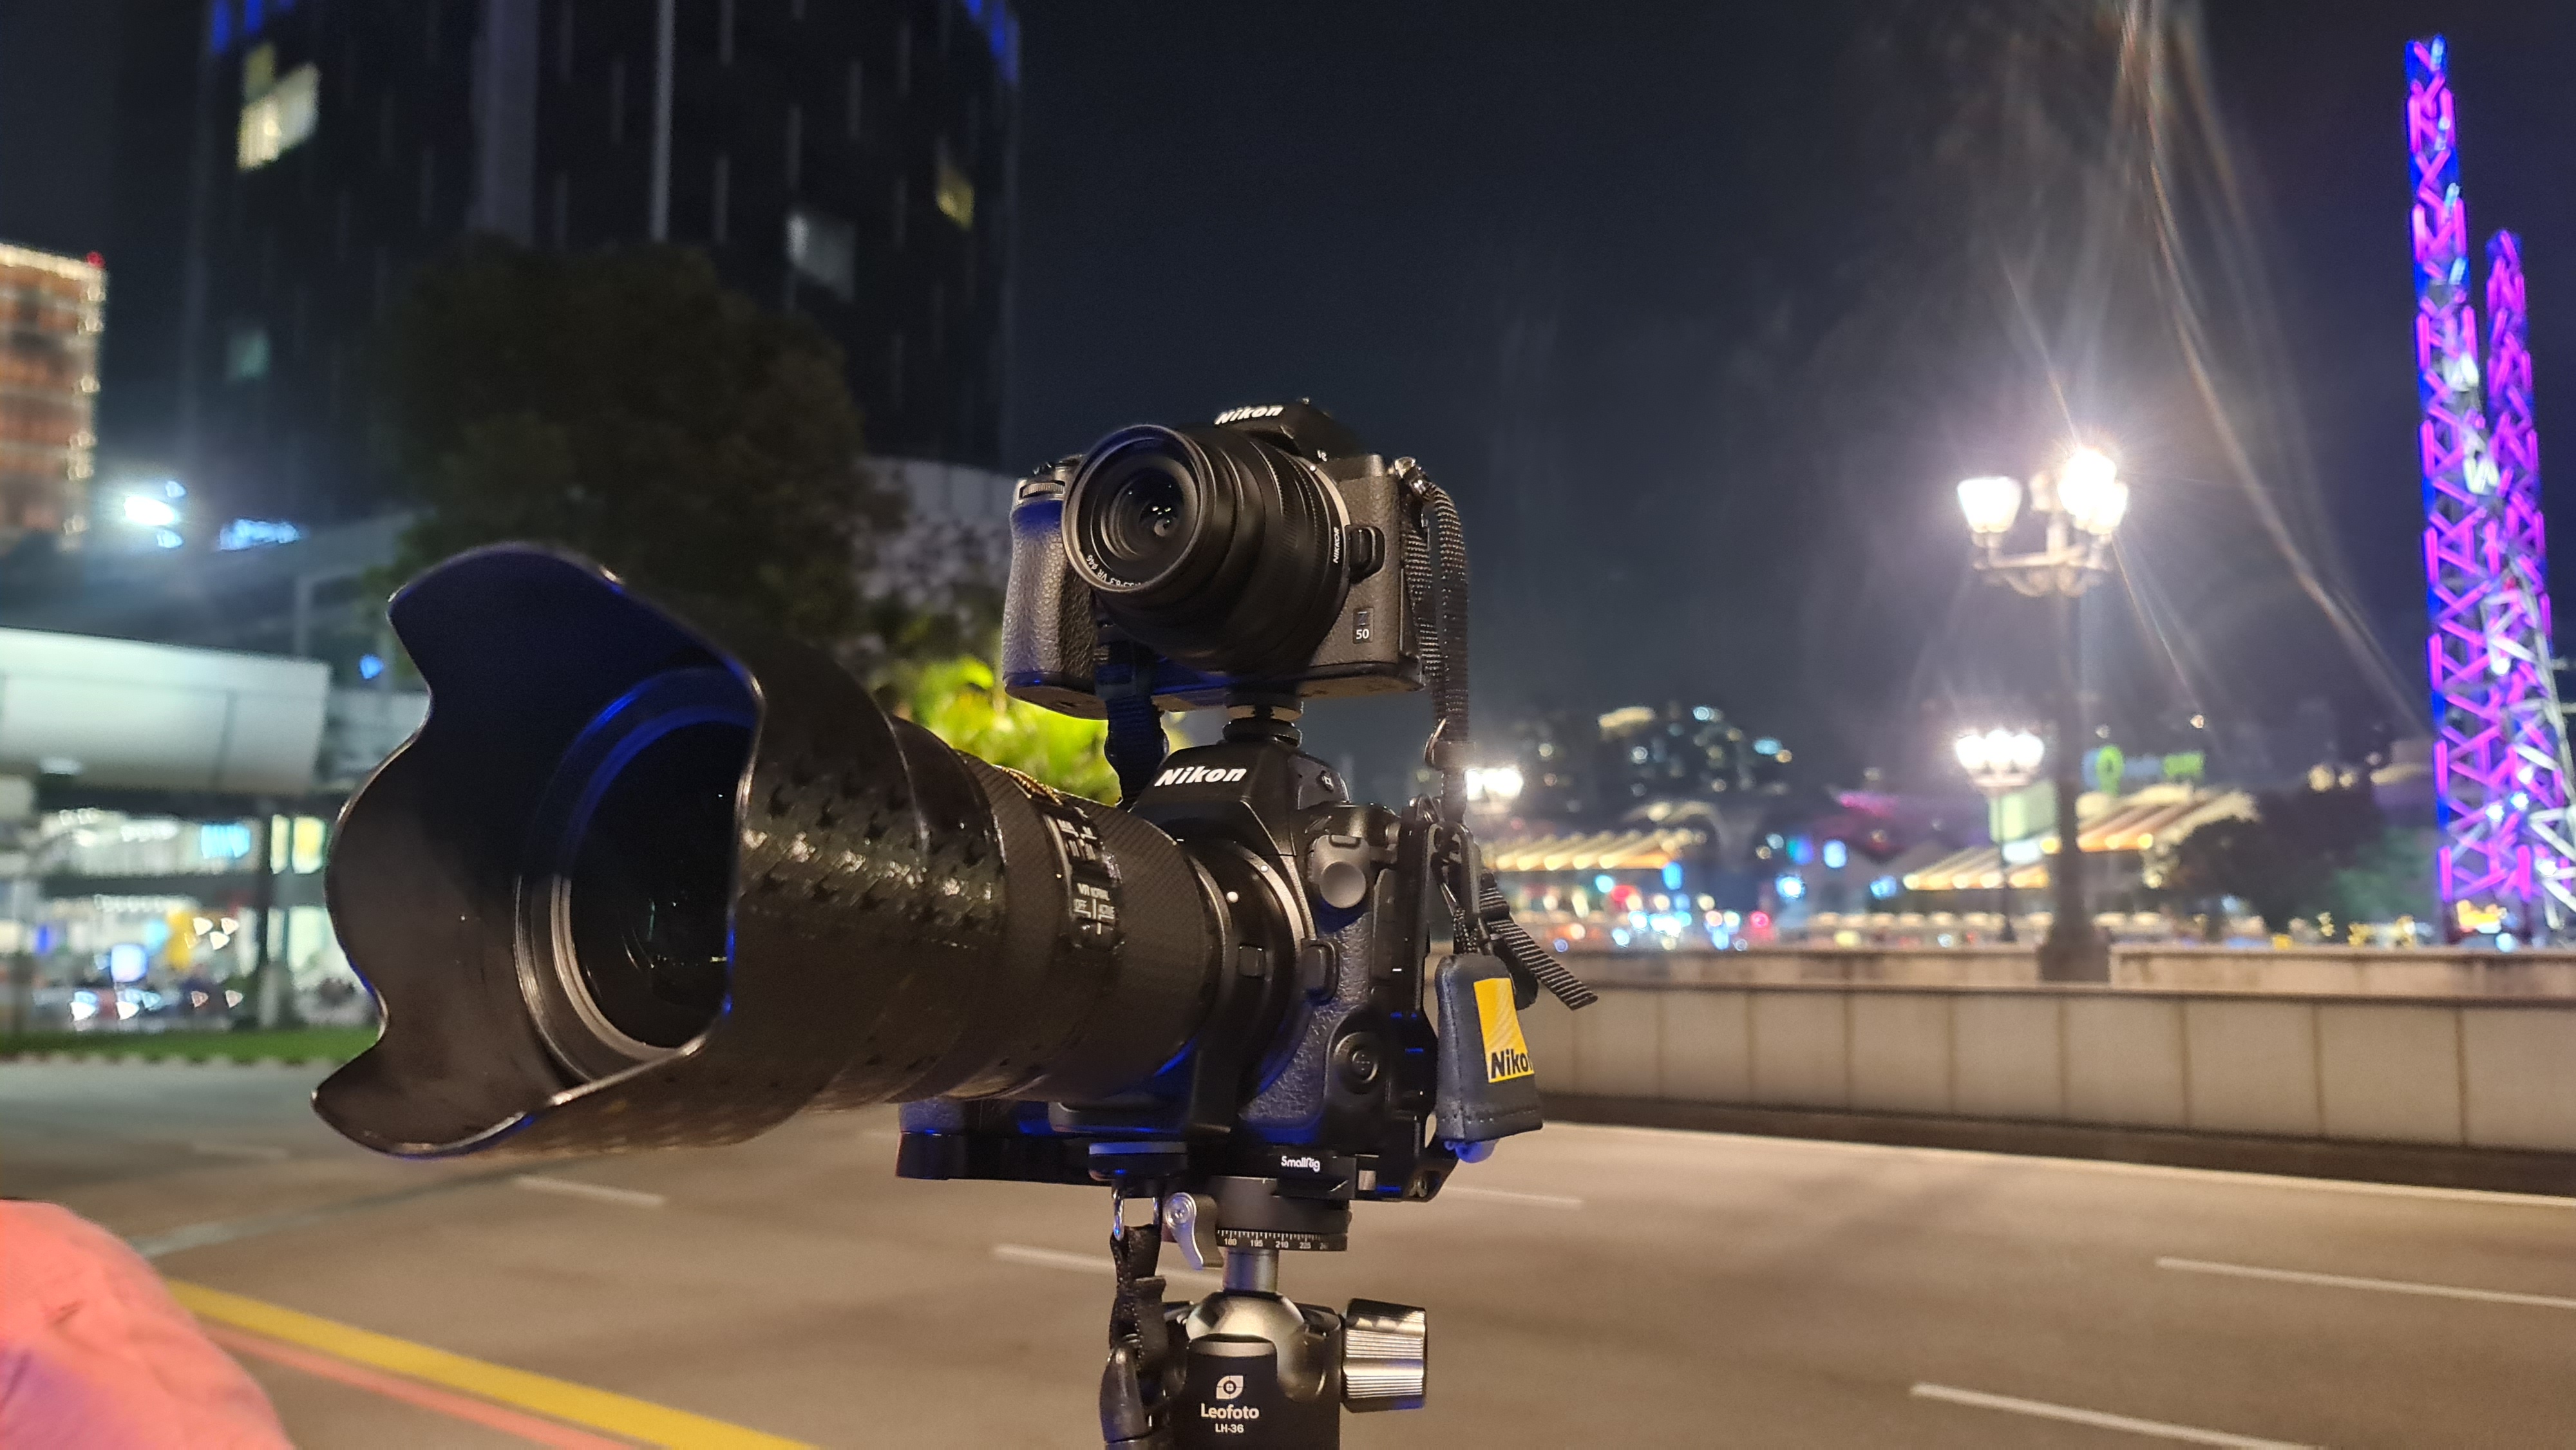 For situations such as super long exposure shots (>1s), even with the best stabilisation systems, most people would struggle to hold a camera still enough to ensure you get sharp photos. Light trails, light paintings, lightning and fireworks all demand for that perfect stillness in your shots, something that using a tripod can help you to achieve.
The photos you see below are shot with long exposures of around 8s. Multiple different images were blended together in editing to get that many lightning bolts in a single image.
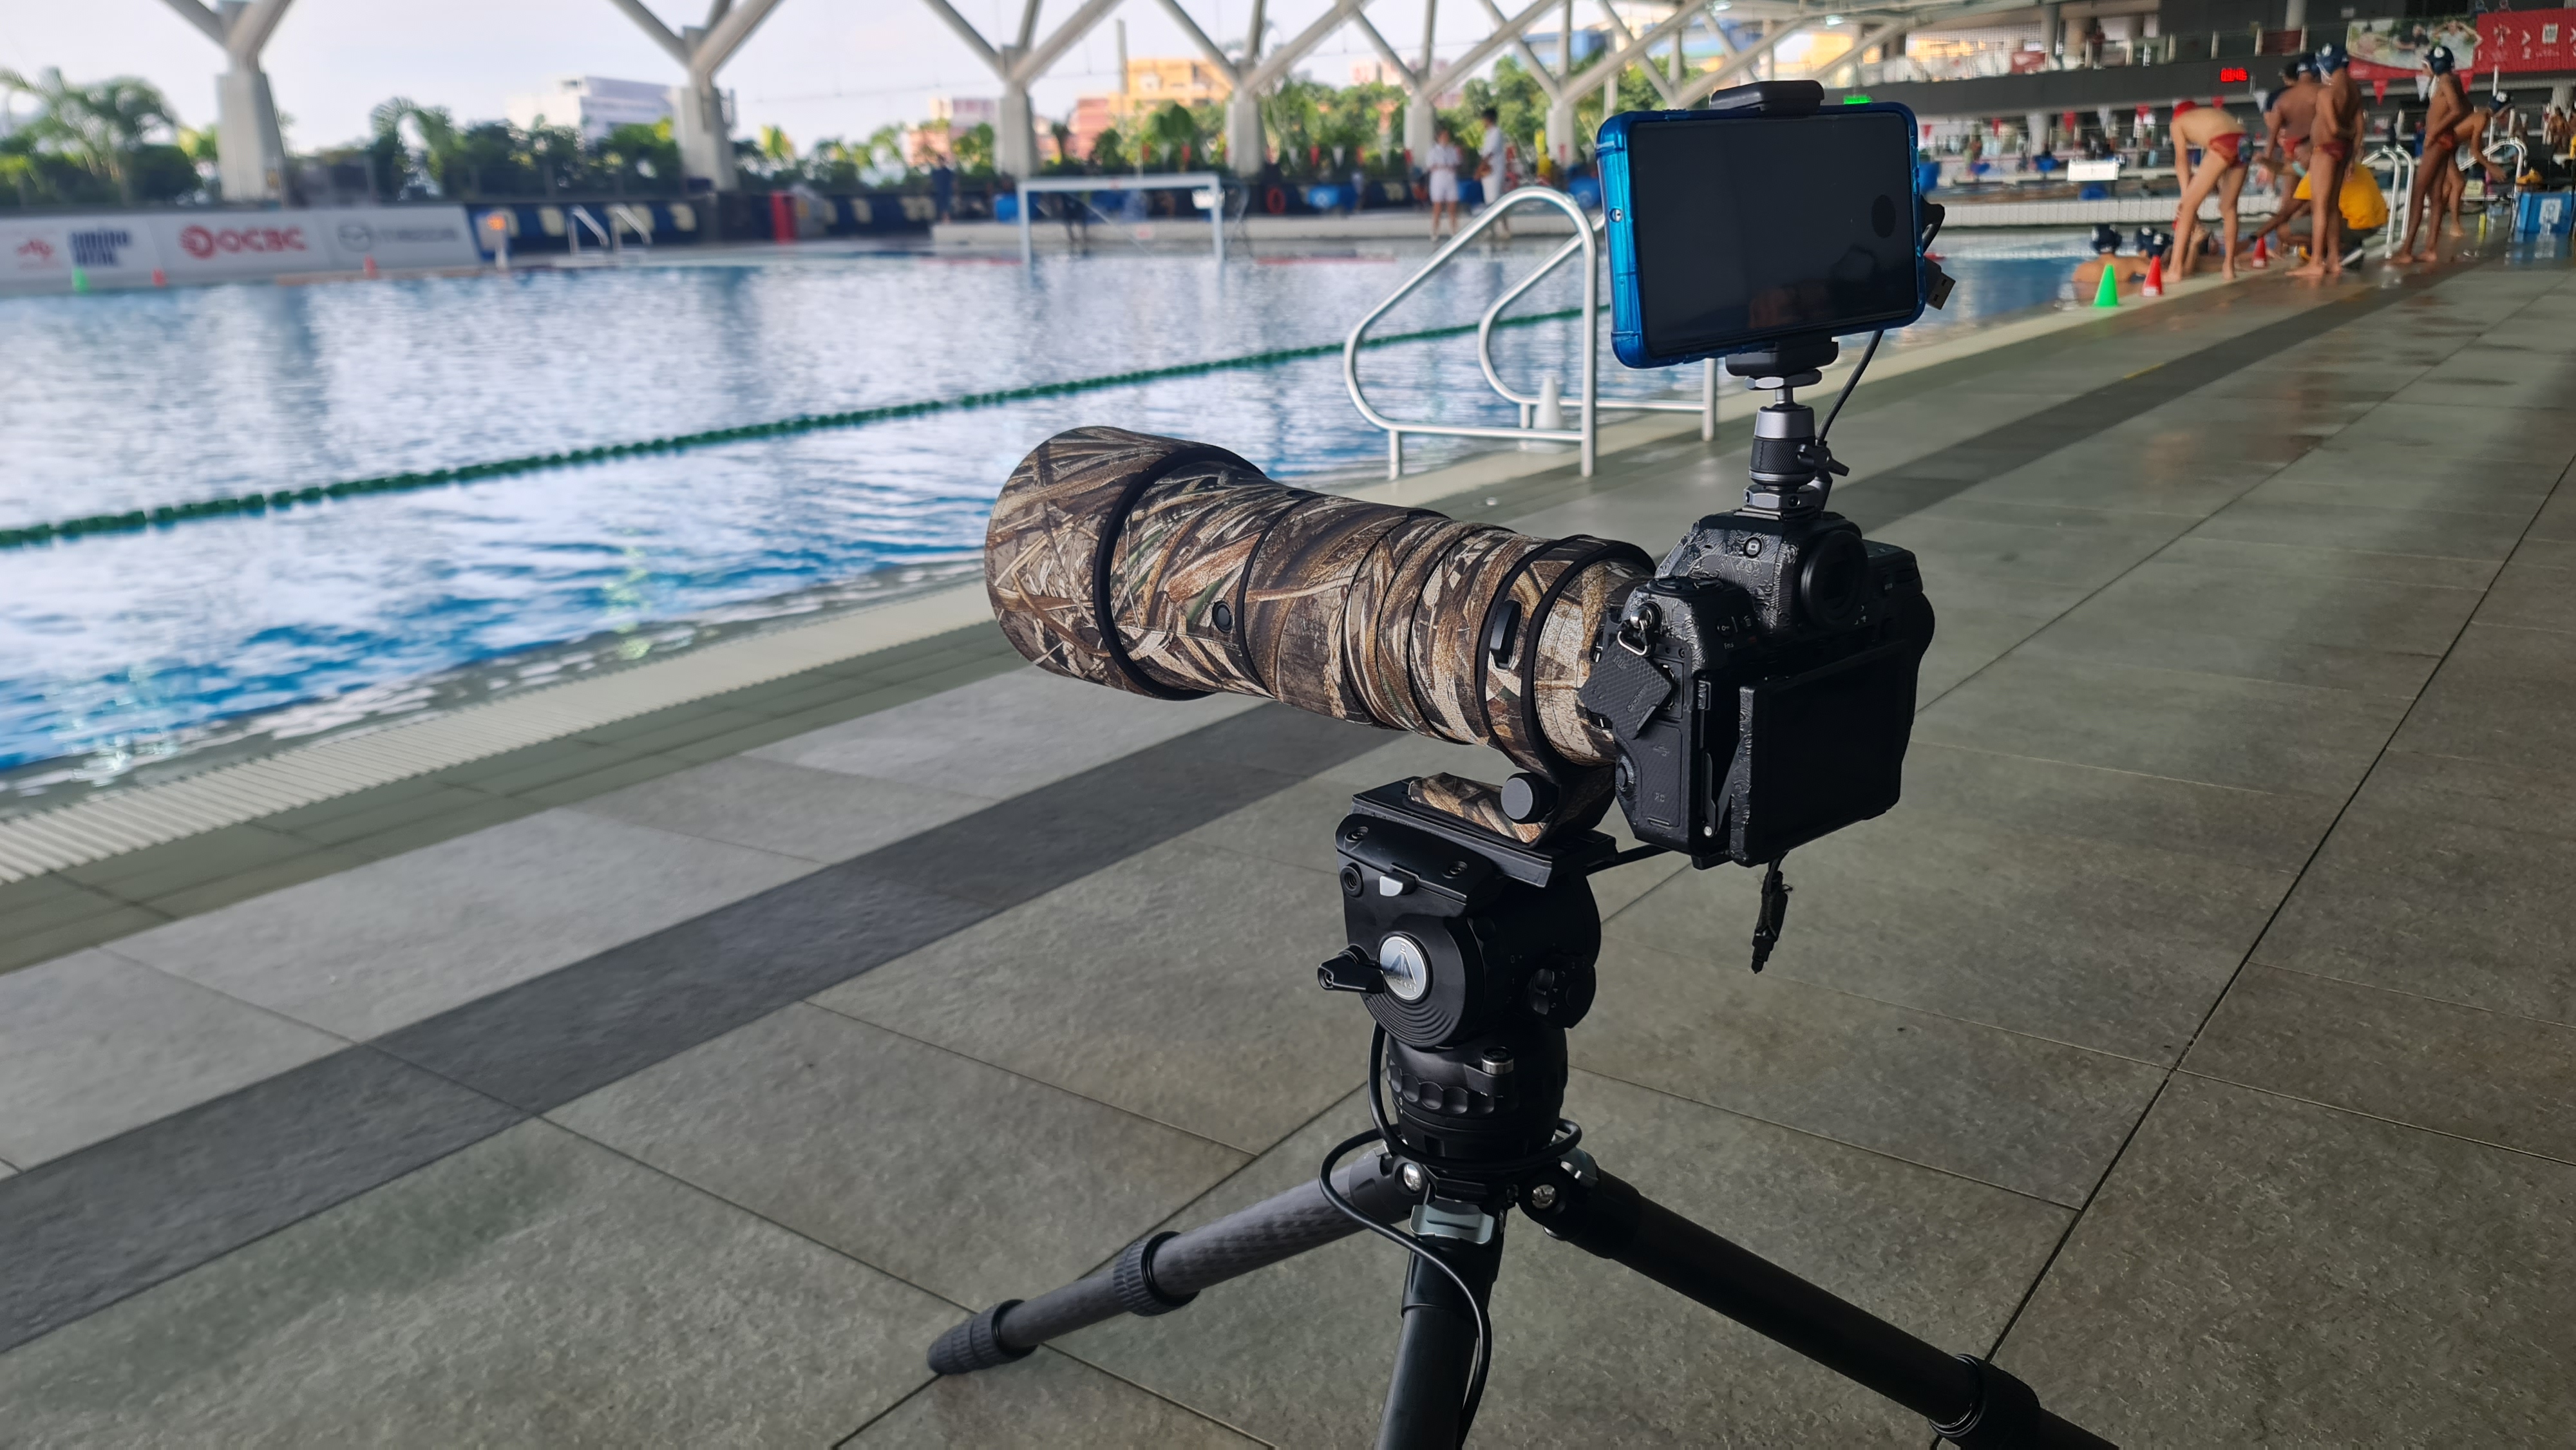
 Especially for wildlife and sports where long lenses are used over extended durations, tripods offer stability and support rather than needing to handhold for an extended priod of time.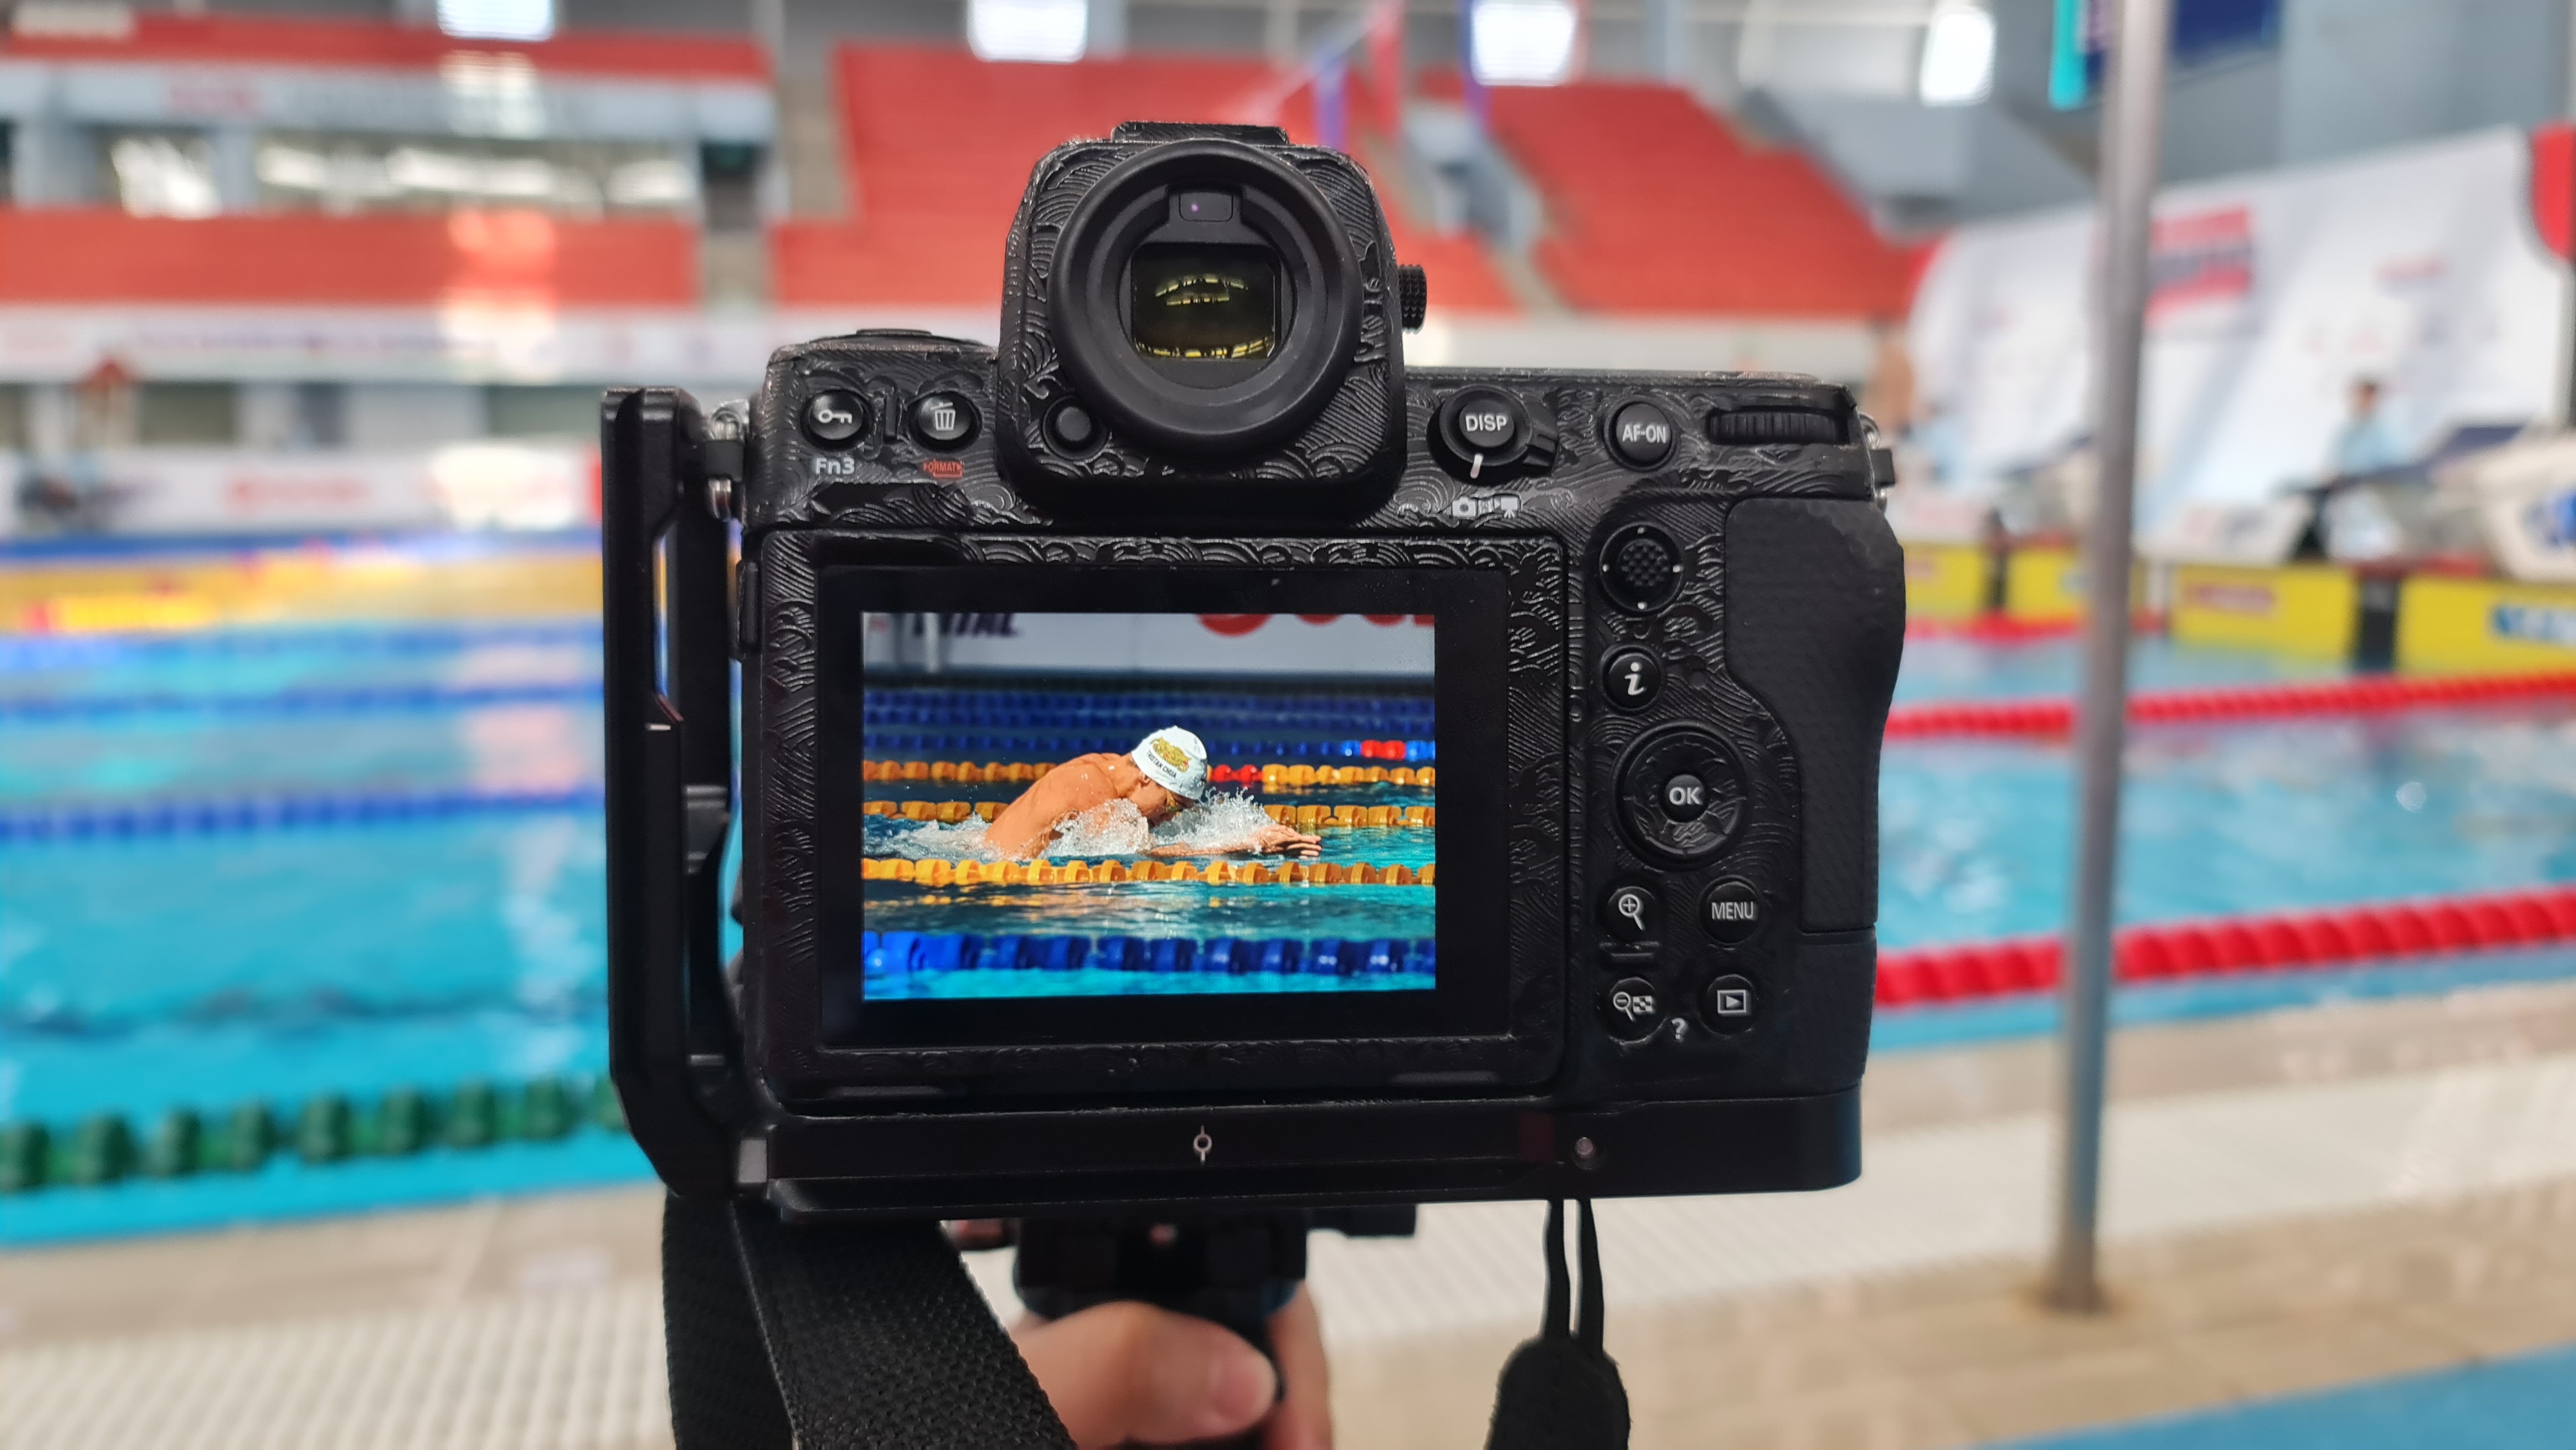
 When shooting products, tripods help lock the camera’s position in, keeping composition the same. This is very useful to get uniformity which can save much time in editing.
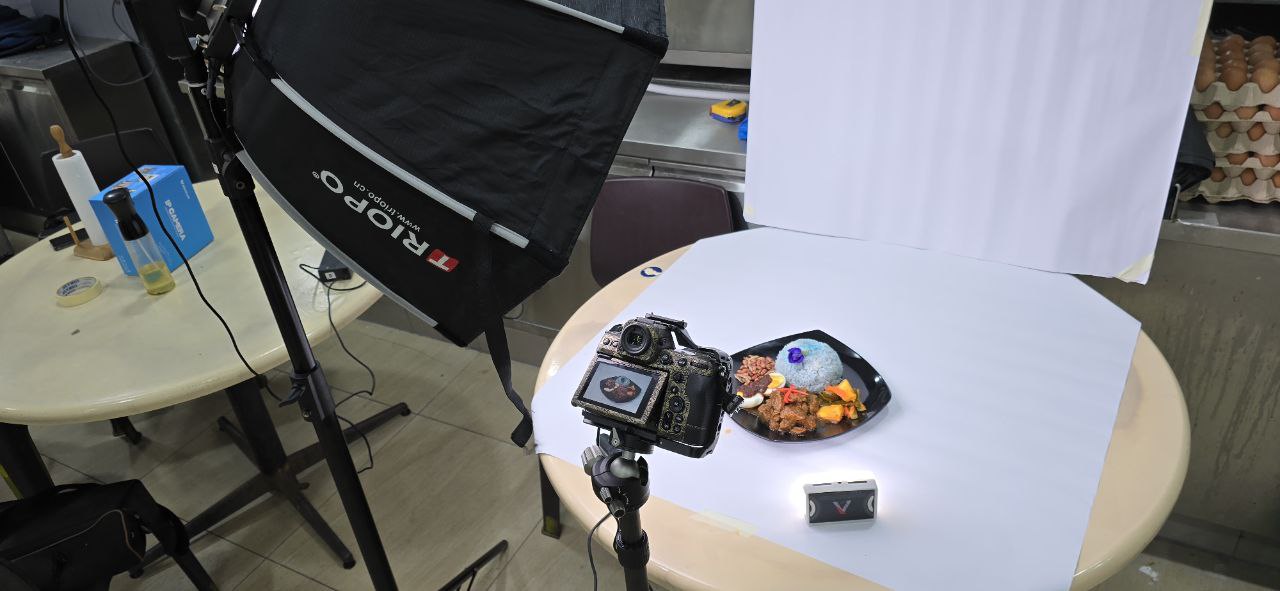 A tripod is also extremely useful in cases where it’s either inadvisable or impractical for a human to be present, such as for remote camera traps or self-portraits. Tripods are also useful for creating timelapses and videos.
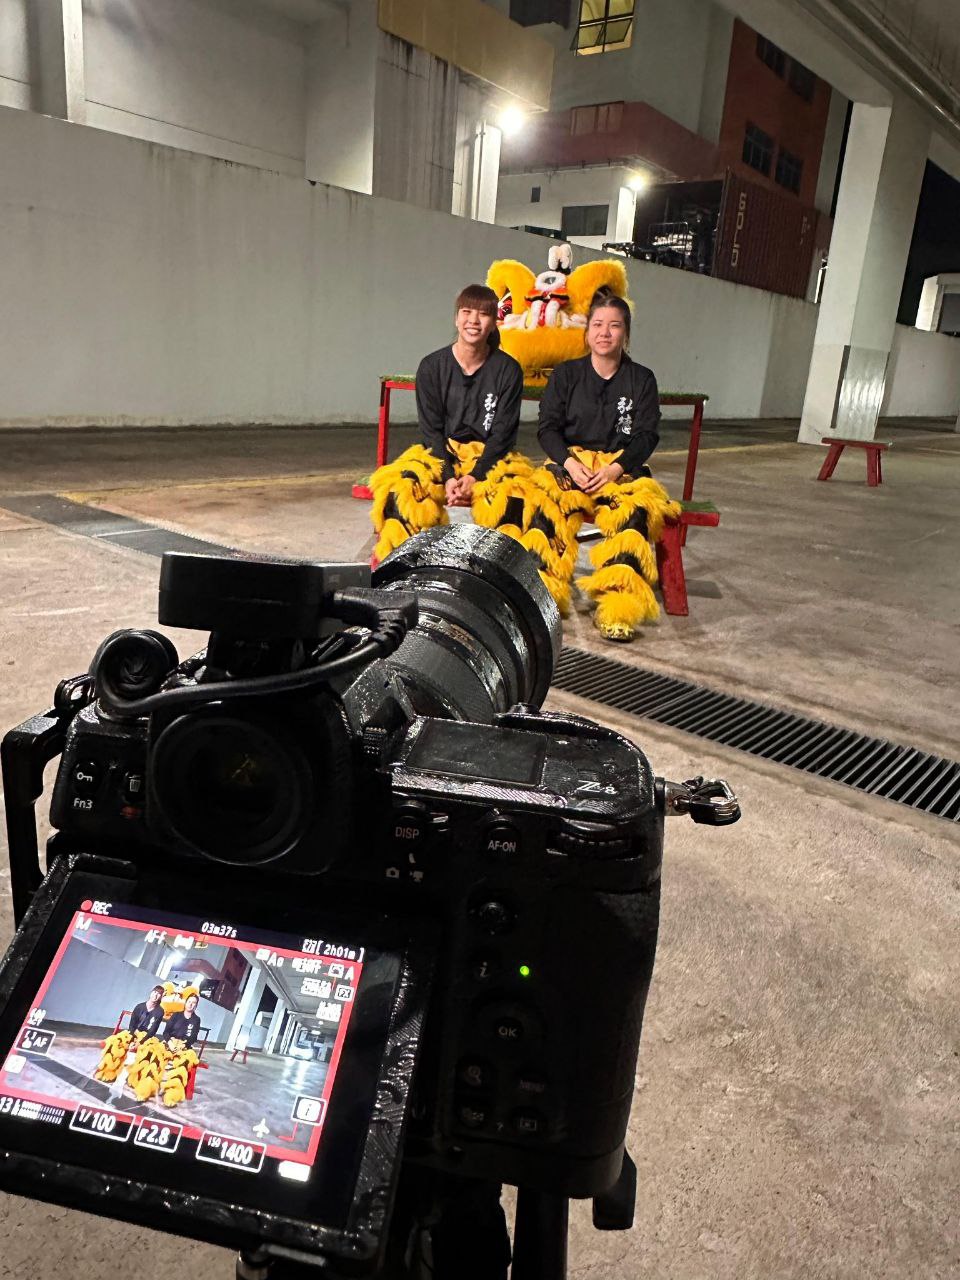 If you find yourself wanting to do any of these, continue reading for some of my tips on how to select a tripod :)
Part 1: Consideration for Tripod Legs
Use Case
Before even going into all the other considerations into choosing a tripod, you should ask yourself this very crucial question. What are you going to use the tripod for mainly?
I know it is very easy to just state everything. Well just like cars there are really so many cars out there, and no car is perfect. No tripod is ever perfect as well and to me there really is no one tripod do all sort of thing.
As much as I hate wasting environmental resources and buying more equipment than necessary, buying the right tripod for what you will be doing most often is a definite long term way to saving costs.
For example, if you are normally taking pictures and videos of wildlife or sports and using those big lenses, it is only advisable to invest in a large enough tripod that can safely hold your precious equipment. Whereas if you are just intending to do TikTok live with a phone, then why bother getting an overkill tripod?
Maximum Payload Rating
When looking for a tripod, one of the most important metrics to consider would be the maximum payload rating. This determines the maximum weight your tripod can safely support (yes, some tripods can support weights beyond their weight rating, but it may not be done safely or reliably).
Generally speaking, the width of the tripod legs is what normally determines how much weight the system can take. The wider the diameter of the leg tube, generally the stronger and more stable the tripod will be. The number of leg sections also contributes to the overall stability of the tripod. As the number of leg sections increase, the bottom sections become thinner overall which may weaken stability when fully extended.
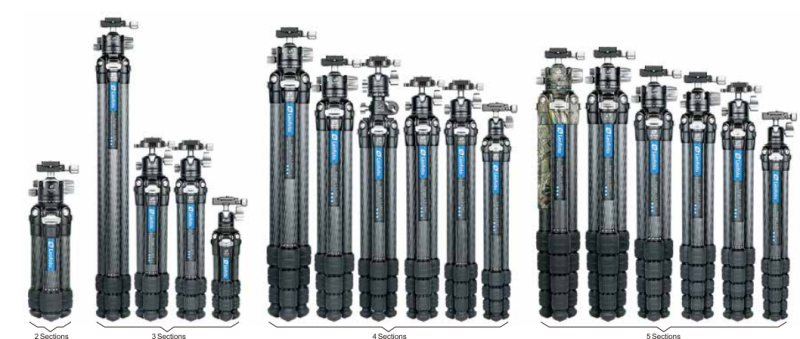 Use the weight of your current gear and potential future upgrades to consider how high of a payload rating you should look out for. While there is no harm in getting a tripod rated for 12kg for a 2kg setup, it would also be considerably more expensive than say a 5kg rated tripod that would perform the same job just fine. And also a LOT heavier from experience. I used to shoot wildlife often and used a very beefy tripod for my long lens. Now that I rarely shoot wildlife due to life committments, I find such a big tripod to be cumbersome for my use cases. In fact I have switched to using clamps on stands to just escape the need for tripods.
If your environment is windy, or if you use very large equipment, find a tripod with a weight hook so you can hang items off.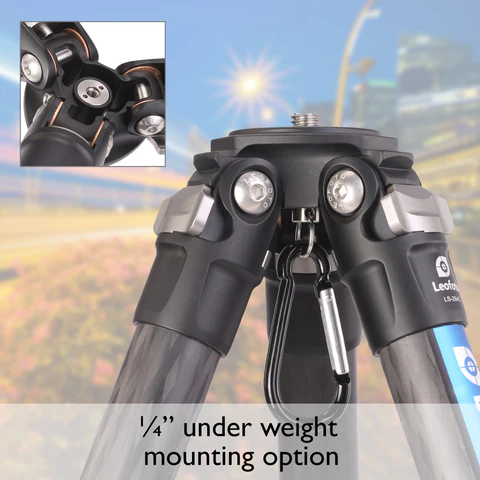
Alternatively, there are rock bags that you can attach to the tripod legs. Personally rock bags are useful for storing small items that are often needed such as triggers and other lenses. Of course you need to be careful when putting and taking items from the rock bag given they are expensive.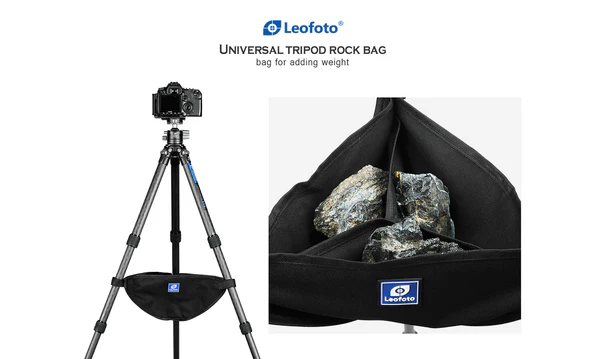
Maximum/ Minimum Height
Another factor to consider would be the maximum height of the tripod. A taller tripod is often times better, allowing you to tower over railings and even people. The general approach is to find a tripod around your chest to eye level, that way with a tripod head and your camera attached you should have enough flexibility.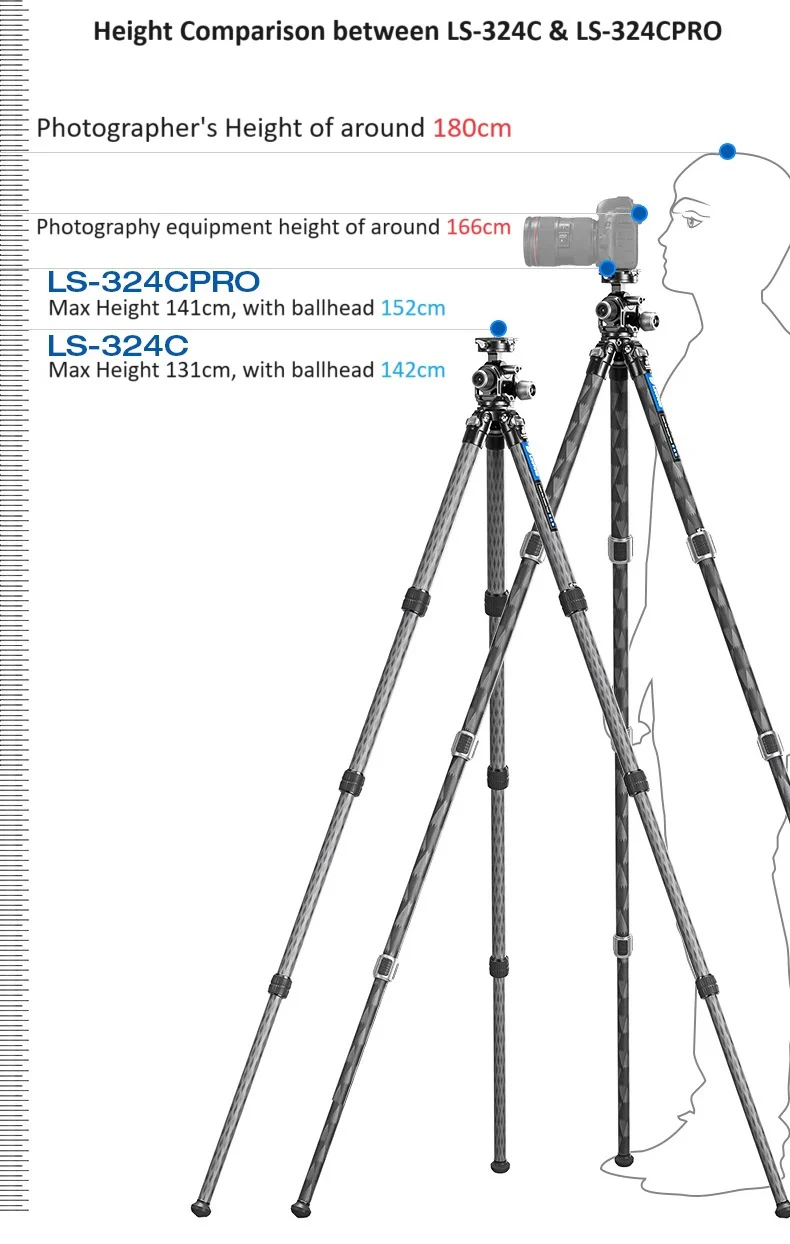 You can also consider getting a center column to further extend the maximum height of your tripod. Some centre columns even allow you to extend the camera out horizontally. Ensure your camera and tripod is well secured especially in these cases, you do not want your equipment to break.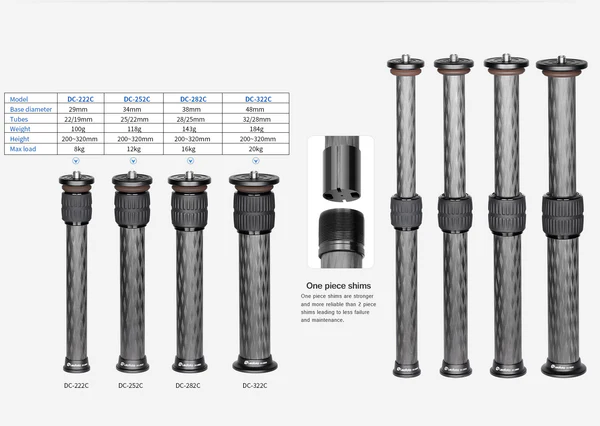
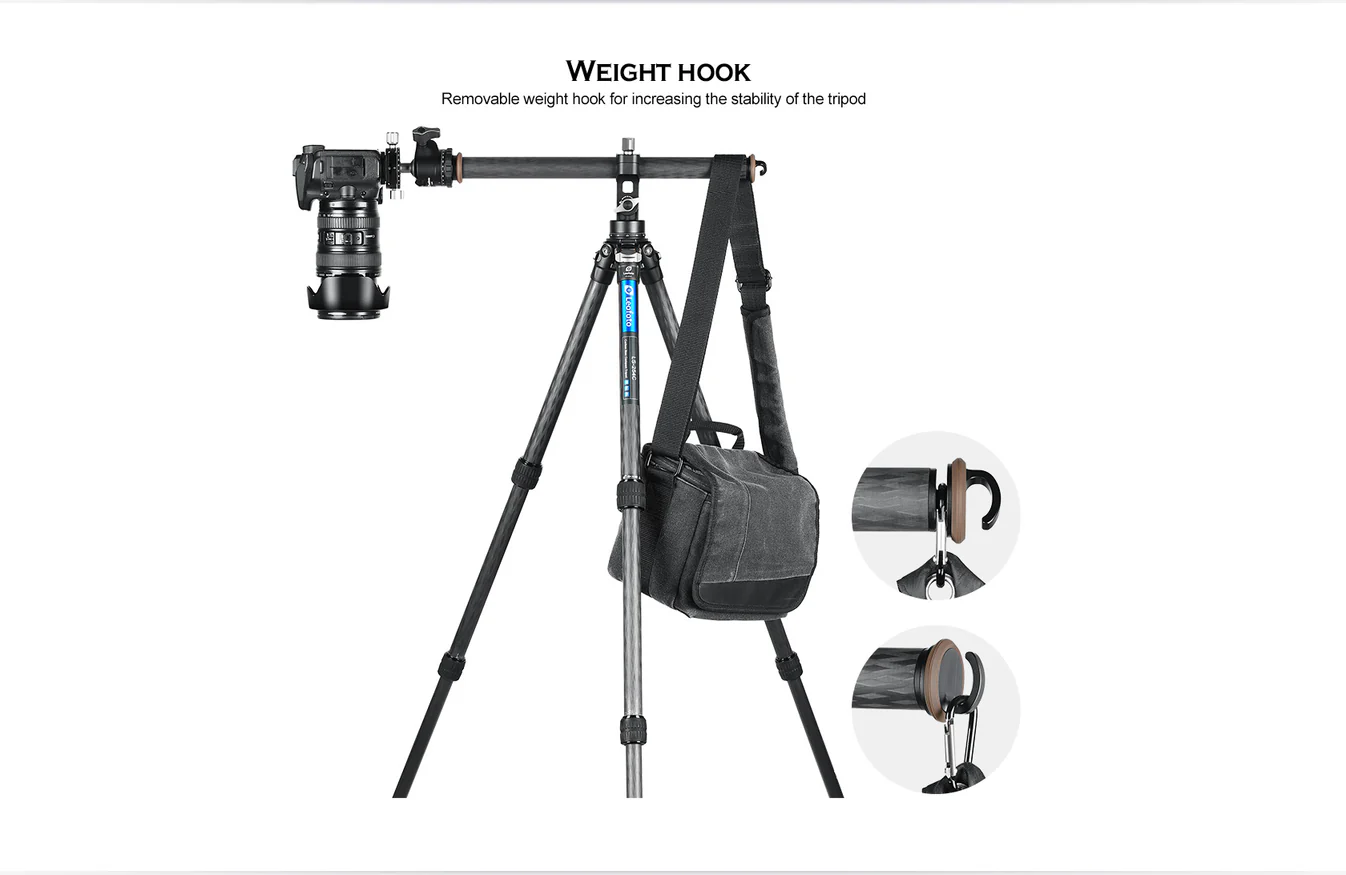 There are certain tripods with built in center columns that can bring in even more cool features. I will talk more about this later on in my recommendations section.
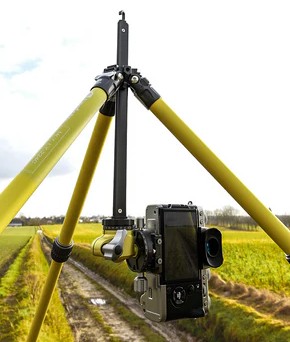 Regardless, increasing the height of your setup raises its center of gravity which would decrease stability in the process. Especially when extending the tripod to the maximum height, please use weight hooks or rock bags if necessary.
Leofoto has ultra tall tripods for certain scenarios, especially for capturing moments that require unobstructed views, something ordinary tripods are unable to do. Of course this does not come cheap and neither is it very compact, but hey there is an option. (PS. dont know which human is 227cm here in Singapore, still looking for someone that tall lol)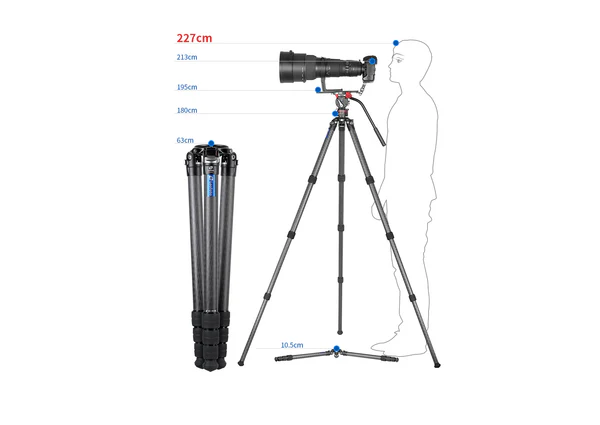 Another important aspect that is often overlooked but very useful is the minimum height of your tripod. I find low angles to also be very important especially in capturing scenic landscapes.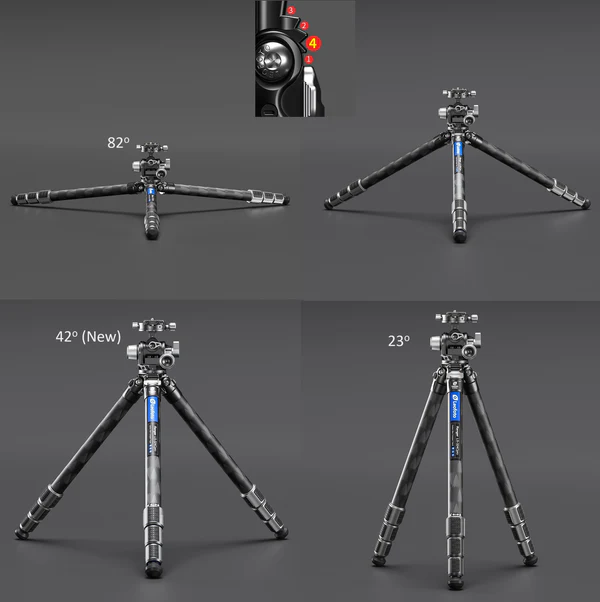
Size and Weight
While large tripods are nice, there is no use buying a large and heavy tripod when it prevents you from getting the shot at the end. One important aspect especially is the size of the tripod when fully collapsed/ compacted in storage mode. Especially for those seeking adventure and often travelling, a small enough tripod can mean a whole world of difference, enabling you to travel the distance and explore uncharted terrains. The LY-224C is sort of my go to perfect travel tripod. I will talk about it later on.
There are two main materials for camera tripods, carbon fiber and aluminium. Carbon fiber generally is lighter and more expensive, while aluminium is heavier but cheaper.
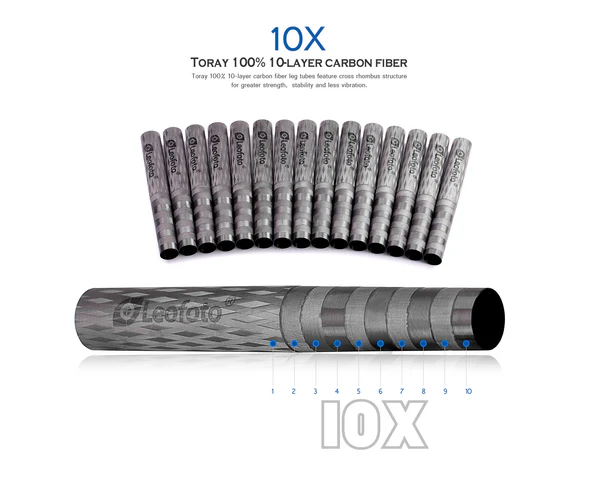 Regardless of the tripod you plan on getting, it is important to find this balance between size, weight and payload. In my opinion, portability trumps all when it comes to choosing your gear.
Twist vs Flip Locks
This is one thing often overlooked but these two leg locking mechanisms are quite different actually and there are some instances where one of them is preferred.
Twist locks are commonly seen in photo tripods. They are more weather resistant (not waterproof!) and thus can be used in more inclement weather. However there is no visual indicator to tell you if the legs are not locked in properly. There have been instances of tripods falling because the legs are not tightened, so please always make sure to double tighten before putting anything on your tripod. 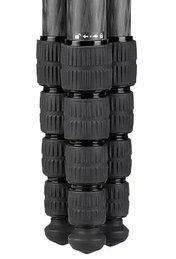 Flip locks are more commonly seen in video tripods. Much faster to set up, clear visual indicator if it is unlocked. However most of the twist lock mechanisms use springs that need to be tensioned and tightened once in a while. Oh and these flip locks can fail especially in inclement weather.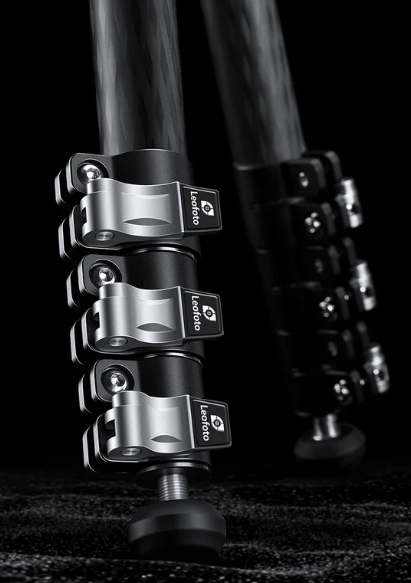
Flat Base vs Bowl Base vs Levelling Base
Most photo tripods out there have a flat base at the top. Not every place is on perfect flat ground, and trying to make sure the top of the tripod is level and parallel to the ground can be a nightmare. Especially for video, where you need to be levelled properly. This is where levelling base and flat bases come into play.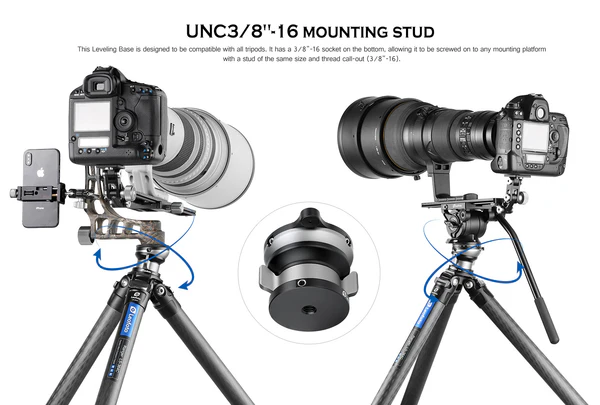 Some tripods have a built in levelling base at the top of the tripod, allowing you to easily adjust the angle at the top and level the tripod. The Leofoto CEX series is one such example.
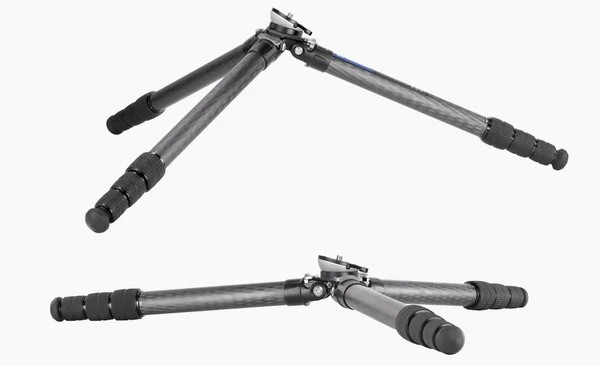 On the video side of things, we have bowl bases. Essentially they do the same job as levelling base tripods, just larger to accomodate heavier video setups.
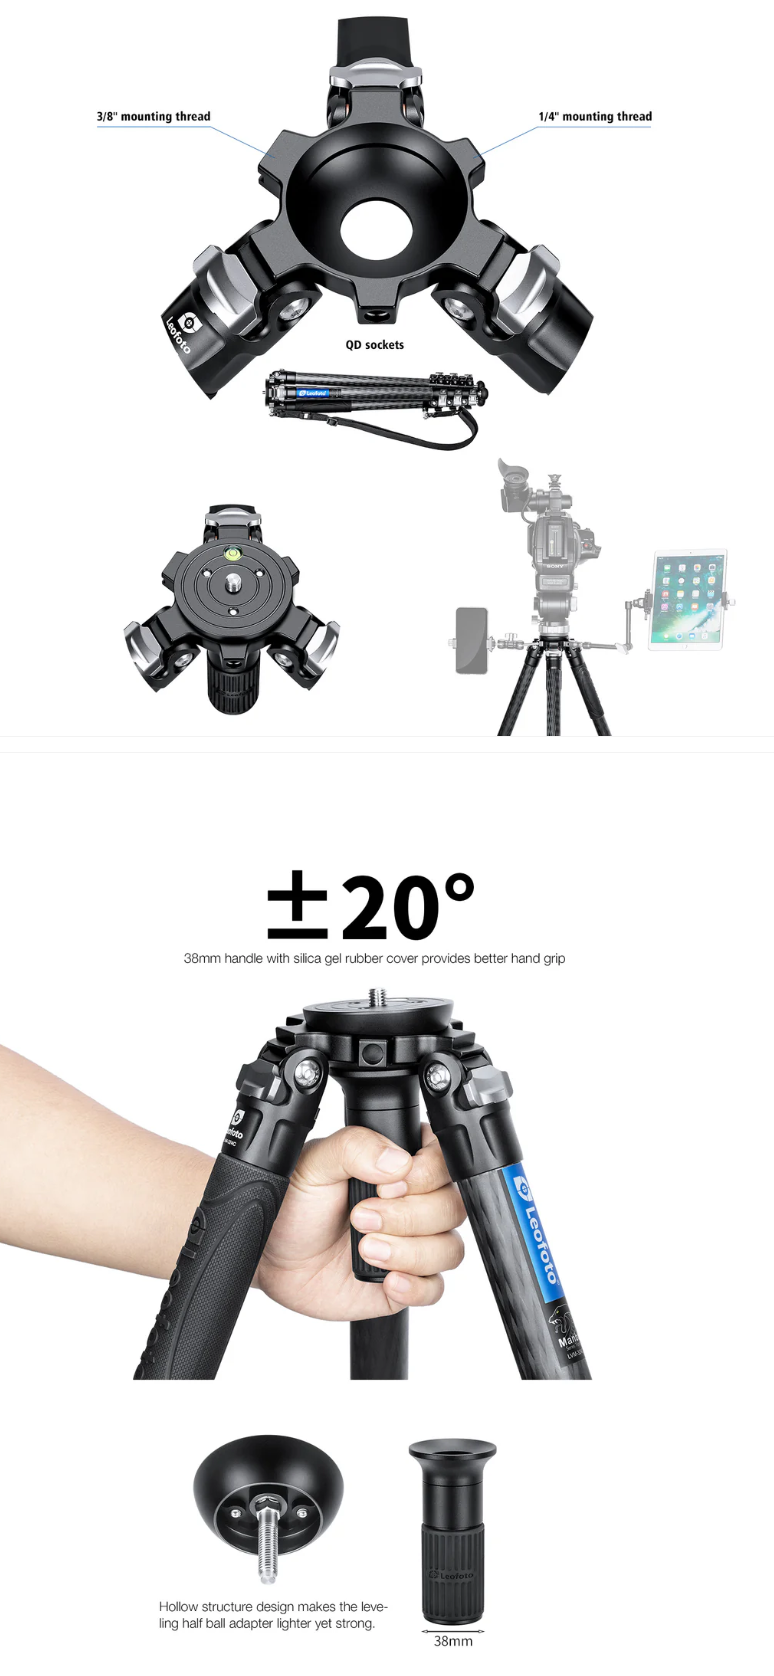 Leofoto offers 2 methods to convert an existing flat base tripod to a levelling base. The first method is a levelling base adapter. Comes in many different size options for you to add to your existing tripod.
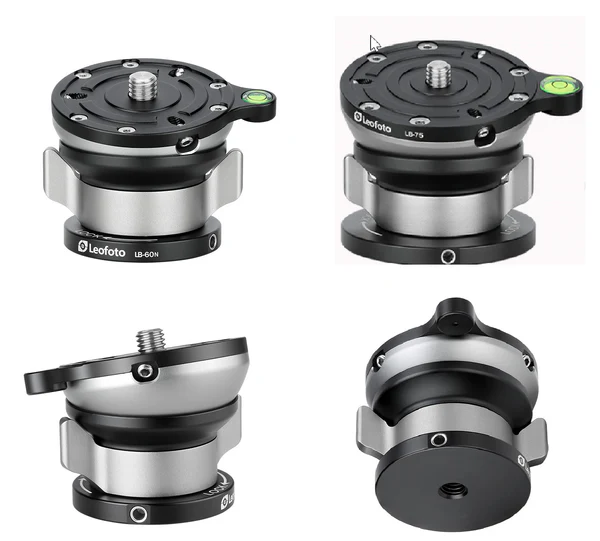 Another method available is to replace the entire apex of the tripod base. However you do have to private message as this will be a custom order. Honestly just get the adapter mentioned above. It does raise the height (and centre of gravity) by a bit but at least you willl not have a paperweight at the end.
Interchangable Tripod Feet
I know quite a number of tripods out there (normally the budget friendly ones) do not have interchangable tripod feet. This means that the bottom rubber cannot be replaced. To me, rubber eventually wears out after years of use and should be a replacable part. If you can maintain your tripod well enough they should last a lifetime, or beyond a lifetime even.
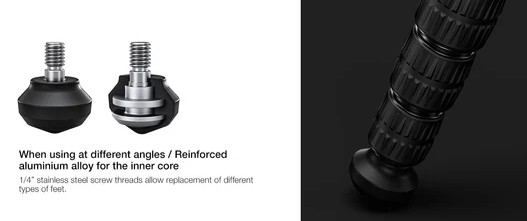 Another useful thing for interchangable tripod feet is that you can interchange the rubber for other accessories such as spikes. This will help the tripod stay rooted to other forms of ground, especially in icy, snowy, sandy and muddy areas.
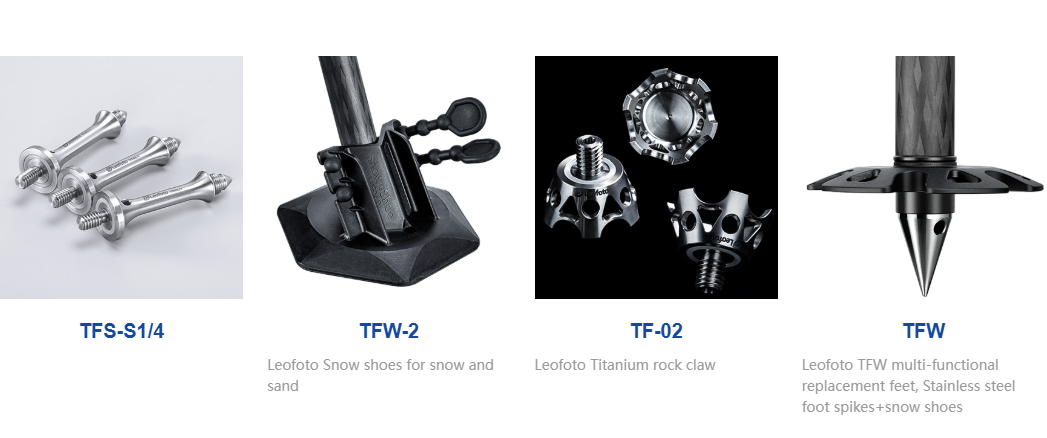 Some tripods, especially video tripods may have a 2 in one option to easily convert from rubber to spiked feet either by removing a cap or twisting.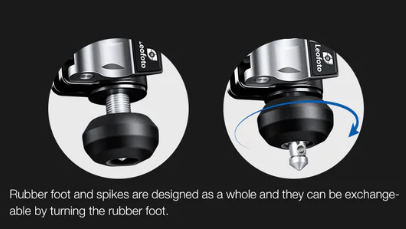
Part 2: Consideration for Tripod Heads
Payload Capacity
Similar to tripod legs, the maximum weight you are putting on the tripod head is super important. Tripod heads lock mostly via friction and most heads are rated for a given weight range. Far exceeding this weight range will make it much harder to lock in place. You can see that even when tightened, over time the head will slip and drop. This will also cause wear and tear of your tripod heads.
I have a few tripod heads (this sounds wasteful but honestly cause my setup changes constantly) that I pick from depending on what I will be doing. This saves me space and weight in my bag, I only bring out the gear I need to get the job done.
Use Case
This is the more important part. There are 3 main types of tripod heads, each has its own use case.
A) Ball heads - These are the commonplace tripod heads you find almost anywhere. Its a ball that is clamped via gravity and friction. Some heads has notch(es) for you to switch to vertical or other orientations. The many knobs is to adjust tension as you need, and of course to lock the position and the camera firmly in place. Generally, bigger ball heads have larger payload capacity. You will most often see ball heads used for photography. I do not advise using supertelephoto lenses on ball heads, as they are far too difficult to lock off accurately with such a large weight.

Some ball heads have an additional panoramic clamp at the top. Very useful especially if you need to use the ball head already to angle the camera horizontal, then all you need is to loosen and rotate that panoramic clamp. For Leofoto specifically, it is the LH-XXR series (XX is the diameter of the inner ball).

There are, however many other types of ball heads, such as pistol grip heads and inverted ballheads. I will not provide much more about them though cause personally I find them too big and bulky, but they may be more useful to you, so feel free to search it up.
B) Fluid Heads - Get smooth pan and tilt shots. Fluid heads use fluids to control the tension and hence smoothness of shots. It is a must for video work, but I do recommend it for wildlife and sports where you need to use large telephoto lenses. A huge majority of fluid heads are good enough for social media or general use case. These normally have a stepless drag control, which means your pan and tilt smoothness may not be in sync, but for most use cases it is more than fine.
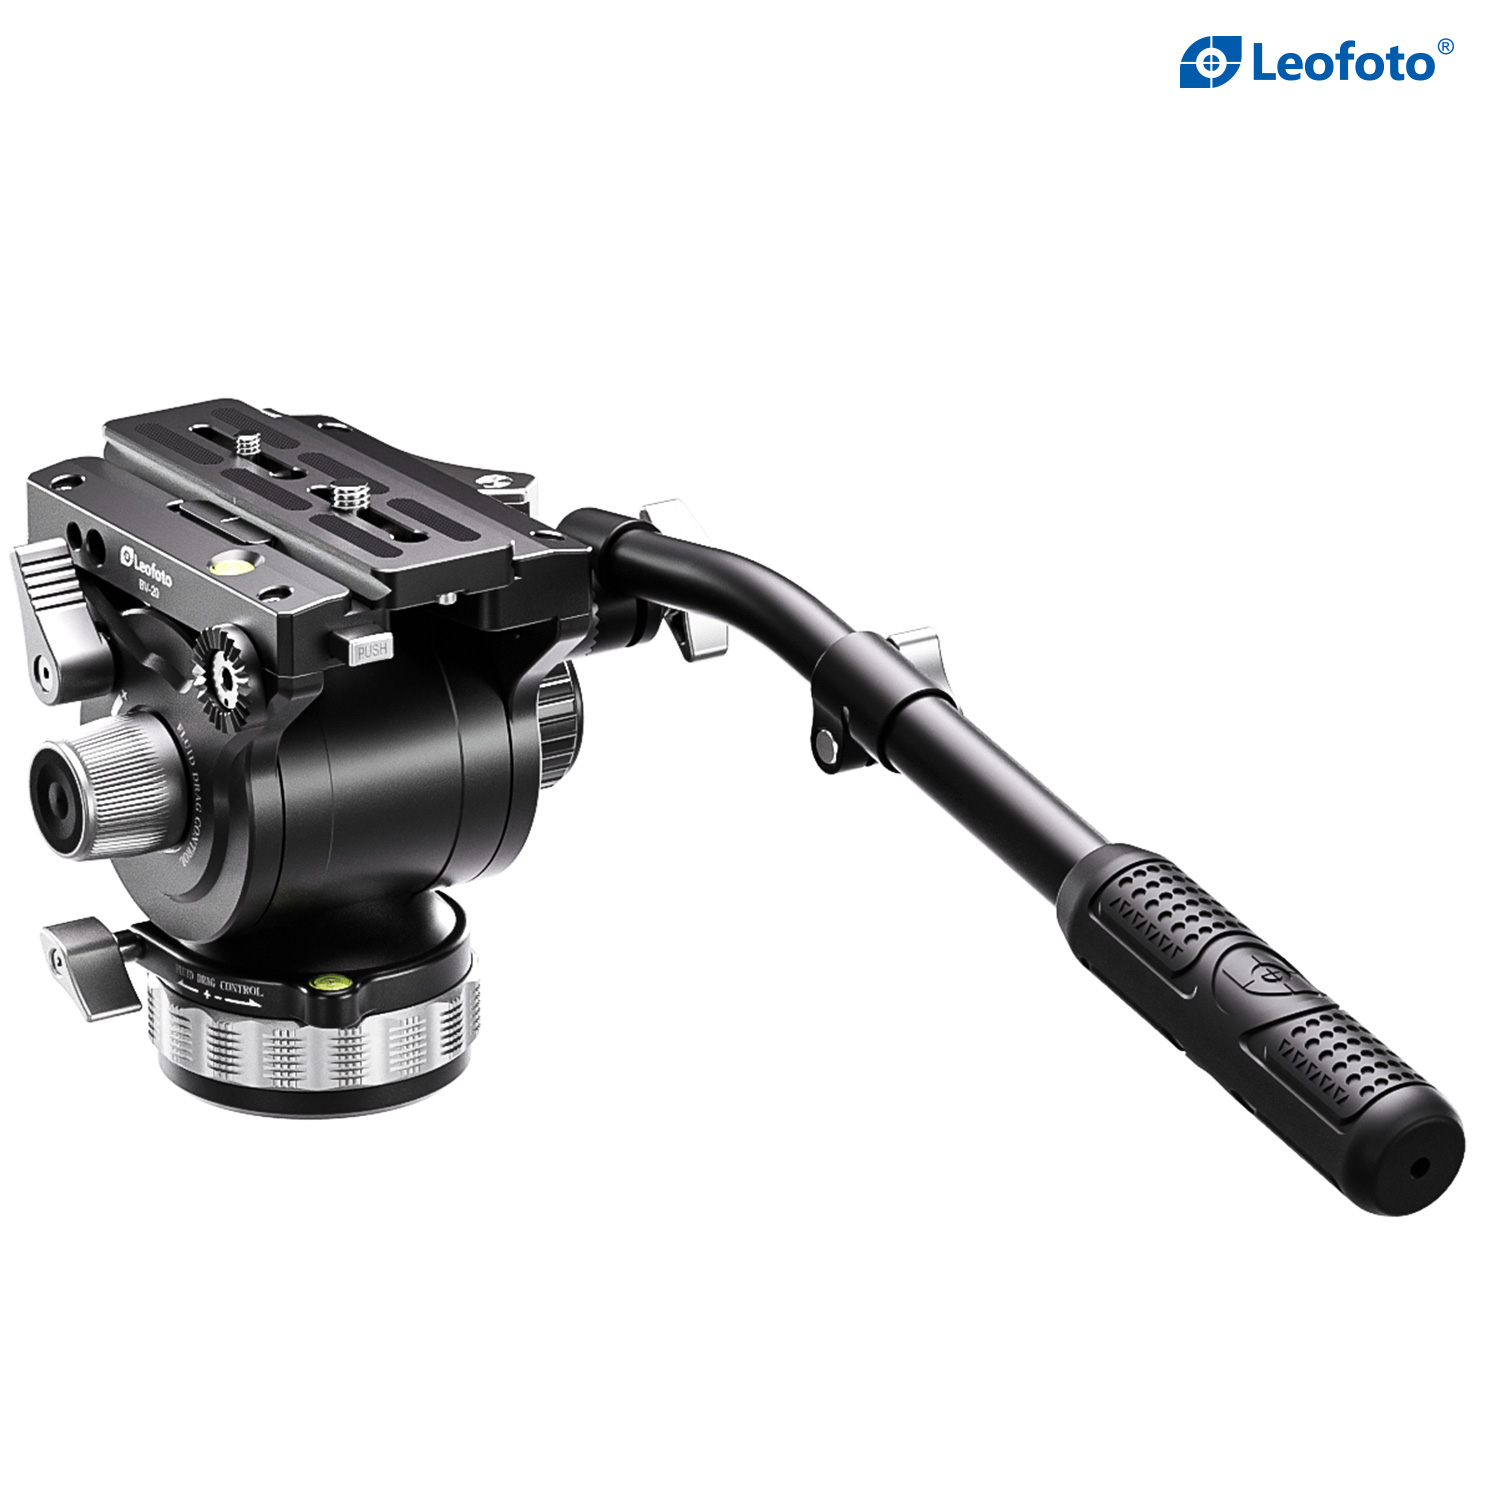
Higher end fluid heads such as the one below have stepped tension control, and it is a lot better for pro level video work. Just note these are a lot heavier. I do have a similar one, and its 2kg just for the head. Imagine how heavy it is to transport my tripod wherever you need to go. And the size in your bag.
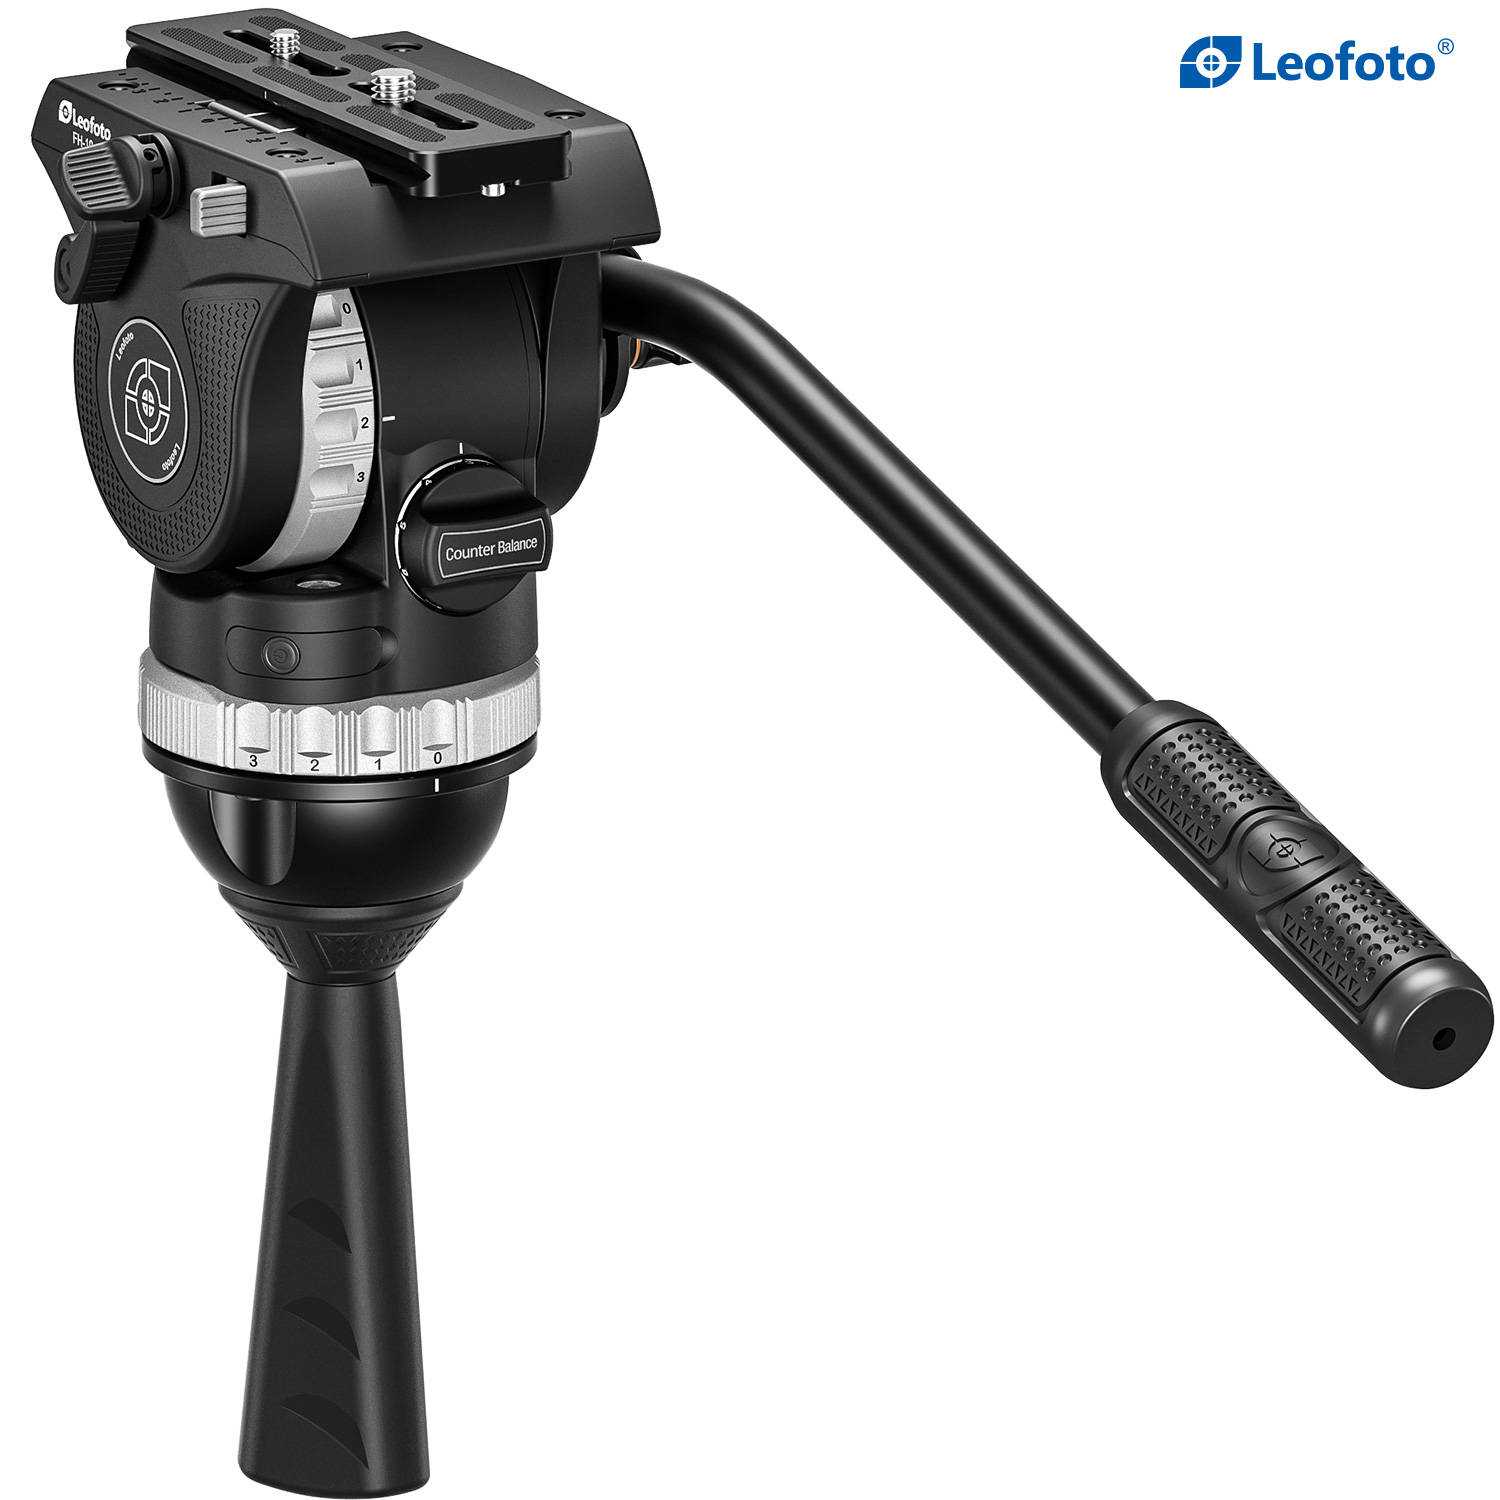
If you realised by now, fluid heads have two disadvantages compared to ball heads.
i) You cannot shoot vertical just by rotating the ball joint. You will have to mount the camera vertically directly. This is why many video shooters use a cage for their camera, it has mounting points for exactly that scenario. However, if your setup is light enough, the BV-0R / BV-1R mini fluid heads work somewhat well due to the panoramic clamp on the top! It can be used as both a ball head AND a fluid head.
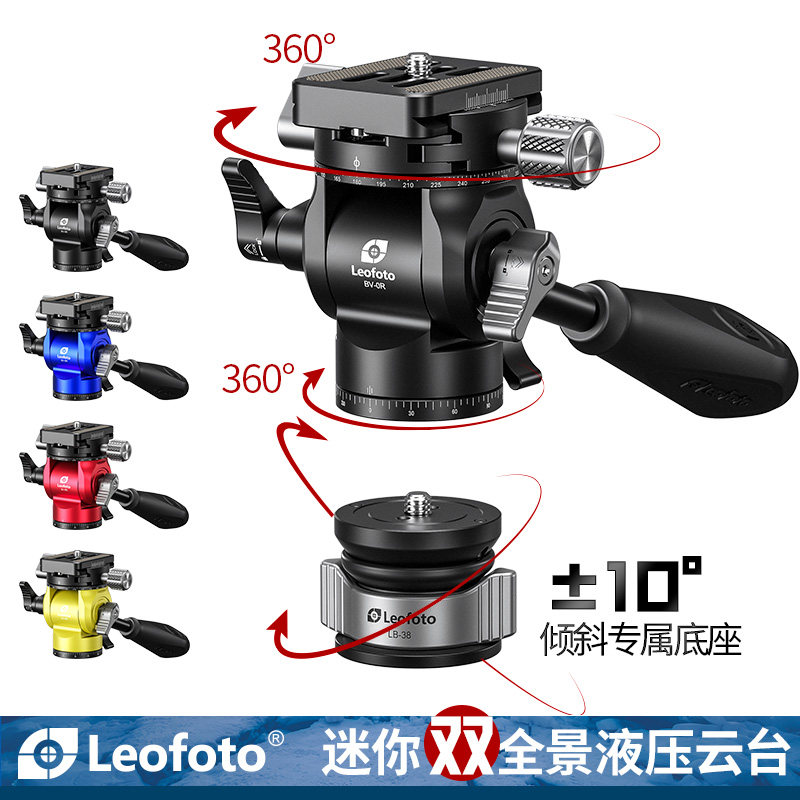
ii) You cannot level off the base of the tripod easily.
Part 3: Tripod Care
Maintaining a tripod is essential for its longevity. While most carbon fiber tripods are technically weather resistant and can survive the elements, not cleaning it after exposure to the elements will cause its performance to worsen. Especially so if you get into sandy and coastal areas, you should do a proper clean of your tripod.
This is also no excuse to mention that your camera gear is water/ weather resistant, and NOT waterproof, or weatherproof. Do not just think "my gear can handle it". Have proper protection equipment for your camera and lenses eg rain covers on standby to protect the camera from the rain. For coastal areas, you can risk your gear for the shot but if a saltwater wave comes crashing onto your camera, it can be the end of your camera. Do take extra caution before you shoot. Always remember, your life and safety comes FIRST. You can always buy another set of equipment but you cannot buy your life.
Here is my guidelines for my own servicing and maintenance. I normally clean disassembled sections with tap water and leave it to dry. In more hardcore scenarios, I will use mild soapy water ONLY for trhe carbon fiber tubes.
1) Dissassemble the bottom leg sections
- Bottom legs went into mud, dirt, sand, ice
2) Dissassemble whole tripod (except the apex)
- Shooting in coastal areas, rain, desert storms
I would have done content myself on how to maintain the tripod, but honestly Leofoto USA has done a very good job doing it so I will just leave the video linked here.
https://www.youtube.com/watch?v=Gp3DFXbaY2o
This generally applies to most tripods. But be very careful especially on the shims. Some brands have 2 piece shims, some may have hidden screws or you need to do additional steps first. Always read the instruction/ service manual if needed, and if a part seems to be completely stuck or you cannot force it, bring it in to a service rep to get it checked. Don't break your gear.
Part 4: My top 2 recommendations
Once again to reiterate, I am not sponsored or compensated in any way shape or form. All of these are my personal opinion from having used them long enough. I will be happy spending my own money getting them if it wasn't for the fact I have too many tripods lying around at home as of current.
For absolute beginners/ ultra compact and portable: Leofoto "Mr Y" Tripod LY-224C + LH-25R
I really love how small, compact and light this tripod is! It is small enough to not protrude out too much when attached to a camera bag, and it can even fit inside some camera bags and luggages. This makes it super convenient especially for travelling, where the weight of your gears matter a lot. Despite its size and weight, it is sturdy enough to carry most setups (unless you shoot wildlife with long telephoto lenses).
The 2 center columns, and the addition of the reversible center column is super useful for low angle and even some macro work! I also love the interchangable lens feet. Replace it with spikes if you are using it on ice, sand or mud areas. This gives the tripod way more grip rather than just rubber.
While using it, I personally encountered scenarios where the tripod was not tall enough, eg shooting over railings in certain buildings, but hey for how small and compact it is, it should be more than enough as an everyday carry tripod. A clamp is an alternative to position your camera over the railings, but you must be really sure the clamp is secured.
Oh and did I forget? this tripod comes in multiple colours! Black, Yellow, Red and Blue! So pick your poison and select your favourite colour! I personally want to stand out the least so my tripod is often black, but hey colours are very cool as well.
Price (including LH-25R ballhead): Around 199 SGD for black version, around 20-30 SGD more for coloured versions.
https://photospheresg.com/products/leofoto-mr-y-tripod-ly-224c-lh-25r
https://photospheresg.com/products/leofoto-mr-y-tripod-ly-224c-bv-0r-lb-38-video-tripod
^ This one is for video shooters and has a fluid head at the top instead. Starts from 299 SGD.


For the one who wants a do it all pro tripod/ landscape shooters/ shoots in the worst weather conditions: Leofoto Tripod LS-284CPRO & LS-324CPRO (2023)
The one and only tripod I honestly think is worth considering for semi-professionals or professionals. Considerably quite light for its size, tall enough, durable enough and did I say "waterproof" ? Yep, this tripod has special seals within all the gaps as well as the twist locks, to keep water and sand out. While it is not 100% foolproof, this definitely saves you a lot of time in maintenance. Definitely recommended for landscape shooters who are always out and about. Since you are already spending so much for a tripod, if you are considering a pro tripod, why not just splurge a little and get one that is ready for whatever you may throw at it?
Price (standalone tripod): Around 418 SGD for 284CPro, 499 SGD for 324CPro
https://photospheresg.com/products/leofoto-tripod-ls-324cpro-2023


Part 5: Why I choose Leofoto
2 simple things. Warranty and great after sales support. Especially if you are in Singapore.
https://photospheresg.com/ is your go to for Leofoto tripods and accessories. They do sell filters and memory cards too. Products available at at their resellers M S Color, Riceball too where you can try your hands on the products before buying! Support local and check them out :)
Closing Comments
Thats about it folks.
Hope this helps you pick a new tripod! Remember to spend wisely and do proper budgeting!
There are MANY brands out there so just find a tripod that meet your needs at your price point.
If this is useful to you, please do share it around! I dont stand to gain anything much from doing these.
Spreading this guide around will definitely help others out in their journey :)
As far as I am concerned, I am one of the few "content creators" who do not make much income at all.
I do content for the fun of it first, rather than a paycheck. So I often don't vibe well on the business side.
It really takes far too long for me to do such posts honestly, this mini project has taken me an odd year.
Definitely looking to embark on bigger projects, but man 2025 has been such a terrible year for me.
Taking the time to rest, recharge and heal so that I can return to making even better educational stuff.
Cheers!
- YK Teo