

Advanced Shiprocket Integration for Botble Maketplace By Viral Addons
$49
🚀 Advanced Shiprocket Integration for Botble Marketplace By Viral Addons
Advanced Shiprocket Integration for Botble Marketplace By Viral Addons plugin integrates Shiprocket, India’s #1 eCommerce shipping solution, with your Botble store. It supports both Standard Ecommerce and Multi-Vendor Marketplace setups, allowing granular control over shipping logistics.
📌 Requirements
Mandatory: Botble Ecommerce CMS
Optional: Botble Marketplace (Only required if you want multi-vendor/seller features)
🏪 Marketplace / Vendor Support
Vendor-Specific Accounts: Empower your vendors to manage their own logistics. Vendors can link their own personal Shiprocket accounts via the Vendor Dashboard, ensuring they pay for their own shipping labels and manage their own wallet.
Isolated Operations & Data Security:
Admin Orders: Orders for the main store are processed via the Admin’s Shiprocket account.
Vendor Orders: Orders for a vendor are processed via that specific vendor’s Shiprocket account.
Data from one vendor never leaks to another.
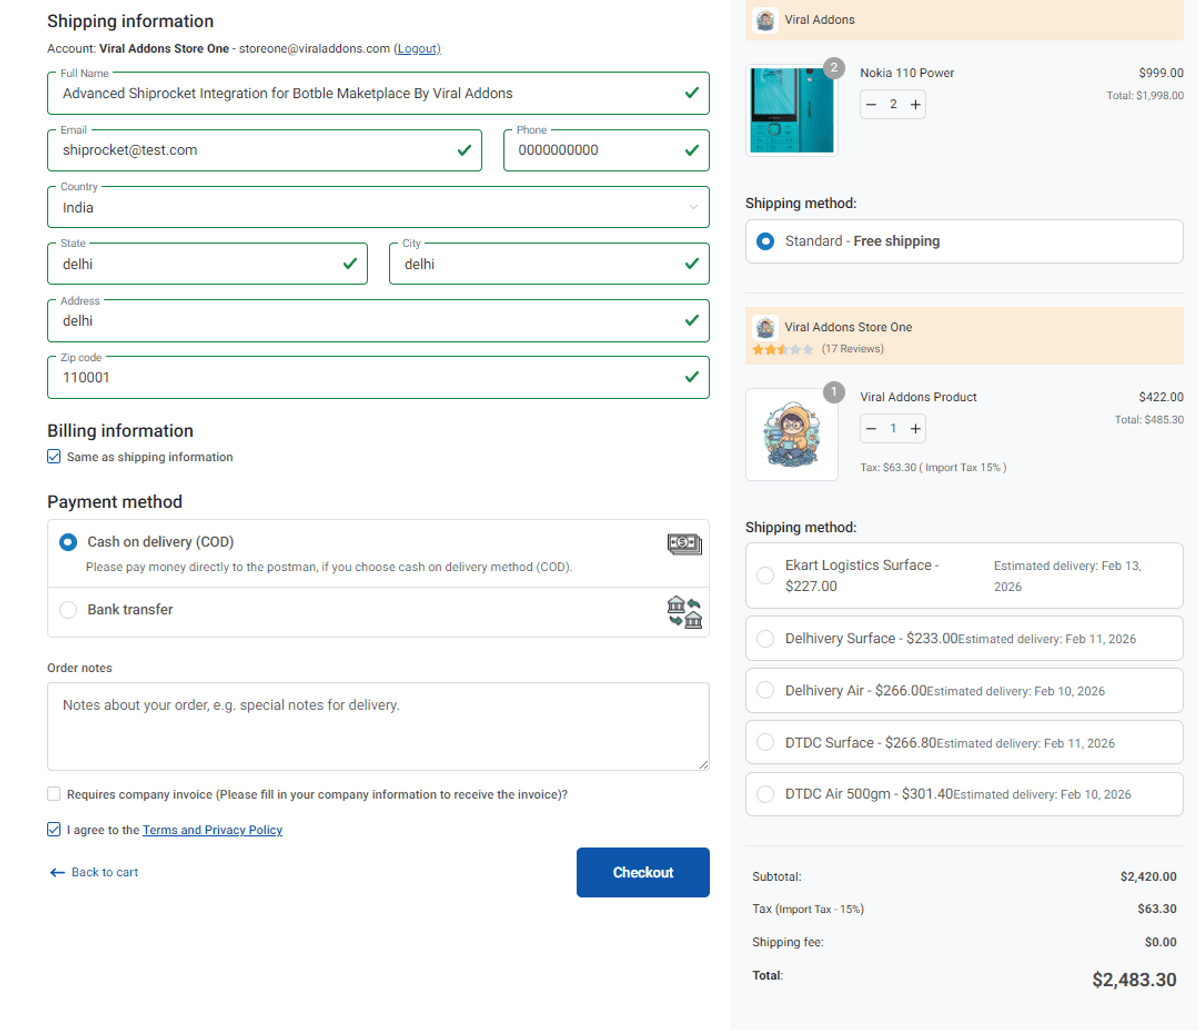
Strict Mode for Vendors: Prevent shipping conflicts. When a vendor enables Shiprocket, the system automatically hides all other basic shipping methods (like Table Rate or Flat Rate) for that vendor’s products. This ensures the only shipping option available is the accurate, weight-based Shiprocket rate.
Vendor-Controlled Free Shipping: Allow vendors to run their own promotions. Vendors can set their own “Free Shipping” rules (for example, “Free Shipping on orders over ₹999”) with a custom title. This overrides the API rate calculation when the condition is met, giving vendors marketing flexibility.
Pickup Location Sync: Ensure accurate logistics. Both admins and vendors can sync and select their specific warehouse or pickup locations directly from a dropdown in their respective settings panels, ensuring couriers arrive at the correct address for pickup.
🛠️ Installation
Extract
Unzip viraladdons-shiprocket.zip
Upload
Move the shiprocket folder into platform/plugins/
Final path: platform/plugins/shiprocket
Activate
Go to Admin Panel → Plugins
Click Activate under “Shiprocket”
⚙️ Admin Configuration
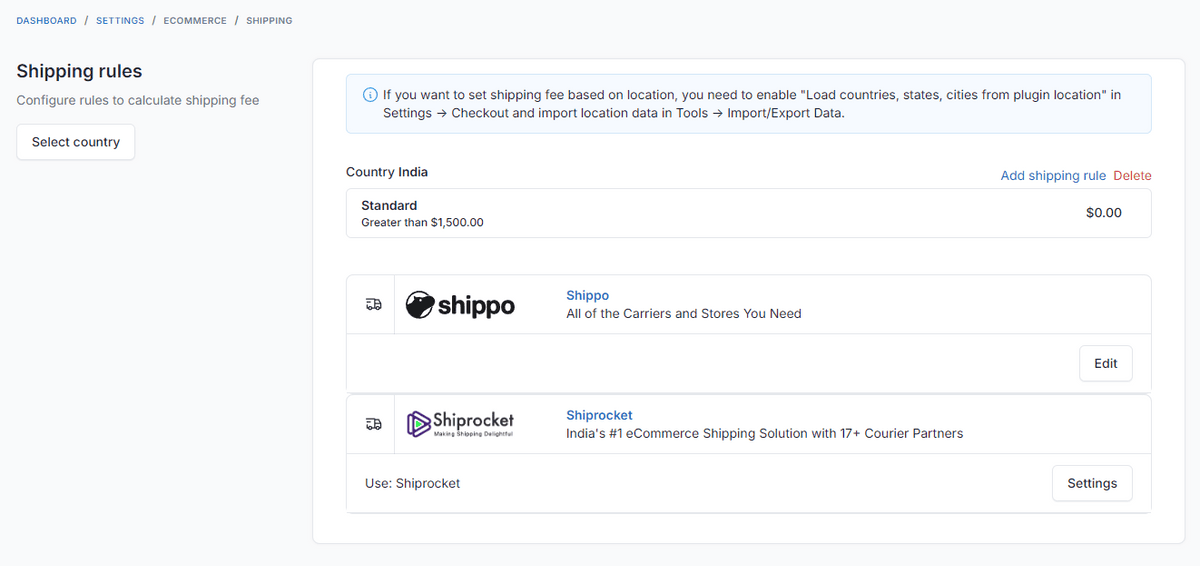
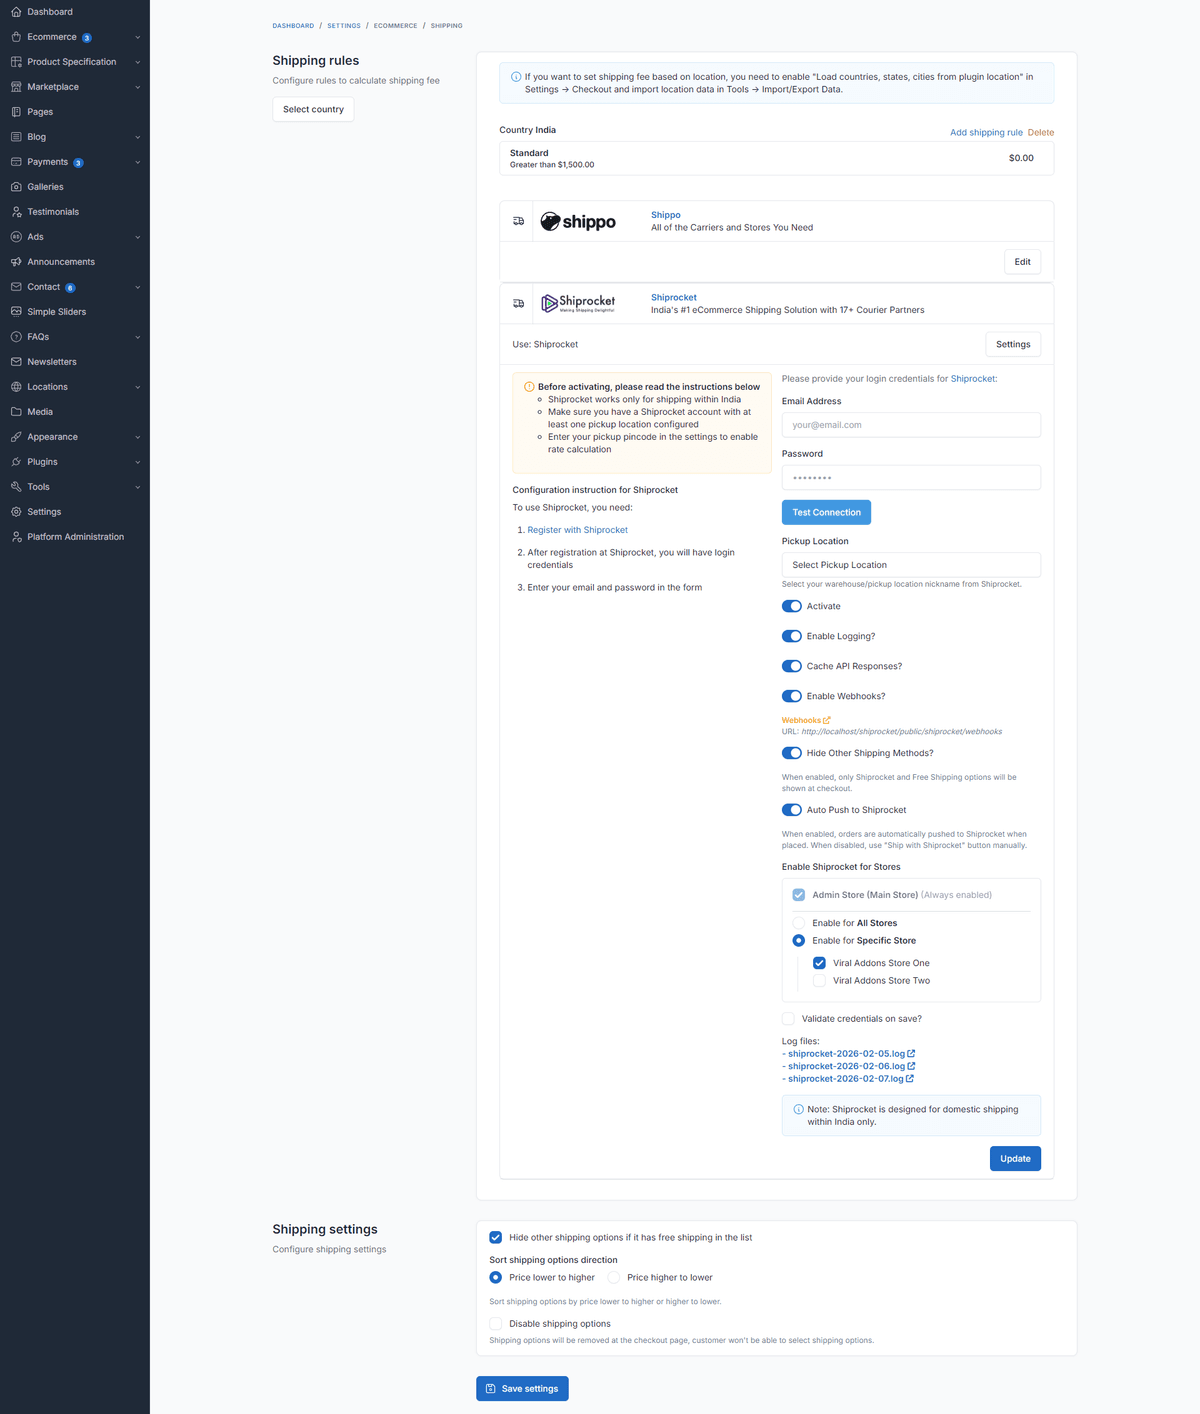
Go to Admin Panel → Ecommerce → Shipping → Shiprocket
Enable Shiprocket: Toggle to ON
Credentials:
Email: The email for the External API User (not your main login email)
Password: The password for the External API User (not your main login password)
Note: You can create an External API User in Shiprocket under Settings → API → Configure → Create New User
Test Connection:
Click Test Connection
If successful, it will load your Pickup Locations
Pickup Location:
Select the warehouse from the dropdown where you want couriers to pick up your products
This is mandatory for rate calculation
Store Availability:
Select “Admin Store” (always checked)
Select which Vendor Stores are allowed to use this plugin if running a marketplace
Auto Push:
ON: Orders placed for the Admin Store are sent to Shiprocket instantly
OFF: You must manually click “Ship with Shiprocket” in the order details
Hide Other Methods:
ON: If Shiprocket provides rates, hide Flat Rate or other static methods to force users to choose real-time couriers
📏 Important: Product Weight & Dimensions
For Shiprocket to calculate accurate shipping rates, all products must have weight and dimensions defined.
Edit Product: Go to Admin → Ecommerce → Products → Edit a product
Shipping Section: Scroll down to the Shipping box
Enter Data:
Weight (g/kg): Crucial for rate calculation
Dimensions (L × W × H): Required for volumetric weight calculation
Save the product
If these are missing, Shiprocket may return a fallback rate or fail to return rates entirely.
👨💻 Vendor Configuration (Marketplace)
If you are a vendor:
Log in to your Vendor Dashboard
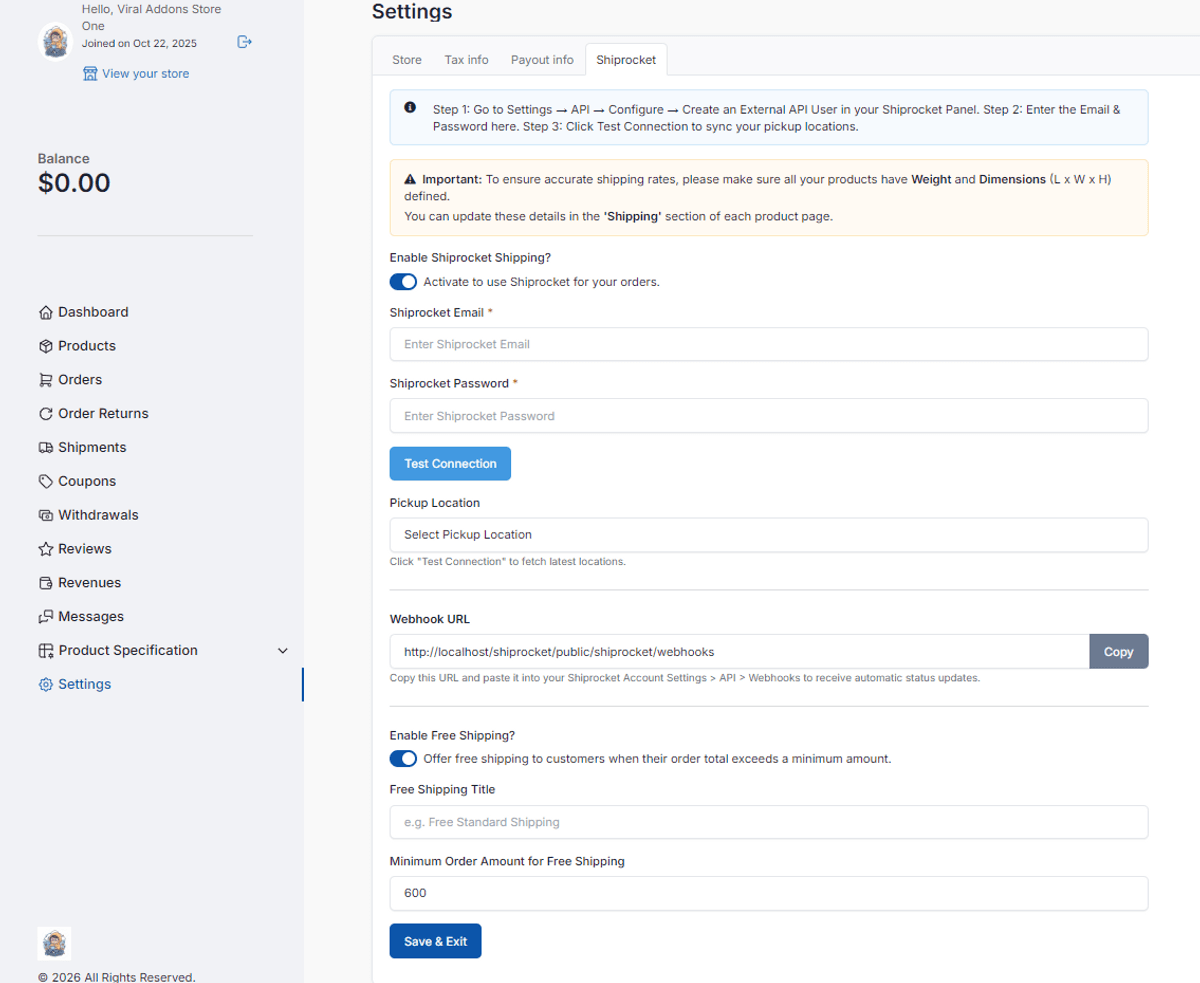
Go to Settings → Shiprocket tab
Setup Credentials:
Go to Shiprocket Panel → Settings → API → Configure → Create New User
Create an External API User (email and password)
Enter these specific credentials in your Vendor Dashboard (do not use your main login)
Click Test Connection to sync
Pickup Location:
Select your correct pickup location from the dropdown
Free Shipping (Optional):
Enable Free Shipping
Set Minimum Amount (for example, 1000)
Set Title (for example, “Free Priority Shipping”)
Result: If a customer buys ₹1000 or more from your store, they get free shipping; otherwise, they pay Shiprocket rates
Strict Mode:
Once enabled, other shipping methods are automatically hidden
🔗 Webhook Setup (Required for Tracking)
To receive updates like “Out for Delivery” or “Delivered” automatically:
Copy URL:
Go to Settings → Shiprocket (Admin or Vendor)
Copy the Webhook URL (for example, https://yourdomain.com/shiprocket/webhooks
)
Paste in Shiprocket:
Log in to Shiprocket panel
Go to Settings → API → Webhooks
Click Create Webhook
URL: Paste the copied link
Events: Select Order Shipped, Order Delivered, Order Cancelled, RTO Initiated
Click Save
📦 How to Process Orders
Method 1: Auto-Push (Admin Only)
If enabled, orders are automatically pushed to Shiprocket immediately upon placement. The system auto-selects the cheapest courier and generates an AWB.
Method 2: Manual Push
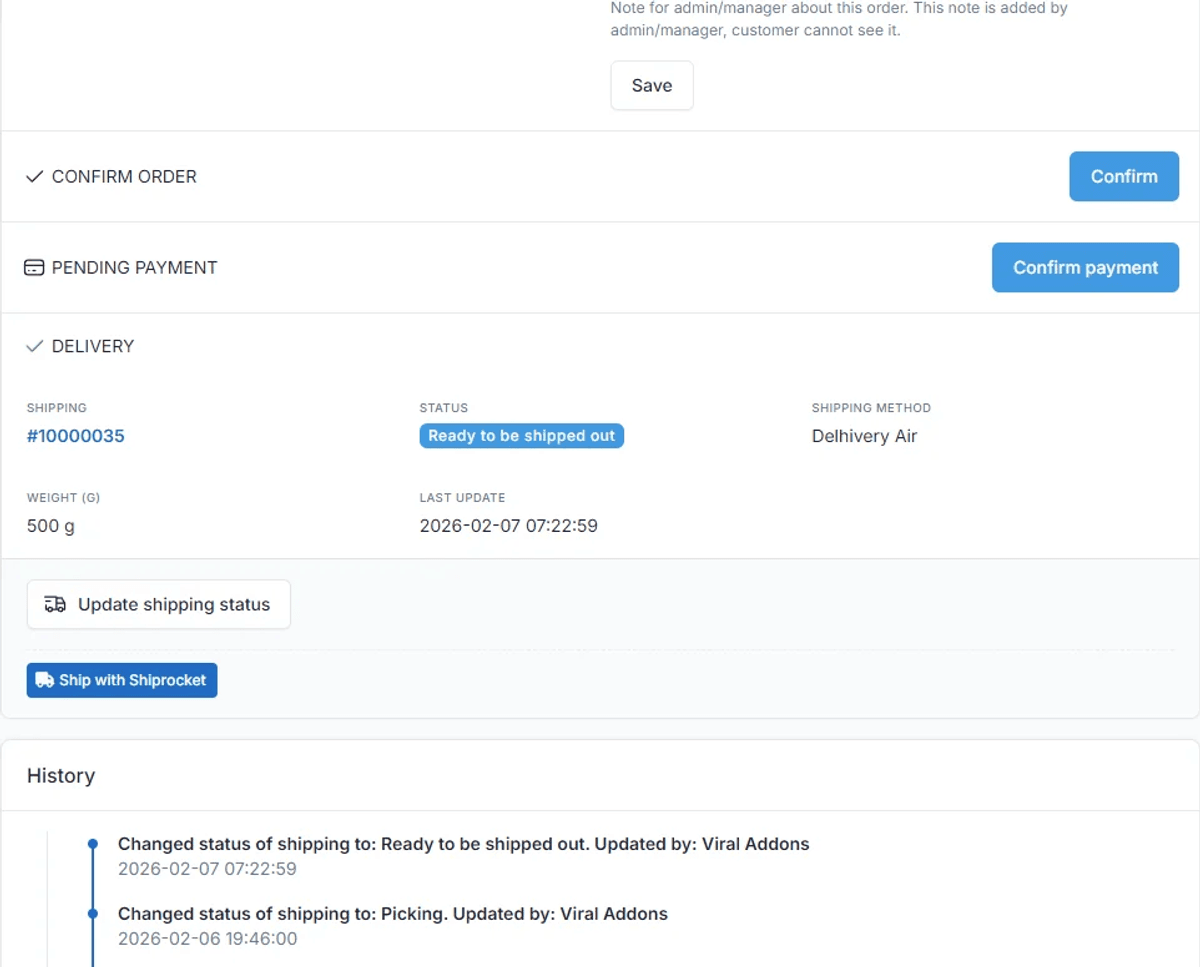
Open the Order Details page
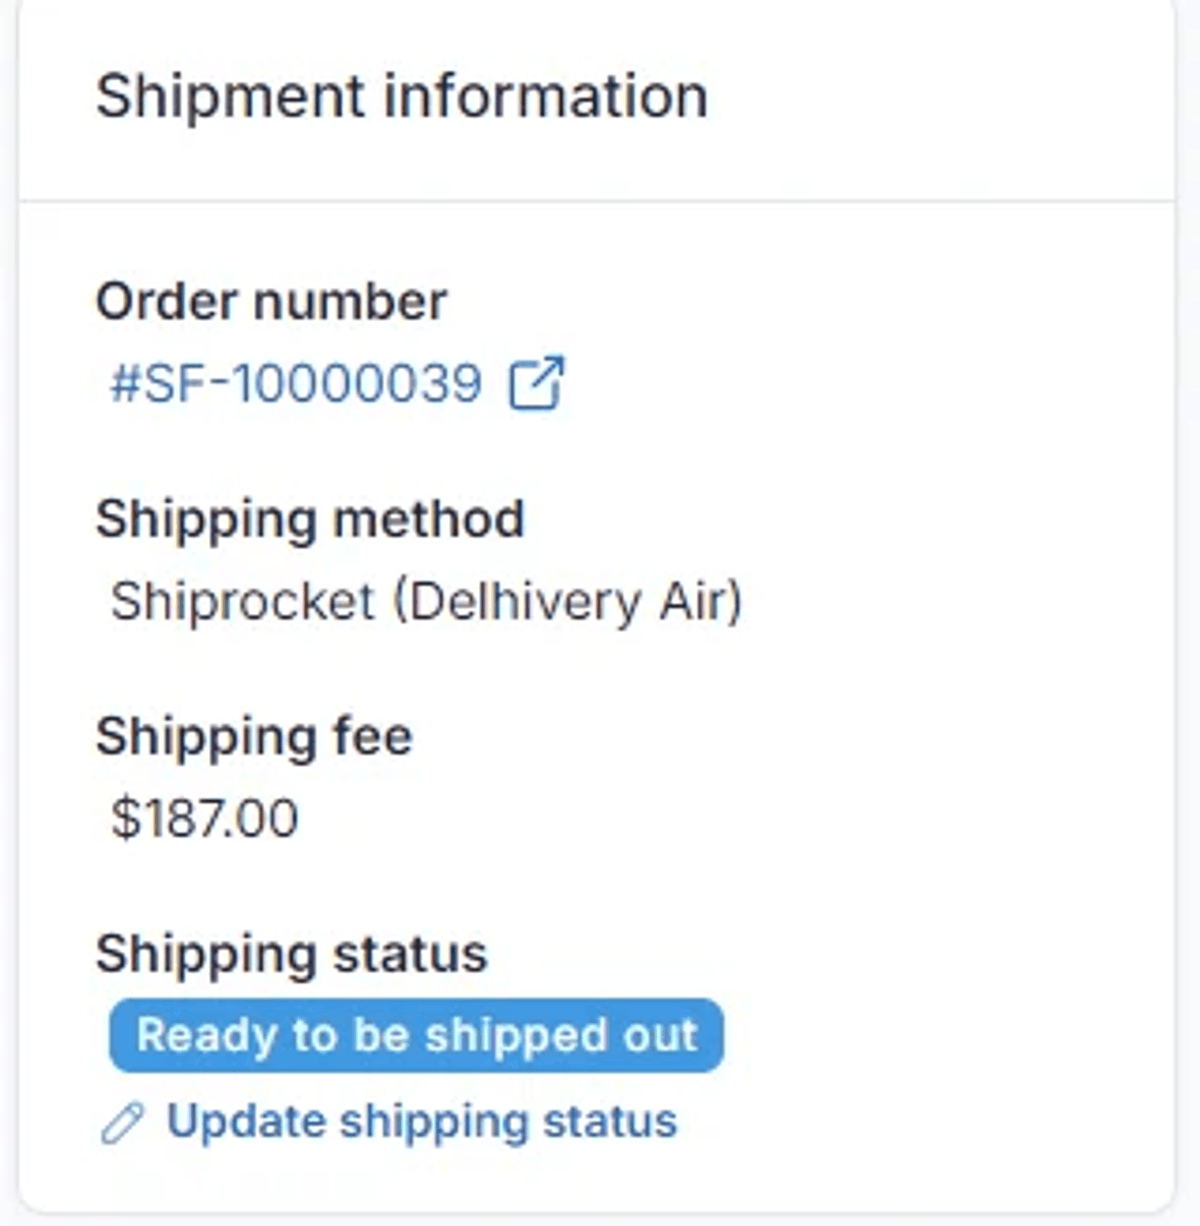
Locate the Shipment box (usually on the right sidebar)
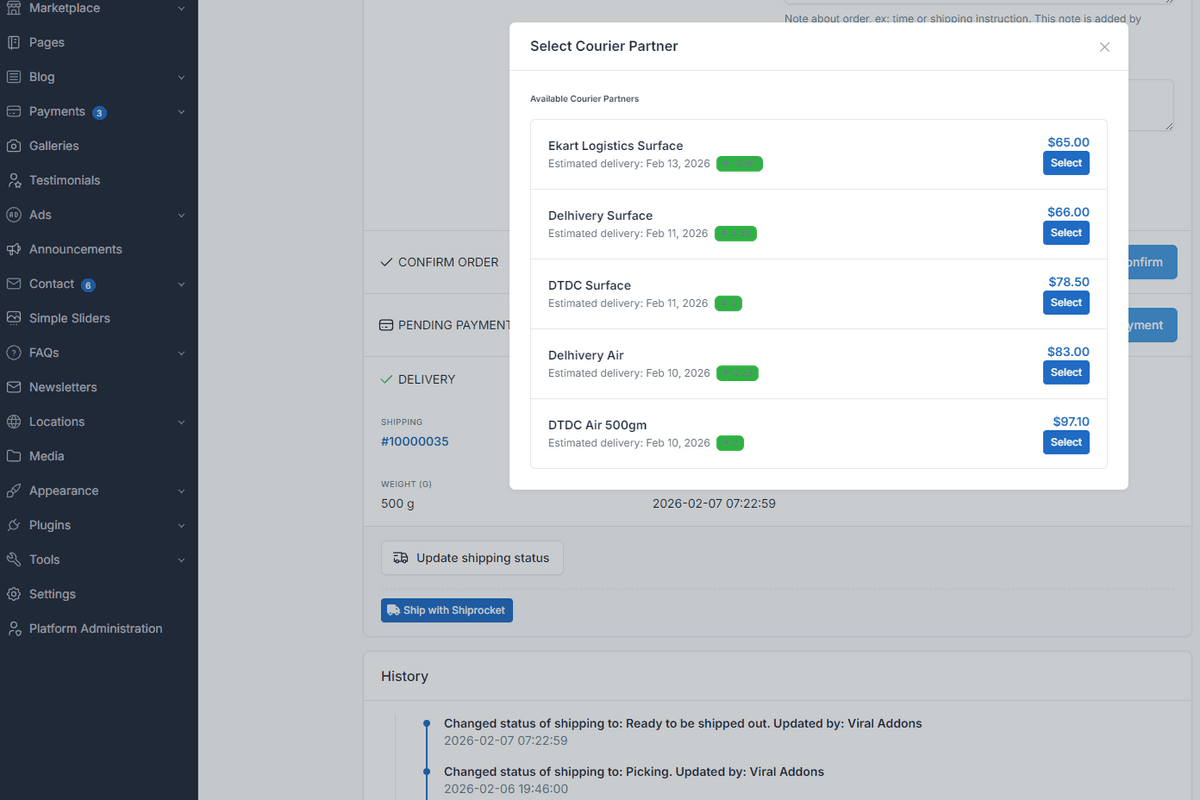
Click “Ship with Shiprocket”
A popup will show available couriers and rates
Select one to proceed
The order is created in Shiprocket and an AWB is assigned
🧾 Print Label & Tracking
Once the order is pushed:
Print Label: Download and print the shipping label
Track Shipment: View real-time tracking status
🚚 What Happens Next (Post-Push Steps)
After an order is pushed and AWB is assigned:
Pickup Scheduling:
Go to Shiprocket Dashboard
Navigate to Orders → Ready to Ship
Select orders and click Request Pickup
Downloading Labels:
Print from Botble Admin Panel, or
Download from Shiprocket Dashboard
Handover:
Paste label on package
Hand it to courier agent
Automatic Tracking:
Status updates to “Shipped” after scan
Further updates sync via webhooks
🛠️ Troubleshooting
“Invalid Pickup Pincode” or “No Rates Found”
Cause: Pickup location may not serve the area
Fix: Select correct pickup location
“Authentication Failed”
Cause: Incorrect credentials
Fix: Use External API User, not main login
© ViralAddons – Building Premium Botble Extensions.
$49
$49