

Welcome one and all to my February round up. I’ve had another exceptionally busy work month, so my evenings have not been such to allow me to progress much of my projects. Fortunately some weekend hours have been available and so I have been plugging away at a few things, and I’ll be sharing those below. Grab yourself your beverage of choice and let’s get started.
 ThoughtAsylum
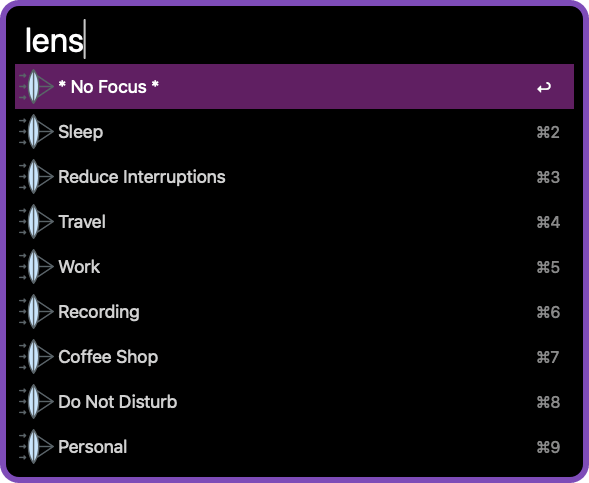
Over on my personal site, I wrote a couple of blog posts this last month. The first one was about a new Alfred workflow to allow you to change focus modes. The “Lens” workflow, which I mentioned at the end of last month’s update, is one I have been trying to create for several years in a flexible way, but Apple’s limitations had thwarted my efforts at every turn until I realised a small change in Shortcuts with Tahoe. While I would like to avoid any dependency on Shortcuts because you cannot bundle a shortcut with a workflow, it does at least now give me a way to flexibly trigger the enablement or disablement of any focus mode from a list of current focus modes. i.e. no more resorting to creating one shortcut per focus mode or one shortcut with a definition in it for your focus modes. Now, with no prior knowledge of your setup on any particular day I have an option that will deal with the available focus modes.
After releasing the 1.0 version I got some feedback that lead me to rework some of the workflow. Originally I had included jq in the workflow to deal with some of the JSON data, and this user had found they had to give permissions to the Mac privacy and security gatekeeper to execute it. That wasn’t something I had hit upon, but likewise I didn’t want that as a requirement so I rebuilt the JSON processing to remove that dependency.
It also turned out there was an issue not to do with jq, but to do with the files being analysed for the focus mode. The process accessing them needed the full disk access permission, so this means Alfred needs to be given it. To address that I updated the documentation and built some more pre-requisite guidance into the workflow to ensure the user provides that access. This was release as version 1.1, so if you are still on 1.0, enter the command “update lens” into Alfred to trigger the process to update to 1.1.
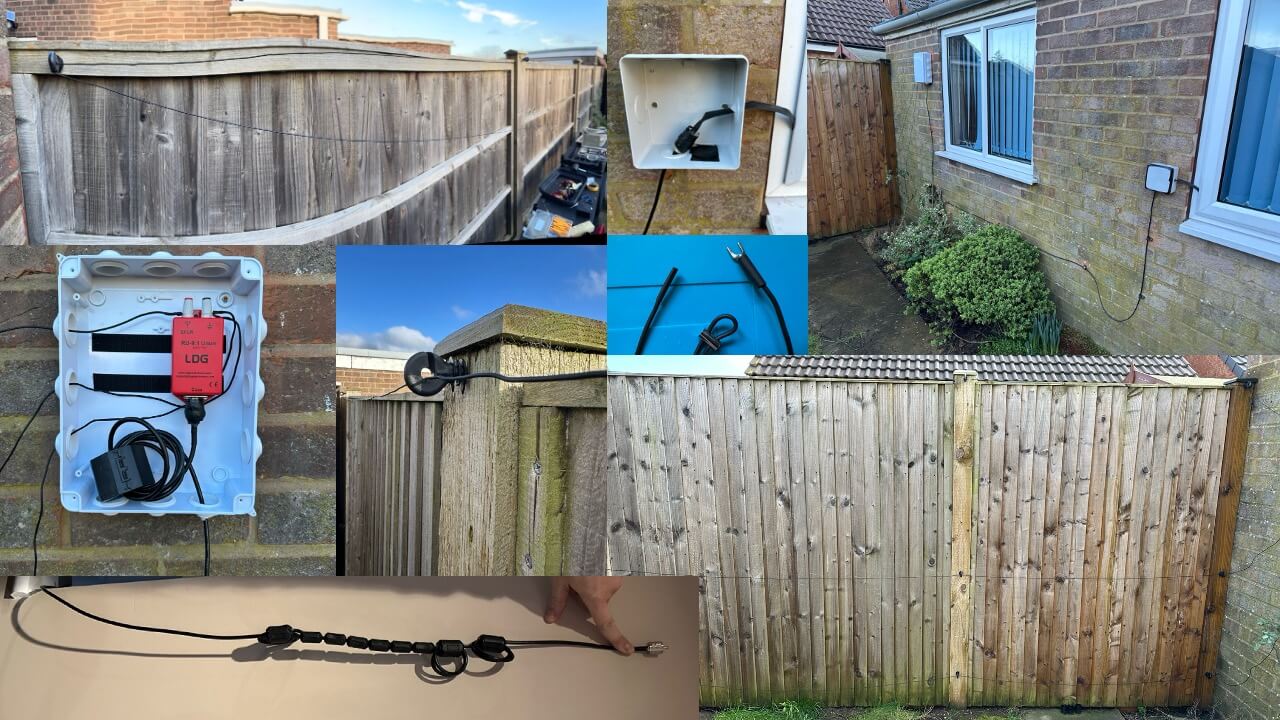
 I also wrote up some information about my first amateur radio antenna build. The post breaks down all the pieces that went into setting up a ‘random wire antenna’ in my tiny back garden. While this is one of the simplest antenna builds possible, I put in a fair amount of effort as I wanted it to work well and to last more than a matter of months. Whether it will or not is yet to be determined, having only recently finished it.
The post also includes some of the considerations and challenges I encountered with the build. Ultimately, the antenna works, though it is probably quite hard for it not to work to some extent. The question of how well it works is one that I am still working on. I need to spend more time with my transceiver hooked up to it, and while I had enough time this past month to do some testing, and this write up, I still have more testing to do.
 Forums
For the first time since it launched, I didn’t post a single thing on the Automators forum in the whole of the month. Nothing has been posted where I could add any additional value so I’ve not had any reason to post. I could certainly post about some of my own automations, but I try not to do that sort of thing too often. I’d rather offer up what I have as solutions when it comes to forum posts. Maybe it’s a British culture thing - I think most of us follow that national, reserved nature, when it comes to promotion of things. What do you think is reasonable, and if I did do this, would it really just be posting for the sake of not having a fallow month on posts?
Over on the Drafts forum however, there were a small number of things that drew my attention.
Drafts
The first one was something to do with an issue with Doctor Drafts, my Alfred Workflow for Drafts. There was a breaking change in Drafts that impacted the way the workflow worked. The fix was relatively quick, but the analysis to identify all such required changes took a little while - but everything is now up and working.
I provided an option for a request to store actions as text files that is based on some advanced processing I do with action groups.
Lastly, I noted to one user who was being impacted by a scrolling issue that there is a way to provide feedback to Apple as an end user.
Other
I don’t know how much the limited forum interactions had to play in this, but I managed to crack-on with a number of things in the first week or so of February before things plunged into a whirlwind of work. There is definitely an overall hardware theme to it this time too.
Mac Automation (Stream Deck Plugin)
My "Mac Automation" plugin for the Elgato Stream Deck got a little bump on the documentation this month with some expanded explanations around the Keyboard Maestro action after a request from a user.
I am always happy to receive feedback and make improvements, so if you have any suggestions, do log them on the GitHub repo. There’s one feature request in at the moment for an Alfred external workflow triggers action that I need to look into. I have some ideas logged on the thread and just need to spend some time looking at it - but would that also be useful to you? If so, let me know.
Conductor for Marked 2
Not to be confused with my Alfred workflow for Keyboard Maestro of the same name, Conductor is a pre-processor for Marked 2 by Brett Terpstra. It is Marked 2 I use for a few of my writing workflows, including the one I use to write this post to publish on Buy Me a Coffee (BMAC).
As part of writing the post I had been using placeholders for the images I include. My Conductor configuration transformed the placeholder (which I can easily see when I add the content to the BMAC post editor) and made it stand out as a block in Marked 2. This just gave me a clearer sense for laying out images and where perhaps an additional image would be useful to break things up. What I would have preferred however was to include the actual images.
Up to now I just stored the images in DropZone as I was building the post. I would drop the images on the drop bar and retrieve them when posting. I have now changed this and I am storing the images in my Drafts preview folder. By storing the files in a specific, Drafts Preview accessible location like this, it meant that I could modify my Conductor configuration to take my placeholder and replace it with the image HTML that would point to the associated file.
The modification takes a placeholder like:
%%COFFEE.JPG%%Then via a call to a Ruby script, it transforms it to:
<img src=“/Users/stephen/Library/Mobile%20Documents/iCloud%7Ecom%7Eagiletortoise%7EDrafts5/Documents/Library/Previews/images/BMAC%20Post/coffee.jpg”>A small workflow change and a small script addition gives me a small improvement to my workflow for writing this very post.
Cough Switch
For quite a few years now I have been using a Shure XLR microphone as my desk microphone. It gives me some directionality of pick-up in my home office (which I share) and improves the audio quality significantly over my previous Blue Yeti (still a decent microphone I mighty add). That audio quality is good for everyone else when I’m having my many video calls for work, the occasional podcast (guest) recording, and it gives a good clear source for audio inputs for dictation, etc.
When I moved away from a USB microphone to an XLR microphone, one thing I did then miss out on was an effective mute option. While I am using a USB audio interface (a Focusrite Scarlett Solo), on device muting never triggered quickly and cleanly enough for me to rely on it. Given I am prone to coughs year round, and surprise sneezes in hay fever season, I prefer to be able to spare any listeners from such intense and random sounds.
In order to deal with this initially, I created a cough switch. This is a button that shorts, and so mutes, the audio line when a button is pressed. My first attempt at this is something that was 100% what I would refer to as a “bodge”, though across the world, a more common description might be ‘crude hack’. I took a short XLR cable, sliced open the sheath, cut some of the wires, and then spliced in a button by just soldering some connections to the wires and the button. The button is a ‘momentary switch’ and does not latch into an on/off state, but is ‘on’ (i.e. shorting/muting) only while it is depressed by someone pressing it in. With that all bundled into a small plastic electronics project box, I stuck it to the underside of my desk and connected it inline between my microphone and my audio interface. Then all I had to do was reach under my desk and press the button. Very subtle and even given my terrible soldering and throwing it together it worked flawlessly for maybe half a decade or so.
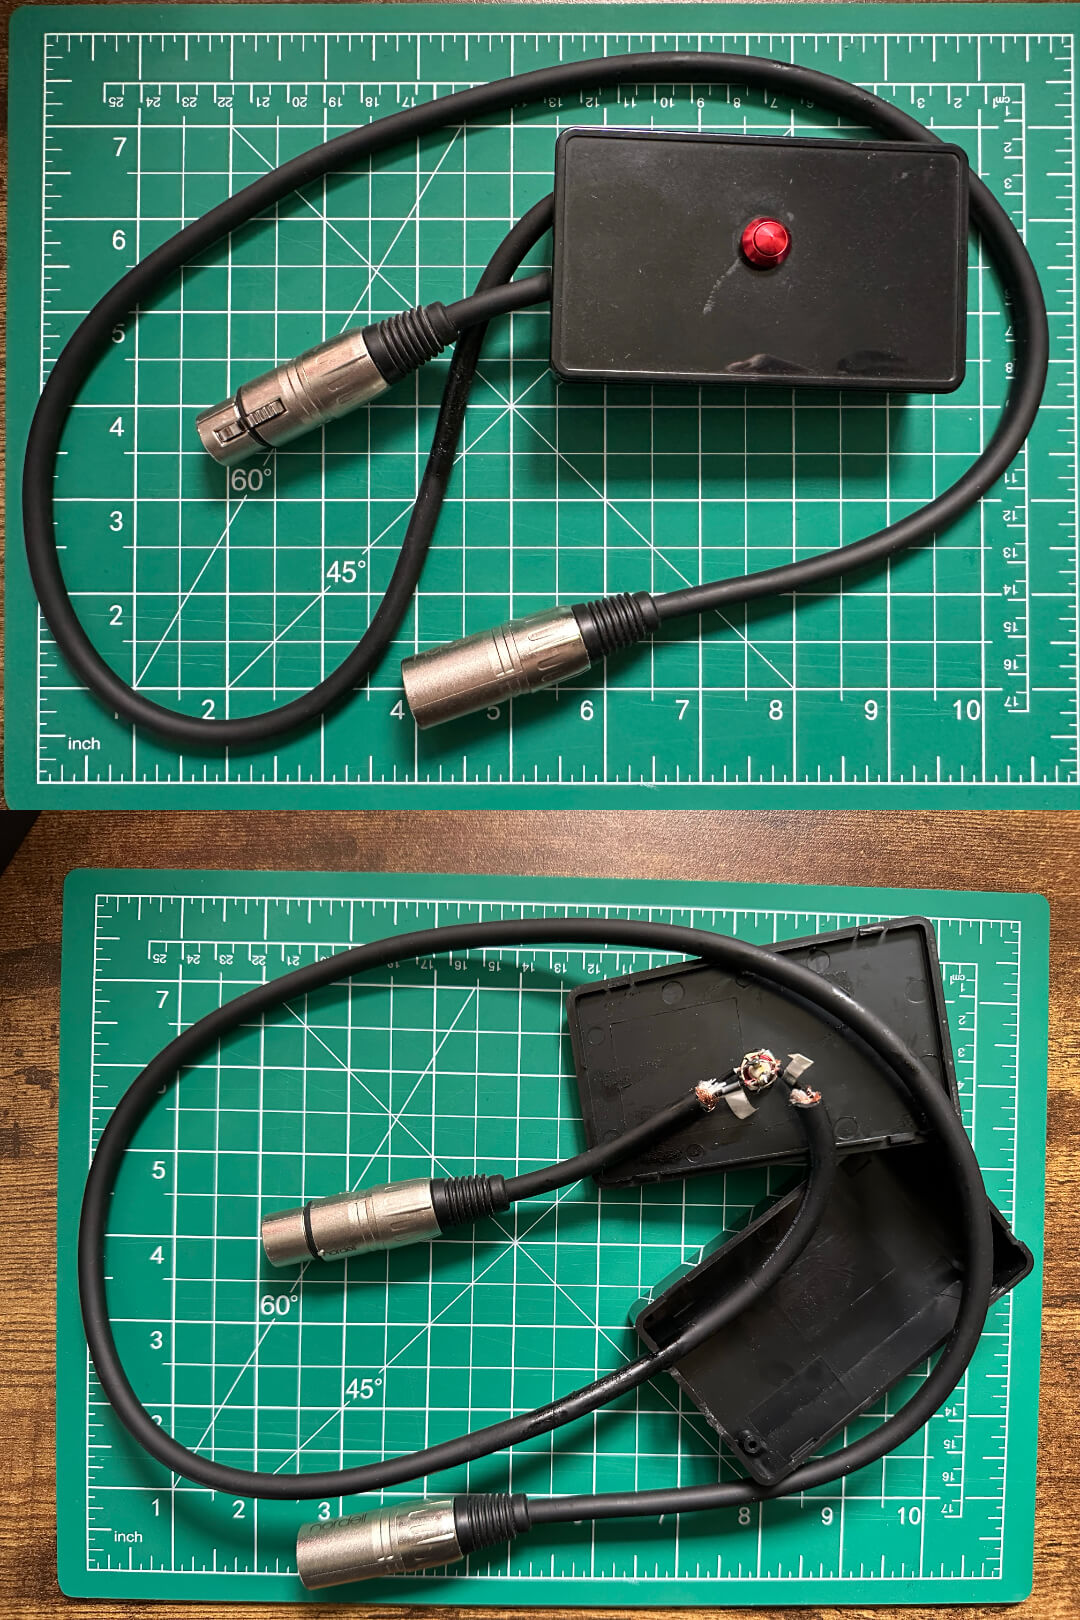 Note that I did add a bit of extra insulation around those connections shown in the photograph. It was just using electrical tape, but it worked.
Of course, stuff like this is not built to last, and at the start of the year I started getting problems with my audio dropping out on calls. Relatively quickly, I discovered that if I removed my cough switch things were stable. Obviously the connections had degraded or the switch was starting to fail. Whatever the issue, it was obviously time to replace it and I decided I wanted to do a better job this time.
I had access to a lot more equipment now to help me doing a better job and after a bit of research I came up with a version 2. This time I would 3D print a custom enclosure and use a male and female panel mount for the connections rather than Frankenstein-ing a cable.
I found a fantastic parametric project box for 3D printing. It gave me all the functionality I needed and I could tweak it to add all the cut outs and bolt holes I needed. I would recommend this, but you do have to go in and modify the OpenSCAD code to meet your needs - but there are plenty of comments, and I am sure even if you are not familiar with OpenSCAD, your LLM du jour could help you out.
I purchased some XLR panel mounts (male & female), along with a momentary switch, and some tiny screws and brass inserts for the box cover.
Now, my soldering is terrible. I have never had much luck with it, and while I can solder a little, I need practice and I could do with some proper hand-on training (I am keeping an eye out in my local area). My results are most certainly mixed, and while I can tin the tip, flow the solder in wires given some flux, and get the solder to mostly stay in the right place, it is never pretty and I do find it frustrating. But nothing prepared me for soldering XLR pins.
I watched a good half dozen videos on soldering XLR pins before I started, and I could follow everything just fine. Every one of them was soldering to pins on an end connector for a cable. No one was soldering panel mounts. Trying to solder the panel mounts was fraught with issues. Getting enough heat into the pin sockets on the mounts was tricky and I had to up the heat on the soldering iron to do it. Unfortunately, on one of the mounts this actually loosened the pins in the plastic part of the housing. After a mis-wiring (I still don’t quite understand how I did that - I followed my own diagram and somehow misread my own notes) and re-soldering, one of the mounts basically gave up and the pins just fell loosely and one even same out. I purchased a replacement, and once again went through the frustration and pain of getting the pins hot enough to accept the solder and hold a wire. The constraints of working with the box and shorter wires than the YouTubers was a non-trivial pain point for me.
In the end after probably five or ten times the time it would have taken someone more experienced and competent at soldering, I had a beautiful new cough switch.
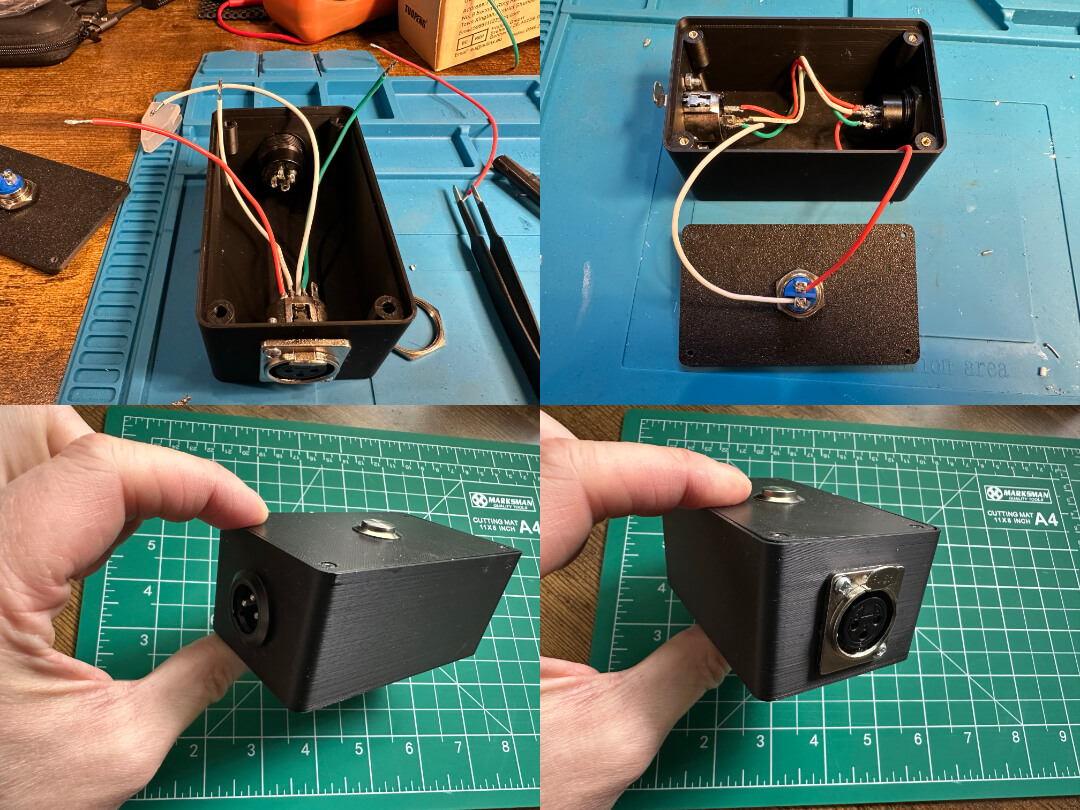 It had taken considerably longer than I had expected to get the pieces and get it put together, and I was a little put out by the cost of some of the components (each panel mount costs much more than a short XLR cable for example), but I now had a much more robust cough switch.
All the electrical continuity tests passed, and it definitely muted cleanly (no popping sounds) and quickly. It also added a not so nice hum to all my audio. I spent many hours checking connections and rechecking anything I could think of. It was frustrating given how well my first bodged version worked. My conclusion in the end was that the shielding on my first switch’s cabling was the difference and why that had never given me a hum. So to get this version working I was probably going to need to throw it out and start afresh with new panel mounts, new shielded cabling, etc. I could reuse the box and the button, but the other parts would have to go.
And that is when I decided to cut my losses. Until I have more skill and experience I didn’t want to put myself through another afternoon of frustration on putting this back together, and while I am pretty confident that the lack of shielding is what was causing the hum, I don’t know for sure, and I could just be throwing more time and money into another thing that doesn’t work and is not in the least bit fun for me to be doing.
I had originally discarded the option of purchasing a pre-made cough switch because I would have to import a decent one, and they are not inexpensive. However, after looking at the problem from a different perspective I found a solution I was willing to drop the cash for so that I was back to having a workable solution and I didn’t have to spend any more of my valuable time battling with XLR panel mount pins.
Rather than a dedicated cough switch I realised I could utilise a switcher. For some reason switchers that change an output between two inputs (or vice versa) are cheaper than cough/mute switches. Most of these are dial like switches rather than buttons, but I was able to find one that incorporated a momentary switch. It is intended to allow performers to switch between studio speakers and speaking to the person running the mixing desk. If I just connected my microphone and my audio interface, then switching would connect my microphone to a disconnected output channel, and there would be no input connected to the audio interface.
While it was more than I had wanted to spend, like I said, I was cutting my losses at this point, and it did have the advantage that it is intended to be used as a foot switch, so I don’t even need to reach under my desk to find it and while I had expected it to be difficult to find with my foot, it has proven surprisingly easy to do.
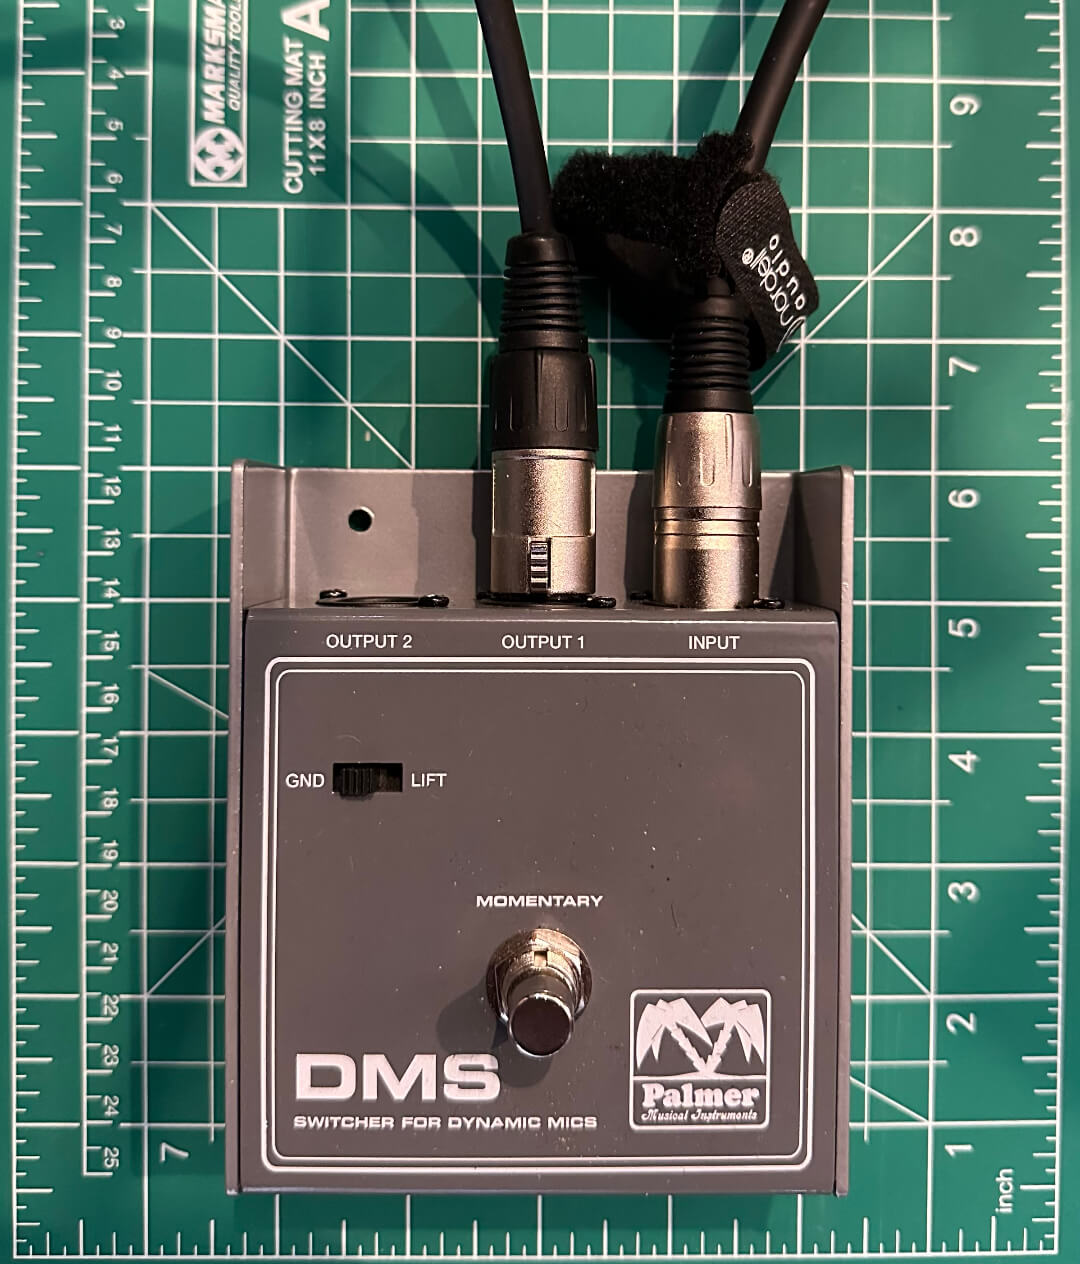 My only remaining change to make is on the XLR cables that connect to it. Because my original cough switch was under desk mounted, the distance between the interface and the switch, and the microphone and the switch was constant. Floor mounting is different in that my desk is a sit/stand desk. The XLR cables I am using are sufficiently long to reach the floor when sitting, but not standing. As a result need to swap the long microphone cable to the audio interface, and buy a longer cable to use with the microphone. I also need to figure out how to manage the cables when sitting so they don’t trail - probably some sort of flexible cable manager - maybe a 3D printed one.
This is the mini-project that just keeps on giving, and costing, which makes me wonder if I should have just bodged a new instance of my first version switch.
Mac Amateur Radio
One of the other amateur radio pieces I started looking into this month was connecting my Mac Studio up to my Xiegu G90. To do this I acquired a Digirig Mobile, which is a device that simplifies the cabling to hook up a computer to a transceiver so that you can use digital modes.
It is important to use a suitably shielded USB cable to connect the Digirig to your computers because of working with sensitive radio equipment, risk of common mode current, stray RF, etc. Most USB cables don’t require this because you won’t be using them with something like a transceiver, and RF shielded USB A cables are available in the UK if you look for them explicitly, but it seems USB C versions are not so easily come by. As a result, I ended up ordering a Digirig USB C cable form the US - which sadly more than doubled in price to get it over to me in the UK.
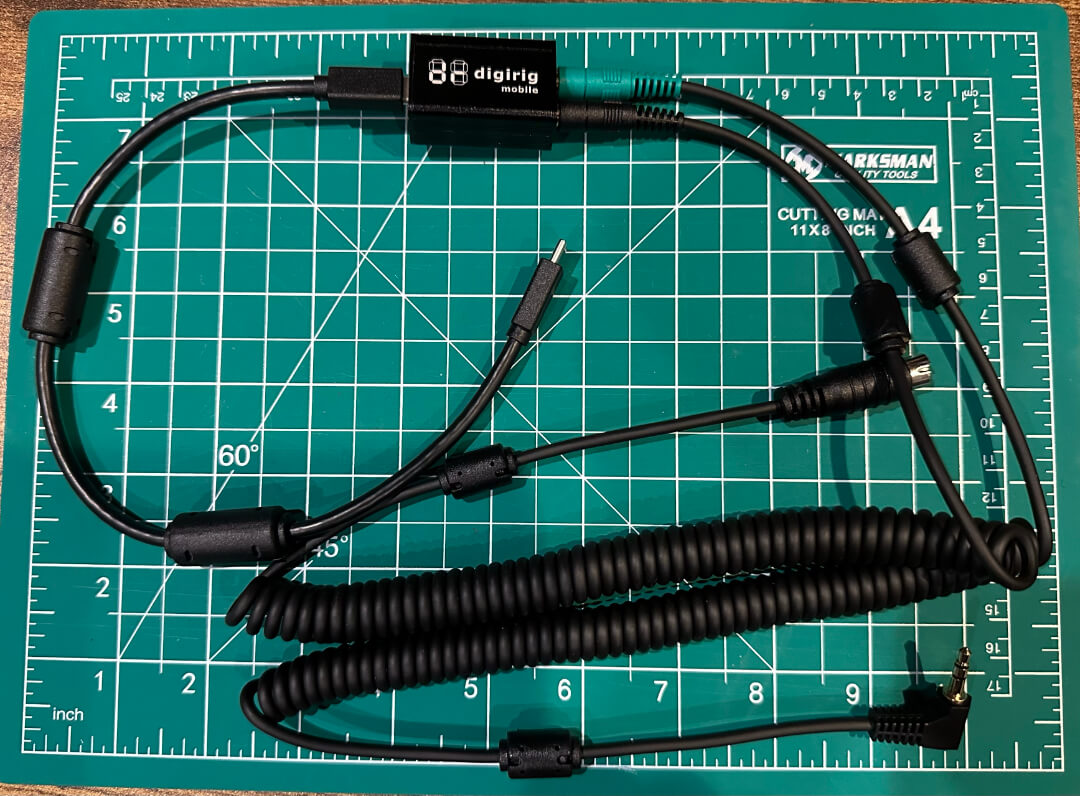 With the hardware in place, I needed some software to get things hooked up, and for that I chose two applications.
The first was FLRIG, a transceiver controller application that allows the Mac to talk to the transceiver (via the Digirig), and control it. It acts as an intermediary and translator for other applications, but it also needs CP210x USB to UART Bridge VCP Drivers, so I had to install those too, and do pay attention to the installation instructions alongside the app. They give you a file to instal that will address some pesky memory errors you will get otherwise - I did not spot this on first install.
Secondly, I installed WSJT-X , which is software that then allows you to run digital modes with as FT8 and WSPR via your transceiver.
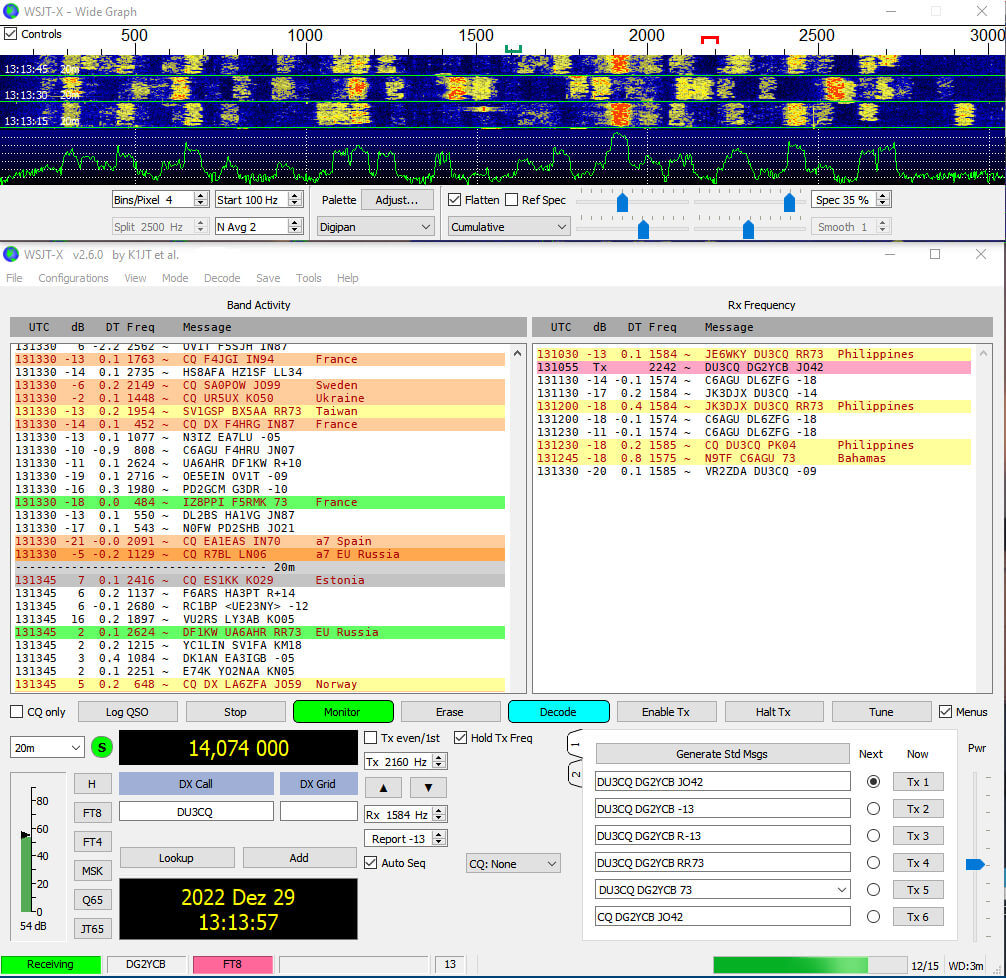 While it is possible to go straight from WSJT-X to Digirig, I believe flrig does give some versatility in that it can be used across a range of apps. Given I will likely experiment in future I figured I would put that one on my Mac now.
Link
On to a few interesting links to share. This time I have an editor extension, a command line utility, and a Mac app to tell you about from my tinkering and problem solving this past month.
Mermaid in VSCode
As someone who works on the front line with technology on a daily basis I often need to put together diagrams to explain or document system interfaces, processes, and other data. While I have access to the basic online version of Microsoft Visio for diagramming, and Microsoft PowerPoint for some of the simpler block or styled presentation diagrams, using Mermaid diagramming fulfils a prominent place for me. At least half of my diagramming is done in Mermaid as I find them easy to modify and not have to reformat - though it is definitely a bit hit and miss how nice some of the diagrams look. I also have a few scripts that can take data sources and generate some diagrams for me.
Another benefit is pretty much any large language model (LLM) AI is capable of creating quick diagrams in Mermaid. These can help you understand concepts and processes faster as well as being presented in a portable and editable format.
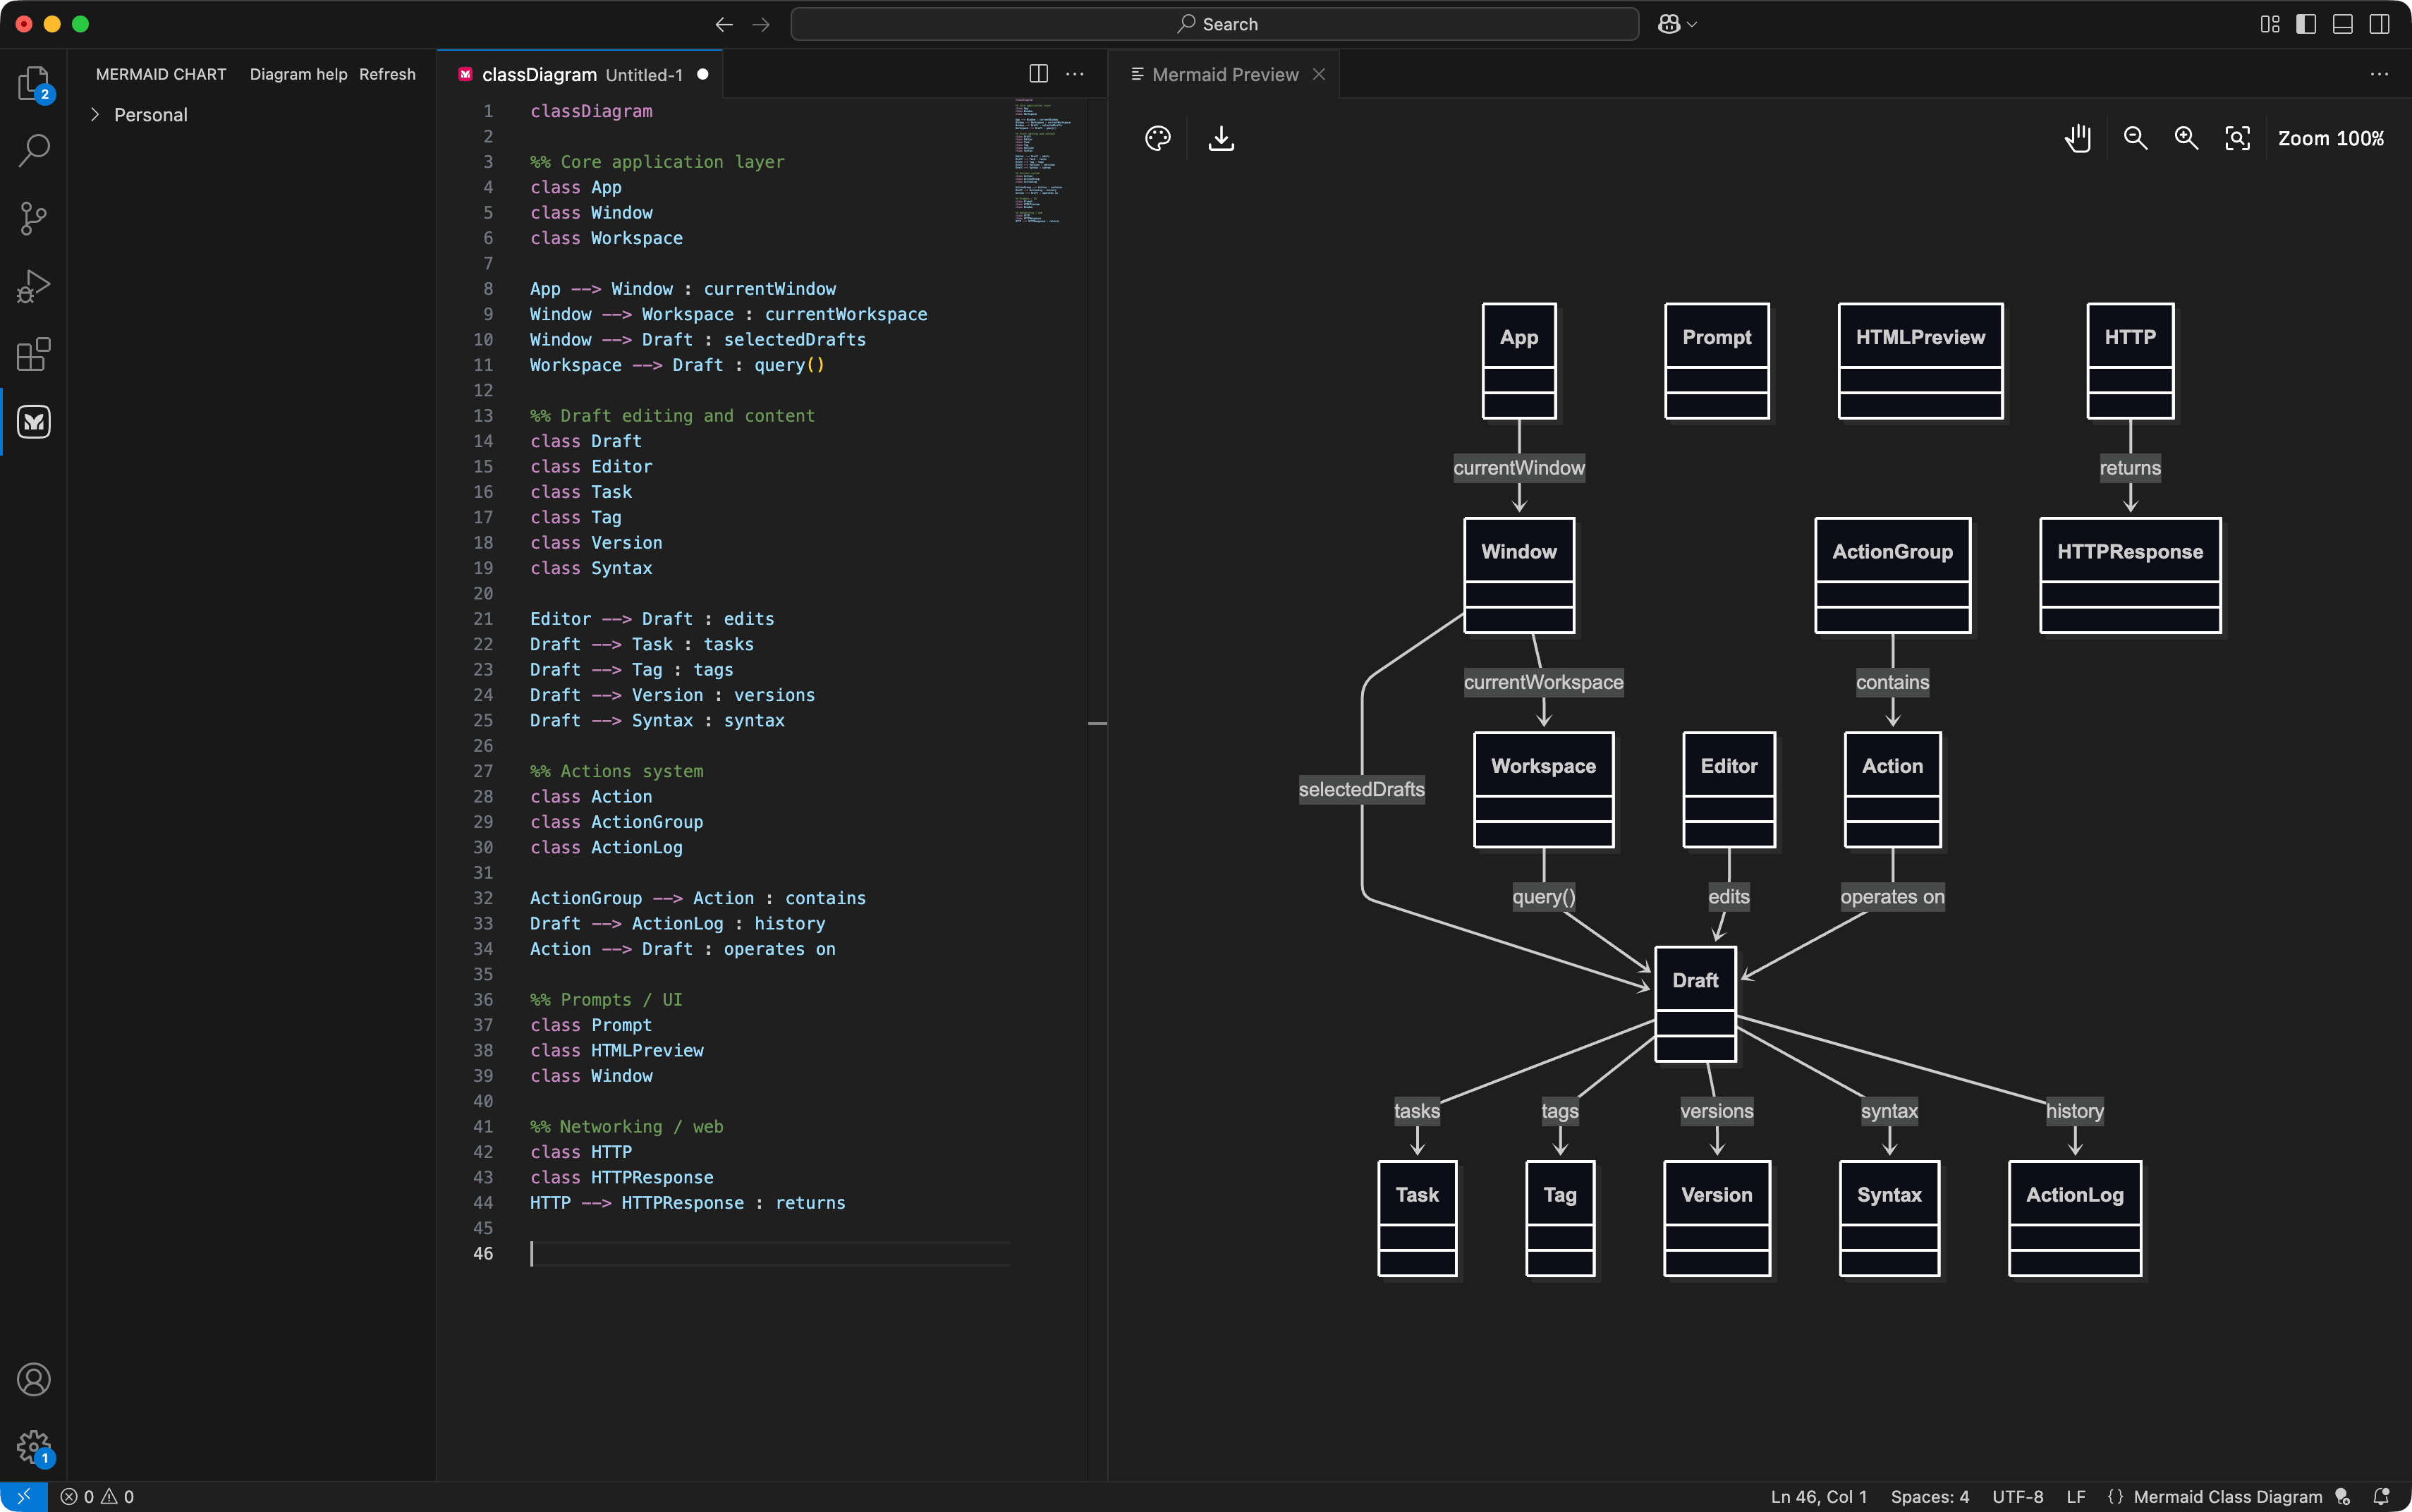
While I do love that Obsidian has built-in support for Mermaid diagrams, I have found that VS Code is an ideal environment in which to build new diagrams, and I can just store separate Mermaid files, which is beneficial when trying to keep things as modular as possible and version controlled of course. But, VS Code needs a little assistance for this functionality in the form of the Mermaid editor plugin. It provides support for the syntax and live previews, as well as access to boilerplate starting points for each type of diagram.
If you need to create diagrams, then this plugin for VS Code is worth checking out.
 Apex
Apex
The second link I have for you for February is Apex, a Markdown processor created by Brett Terpstra.
Why do I need a(nother) Markdown processor? Well I used Markdown all over the place, and I use different processors in different places. Github Flavoured Markdown (GFM), and MultiMarkdown in Drafts, Kramdown for my websites, and vanilla in many other places. Apex actually gives me the power of all of these in one package. It also allows me to include meta data to drive what options are used so I can vary the options used between files. In fact if I use this in Marked 2, I can also utilise Conductor and insert that meta data based on other criteria such as the source application or file location.
Apex is also extensible, providing a plugin system so you can build out the processor to meet your own specific needs.
If you consume Markdown as rendered page content, take a look at Apex, it will give you so much flexibility and power that you will be able to not only set your own flavour of Markdown processor but season it to your personal tastes too.
Quick Camera
The final link is for Quick Camera, a free utility app that lets you display a USB web camera in an onscreen window. This is useful should you need to record or transmit your screen and don’t have any additional software to put any picture-in-picture (pip) for it. You can just bring this window onto your screen and it will display the feed into your recording/sharing.
This was something I had as a backup recently in case I could only share my screen or my video feed. It turned out that there was a facility to do both available, but it was handy to have this simple utilitarian app as a backup I knew I could rely upon.
Upcoming
In January’s round up I mentioned a video I recorded for the MacSparky Labs community that was due for release in February. Well, it was delayed a little and it was published in early March, so I will cover that in my March round up, but for any MacSparky Labs members who are reading this, please do go and check out the video if you have not done so already.
The day job has taken up a lot of time in February and the same is true for March. It is going to be a rough month time-wise. It has taken me over a week just to make the time to write this post, so I’m expecting it might be a lighter month for getting my personal projects progressed - but I will make some progress and be back to cover it next month.
Thank you to everyone who has bought me a coffee, and everyone who has subscribed to following along with my monthly reflections. I really appreciate it and I am humbled by the positive feedback I have received recently from several of you. I will do my best to keep putting some curious and interesting things out into the world and I look forward to having the company on the journey as I do.
Have a great March everyone and I’ll be back in April for my March round up.