

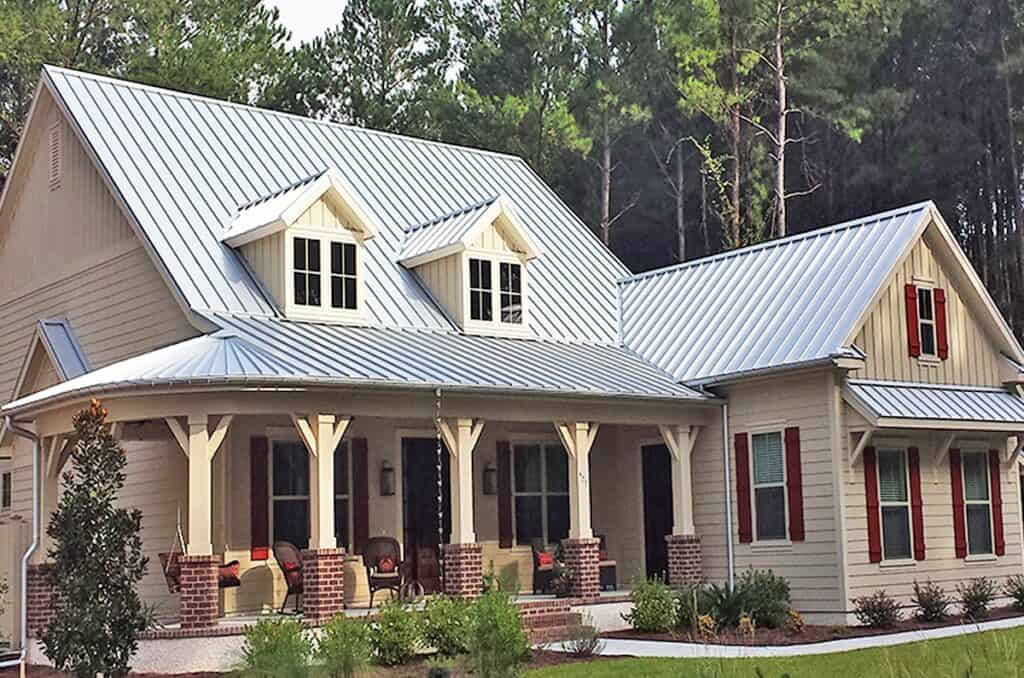
 High energy bills can begin overhead, where relentless sunlight, inadequate insulation, hidden air leaks, and unbalanced attic airflow make cooling equipment run longer than necessary. Expert roofers examine the full roof assembly rather than treating shingles, decking, ventilation, and insulation as unrelated components. “Homeowners should look at how the entire roofing system handles heat, air, and moisture, because reflective shingles cannot correct soaked insulation or obstructed ventilation beneath them,” an Advanced Roofing representative said. Detailed planning can reduce heat transfer, stabilize indoor comfort, and direct repair funds toward improvements that address the home’s actual sources of energy loss.
Examine the roofing surface, attic, insulation, and ventilation together.
Compare each upgrade with the roof’s age and estimated remaining life.
Repair leaks, air gaps, and moisture damage before adding efficiency products.
Document current utility costs so future improvements can be measured.
Expert Roofing Methods for Reducing Energy Use
Homeowners may notice that upstairs rooms remain stuffy after sunset, the air conditioner runs for extended periods, and monthly electric bills rise even though thermostat settings have not changed. A thorough inspection could uncover heat-absorbing shingles, insulation shifted away from attic edges, clogged soffit vents, or narrow ceiling openings that allow cooled air to escape upward. “Advanced Roofing recommends tracing heat from the exterior roofing surface through the attic and into the occupied rooms, since an expensive product will not always correct the weakest part of the system,” the representative said. That methodical evaluation helps determine whether reflective roofing, air sealing, insulation repairs, or ventilation corrections should receive attention first.
Note which rooms become uncomfortable earliest in the day.
Track how long the air-conditioning system runs during peak heat.
Compare current utility bills with the same months from prior years.
Request attic observations alongside findings about shingles, flashing, and decking.
1. Select a Cool Roof That Reflects More Sunlight
Cool roofing materials reflect a greater portion of incoming sunlight and release absorbed heat more readily than many traditional surfaces. Reduced surface temperatures can limit the heat passing through the roof deck and into the attic, easing some of the strain placed on air-conditioning equipment during demanding summer afternoons. The U.S. Environmental Protection Agency reports that a cool roof can reduce peak cooling demand by 11% to 27% in air-conditioned homes, although results vary according to climate, insulation, roof shape, and building design. Expert roofing guidance should compare verified solar reflectance and thermal emittance ratings instead of relying on color descriptions or general sales claims.
Roof exposure affects how much value a reflective product may provide. A roof that receives uninterrupted sunlight from morning through late afternoon will often experience different heat loads than one shaded by large trees or nearby buildings. The U.S. Department of Energy has reported measured home energy savings of 10% to 15% from certain cool roof coatings, but household habits, air leakage, attic insulation, and HVAC performance can change the outcome. Energy-efficient roofing becomes more dependable when the selected material fits the roof’s slope, exposure, drainage pattern, and expected service life.
Compare solar reflectance and thermal emittance values for every product.
Review reflective shingles, coated metal, tiles, or compatible roof membranes.
Study shade patterns during different times of day and seasons.
Confirm compliance with local wind, fire, and installation requirements.
Ask how dirt, algae, and weathering may affect reflectance over time.
2. Match Roof Color and Material to the Climate
Roof color influences solar heat gain, yet appearance alone does not reveal how efficiently a product will perform. Two shingles with nearly identical shades may carry substantially different reflectance ratings, and newer cool-color products can offer darker visual choices while rejecting more solar energy than older materials. The EPA reports that cool roofing may lower maximum indoor temperatures by approximately 2.2 to 5.9 degrees Fahrenheit in homes without air conditioning. Expert roofing decisions should balance color with tested performance, durability, upkeep needs, local weather, and the home’s construction.
Climate conditions also shape which roofing material makes practical sense. Reflective metal may provide strong heat resistance and an extended service life, while cool-rated asphalt shingles can preserve a familiar appearance and fit a different budget. Tile and membrane systems have their own weight, drainage, underlayment, and structural requirements, so a product that works well for one property may be unsuitable for another. Energy-efficient roofing performs more consistently when homeowners evaluate the entire building instead of selecting a material from a small showroom sample.
Review certified product ratings instead of relying on color alone.
Consider resistance to intense heat, heavy rain, wind, hail, and temperature swings.
Compare service life, repair requirements, warranty terms, and installation costs.
Determine whether the roof framing can support heavier roofing materials.
Ask whether nearby trees or buildings will reduce the value of added reflectivity.
3. Seal Attic Air Leaks and Strengthen Insulation
Energy-efficient roofing relies heavily on the thermal boundary located between the attic and the occupied rooms below. Insulation slows heat movement, but narrow gaps around plumbing lines, electrical wiring, recessed fixtures, duct penetrations, and attic access panels can allow conditioned air to escape. ENERGY STAR estimates that homeowners can save an average of 15% on heating and cooling costs by sealing air leaks and adding insulation in recommended areas. Expert roofing inspections should identify bare sections, compressed insulation, moisture damage, and concealed openings that weaken the home’s energy barrier.
Attic insulation can appear adequate near the access opening while distant corners contain thin, disturbed, or missing coverage. Air moving through soffit areas may push loose insulation away from exterior wall plates, leaving narrow strips where outside heat enters more easily. Damp insulation may settle, clump, hold moisture against wood, and provide less resistance to heat transfer. Air sealing should usually occur before additional insulation is installed because fresh material can cover the gaps that need repair.
Seal openings around pipes, wiring, ducts, and ceiling penetrations.
Measure insulation depth in several areas rather than checking one location.
Repair every active roof leak before replacing wet insulation.
Add baffles where needed to keep insulation from blocking soffit airflow.
Weather-strip and insulate attic stairs, access doors, and ceiling hatches.
4. Balance Attic Intake and Exhaust Ventilation
Balanced attic ventilation allows outdoor air to enter through lower intake vents and exit through higher exhaust vents. Proper airflow can help control heat and moisture, but simply adding extra vents does not guarantee improved performance and may create new problems when the system is poorly designed. ENERGY STAR warns that powered attic fans can pull cooled household air into the attic when soffit vents are restricted or the ceiling contains air leaks. Expert roofing work should consider attic volume, roof shape, vent positioning, existing insulation, and available intake air before mechanical ventilation is recommended.
Obstructed soffit vents are common because insulation, paint, debris, insect nests, or stored belongings can restrict incoming air. Exhaust vents cannot operate properly when replacement air lacks a clear entrance, and the resulting pressure difference may draw conditioned air through ceiling openings. Moisture may then collect on the underside of roof decking during cooler weather, increasing the risk of stains, odors, corroded fasteners, and decayed wood. Energy-efficient roofing plans should treat attic air sealing and ventilation as connected improvements rather than unrelated projects.
Keep soffit vents free of insulation, paint, debris, and storage items.
Confirm that exhaust vents are positioned evenly across the roof.
Seal ceiling openings before installing a powered attic fan.
Inspect decking for discoloration, rusted fasteners, and musty odors.
Check whether bathroom or kitchen exhaust ducts terminate inside the attic.
5. Apply Reflective Roof Coatings to Suitable Surfaces
Reflective coatings can improve solar performance on certain roofing systems without requiring an immediate replacement. The existing roof must remain clean, dry, firmly attached, and compatible with the coating manufacturer’s specifications. ENERGY STAR explains that a cool roof can use reflective materials or specialized coatings to lower surface temperatures and reduce heat transfer into a building. Energy-efficient roofing professionals should inspect seams, fasteners, flashing, drainage points, penetrations, and earlier repairs before recommending a coating system.
Roof coatings cannot rebuild rotted decking, restore crumbling materials, or permanently correct moisture trapped beneath the surface. A new coating may temporarily hide uneven repairs while deterioration continues underneath, and ponding water can shorten the life of products that are not designed for prolonged exposure. Surface preparation often determines whether the coating adheres properly, so cleaning, patching, priming, and seam reinforcement should never be treated as optional details. Expert roofing recommendations should explain expected coating thickness, curing conditions, maintenance needs, and the areas that remain unsuitable for restoration.
Inspect seams, flashing, penetrations, and exposed fasteners.
Verify that the coating is approved for the existing roofing material.
Repair cracks, loose sections, and open seams before application.
Correct clogged drains, low areas, and persistent ponding water.
Review cleaning, primer, thickness, and curing requirements in writing.
6. Prepare the Roof Before Installing Solar Panels
Solar panels can reduce the amount of electricity purchased from a utility, but the roof supporting them must remain dependable for many years. An aging roof may need replacement soon after solar installation, forcing the homeowner to pay for panel removal, temporary storage, and reinstallation. The Department of Energy advises homeowners to evaluate roof suitability, shade, system size, ownership terms, and estimated savings when planning residential solar. Expert roofing inspections should also examine decking, framing, flashing, drainage, and the exact locations where mounting equipment will be attached.
National Renewable Energy Laboratory specifications call for roofs to be inspected and repaired before rooftop solar equipment is installed. That inspection can uncover brittle shingles, weakened decking, sagging sections, damaged flashing, or small leaks that could become harder to reach after panels cover the area. Solar contractors and roofing professionals should coordinate mounting positions, flashing methods, drainage clearances, and warranty responsibilities before installation begins. Energy-efficient roofing and solar power can work together effectively, but poor timing can create expensive and preventable labor.
Estimate the roof’s remaining service life before approving solar work.
Inspect rafters, trusses, decking, flashing, shingles, and drainage paths.
Coordinate solar mounts with roof warranty requirements.
Confirm who is responsible for leaks near attachment points.
Photograph roof conditions before panels and mounting hardware are installed.
7. Repair Roof Leaks Before Adding Efficiency Upgrades
Roof leaks can soak insulation, discolor decking, damage ceilings, and create uneven temperatures that resemble ordinary energy loss. Reflective shingles, coatings, or added insulation cannot correct active water entry, and covering damaged materials may allow moisture to spread beyond the original area. The Department of Energy’s whole-house weatherization guidance instructs crews to repair minor roof and wall leaks before installing insulation. Expert roofing repairs protect both the building and the efficiency improvement, reducing the risk that recently installed materials will need to be removed.
Small leaks commonly develop around pipe boots, skylights, chimneys, wall intersections, flashing, and exposed fasteners rather than across an open field of shingles. Water may travel along rafters, nails, or decking before reaching the ceiling, which means the visible stain can appear several feet from the actual opening. Damp insulation may compress and lose some thermal resistance, while repeated moisture exposure can support mold growth and wood decay. Energy-efficient roofing work should begin only after the source of water entry has been located, repaired, and monitored during later rainfall.
Inspect flashing around chimneys, walls, vents, and roof penetrations.
Look for wet insulation, dark decking, rusted nails, and ceiling stains.
Clear gutters and drainage paths that cause water to collect near roof edges.
Replace damaged insulation instead of covering it with fresh material.
Recheck repaired areas after rain before completing attic improvements.
Home Energy Assessment
A home energy assessment can separate roof-related heat gain from duct leakage, window exposure, aging equipment, air infiltration, and other causes of high utility bills. The Department of Energy explains that a weatherization assessment may include energy-bill analysis, blower-door testing, attic inspections, and HVAC evaluations. Those findings help homeowners avoid spending heavily on a roofing feature when another weakness accounts for a larger share of the waste. Expert roofing observations become more valuable when they are supported by measured energy data and documented building conditions.
Blower-door testing may reveal substantial leakage near attic hatches, wall connections, recessed fixtures, and hidden ceiling penetrations. Infrared imaging can highlight temperature differences associated with missing insulation or unexpected air movement, although the images should be interpreted alongside physical inspection results. Utility records can also show whether energy use rises mainly during summer heat, winter cold, or every season. Energy-efficient roofing decisions should follow those patterns rather than assumptions based on one uncomfortable room or one unusually high bill.
Gather at least 12 months of electricity and heating bills.
Record which rooms remain warmer or cooler than nearby spaces.
Compare indoor comfort during similar outdoor temperatures.
Pair energy-test findings with a roof and attic inspection.
Rank repairs by urgency, expected savings, cost, and remaining service life.
A Whole-Roof Plan Protects Comfort and Household Costs
Energy-efficient roofing provides stronger results when reflectivity, insulation, ventilation, air sealing, moisture control, and roof condition support one another. A reflective surface can reduce solar heat gain, yet gaps in the attic floor may still release cooled air, while thick insulation can lose value after a slow leak saturates one section. Homeowners should prioritize work according to safety, water damage, energy impact, and the roof’s remaining useful life. That sequence prevents money from being directed toward a visible upgrade while a hidden weakness continues to raise energy use.
Roof replacement can create a practical opportunity to complete several related improvements during the same project. Contractors may gain access to damaged decking, worn flashing, outdated ventilation, and areas that would be difficult to inspect after new materials are installed, which can reduce duplicated labor later. A fresh roof covering will not solve every comfort problem, but combining roof work with attic sealing, insulation correction, and ventilation planning can close several heat pathways at once. Expert roofing guidance should clearly separate urgent repairs, worthwhile long-term improvements, and products that are unlikely to produce meaningful savings for the property.
Repair structural damage and water entry before efficiency upgrades.
Treat air sealing, insulation, and ventilation as connected work.
Select roofing materials after reviewing the entire roof assembly.
Separate immediate repairs from future energy improvements.
Request written findings that explain why each recommendation is needed.
Energy-Efficient Roofing Key Takeaways
Expert roofing for energy savings depends less on one heavily promoted product and more on controlling how heat, air, and moisture move through the building. Cool roofing can reduce solar heat gain, attic sealing can keep conditioned air inside, insulation can slow heat transfer, and balanced ventilation can help control moisture. Solar panels may reduce purchased electricity when the supporting roof is structurally sound and has enough remaining life. Each measure addresses a different weakness, so homeowners should identify the main source of energy waste before approving an upgrade.
Project timing can also influence total cost and long-term value. A targeted flashing repair and attic air-sealing project may deserve priority over a premium reflective surface when leaks and air gaps are already present, while a scheduled roof replacement may create the right time to complete several efficiency upgrades together. Energy-efficient roofing choices become easier to compare when inspection reports, utility bills, and energy-test findings point toward the same problems. Clear documentation also helps homeowners evaluate competing estimates without relying on broad promises or incomplete product descriptions.
Reflective roofing is one part of a larger energy system.
Roof leaks, insulation, ventilation, and air leakage should be inspected together.
Solar planning should begin with structural condition and remaining roof life.
Energy assessments can reveal whether the roof is the primary source of waste.
Written findings make contractor estimates easier to compare.
Repairs should be prioritized according to safety, moisture, and measurable value.
Frequently Asked Questions About Energy-Efficient Roofing
Does a Light-Colored Roof Always Reduce Energy Bills?
A light-colored roof often absorbs less solar energy than a dark surface, but real savings depend on tested reflectance, roof exposure, shade, insulation, ventilation, and household cooling habits. A pale product with poor performance ratings may not outperform a darker cool-color material that was engineered to reflect more sunlight. Homeowners should compare published roofing data and attic conditions instead of selecting a product based only on appearance.
Review solar reflectance and thermal emittance ratings.
Determine how many hours of direct sunlight the roof receives.
Account for tree shade, roof slope, and nearby structures.
Consider insulation, ventilation, and HVAC performance.
Can a Reflective Coating Restore an Aging Roof?
A reflective coating may extend the life of a compatible roof that remains dry, secure, and structurally sound. Active leaks, deteriorated decking, loose materials, trapped moisture, and failing seams require direct repairs before a coating is applied. Expert roofing inspections should determine whether restoration offers useful service life or simply delays an unavoidable replacement.
Verify the condition of the deck and roofing surface.
Confirm compatibility between the coating and existing material.
Repair seams, flashing, punctures, and drainage defects.
Ask how frequently the coating will require inspection or renewal.
How Much Can Attic Sealing and Insulation Save?
ENERGY STAR estimates average heating and cooling savings of 15% when homeowners seal air leaks and add insulation in recommended areas, although individual results vary widely. Existing insulation levels, climate, household routines, equipment efficiency, and the number of air leaks all influence the result. Energy-efficient roofing assessments can produce a more realistic estimate by documenting attic conditions and identifying where heat or conditioned air is escaping.
Measure insulation depth in multiple attic sections.
Locate openings around fixtures, pipes, ducts, and hatches.
Repair leaks before installing new insulation.
Compare energy use before and after the work.
Will an Attic Fan Make a House Cooler?
An attic fan may lower attic temperatures, but it can also pull cooled air from the living area when intake vents are blocked or the ceiling contains numerous leaks. That air loss may increase the cooling load, extend air-conditioner run times, and reduce the expected energy benefit. Ceiling air sealing and passive ventilation checks should usually happen before a powered fan is considered.
Clear soffit and intake vents.
Seal gaps around fixtures and attic access points.
Confirm that enough replacement air can enter the attic.
Review fan size, controls, and operating costs.
Should an Older Roof Be Replaced Before Solar Panels Are Installed?
An older roof often needs repair or replacement before solar panels are mounted because later roofing work may require expensive panel removal and reinstallation. Decking strength, framing capacity, flashing condition, drainage, material age, and expected remaining life should all be evaluated. Coordinated expert roofing and solar planning can protect both systems, preserve warranties, and reduce avoidable labor.
Estimate the roof’s remaining useful life.
Inspect shingles, decking, framing, and flashing.
Review how attachment points will be waterproofed.
Confirm how the solar installation affects the roof warranty.