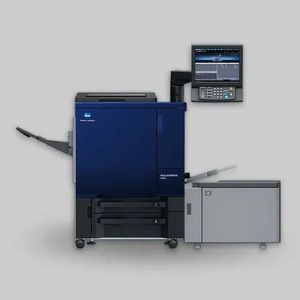

Konica Minolta Print Driver Installation Guide
Overview
This guide explains how to download, install, and configure Konica Minolta print drivers on your computer or laptop. The process covers driver selection, installation, IP address configuration, and troubleshooting connectivity issues. This guide is applicable to Konica Minolta models including C 6100, 1100, 3080, 4070, 73HC, 71HC, and 12000.
Step 1: Download Konica Minolta Drivers
Access the Driver Download Portal:
Visit the official Konica Minolta driver website: https://www.btapac.konicaminolta.com/
On the homepage, select your printer category:
A4 machines (Black and White or Color)
A3 machines (Black and White or Color)
Production machines (Black and White or Color)
Select Your Printer Model:
Once you select the category, browse and find your specific printer model
Examples of available models range from older machines (920, 950) to latest releases (6120, 6136, 12000, 14000)
Click on your printer model and press Go
Download the Driver:
Navigate to the Drivers section (note: utilities, software, font management, and color management tools are also available)
Click on Print Driver
Multiple driver versions will be displayed with release dates
Select the latest version for your machine
Click Download
Accept Terms and Extract Files:
Accept the license agreement
Click the download link to download the ZIP file
Right-click the downloaded ZIP file and select Extract All
Open the extracted folder
Step 2: Install the Print Driver
Run the Printer Installer:
Open the extracted folder
Locate and click on Printer Installer
Click Yes when prompted
Enter Printer IP Address:
The installer will ask for the IP address of your printer
If you don't know the IP address, access it from the printer:
On the printer's touchscreen, press Utility or Counter button
Press Administrator settings on the right side of the screen
Navigate to Network Settings > Machine Network Settings > IPv4 Settings
Note the IPv4 address displayed
Enter the printer's IP address in the format: 192.168.29.10 (example)
Complete Installation:
Press Next in the installer
If the driver is already installed, choose whether to keep the existing driver or replace it with the latest version (replacement recommended)
When prompted about Duplex Printing support, keep it ON if your printer supports double-sided printing
Press Next and then Finish to complete installation
Step 3: Configure Printer Properties
Access Printer Settings:
On your computer, go to Start and type "Printers"
Select Printers and Scanners
Locate your installed Konica Minolta printer
Click on it, then select Manage
Click on Printer Properties
Configure Port and IP Address:
In Printer Properties, go to the Ports tab
Select the port that corresponds to your printer
Click Configure Port
Verify or update the printer's IP address here
Important Network Requirement:
The IP address configured in the printer driver must match exactly with the IP address you set inside the printer. If these don't match, the printer driver will not communicate with the machine.
Example:
If printer IP changed from 10 to 20, update it both in the printer settings and in the driver port configuration
Port Number:
The port number is always 9100 (default) - do not change this
Step 4: Verify Driver Configuration
Check Print Preferences:
In Printer Properties, go to Printing Preferences
Navigate to the Paper tab
Press Acquire Tray Paper Data
Successful Connection Indicators:
If your computer and printer are properly networked and configured, you will see a green checkmark next to the tray information
This indicates the printer driver and computer are ready to print
Troubleshooting - Red X Mark:
If you see a red X mark instead of a checkmark, it indicates a connectivity issue. Check the following:
IP address mismatch between driver and printer
Network cable connection issues
Network configuration problems
Step 5: Verify Network Configuration
Check Computer IP Address:
Press Windows + R to open the Run command
Type cmd and press Enter
In the command prompt, type ipconfig and press Enter
Note your computer's IPv4 address
Verify Network Compatibility:
Your computer and printer must be on the same network:
Example:
Computer IP: 192.168.29.207
Printer IP: 192.168.29.10
The first three octets must be identical (192.168.29). Only the last octet differs.
Additional Network Settings:
The following network parameters must match between your computer and printer:
Subnet Mask: Keep the same across both devices
Default Gateway: Must be the same on both computer and printer (if configured)
Note: While the printer driver only requires the IP address input, the subnet mask and default gateway must be configured inside the printer itself, not in the driver.
Applicable Models
This driver installation and configuration procedure applies to:
Konica Minolta C series: 6100, 1100, 3080, 4070
Konica Minolta HC series: 73HC, 71HC
Konica Minolta production series: 12000, and other similar models
Summary
Konica Minolta print driver installation involves downloading from the official portal, running the installer with the correct printer IP address, configuring port settings, and verifying network connectivity. The most critical requirement is ensuring that the IP address in the printer driver exactly matches the IP address configured in the printer itself. Both devices must also be on the same network subnet. A green checkmark in print preferences indicates successful configuration and readiness for printing.