
This guide will work for all free Shopify store themes
If you can't do it, you can contact me via email: [email protected] , I will add it for free
The timer will count down after accessing the product page. After reloading the page, the timer will count down from the beginning.
If you want the timer to count for the setup time like a sale and end when the setup time is over. Please contact me, I will check the instructions for you.
Please follow these steps:
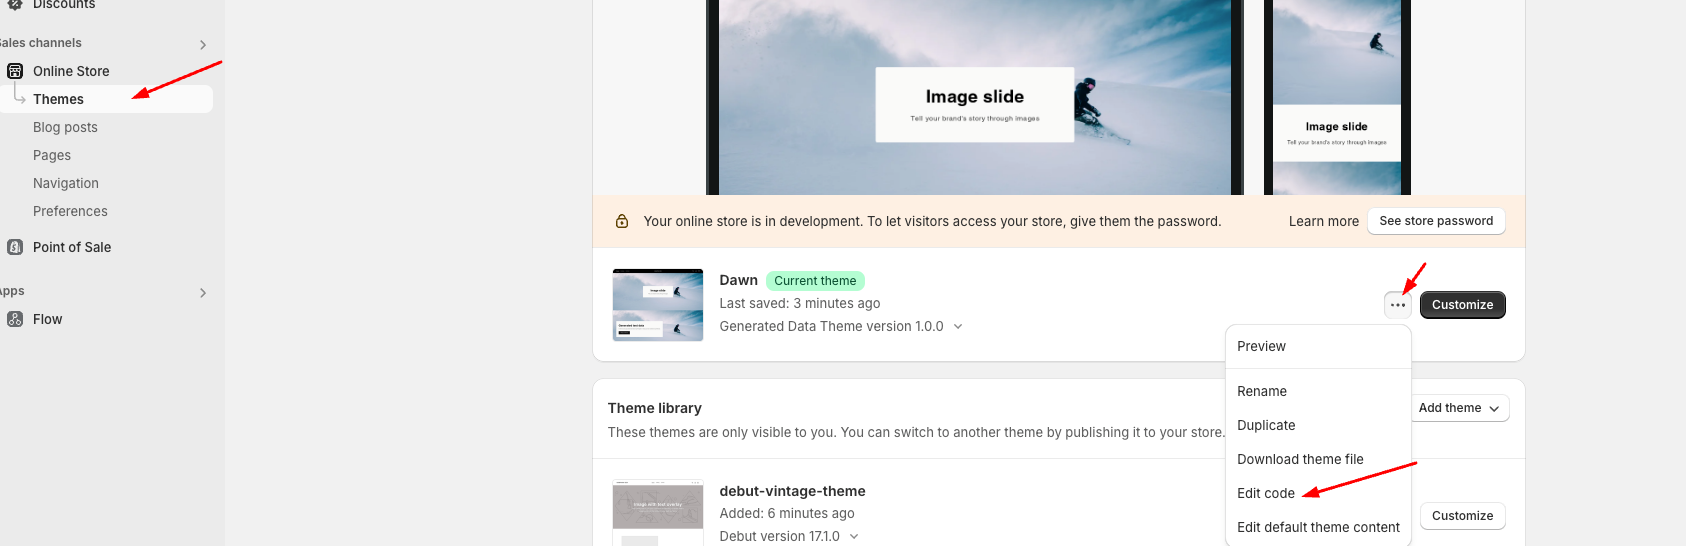
Step 1: Go to Online Store > Themes > Edit code:
Step 2: Find 'main-product.liquid' file, go to line 1947 and add code here:
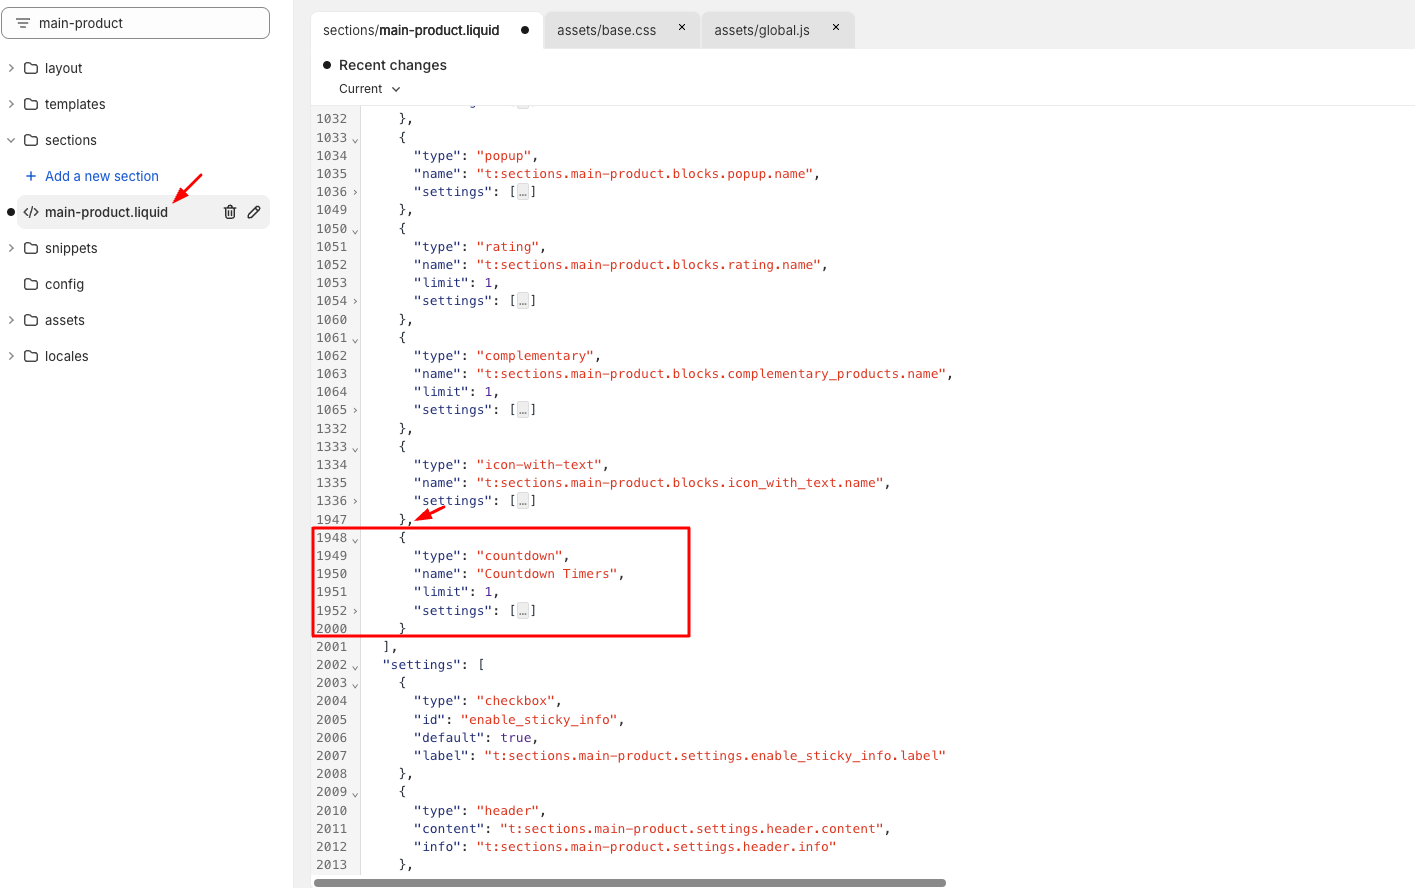
Code:
,
{
"type": "countdown",
"name": "Countdown Timers",
"limit": 1,
"settings": [
{
"type": "text",
"id": "heading",
"label": "Heading",
"default": "Hurry up!!",
},
{
"type": "text",
"id": "subheading",
"label": "Sub heading",
"default": "Sale ends in:",
},
{
"type": "range",
"id": "timers",
"min": 1,
"max": 100,
"step": 1,
"unit": "min",
"label": "Timers",
"default": 25
},
{
"type": "text",
"id": "days",
"label": "Days",
"default": "Days",
},
{
"type": "text",
"id": "hours",
"label": "Hours",
"default": "Hrs",
},
{
"type": "text",
"id": "minutes",
"label": "Minutes",
"default": "Mins",
},
{
"type": "text",
"id": "seconds",
"label": "Seconds",
"default": "Secs",
}
]
}
Step 3: Find 'main-product.liquid' file, go to line 437 and add code here:
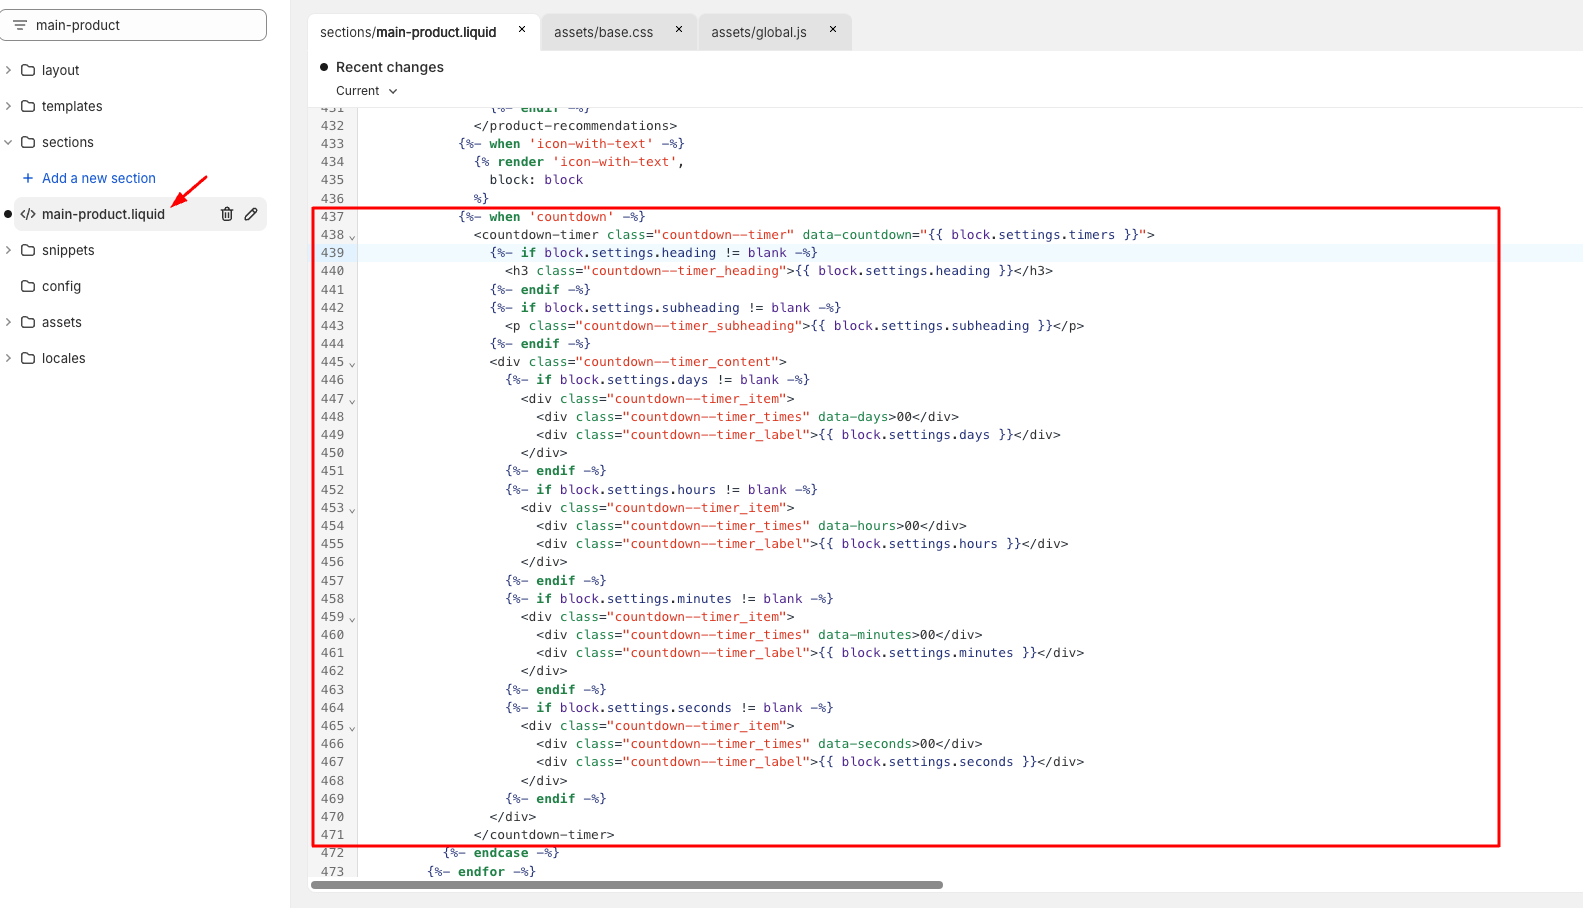
Code:
{%- when 'countdown' -%}
<countdown-timer class="countdown--timer" data-countdown="{{ block.settings.timers }}">
{%- if block.settings.heading != blank -%}
<h3 class="countdown--timer_heading">{{ block.settings.heading }}</h3>
{%- endif -%}
{%- if block.settings.subheading != blank -%}
<p class="countdown--timer_subheading">{{ block.settings.subheading }}</p>
{%- endif -%}
<div class="countdown--timer_content">
{%- if block.settings.days != blank -%}
<div class="countdown--timer_item">
<div class="countdown--timer_times" data-days>00</div>
<div class="countdown--timer_label">{{ block.settings.days }}</div>
</div>
{%- endif -%}
{%- if block.settings.hours != blank -%}
<div class="countdown--timer_item">
<div class="countdown--timer_times" data-hours>00</div>
<div class="countdown--timer_label">{{ block.settings.hours }}</div>
</div>
{%- endif -%}
{%- if block.settings.minutes != blank -%}
<div class="countdown--timer_item">
<div class="countdown--timer_times" data-minutes>00</div>
<div class="countdown--timer_label">{{ block.settings.minutes }}</div>
</div>
{%- endif -%}
{%- if block.settings.seconds != blank -%}
<div class="countdown--timer_item">
<div class="countdown--timer_times" data-seconds>00</div>
<div class="countdown--timer_label">{{ block.settings.seconds }}</div>
</div>
{%- endif -%}
</div>
</countdown-timer>
Step 4: Find 'base.css' file, go to bottom and add code here:
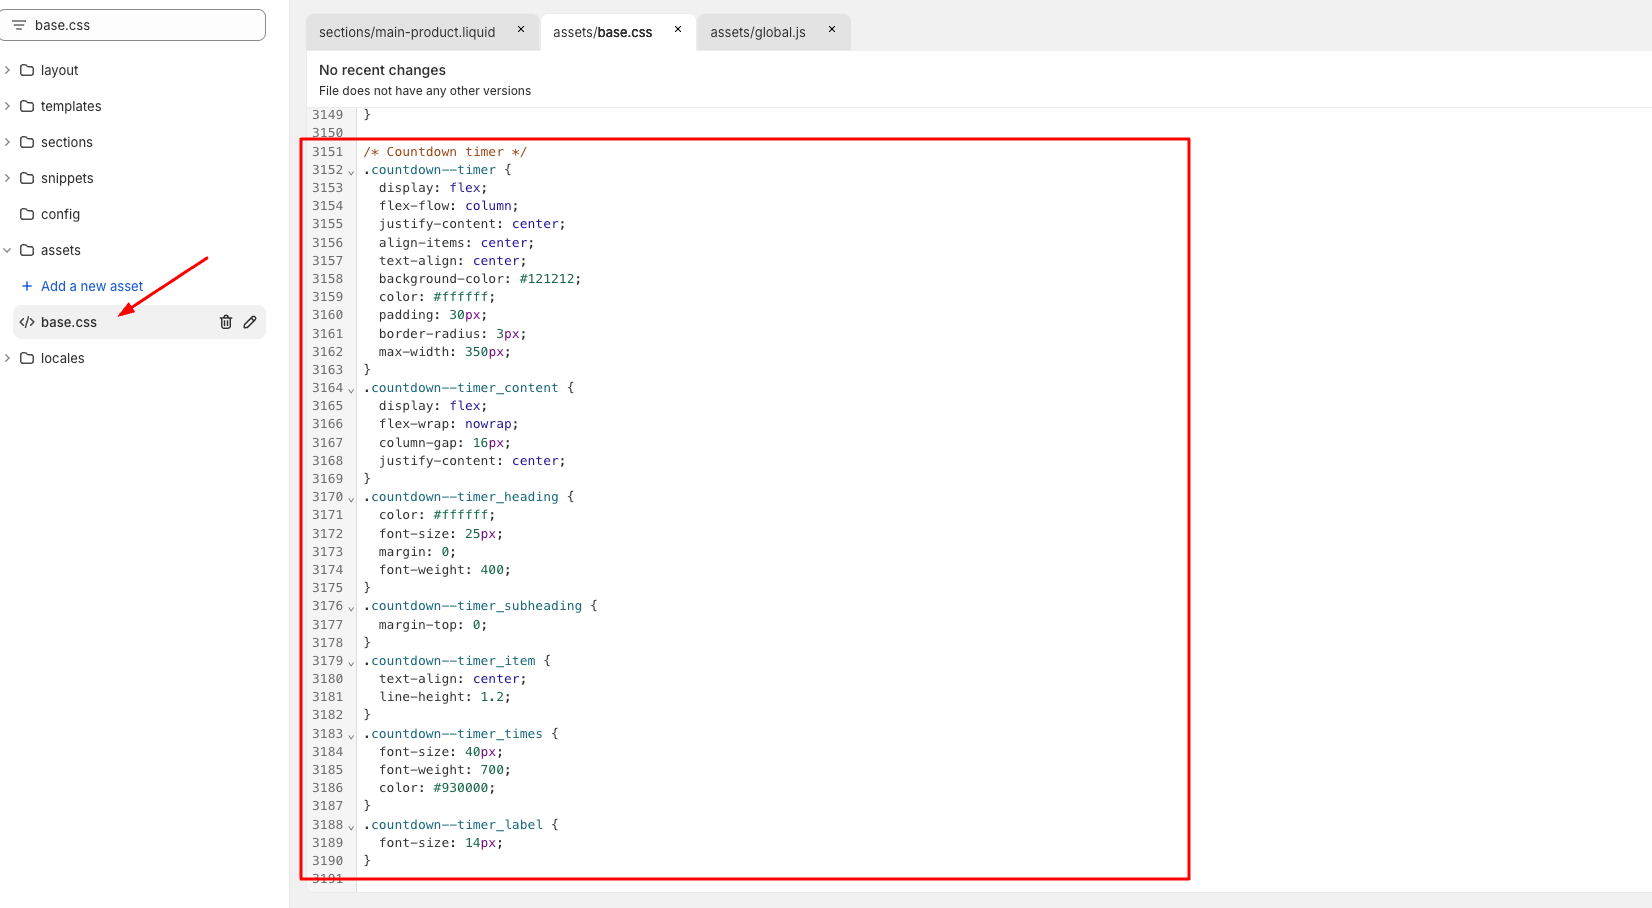
Code:
/ Countdown timer /
.countdown--timer {
display: flex;
flex-flow: column;
justify-content: center;
align-items: center;
text-align: center;
background-color: #121212;
color: #ffffff;
padding: 30px;
border-radius: 3px;
max-width: 350px;
}
.countdown--timer_content {
display: flex;
flex-wrap: nowrap;
column-gap: 16px;
justify-content: center;
}
.countdown--timer_heading {
color: #ffffff;
font-size: 25px;
margin: 0;
font-weight: 400;
}
.countdown--timer_subheading {
margin-top: 0;
}
.countdown--timer_item {
text-align: center;
line-height: 1.2;
}
.countdown--timer_times {
font-size: 40px;
font-weight: 700;
color: #930000;
}
.countdown--timer_label {
font-size: 14px;
}
Step 5: Find 'global.js' file, go to bottom and add code here:
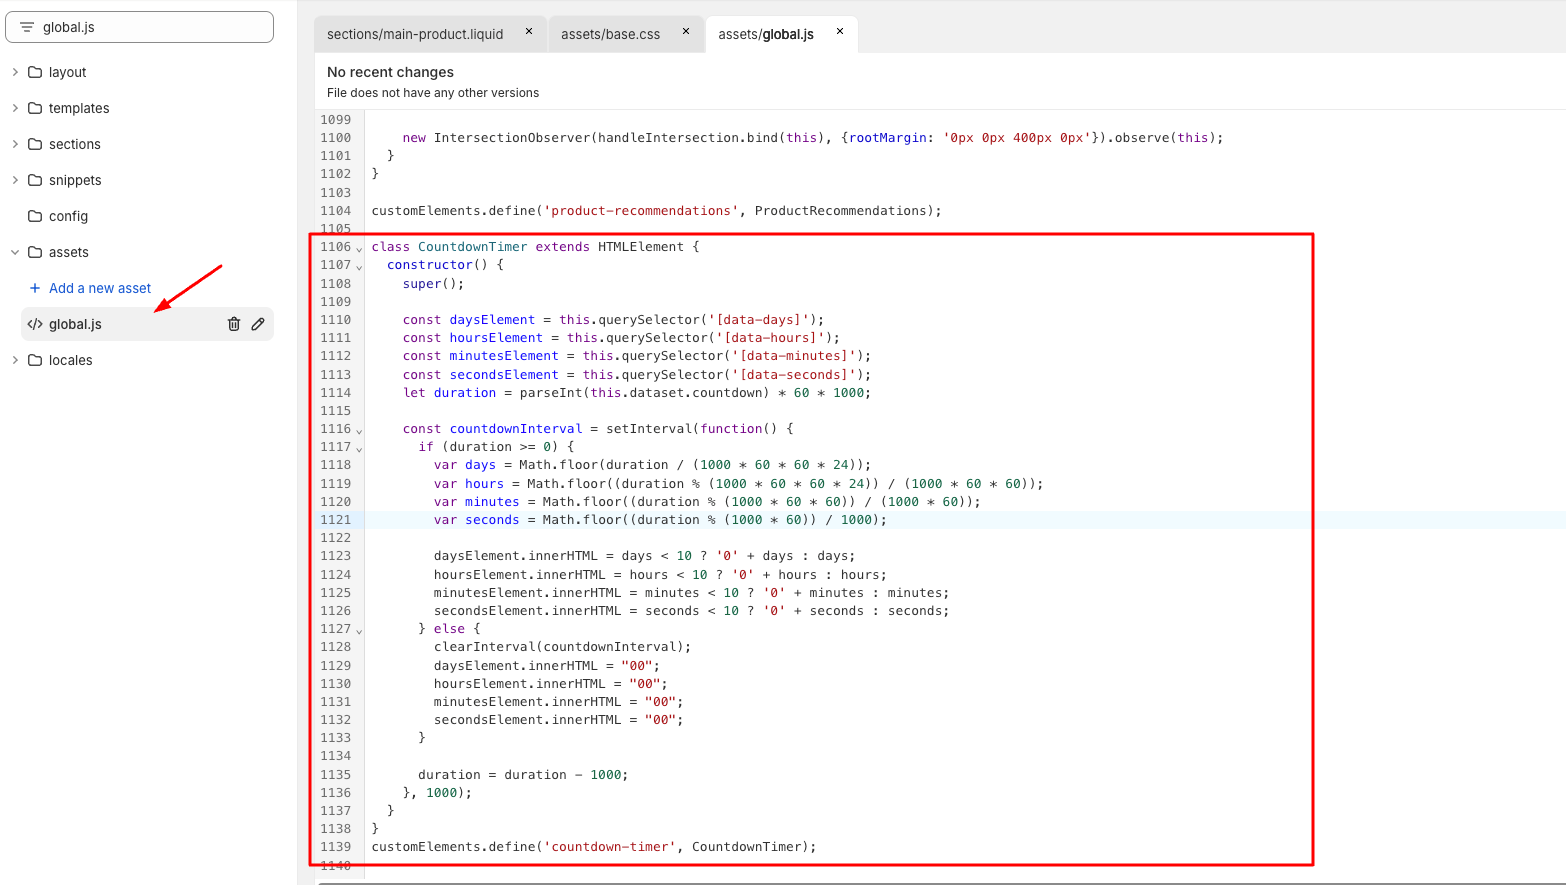
Code:
class CountdownTimer extends HTMLElement {
constructor() {
super();
const daysElement = this.querySelector('[data-days]');
const hoursElement = this.querySelector('[data-hours]');
const minutesElement = this.querySelector('[data-minutes]');
const secondsElement = this.querySelector('[data-seconds]');
let duration = parseInt(this.dataset.countdown) 60 1000;
const countdownInterval = setInterval(function() {
if (duration >= 0) {
var days = Math.floor(duration / (1000 60 60 * 24));
var hours = Math.floor((duration % (1000 60 60 24)) / (1000 60 * 60));
var minutes = Math.floor((duration % (1000 60 60)) / (1000 * 60));
var seconds = Math.floor((duration % (1000 * 60)) / 1000);
daysElement.innerHTML = days < 10 ? '0' + days : days;
hoursElement.innerHTML = hours < 10 ? '0' + hours : hours;
minutesElement.innerHTML = minutes < 10 ? '0' + minutes : minutes;
secondsElement.innerHTML = seconds < 10 ? '0' + seconds : seconds;
} else {
clearInterval(countdownInterval);
daysElement.innerHTML = "00";
hoursElement.innerHTML = "00";
minutesElement.innerHTML = "00";
secondsElement.innerHTML = "00";
}
duration = duration - 1000;
}, 1000);
}
}
customElements.define('countdown-timer', CountdownTimer);
Step 6: Go to Customize and add block 'Countdown Timers':
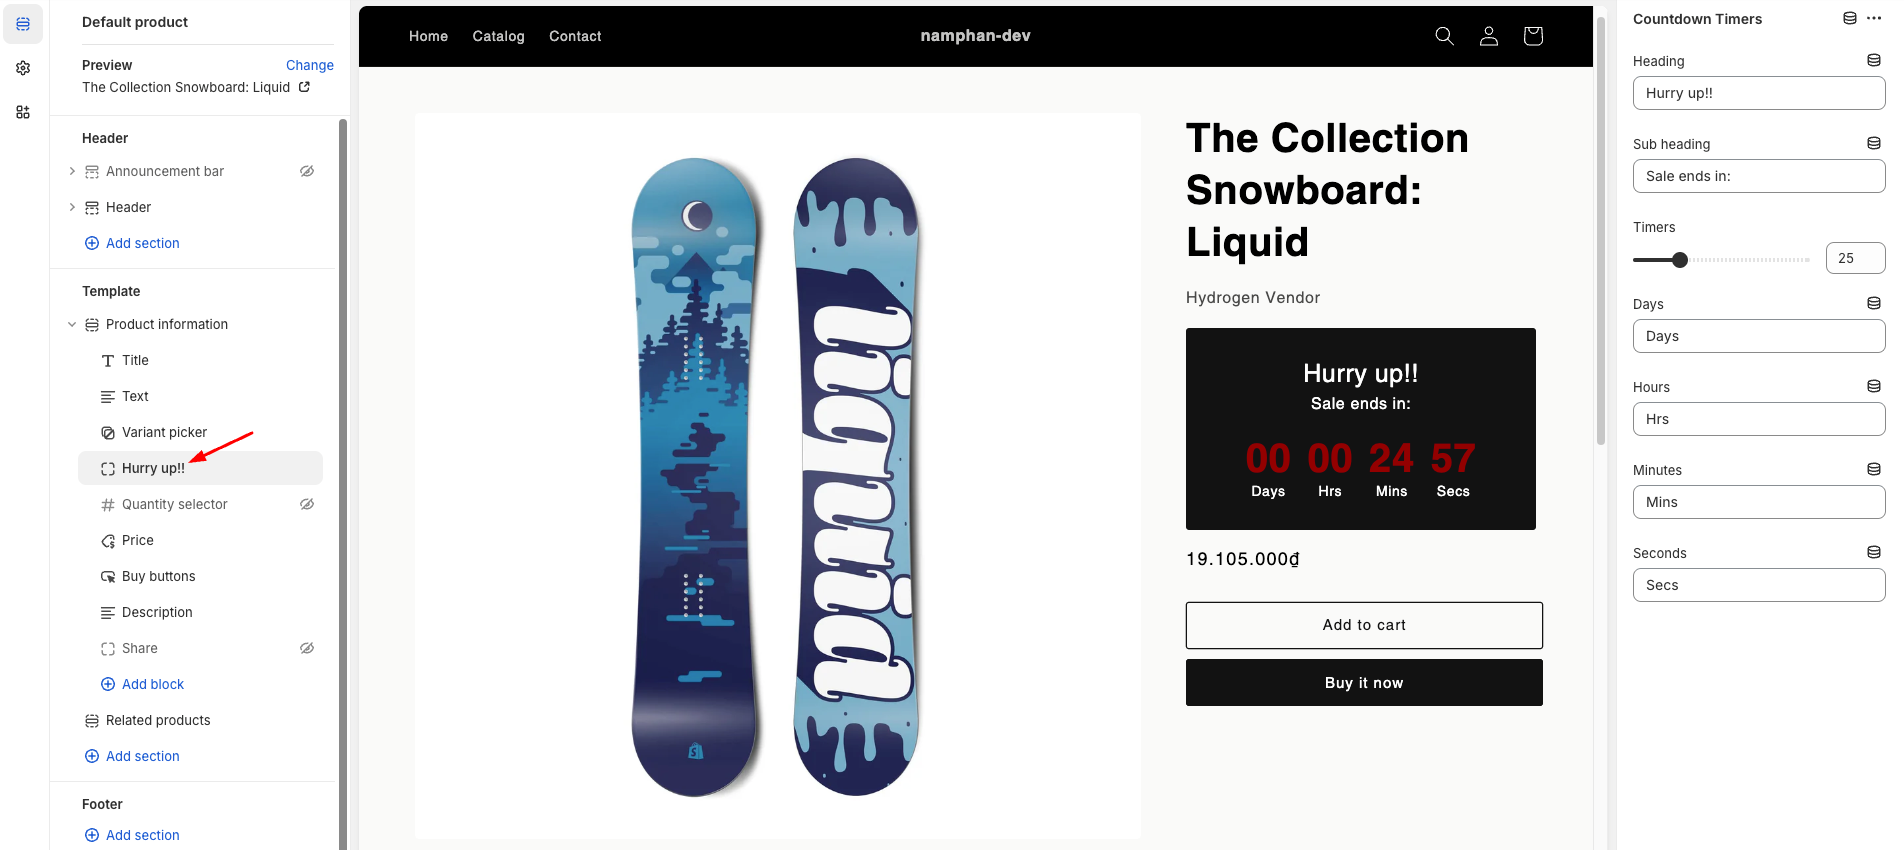
You can check the preview result from this link: https://namphan-dev.myshopify.com/products/the-3p-fulfilled-snowboard ( password: namphan ).
I hope my solution worked well for you!