
Objectives
This chapter will cover the wiring of a temperature and humidity sensor for an Arduino project. The DHT11 sensor, capable of measuring both temperature and humidity, is commonly utilized in weather stations, greenhouses, and climate control applications.
Prerequisites
Setup
DHT11 Temperature and Humidity Sensor
Arduino Uno board
Jumper Wires
About the DHT11 Sensor
The DHT11 sensor is designed to measure both temperature and humidity, but it does have its limitations and inaccuracies. It can measure temperatures ranging from 0 to 50 degrees Celsius with an accuracy of +/- 2 degrees. Meanwhile, it can measure humidity levels from 20% to 80% with an accuracy of +/- 5%.
The DHT11 sensor requires three pins to function and they are:
VCC (Voltage Supply Collector): Should connect to a 5v power source to power up the sensor,
GND (Ground): The ground reference where current exits in the circuit, and
Out: Allows the Arduino to obtain temperature and humidity data.
Building the Circuit
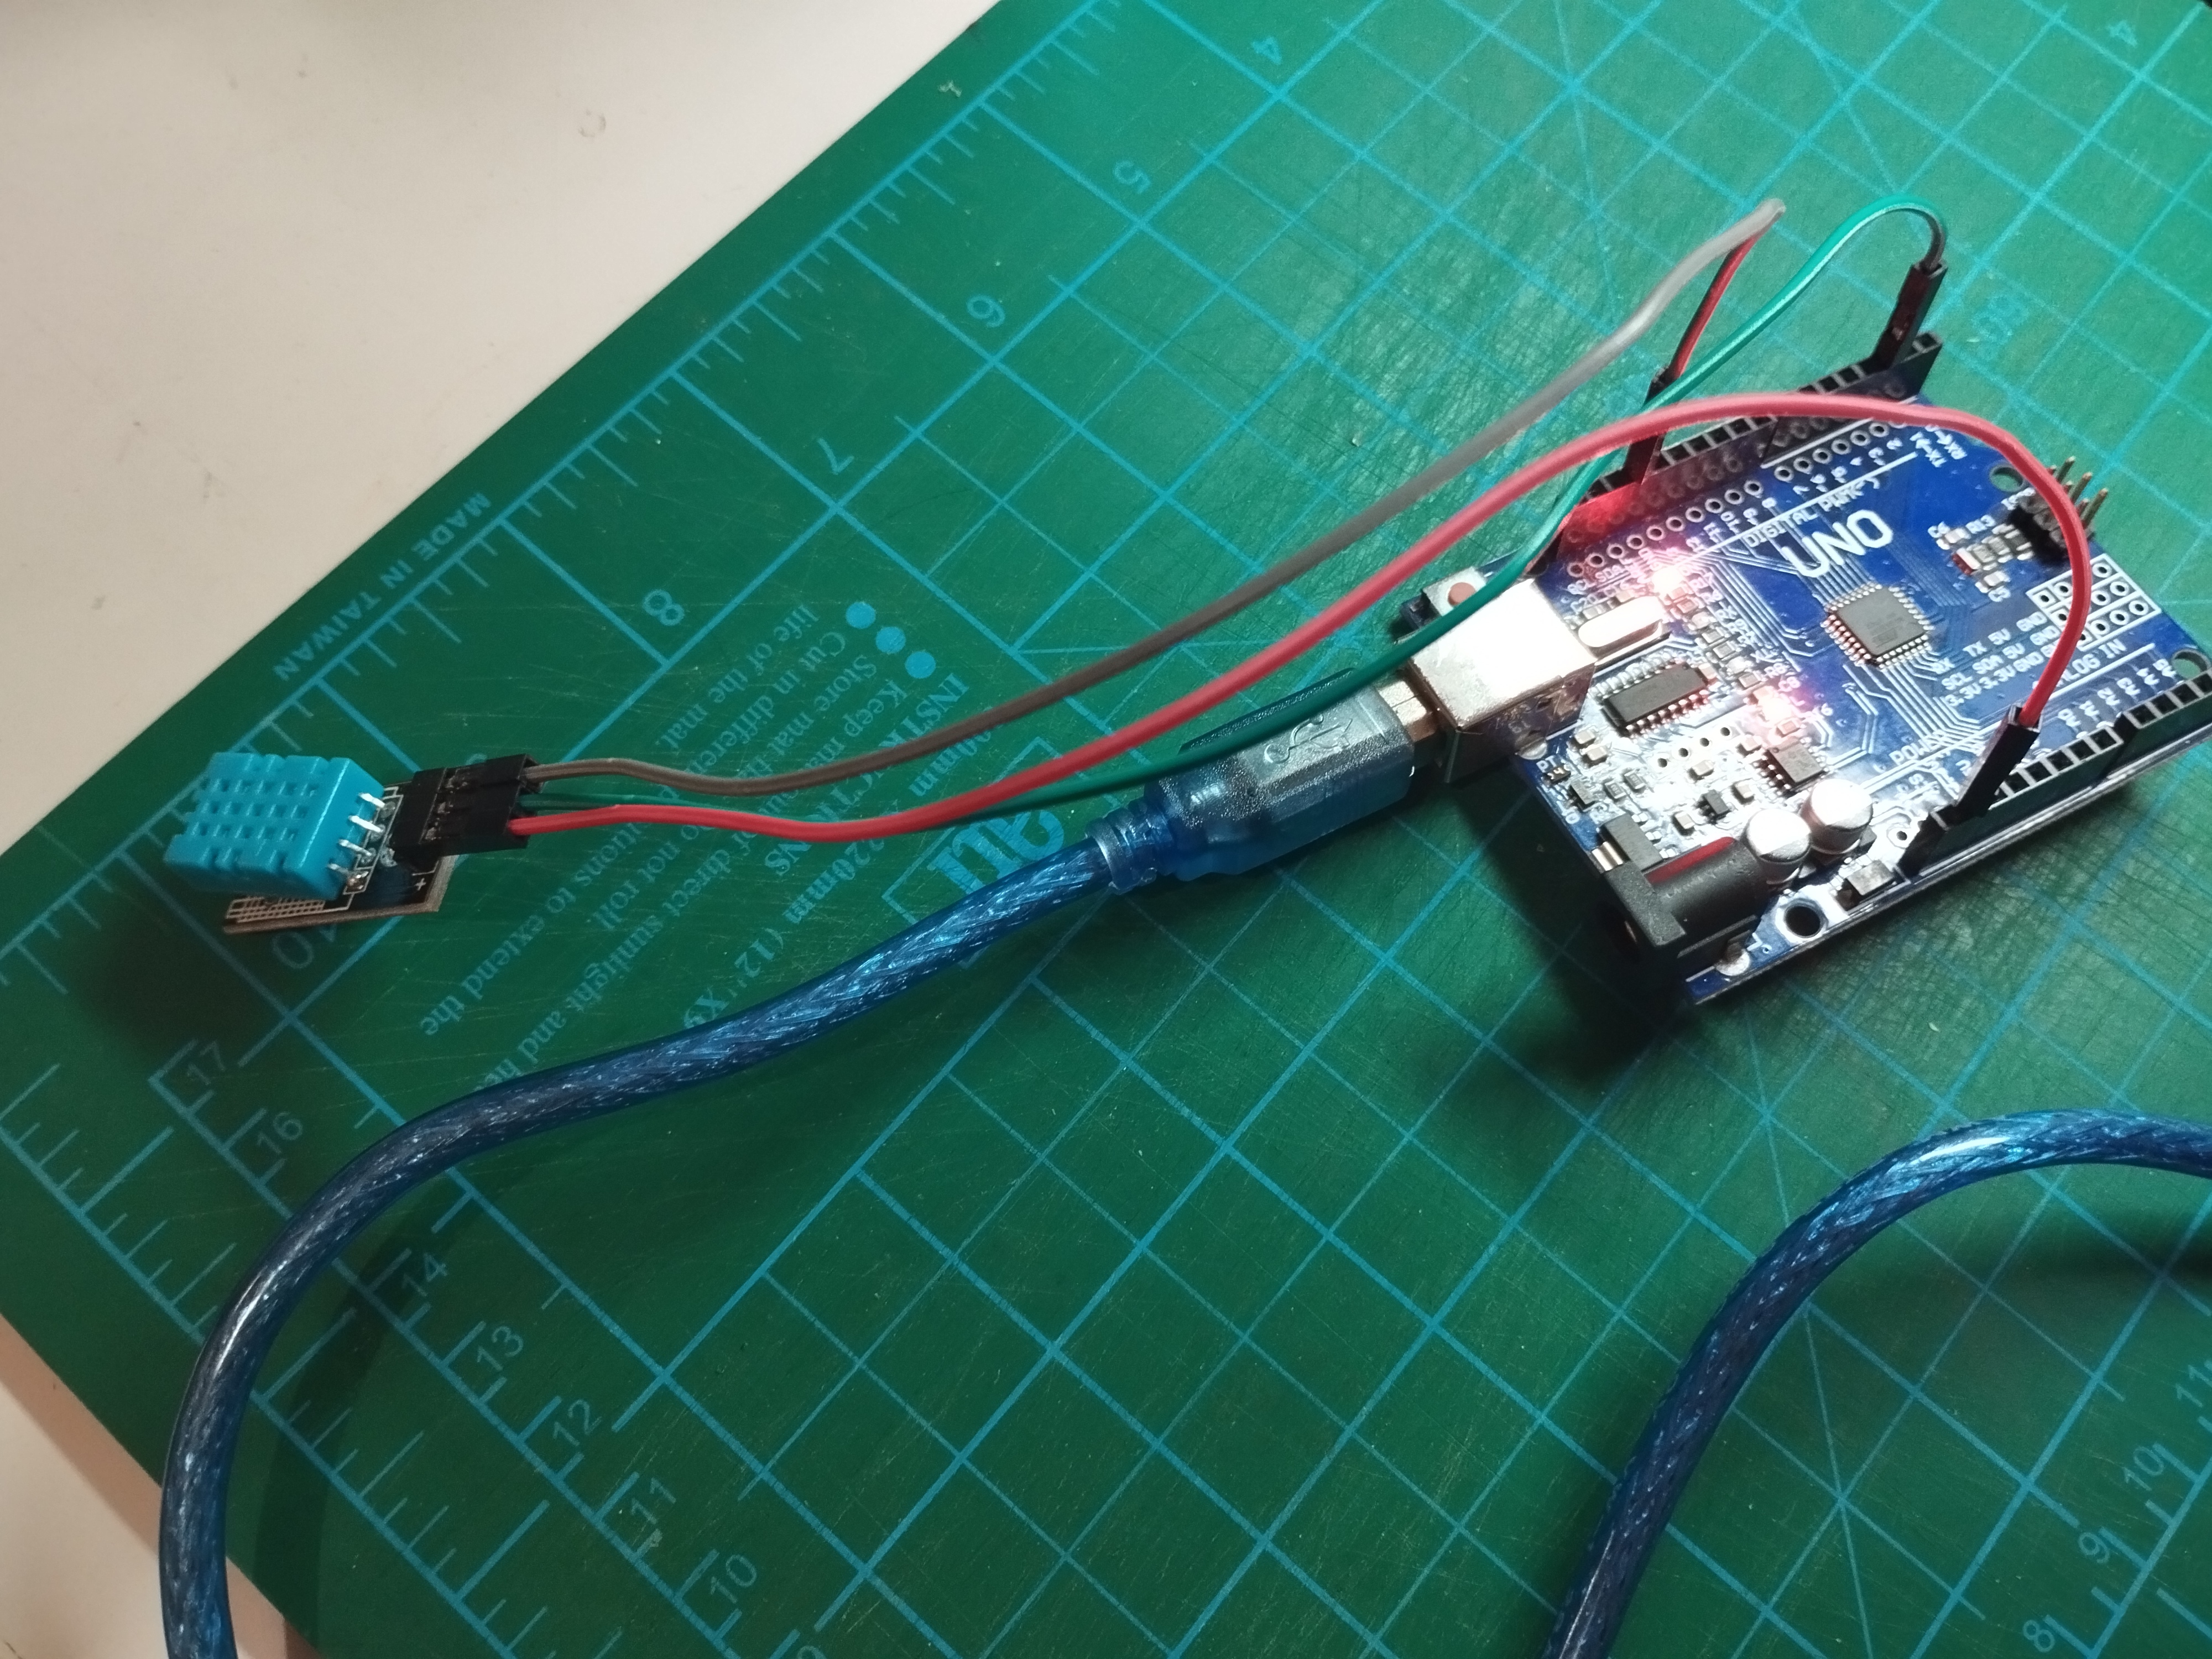
Now we do a hands-on exercise by building a circuit with a DHT11 sensor. To simplify this exercise, we'll skip the breadboard and directly connect the jumper wires from the Arduino board to the ultrasonic sensor. Nevertheless, a breadboard can always be utilized as a separate exercise.
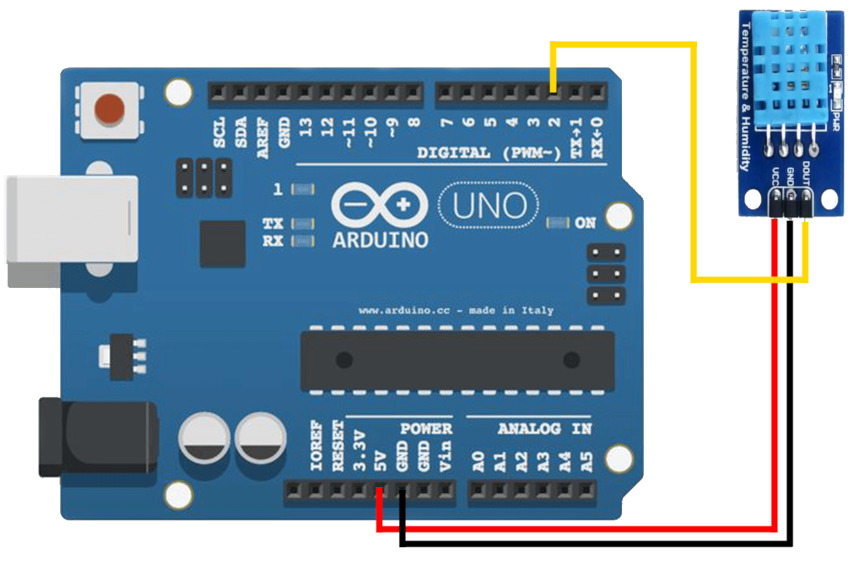
Grab a jumper wire and pin one end to Arduino Uno's "5v" (Power supply). Pin the other end to the DHT11 sensor's "VCC".
Grab a jumper wire and pin one end to Arduino Uno's "GND" (Ground). Pin the other end to the DHT11 sensor's "GND".
Grab a jumper wire and pin one end to Arduino Uno's pinhole number 2. Pin the other end to the DHT11 sensor's "Out".
In this demonstration, we utilized pinhole number 2 for "Out". While other pinhole numbers are technically viable, it's crucial to note the specific ones in use, as we will need to specify these pinhole numbers later in the code.
Setting up the Library before Coding
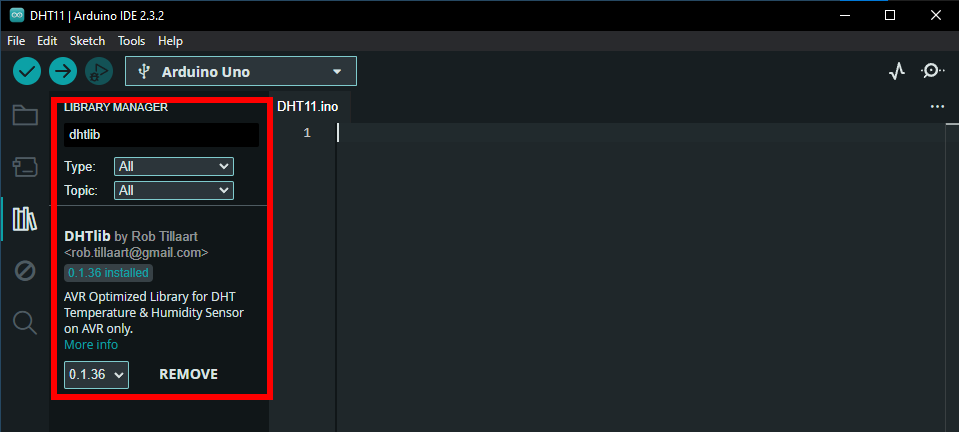
We will utilize a library that facilitates the reading of temperature and humidity data. Please open the library manager, look for "DHTlib" by Rob Tillaart, and proceed with the installation.
Writing the Source Code
Next, we will write code that reads temperature and humidity data and then displays it on the Serial Monitor.
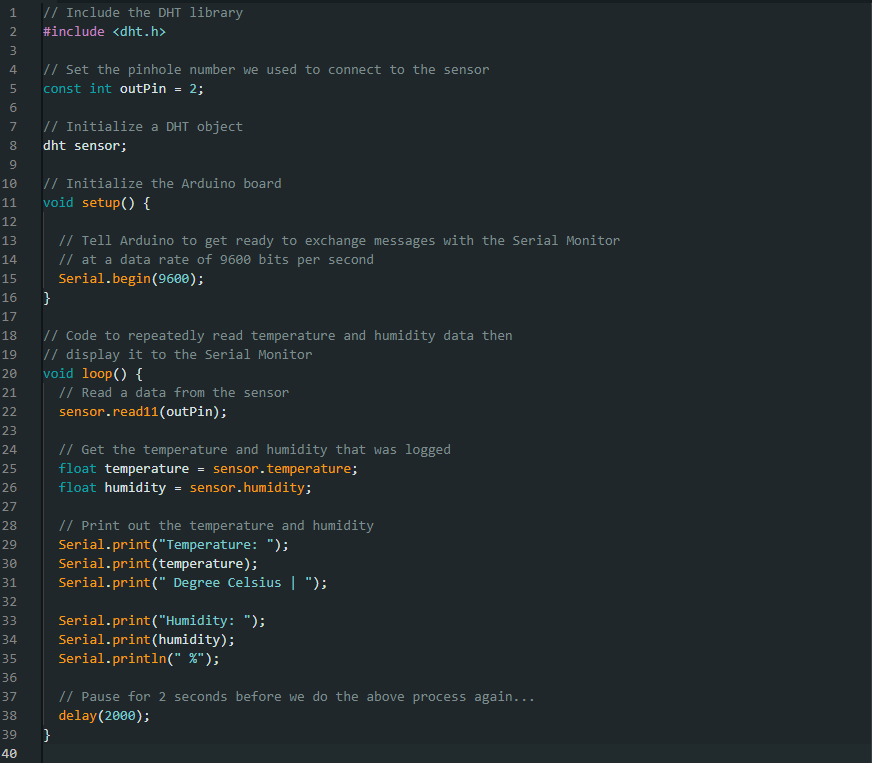
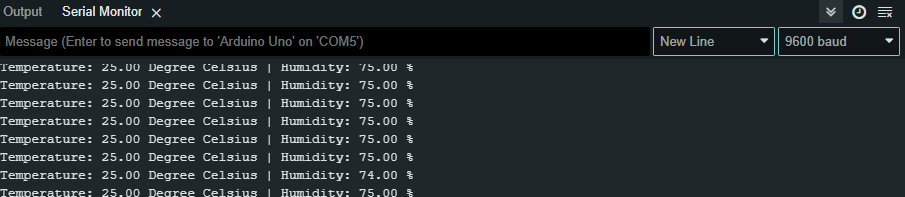
After verifying and uploading the code to the Arduino board, the Serial Monitor should display an output indicating the temperature and humidity.