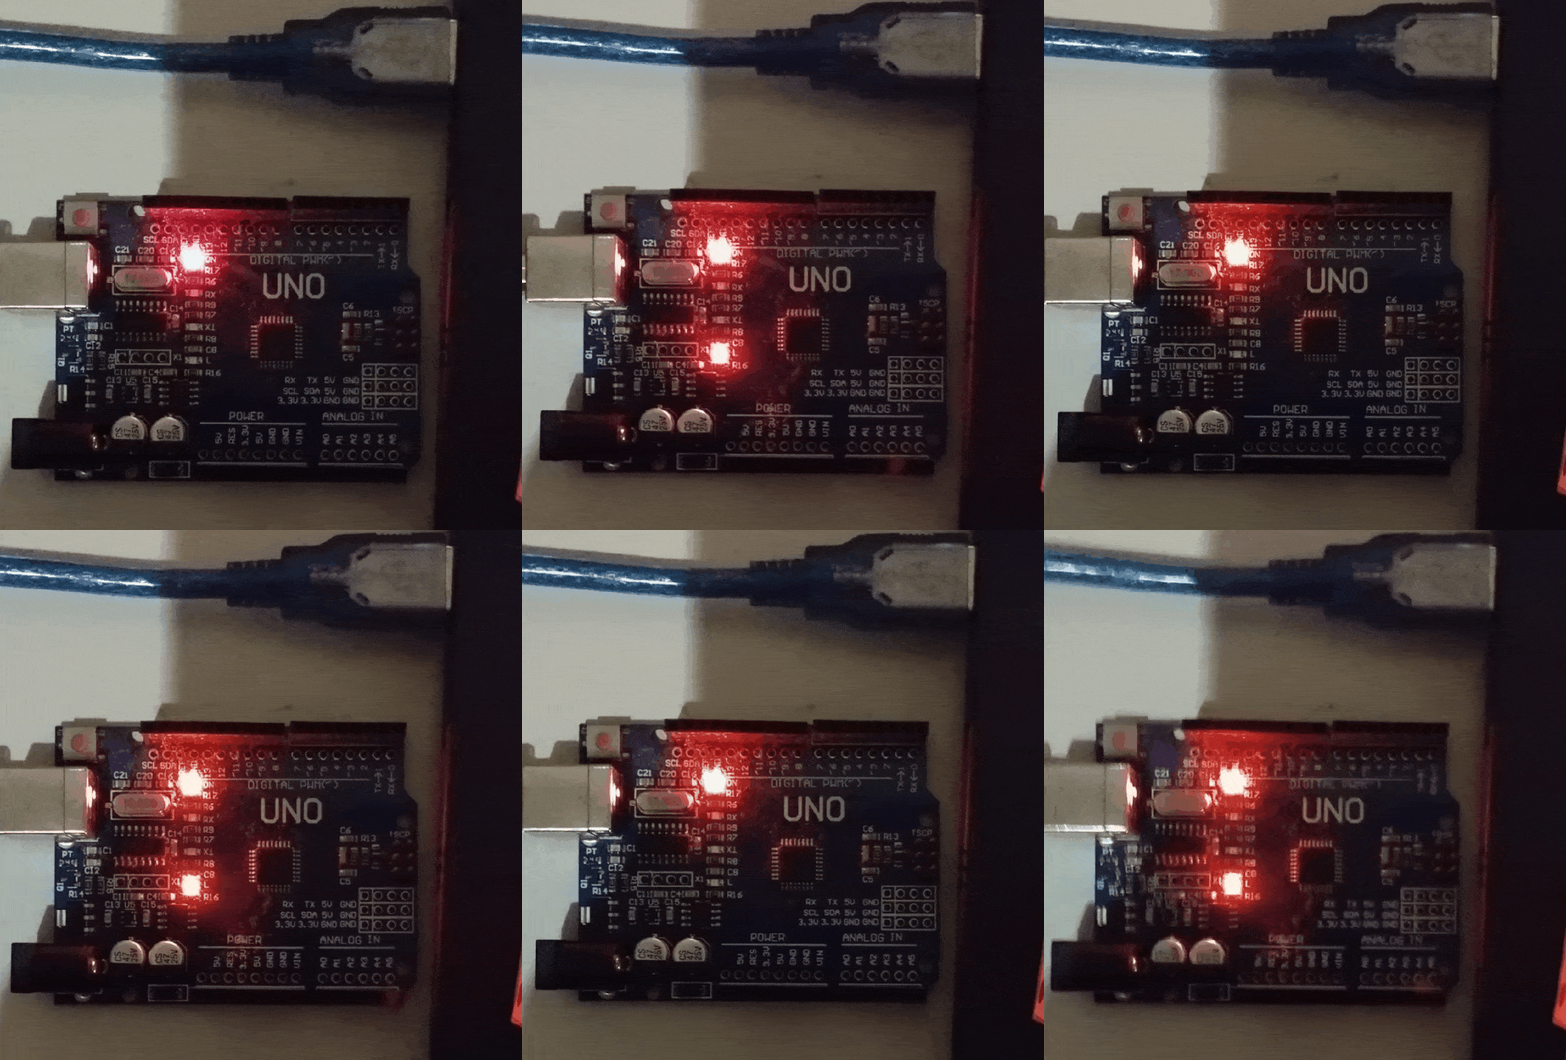

Objectives
We'll explore Arduino by blinking our first Light Emitting Diode (LED). At the end of this chapter, we should have gained a basic idea of using and running a program on an Arduino Uno board.
Setup
Arduino Uno board
Let's start...
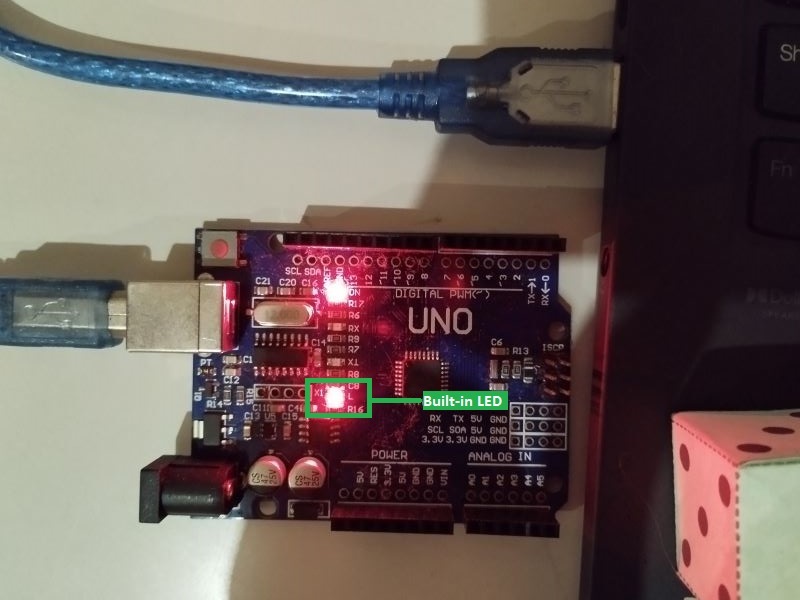
The Arduino Uno board has a built-in LED by default. It will light up when we connect it to a power source, which can be either a battery or a computer via a cable. For this chapter, we'll be using the power cable, which is also what we need to upload our code to the Arduino Uno board later on.
After connecting the Arduino Uno board to the computer using a cable, the next step is to look for it in the computer's Device Manager, specifically under the Ports (COM & LPT) menu.
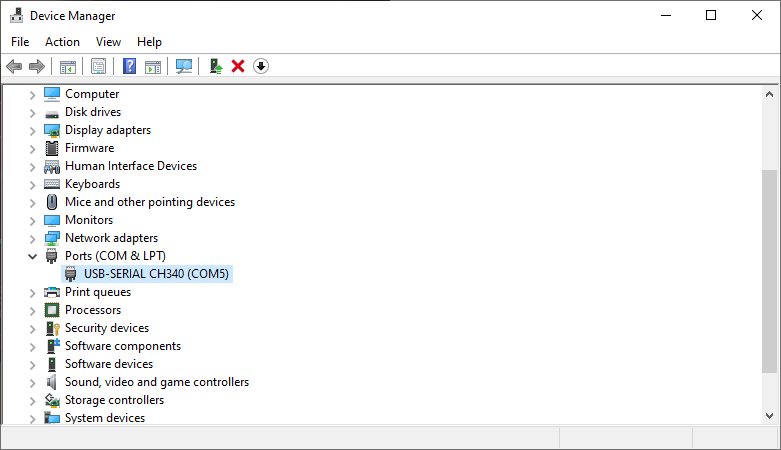
From the above example, the Arduino Uno board has been detected at COM5. We'll have to remember that for now. In the meantime, we download, install, and run the Arduino IDE.
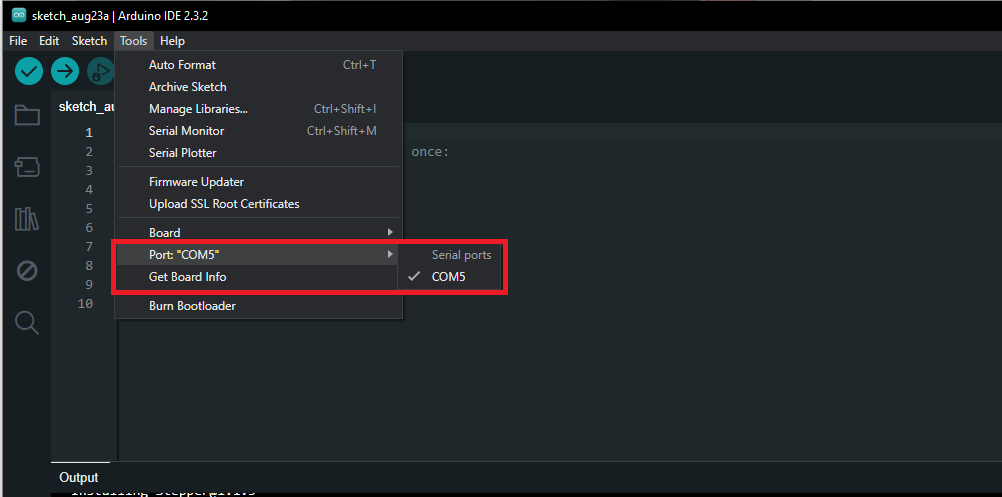
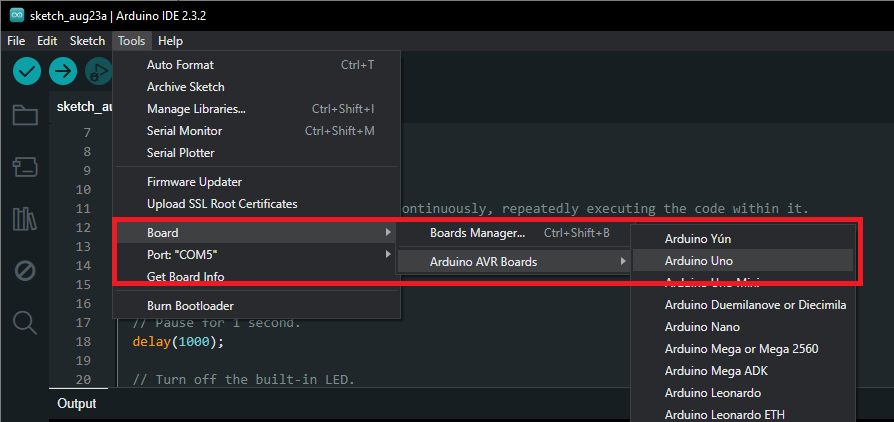
In the Arduino IDE's interface, we select COM5 under the "Tools > Port" menu because that's where the Arduino Uno board was detected earlier. Doing so tells the IDE that our source code will be uploaded to the Arduino board connected to the said port.
Next, we tell Arduino that we are using the Arduino Uno board. To do that, select "Arduino Uno" under the "Tools > Board > Arduino AVR Boards" menu.
We are ready to create a code to make the built-in LED blink.
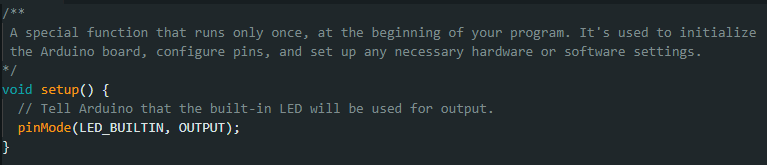
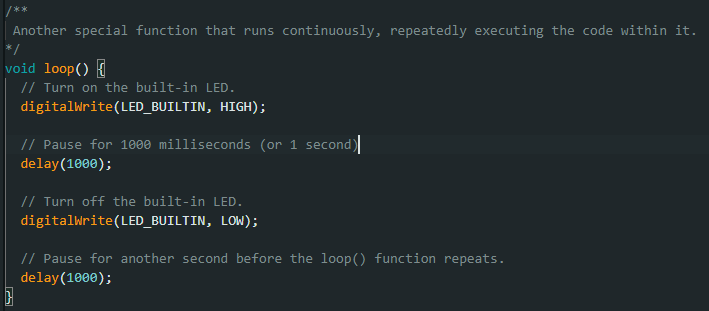
After writing the code, press the "Verify" button to verify the source code for syntax errors and other potential issues. If successful, press the "Upload" button to upload and run the code on the Arduino board. We should see the built-in LED blinking after every second.