
Freeze Dried Pumpkin Pie, Apple Pie, and Cinnamon Applesauce Bites
Experiment Batch #1 - Here's What We Learned:
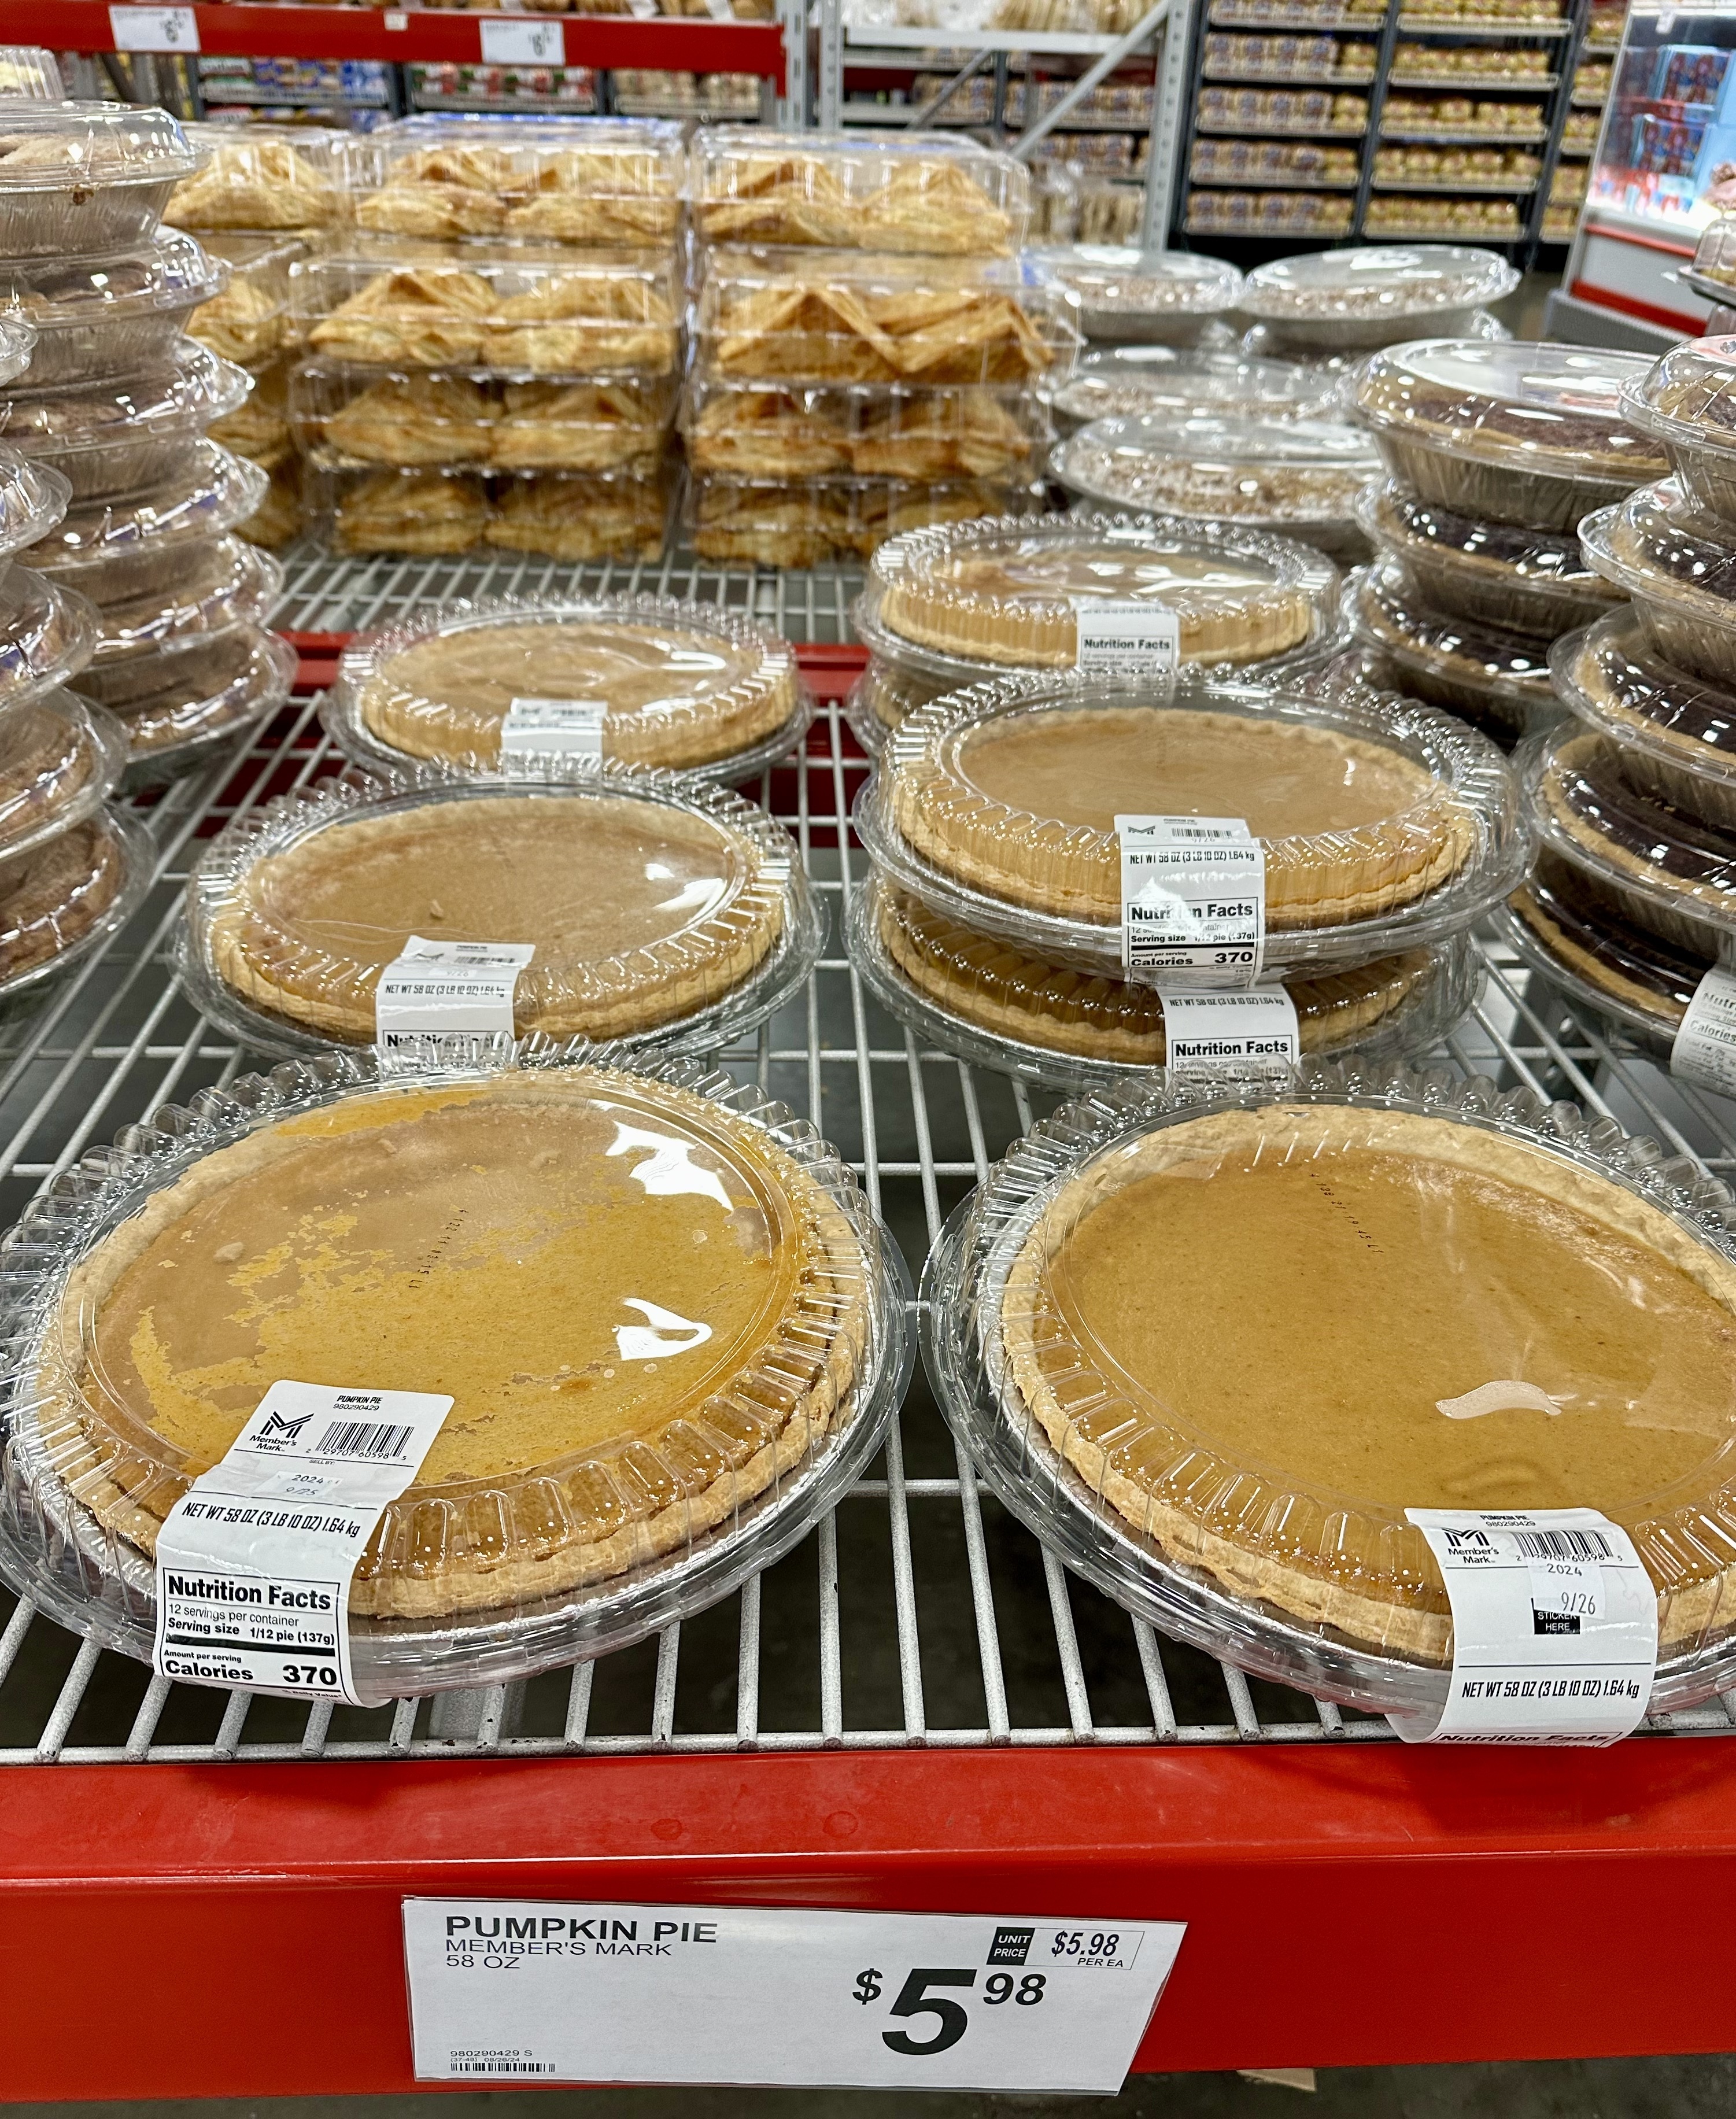
1. Next time, we'll buy bigger pies at a lower cost from Sam's Club. For this batch, we got a 1 lb pumpkin pie from Walmart and it was about $12.00. Then we went to Sam's Club and saw 3 lb pumpkin pies for only $5.98! Also, at the end of the season they put their pies on sale so they're even less - wow!
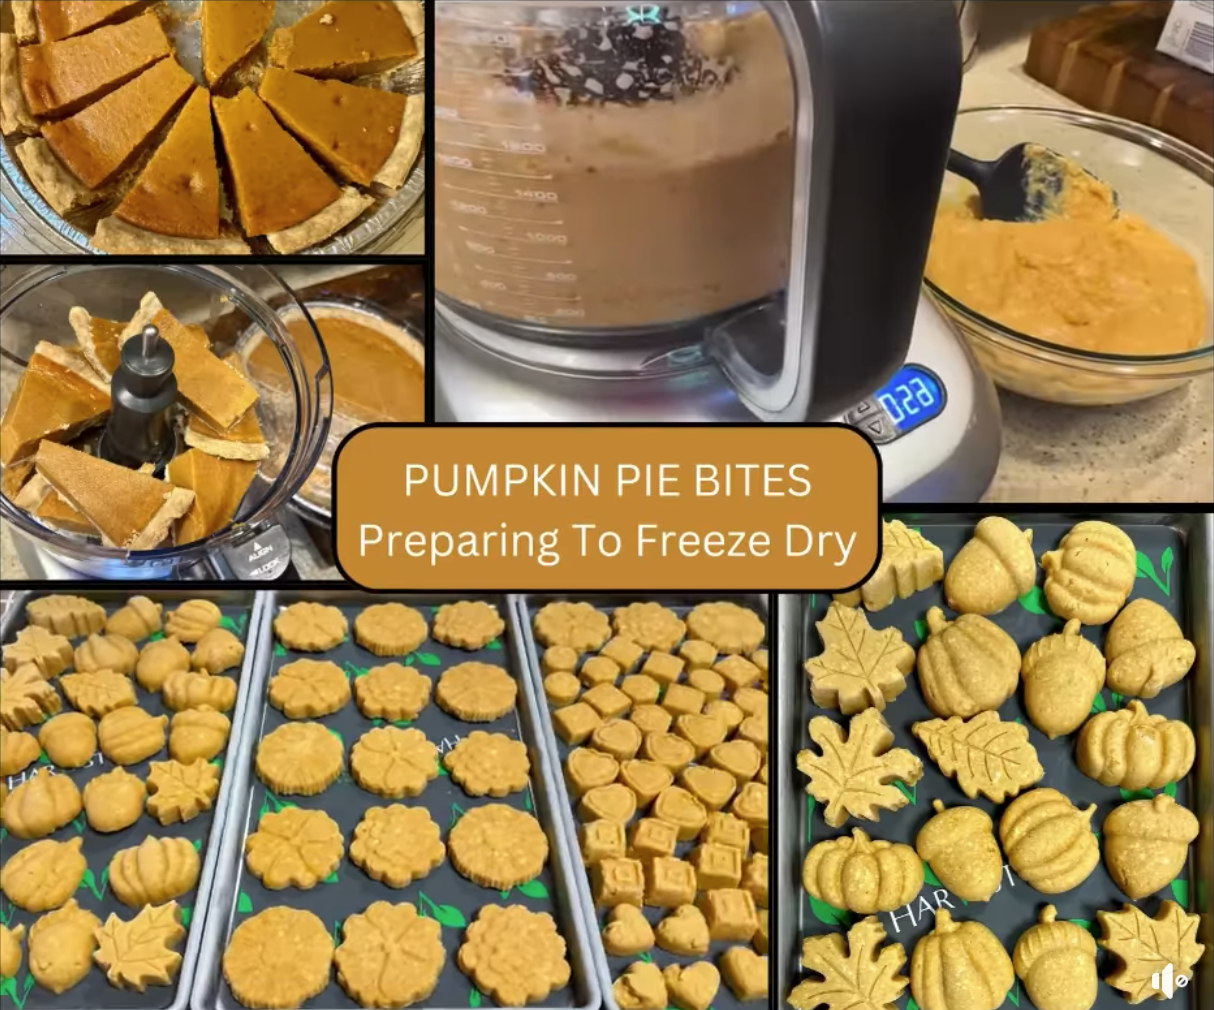
2. Using a blender was much more difficult than the food processor to mix up the pie with milk. We took the 1 lb pumpkin pie and cut it in half. The first half went into the blender and we added milk 1/8 cup at a time until we got a thick, yet spoon-able consistency. For the 8 oz of pie we ended up adding a total of 1/2 cup milk. I had to keep stopping the blender and use a spoonula to push down the mixture. Also, it was very difficult to spoon out of the blender.
3. Using a food processor was much easier and more efficient than the blender. We took the 2nd half of the pumpkin pie, cut into pieces, placed in the processor, and added 1/2 cup of milk. It was faster and easier to scoop out vs. the blender.
4. The mixture spooned into the food molds fairly quickly and easily. We only filled about halfway so the FD Pie Treats would not be too thick to bite into. In the past we have done this with applesauce treats and it worked very well.
5. Once pre-frozen, the pie treats popped out of the food molds easily. We placed onto trays using silicone mats so they would not stick and be easy to lift off after FDing. Yes, you could use parchment paper, but sometimes we like the reusable silicone mats better.
6. This particular batch took about 45 hours in our Small HR Pro FD before all the tray weights stopped dropping (we use the Weigh Method to determine dryness and our scale measures to the tenth of a gram). There were two trays of pumpkin pie treats, one tray of sour cream, and a tray of apple pie treats along with a few cinnamon applesauce treats. Every batch you run will be different but this just gives you an idea.
7. The apple pie treats were made from two tiny 3.5 oz pies. This resulted in there being a higher crust-to-filling ratio, and while yummy, they definitely tasted more like crust than the apple filling. (Note to Self: Next time just get a bigger pie! lol)
8. The Cinnamon Applesauce treats came out great just like the last time we did them in food molds. If you need something fast, easy, and cute then just spoon applesauce into food molds, pre-freeze, pop out onto trays with silicone mats or parchment paper, and FD. Super easy and delicious!
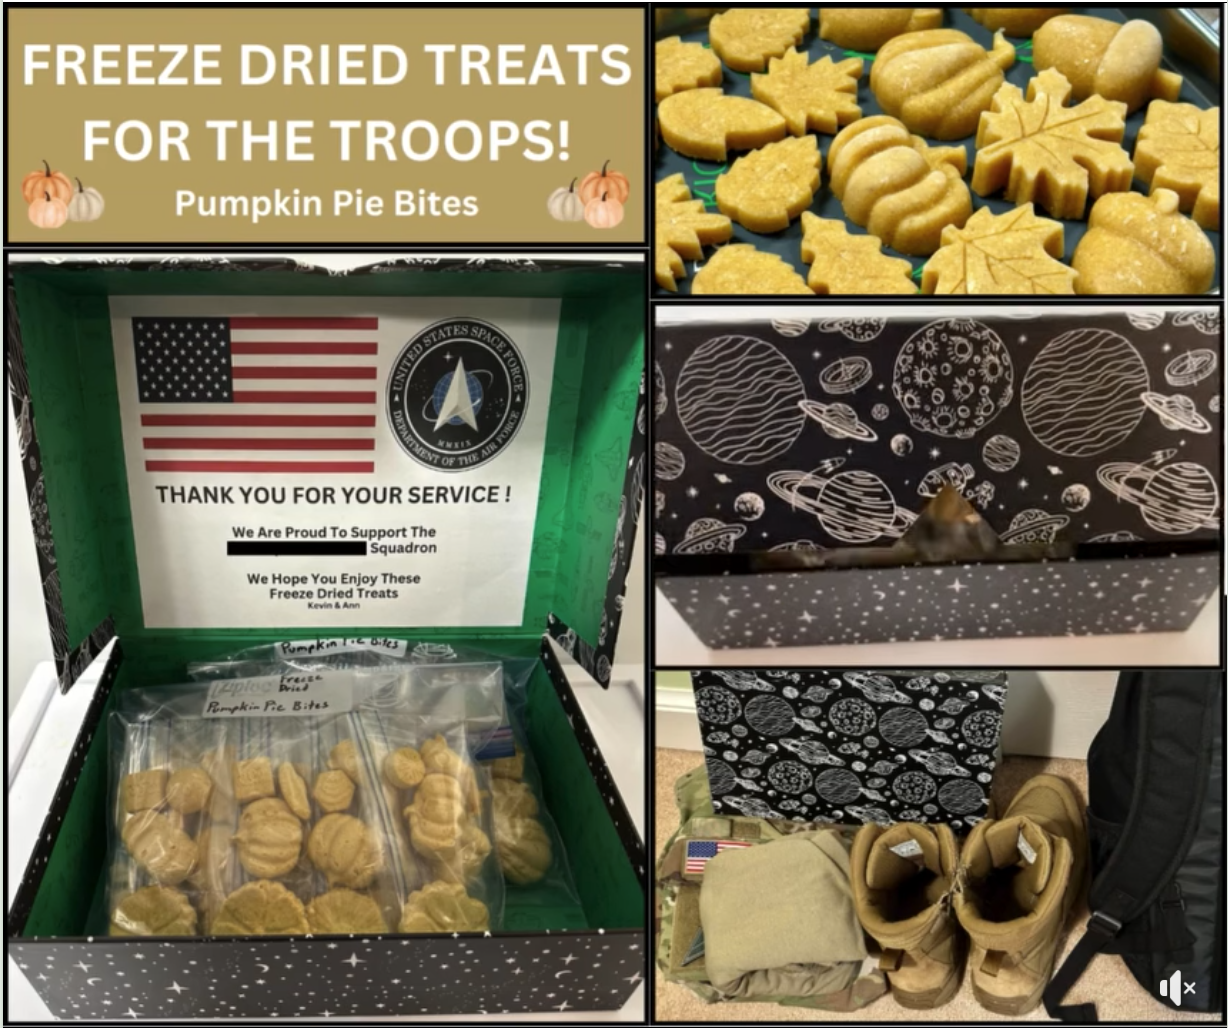
9. The Pumpkin Pie Treats were AMAZING! We are lower-sugar lower-carb and are making these treats for our Son and his Teammates on Base, but of course we had to "Quality Check" our work, lol! They tasted like delicious, rich pumpkin pie - but like a cookie - and not too hard on the tooth (thanks to the added milk and filling the food molds only halfway). I'm not joking when I say it's been a real struggle to not dive into those jars, they are so delicious. We'll be doing more very soon so he has a big box full to return to Base with after his Leave is over.
Here is our link to the Fall-Themed Food Molds we used!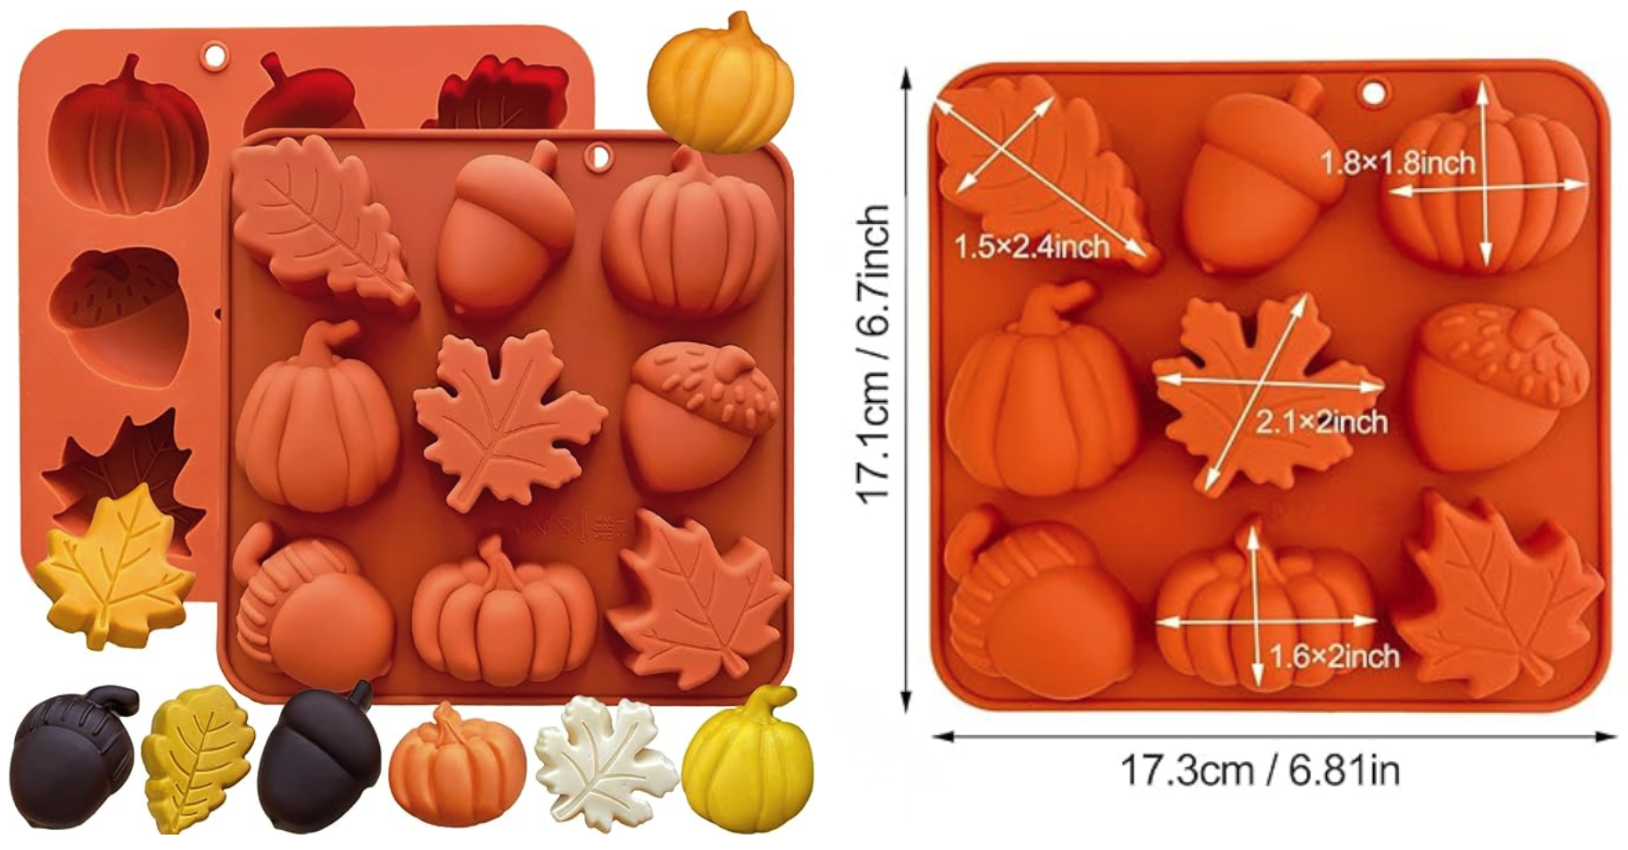
Love these shapes? Here are additional molds you should see:
Bite-Sized Pumpkins: https://amzn.to/46UhDZq
Mini Pumpkins, Acorns, Leaves: https://amzn.to/4nbSXSE
Pumpkins, Turkeys, Acorns, Leaves: https://amzn.to/3J7Dyoc
Pumpkins, Turkeys, Squirrels, Acorns, Leaves: https://amzn.to/3WxDz7V
Fall Leaves: https://amzn.to/47m9D4U
Pinecones, Acorns, Leaves: https://amzn.to/4n4qrC1
Halloween Pumpkins and Ghosts: https://amzn.to/3W4g1HJ
Here are some cute pumpkins molds in a set of 3: https://amzn.to/42Ln63P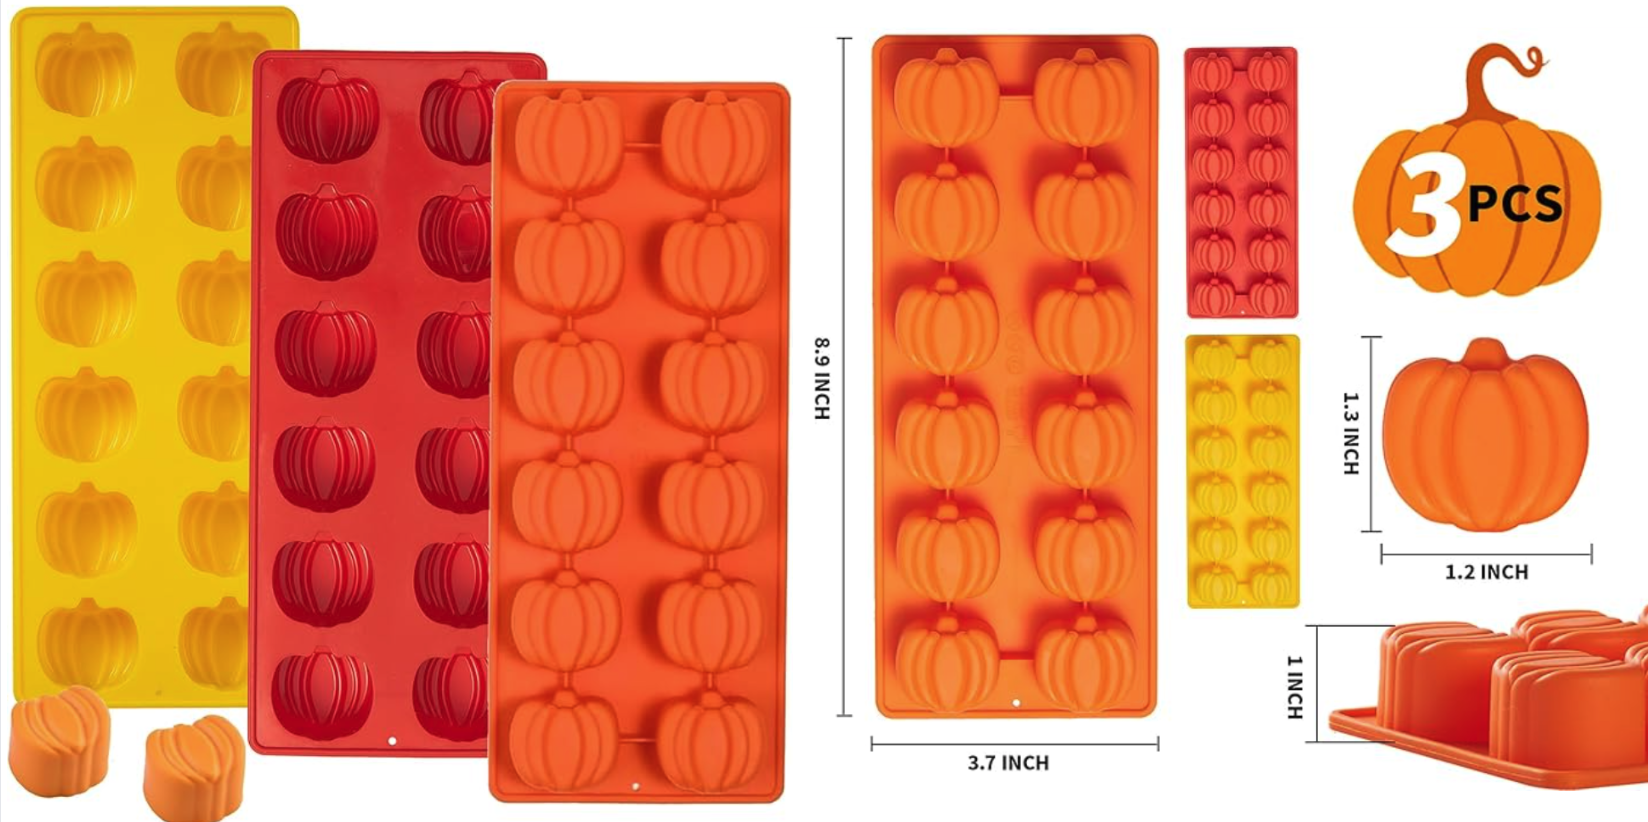
Photo Below shows the Pre-Frozen Pumpkin Pie Bites Removed from food molds and placed onto trays lined with silicone mats to prevent sticking. This is Before Freeze Drying.

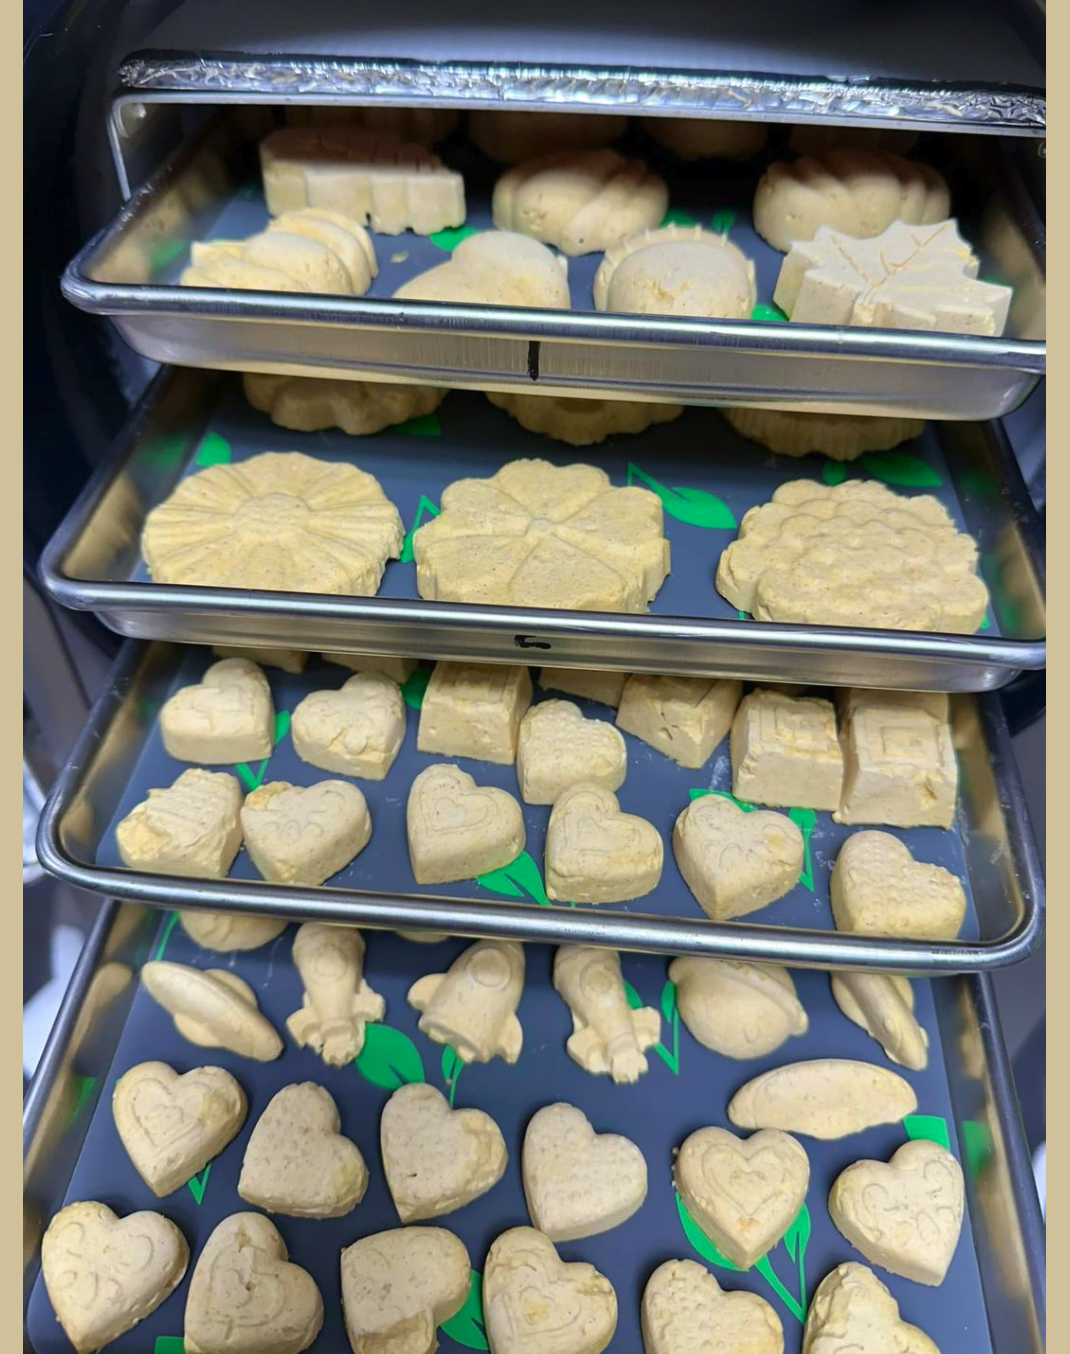
Photo Below shows the Pumpkin Pie Bites After Freeze Drying
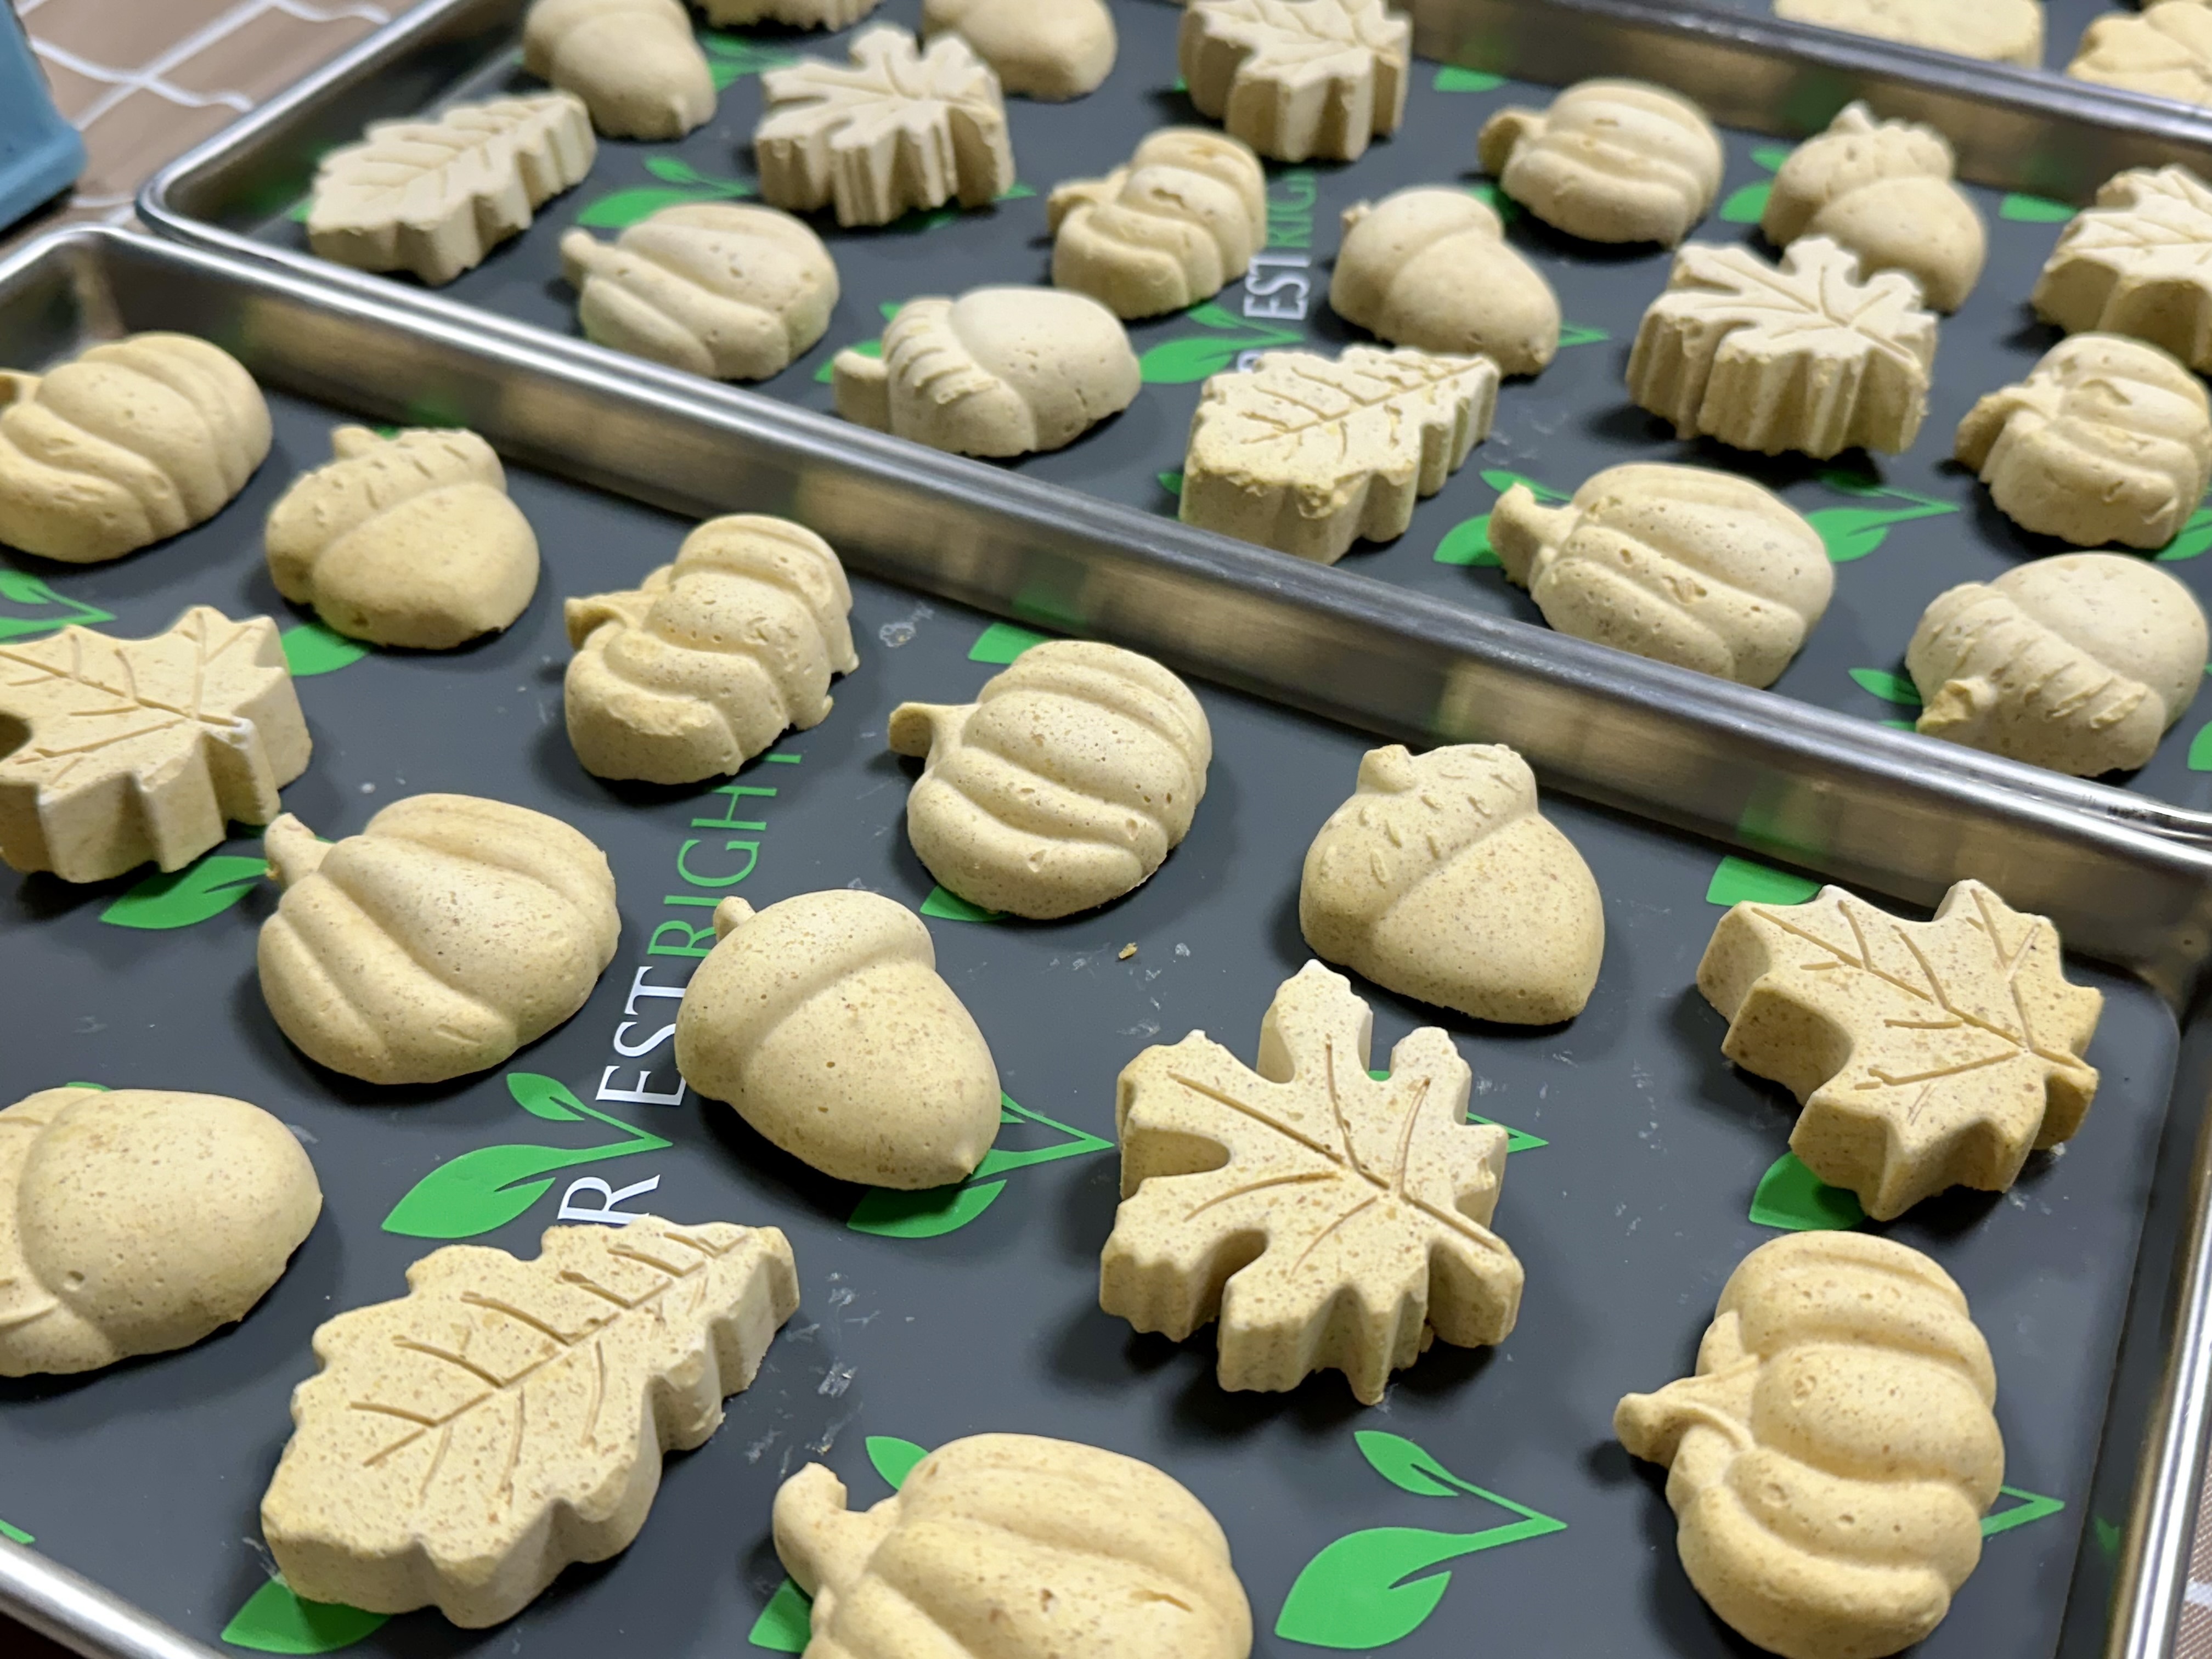
Photo Below shows Pumpkin Pies for Sale at our local Sam's Club. They were selling 3 lb pies for $5.98 each. They also have sales to get rid of the excess pies which means even more savings!
Top Left of Photo shows Cinnamon Applesauce that was spooned into the food mold - super fast and easy! The The lighter-colored mixture is the apple pie blended with milk to make it thick, yet spoonable for filling the food molds.
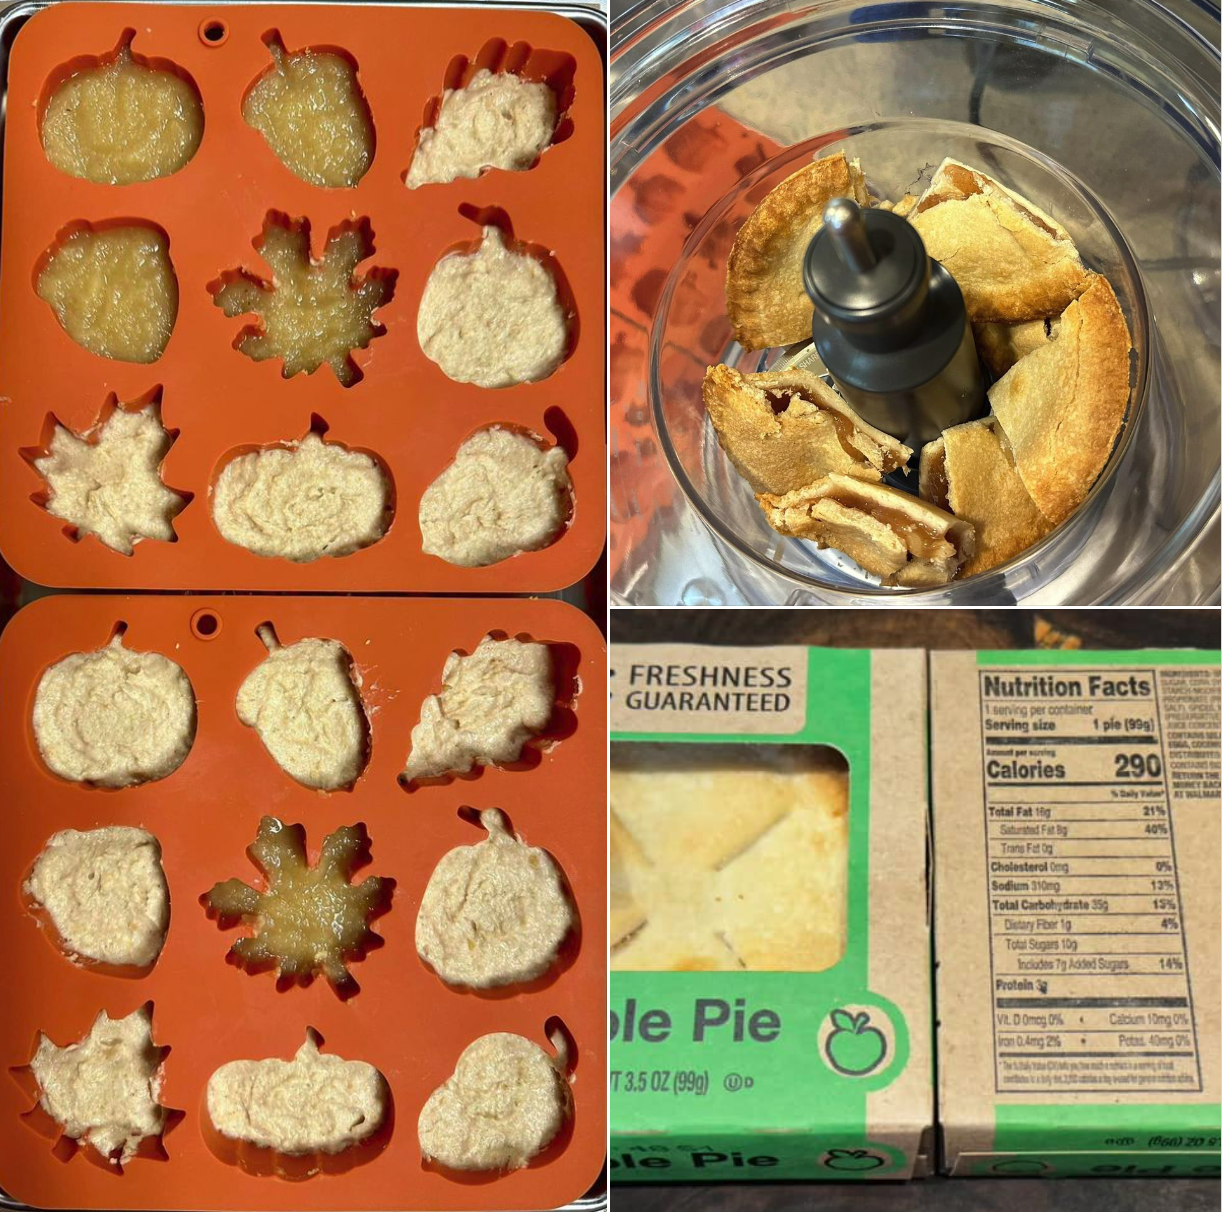
Photo Below shows the pumpkin pie we used for our first batch. It was a 1 lb pie from Walmart. For Batch #2 we used a 3 lb pie from Sam's Club - blended with milk, and then the mixture spooned into molds.
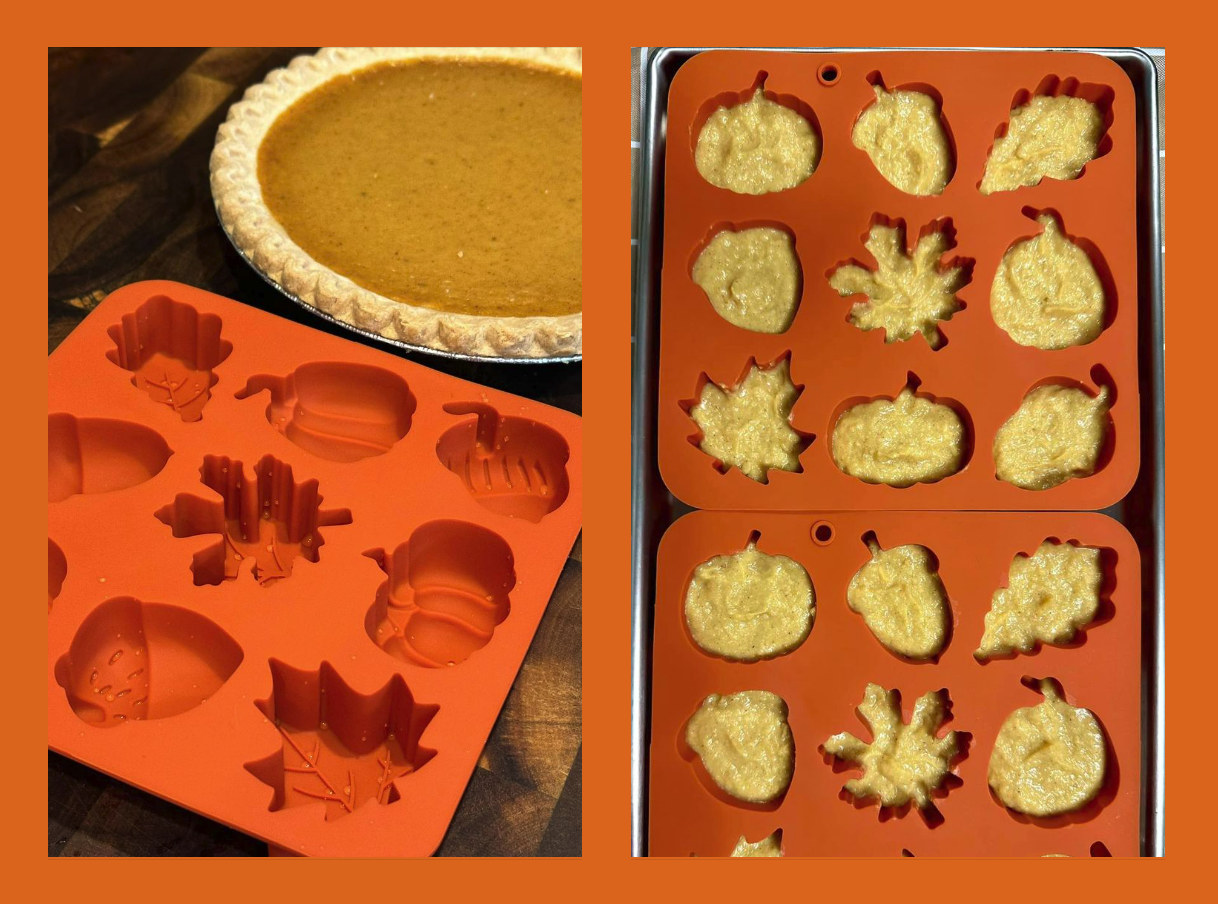
Photo Below shows Freeze Dried Pie Bites taken during a tray rotation.
Experiment Batch #2 (Using 3 lb Pumpkin Pies from Sam's Club) - Here's what we learned:
1. These Sam's Club pumpkin pies were much more affordable at $5.98 each for a 3 lb pie compared to the one we bought at Walmart for $12 for a 1 lb pie.
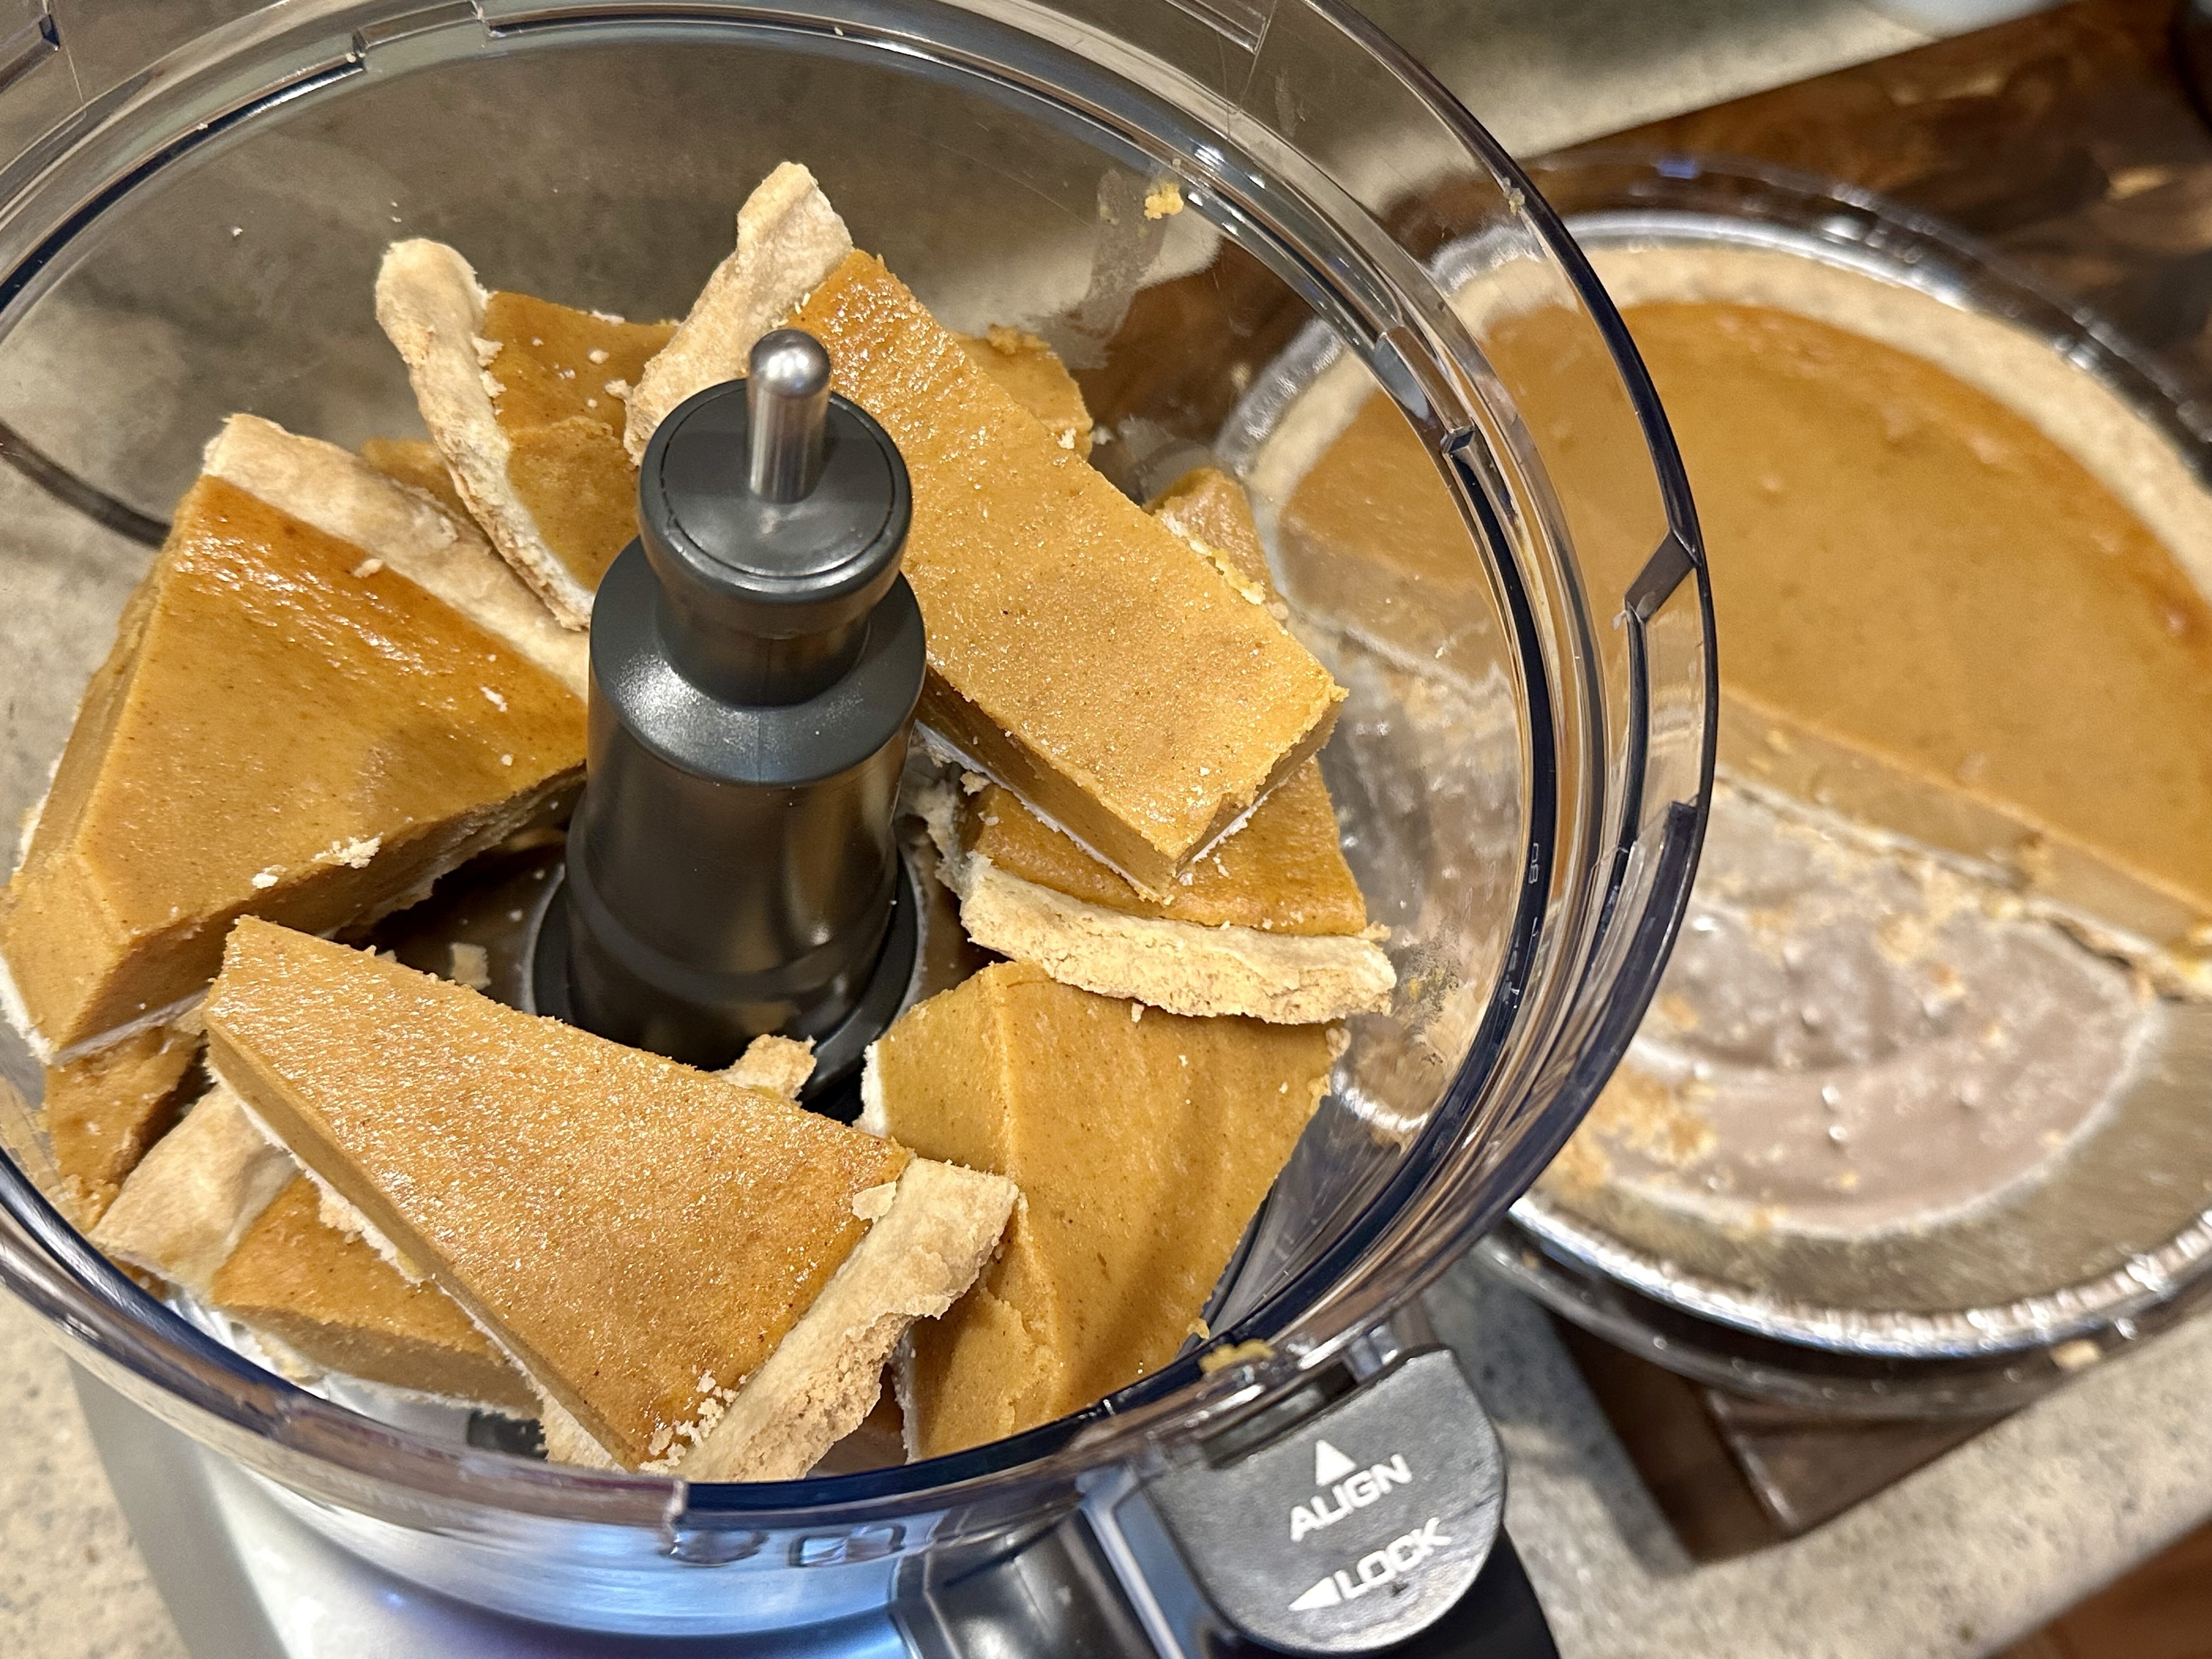
2. The Sam's Club pumpkin pies had a greater pie filling to crust ratio, which meant we didn't have to add as much milk compared to the other pie we used. This time, we cut the 3 lb pie in half, added 1 cup of milk, and blended in the food processor. This produced a thick, yet spoonable mixture to put into the food molds.
3. We used the Fall-Themed food molds we recently bought, along with the other silicone food molds we already had, to make a nice variety of fun shapes for the care package we're putting together for our Son to return to Base with (and share with his Teammates). Silicone food molds allow you to make some really fun shapes for gift-giving.
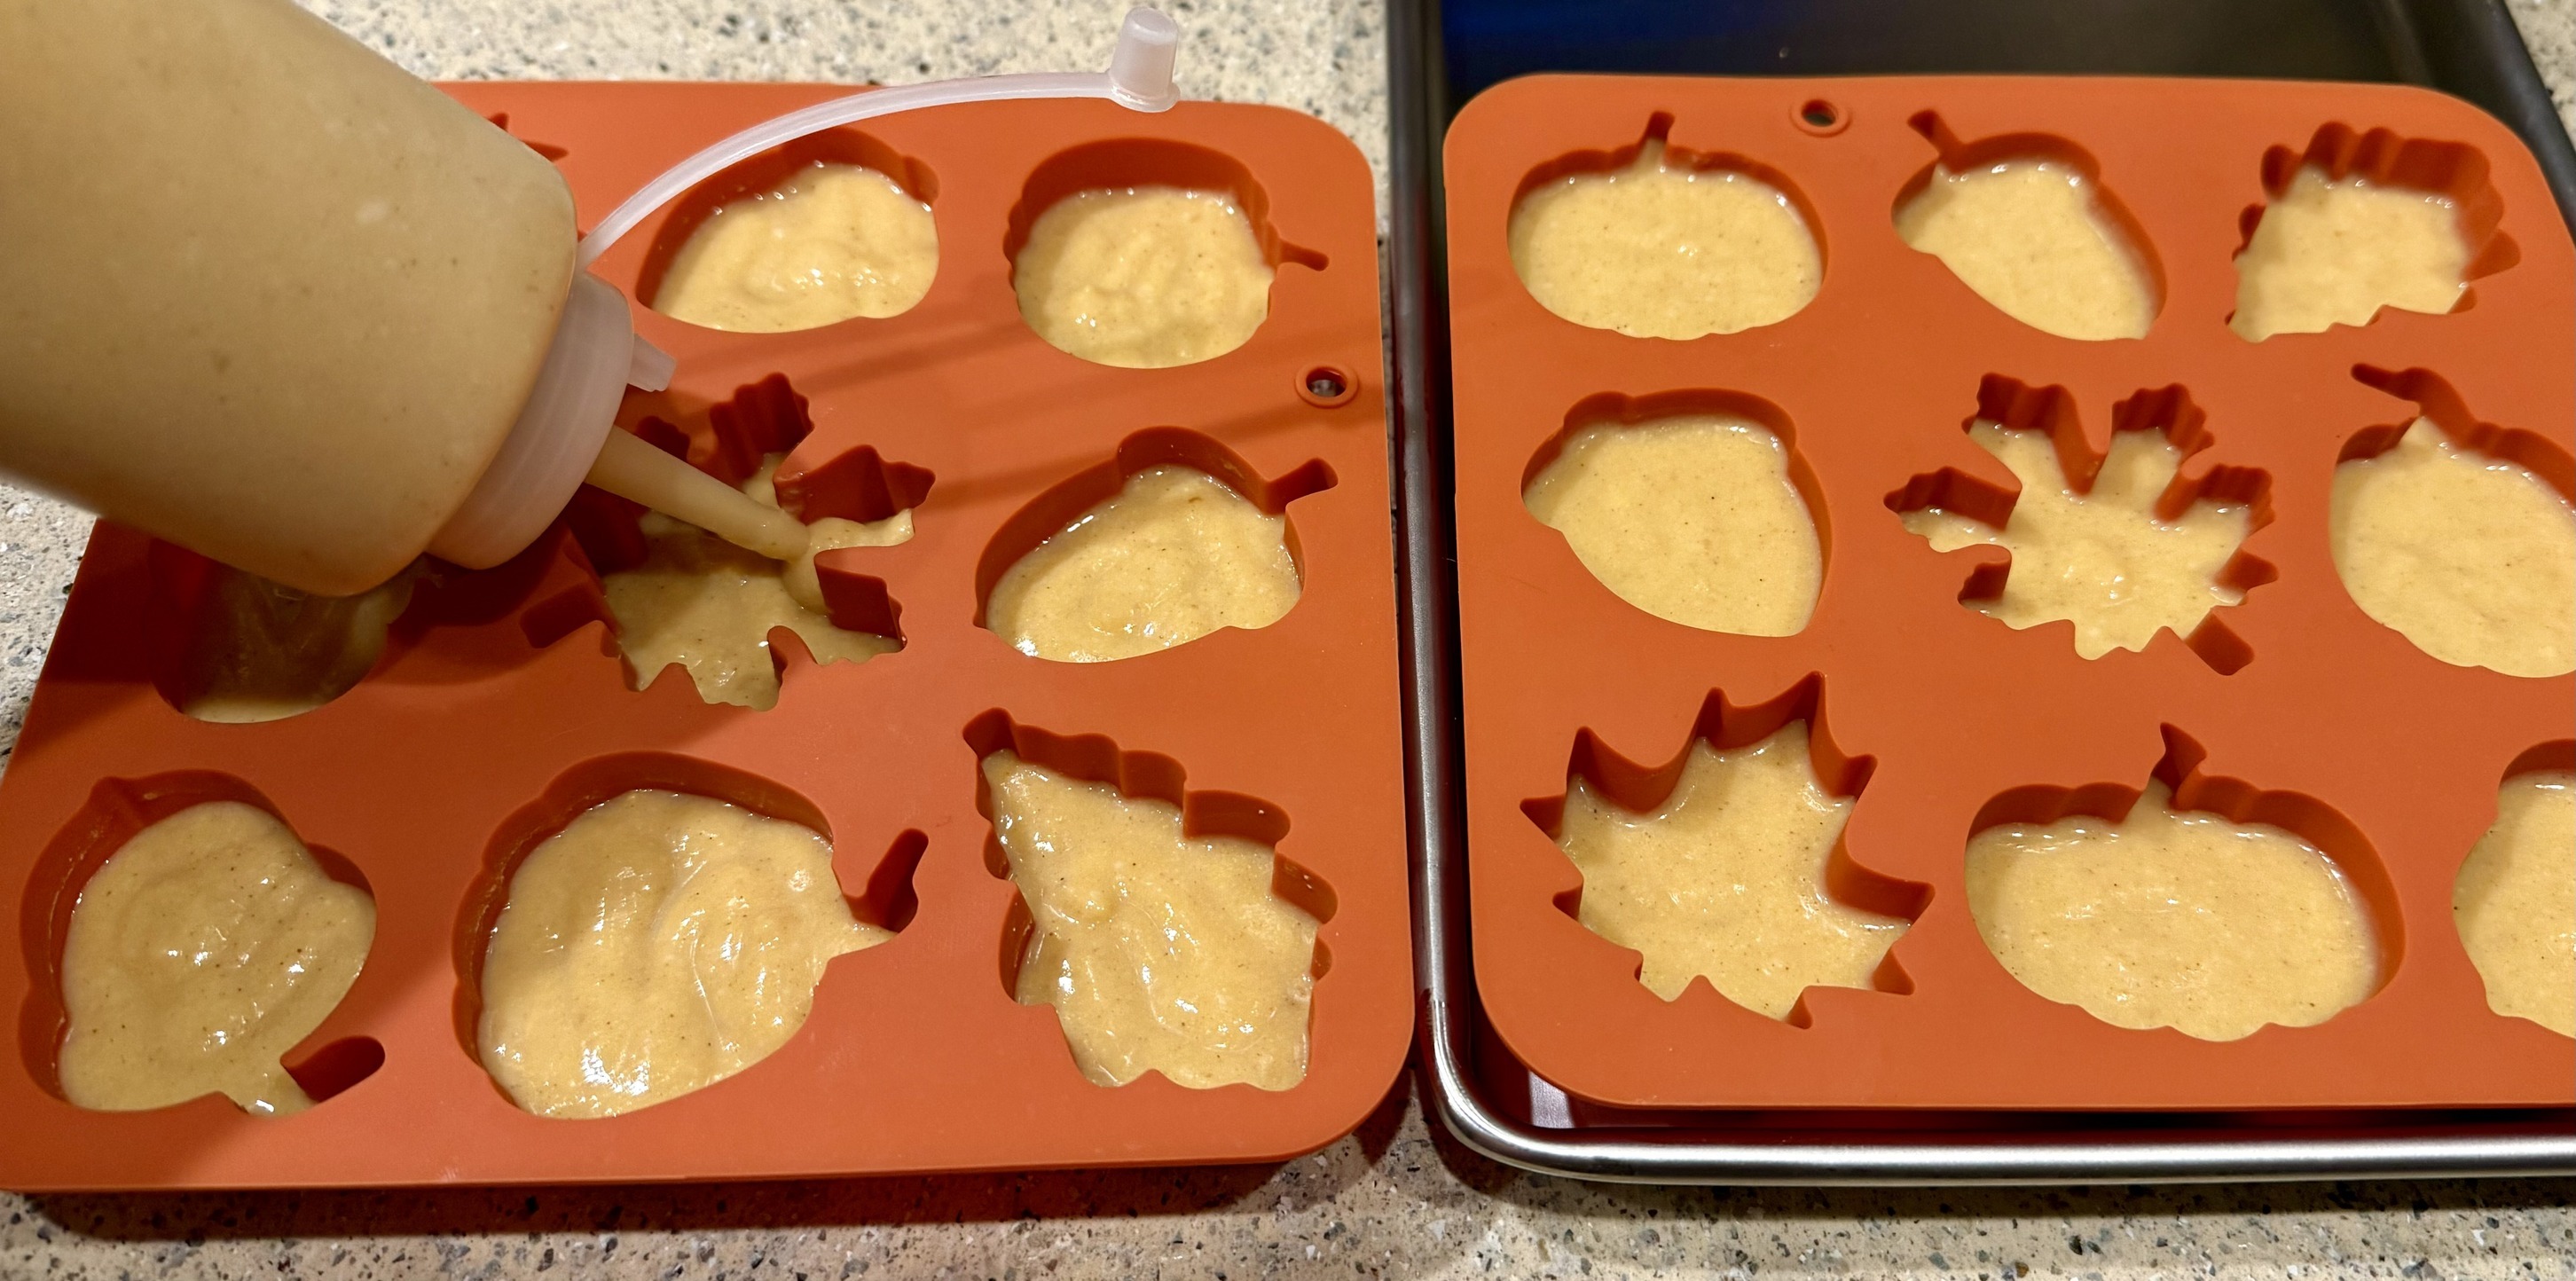
Photo Below shows the new set of Chef Squeeze Bottles we bought just for filling food molds - it has a narrow tip for the thinner mixtures and a wider tip for the thicker mixtures. Using these tips makes it so much easier to reach in all the corners and distribute the mixtures into all of the various shapes! These squeeze bottles come in a set of two or a set of five if you need to make larger batches at a time.
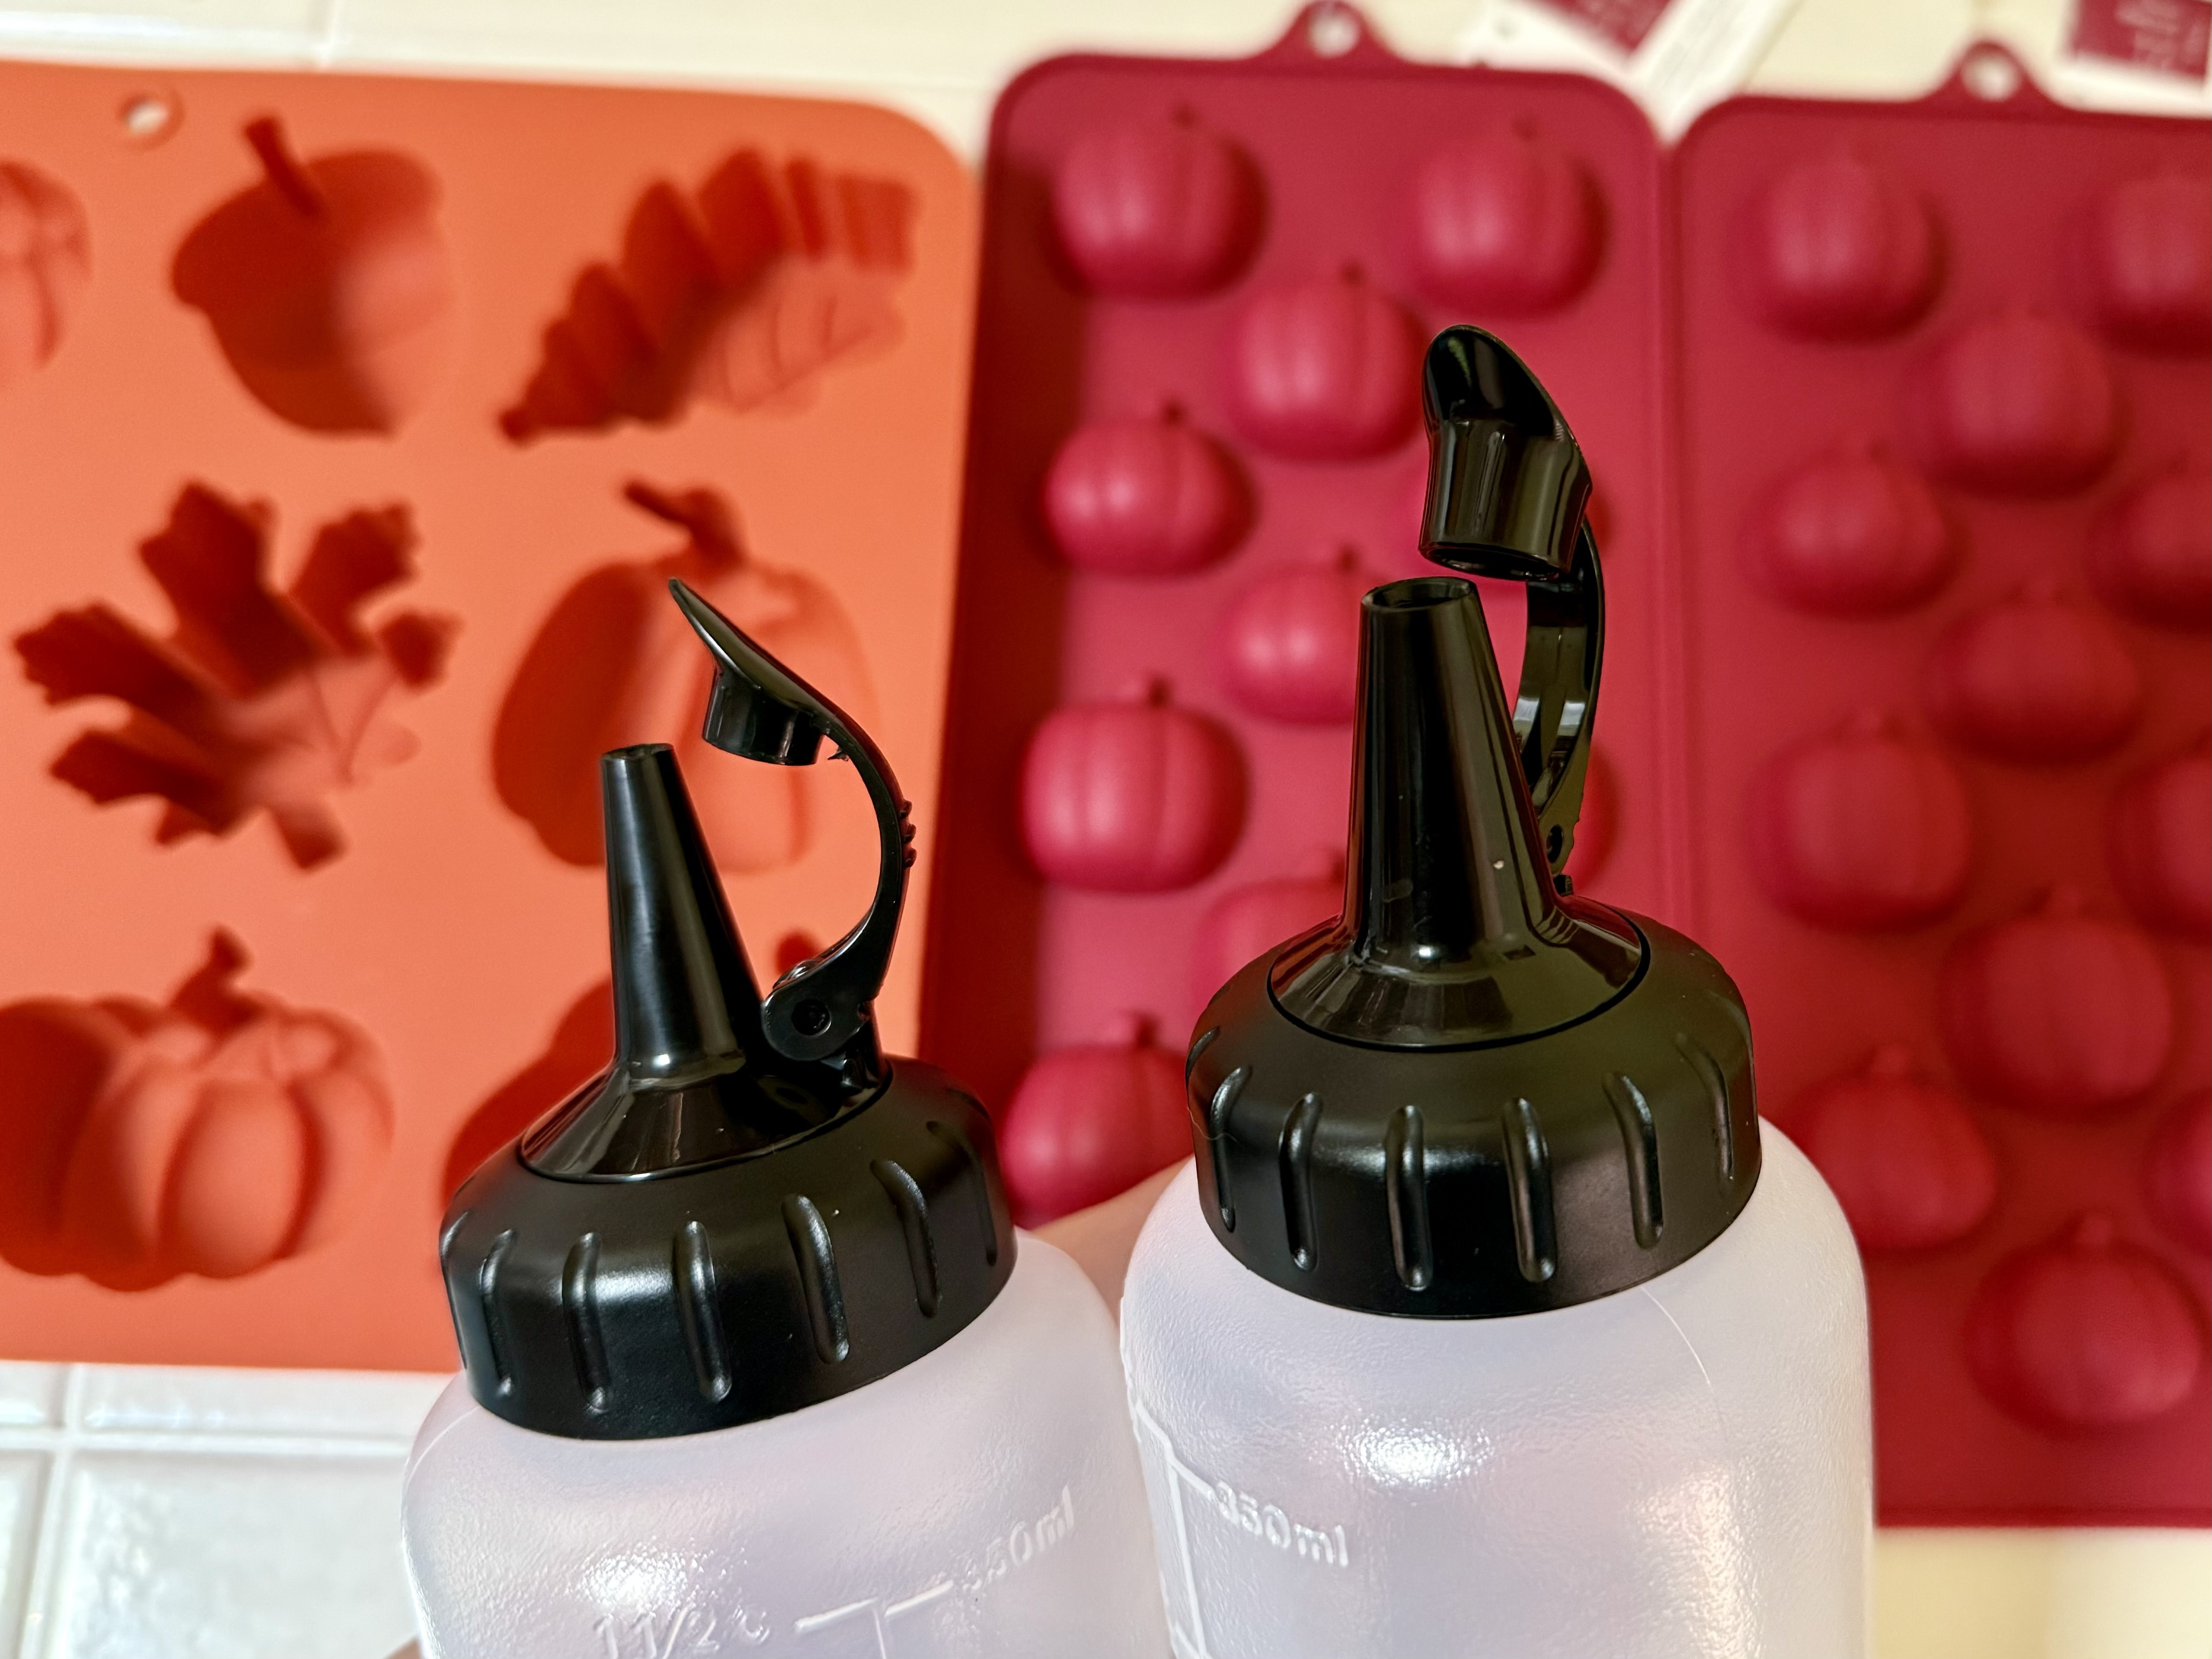
Photo Below shows 1/2 pie cut into pieces and placed into food processor for blending.
Experiment Batch #3 - Here’s what we learned:
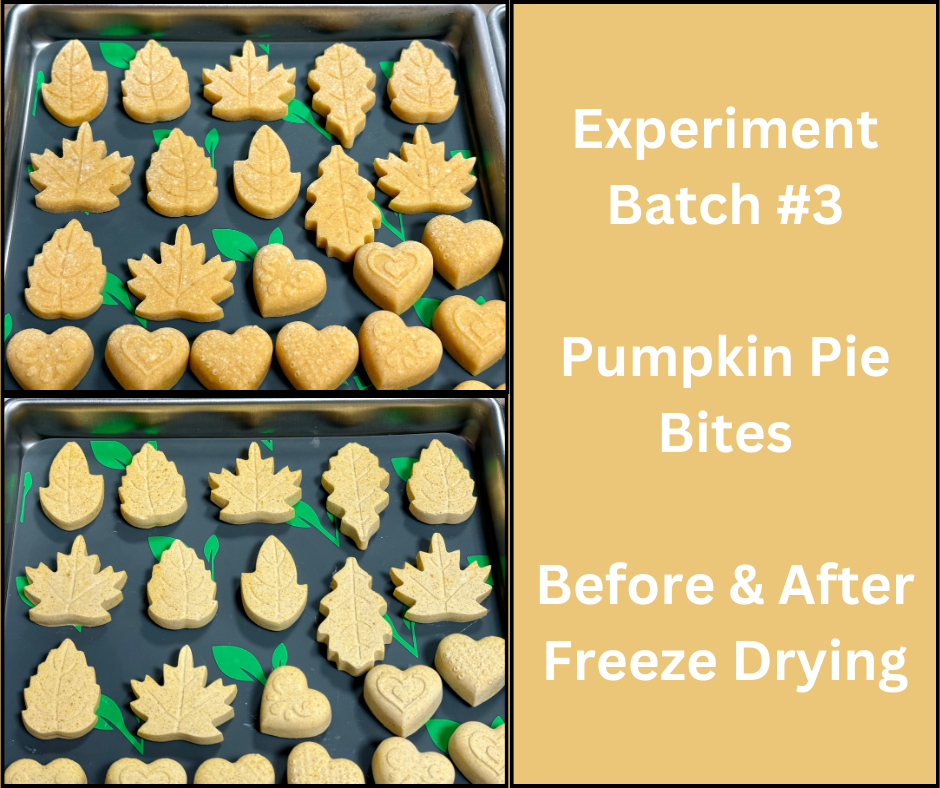
1. We were curious to see how delicate (or not) this batch would be since we used milk AND water to thin the mixture. This third batch had a much greater volume of liquids added. We took a 3 pound pie, cut in half, and blended each half with 1 cup of milk plus 2 cups of filtered water. This made the mixture easier to spoon into the molds. We also switched to a condiment bottle which made it even faster & easier to fill the food molds. Once FD, the shapes held together perfectly. They didn’t crumble to powder. I even gently turned them in the jars while filling and none broke apart. I was impressed! (This means I can ship to Family at Christmas time)
2. We were able to make more pie bites with this batch since adding all that liquid made the mixture go farther. I also imagine that per bite, the calories/carbs/sugar/etc were less than prior batches since the mixture was thinned out with so much water.
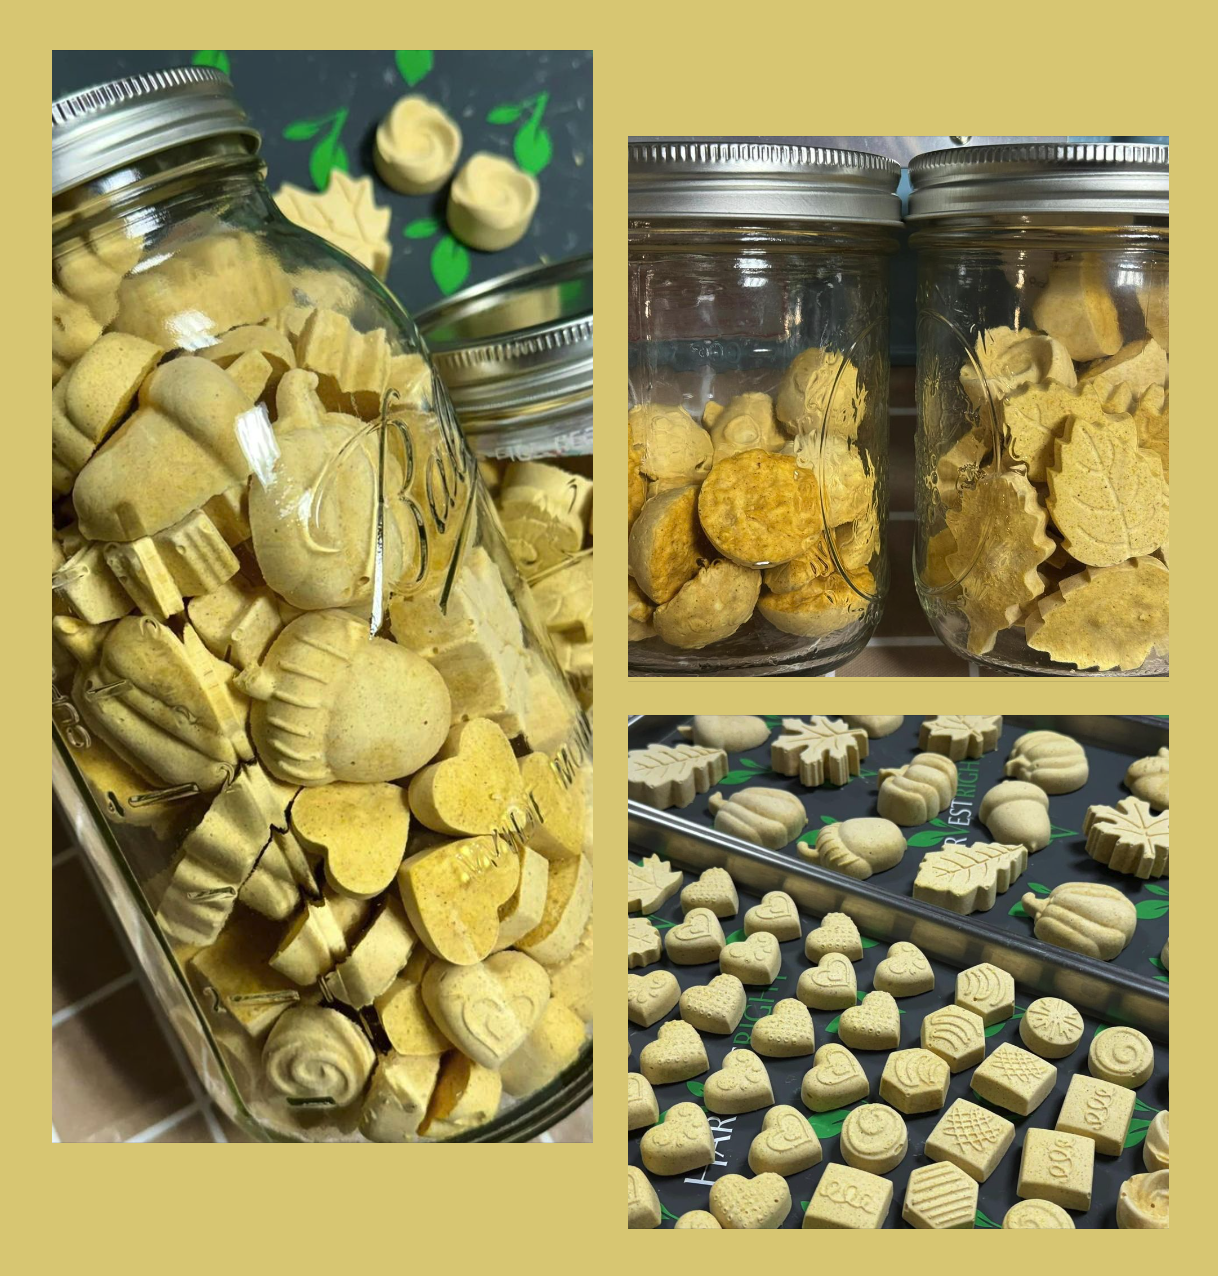
3. This batch was lighter in color compared to the other two batches. Still a nice orange, but noticeably lighter due to thinning out the mixture.
4. They were not too hard on the tooth to bite into. For the deeper food molds we only filled them halfway on purpose so they wouldn’t be too thick. The smaller ones (that you can just pop into your mouth) were delightful crunchy, like a cookie.
5. And the taste? Still tasted like yummy pumpkin pie! Still smelled like yummy pumpkin pie too! Even with all that “watering down.”
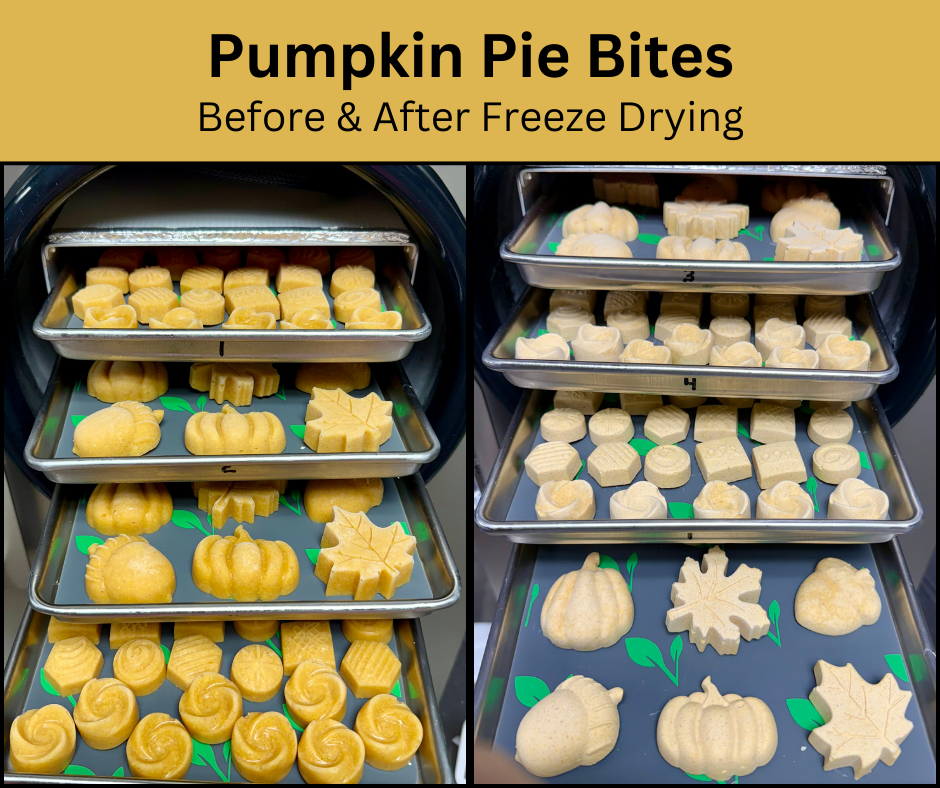
Photo below of two pint jars shows the color difference between Batches #2 and #3. (Still orange, just lighter)
Experiment Batch #4 - Here’s what we learned:
This fourth batch was a combination of pumpkin pie blended in a food processor with filtered water only - no milk this time. We took a 3 pound pumpkin pie from Sam's Club, cut half of it into smaller pieces so they would fit into the food processor, and blended with 3 cups of cool filtered water. We set the other half of the pie aside for other experiments.
1. This mixture was the thinnest and the easiest to work with compared to the other batches. The mixture had the consistency of applesauce - very thin and liquidy. Unlike the thicker mixture we had in batches 1 & 2, this thinner mixture was super easy to pour out of the food processor, and into a condiment bottle using a funnel. The mixture was so thin that it easily squeezed out of the thin tipped condiment bottle and into the food molds. I filled up the food molds much faster for this batch compared to the others. To be fair though, I used a couple different sizes of spoons for batches 1 & 2 to fill the molds and of course that took more time to do compared to squeezing out of a bottle. I think it was batch 3 that I also tried using a frosting bag and tip and that was faster than the spoons but not as fast as the condiment bottle. There's no way that the first two batches would have passed through the opening of the condiment bottle since they were much thicker in consistency.
2. Just like Batch #3, using 3 cups of liquid mixed with 1/2 of the pumpkin pie from Sam's Club (a 3 lb pie) made the mixture go farther compared to the first two batches where a much lesser amount of liquids were used. I was able to fill more molds and get a greater number of FD pie bites using the thinner mixture - so if you're trying to make foods stretch to share with a lot of people you may find this useful.
3. This fourth batch was the lightest in color. You could still tell the pieces were orange, but holding them next to the first two batches the color difference was definitely noticeable. This may or may not be a big deal to you depending on what you plan to use them for.
4. This batch was the easiest to bite into and the easiest to chew. If you've experienced FD Pie Bites in the past that were way too hard to bite into then this mixture may help you love making pie bites again. Since the mixture was thinner, the pie bites were less dense, and therefore more light and airy. For the larger shapes we only filled the food molds half way so they would not be too thick and easier to bite into. The smaller shapes that you just pop into your mouth were light and crispy.
5. We were worried that this batch would result in pieces that were too delicate since the mixture was thinned out so much. I used a small spatula to scoop them off the trays and load into jars. I started off being super careful, and they were fine. I let some drop into the jar and they were fine. I rolled them around in the jar and they were fine. I believe they are sturdy enough to ship through the postal system to Family for the holidays.
6. And the Taste? Well, they definitely tasted like pumpkin pie, lol! But...definitely not as concentrated of flavor compared to batches 1 & 2 that were much thicker and were a denser ratio of pie to liquids. If I gave them to Family & Friends at a gathering, and they didn't have the comparison of tasting the first two batches, they would definitely know they were pumpkin pie and would enjoy them. They smelled great too - all the batches smelled like delicious pie.
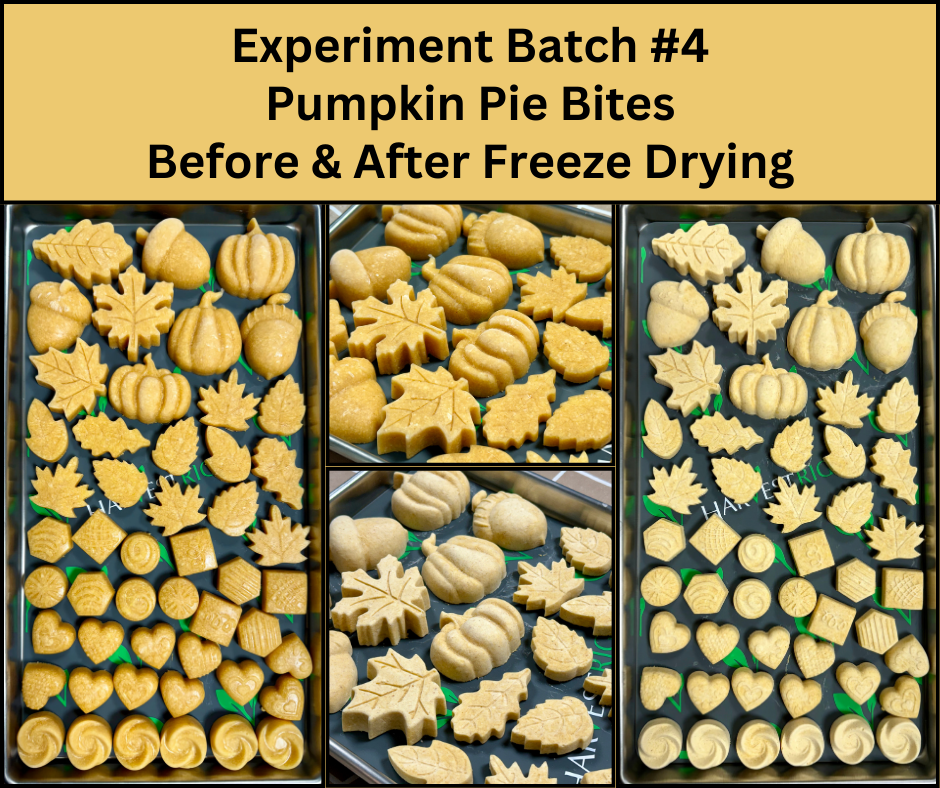
There are pros and cons to everything. If you like a more dense, more flavorful, more colorful pie bite, then do the mixture of batches 1 & 2. Just know that they will be much more like a crunchy cookie to bite into - not too hard on the tooth, but definitely not as light as batches 3 or 4.
If you're more concerned about having a lighter pie bite that is even easier on the tooth, and don't mind the lighter color & more delicate flavor, then do the mixture of batches 3 or 4. Also if you are pressed on time then it's easier to have a thinner mixture to squeeze into food molds using a condiment bottle.
This could also be a fun project for kids! (you cut the pie and prepare the mixture in the food processor, and they can fill the molds)
We hope you find this to be Interesting, Informative, and Inspires you make some freeze dried pie treats very soon! Great for Care Packages, Holiday Parties, Gift-Giving - they are sure to generate a fun conversation at any gathering.
Photo below shows the care package we put together for our Son to bring back to Base and share with his Teammates (we heard back later that it was a hit & everyone loved the Pie Treats!) We used snack-sized zip bags to make distribution easier. Those were temporarily packed in two large mylar bags for the trip back, and then opened to share the little zip bags with everyone.
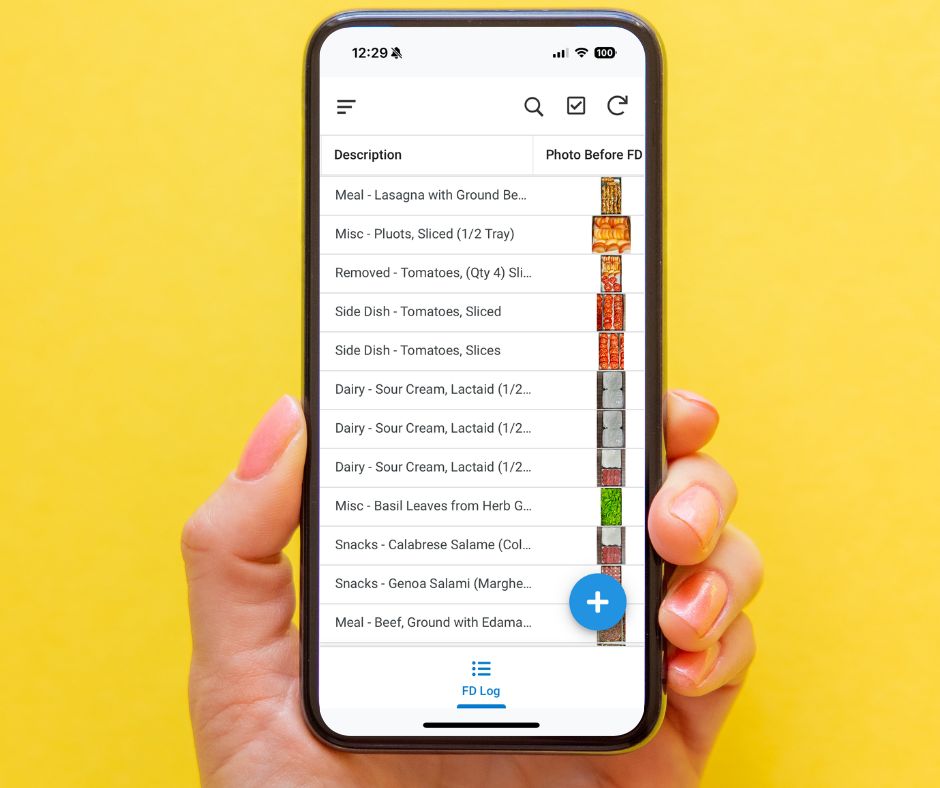
We track all of our batches of FD foods in our FD Log App! It's handy to review past batches of similar food items to see how long they took. It helps us find specific items quickly too since there's a field for the storage location. If you'd like to learn how to custom-build your own FD Log App to track your batches and inventory using your cell phone or tablet, click here to learn more about our online tutorial!
We believe in Collaboration. Let's all help and support each other to become more Confident Freeze Dryers.
Love Our Content?
Want To Support Our Efforts In The Freeze Drying Community?
Here are ways you can contribute:
1. Use our links to purchase FD tools and Accessories. It's free for you and may earn us a small commission
2. Need to get more organized? Purchase our Online Training Guide to learn How to Custom-Build your own FD Log App to track your batches and storage inventory
3. Subscribe To Our YouTube Channel
4. Buy us a coffee! Your donations fuel our passion for freeze drying - We Appreciate Your Support!
5. Share Our FD Blog Posts With Others Who Will Enjoy This Info
6. Join our Facebook Group Freeze Dried Food For Travel And Storage
Scroll Down To See More Posts On Our Freeze Drying Projects And Experiments