I’ve been driving my 2022 Tesla Model Y RWD for almost two years now but shortly after I took delivery, the first accessory I installed right away was a mini instrument cluster. I had one installed prior to this and I love them all even though I replace them constantly. But not for the wrong reasons, don’t get me wrong. Technology and innovation move at such a fast pace that within less than two years of ownership, there had been four types of vent-mounted mini instrument cluster released. I feel I’m compelled to upgrade because not doing so when a new product is released feels like I’m missing out on something.
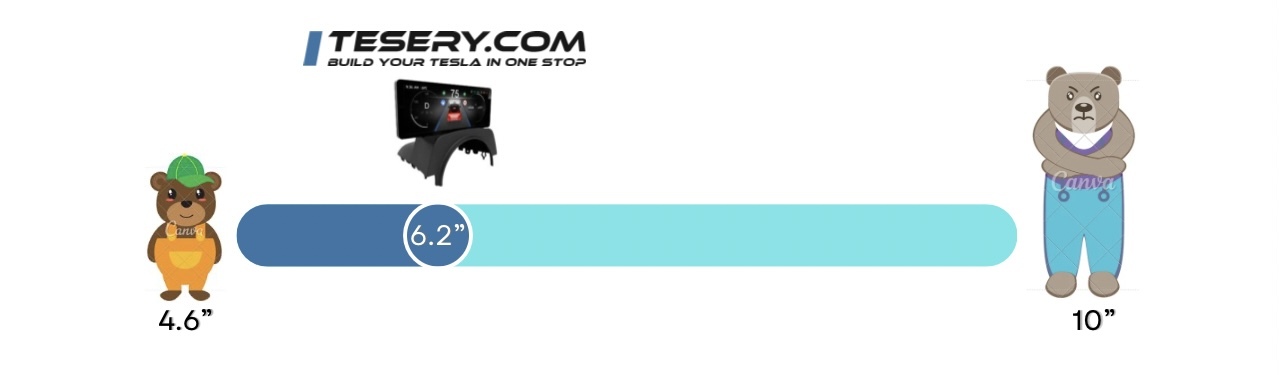
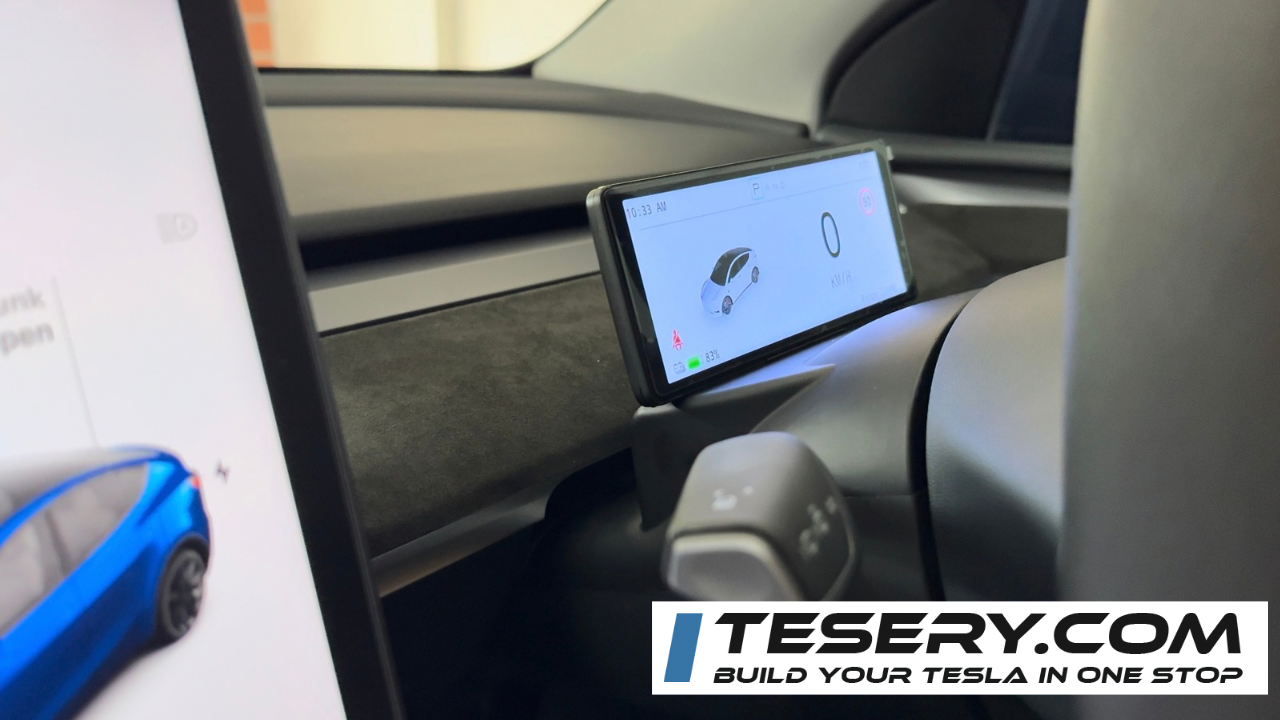
Introducing, the TESERY 6.2” Smart LCD Dashboard for the Tesla Model 3/Y.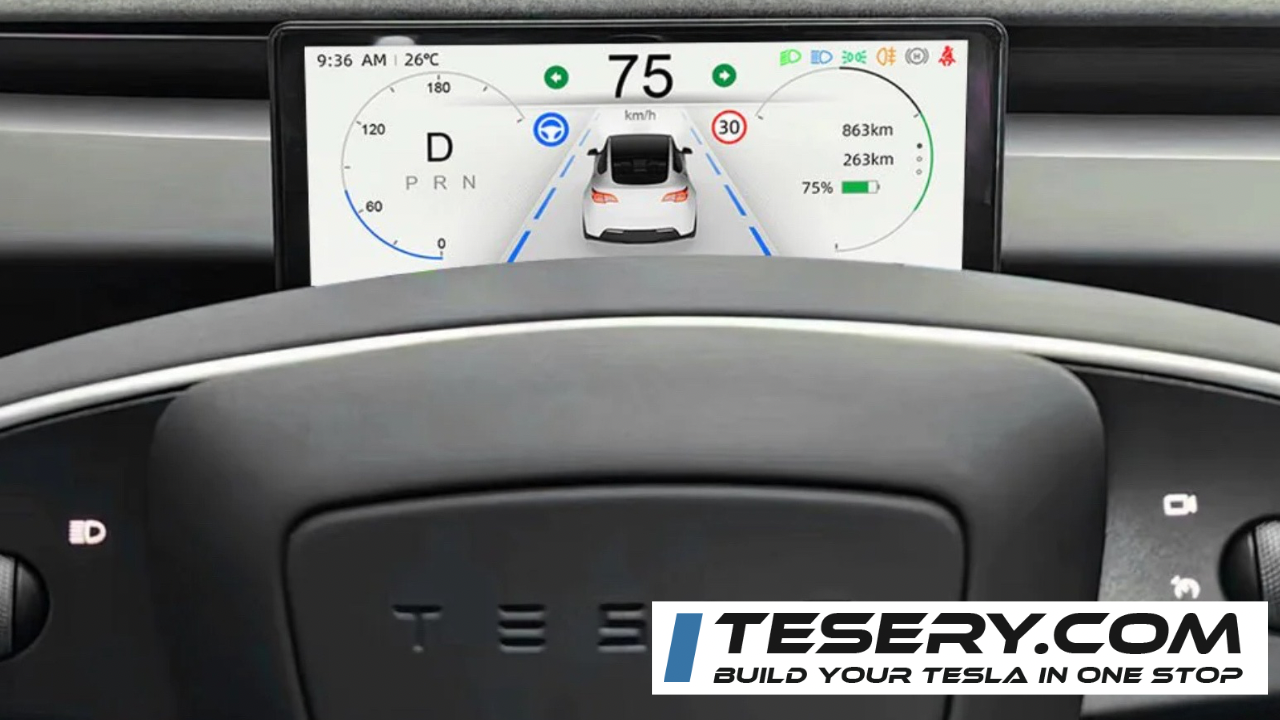
In this article, I will be covering all aspects of this product such as:
Installation
Features
System Settings
My Verdict
If you are a fellow Tesla Model 3/Y owner and you are looking for a great product to provide you with easy-to-read crucial driving information, you will appreciate this product. Have a read through this article and by the end if you are convinced, you can buy them from my affiliate link below (NOTE: I may get a small commission from Tesery if you click this link and purchase any of their product).
⭐️ PRODUCT AFFILIATE LINK:
https://www.tesery.com/products/model-3-highland-y-dashboard-display?ref=ANGDEALS
Installation
For those who prefer to see the instructions printed on screen (rather than as video), below is a rough guide based on the Youtube video I created. With any car accessory installation, the most crucial step is the removal/dismantling process as this is where most damages could happen so be careful when prying clips or pulling plastic trims that seems to be too tight.
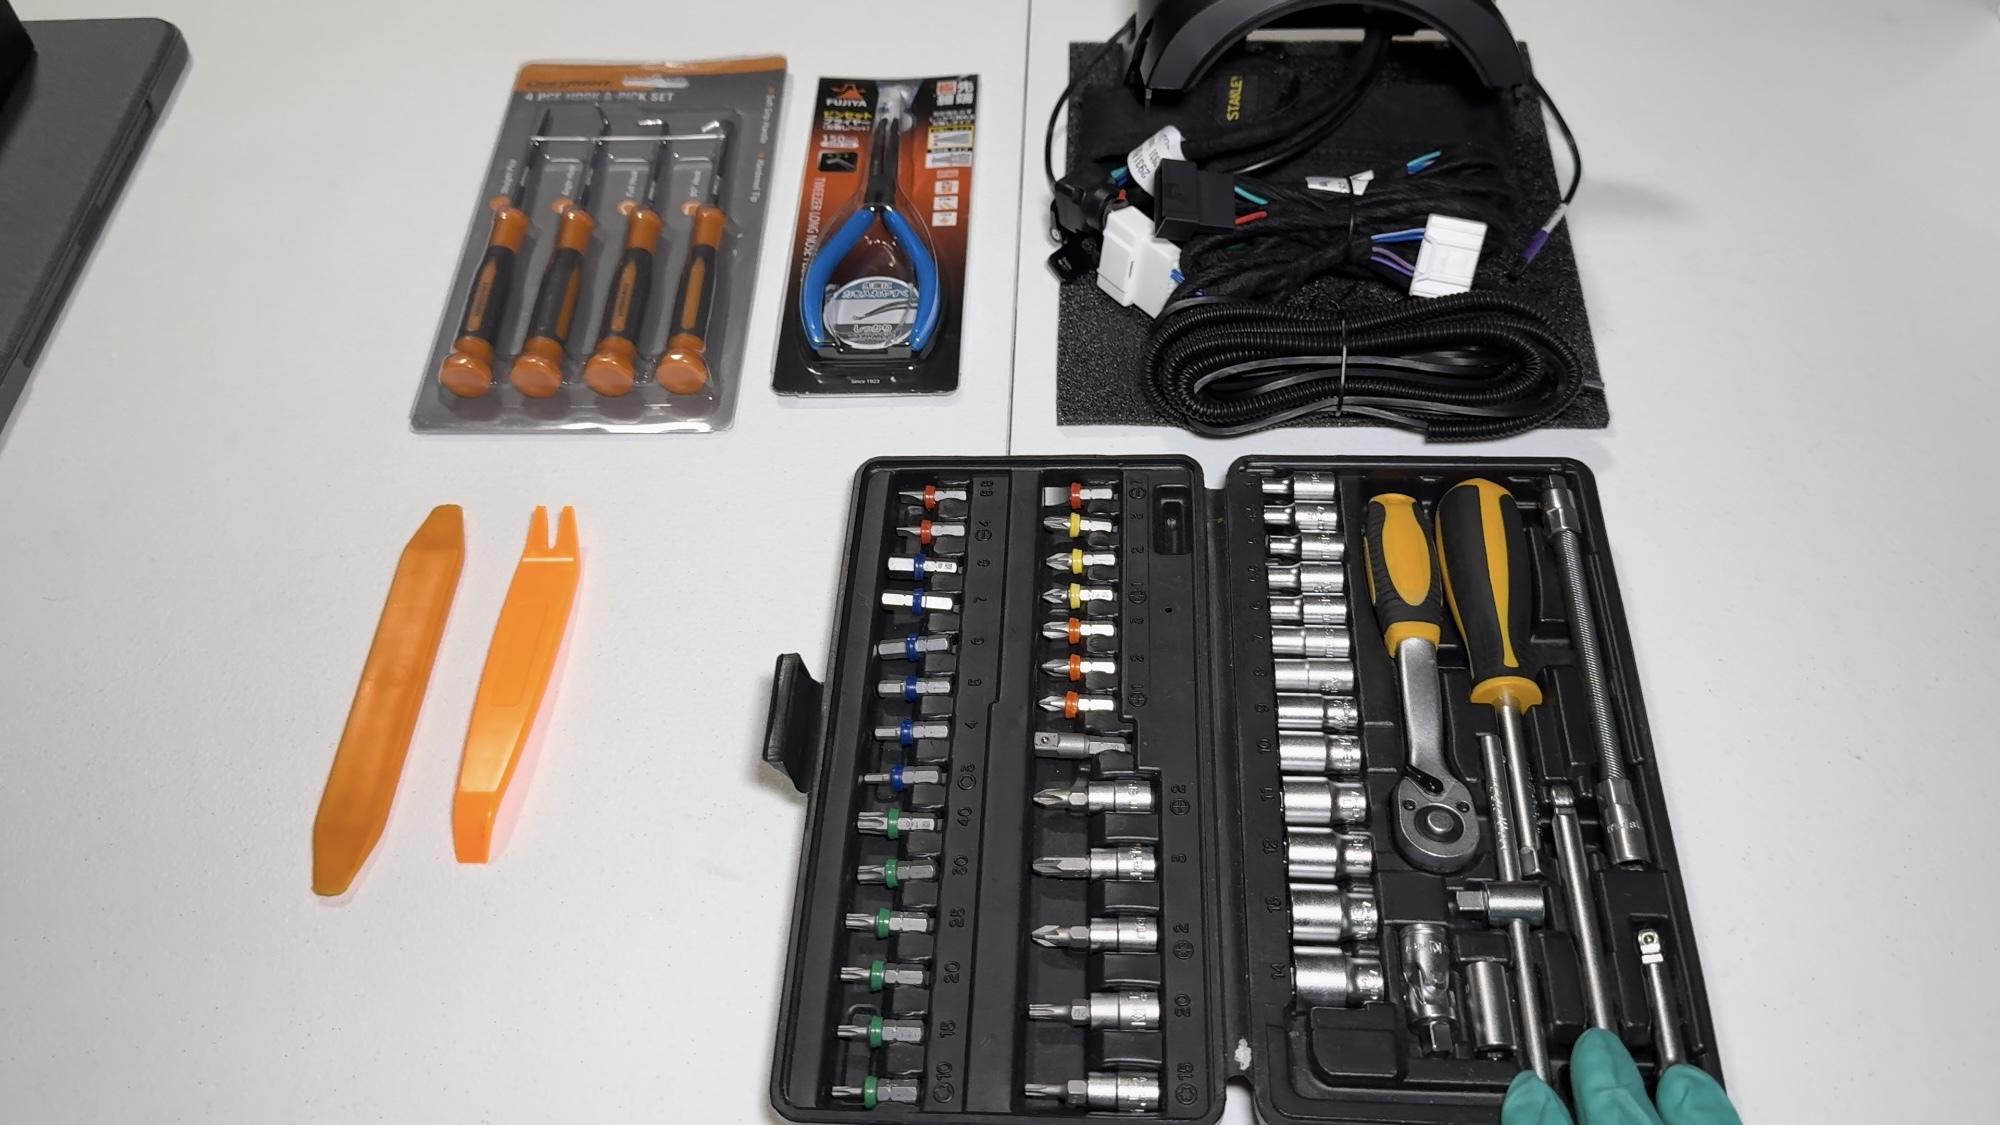
Tools you need:
Plastic pry tools
T20 Torx screw driver
Pick tool
Fabric tape
Zip ties
PART A - Disassemble trims
I wil list the trims to disassemble in the order the difficulty of removing them - starting from the easiest.
A.1 Driver-side footwell plastic trim
This trim is held in place by a self tapping plastic clip, a T20 screw and a series of 4 clips at the front. Remove the self-tapping plastic clip and T20 screw first. Then carefully pull trim from the front to release the clips. The plastic clip is in an area that difficult to reach and depending on the plastic pry tool you use, you might find it hard to get it into the right spot so just be patient.
A.2 Righthand-side front door trim
Notice how I said here “Righthand-side” instead of driver-side? It’s because the OBD port we need is located there. It means it doesn’t matter if your car is Left-hand or Right-hand drive. The OBD port we need to connect to is on the right side of the car.
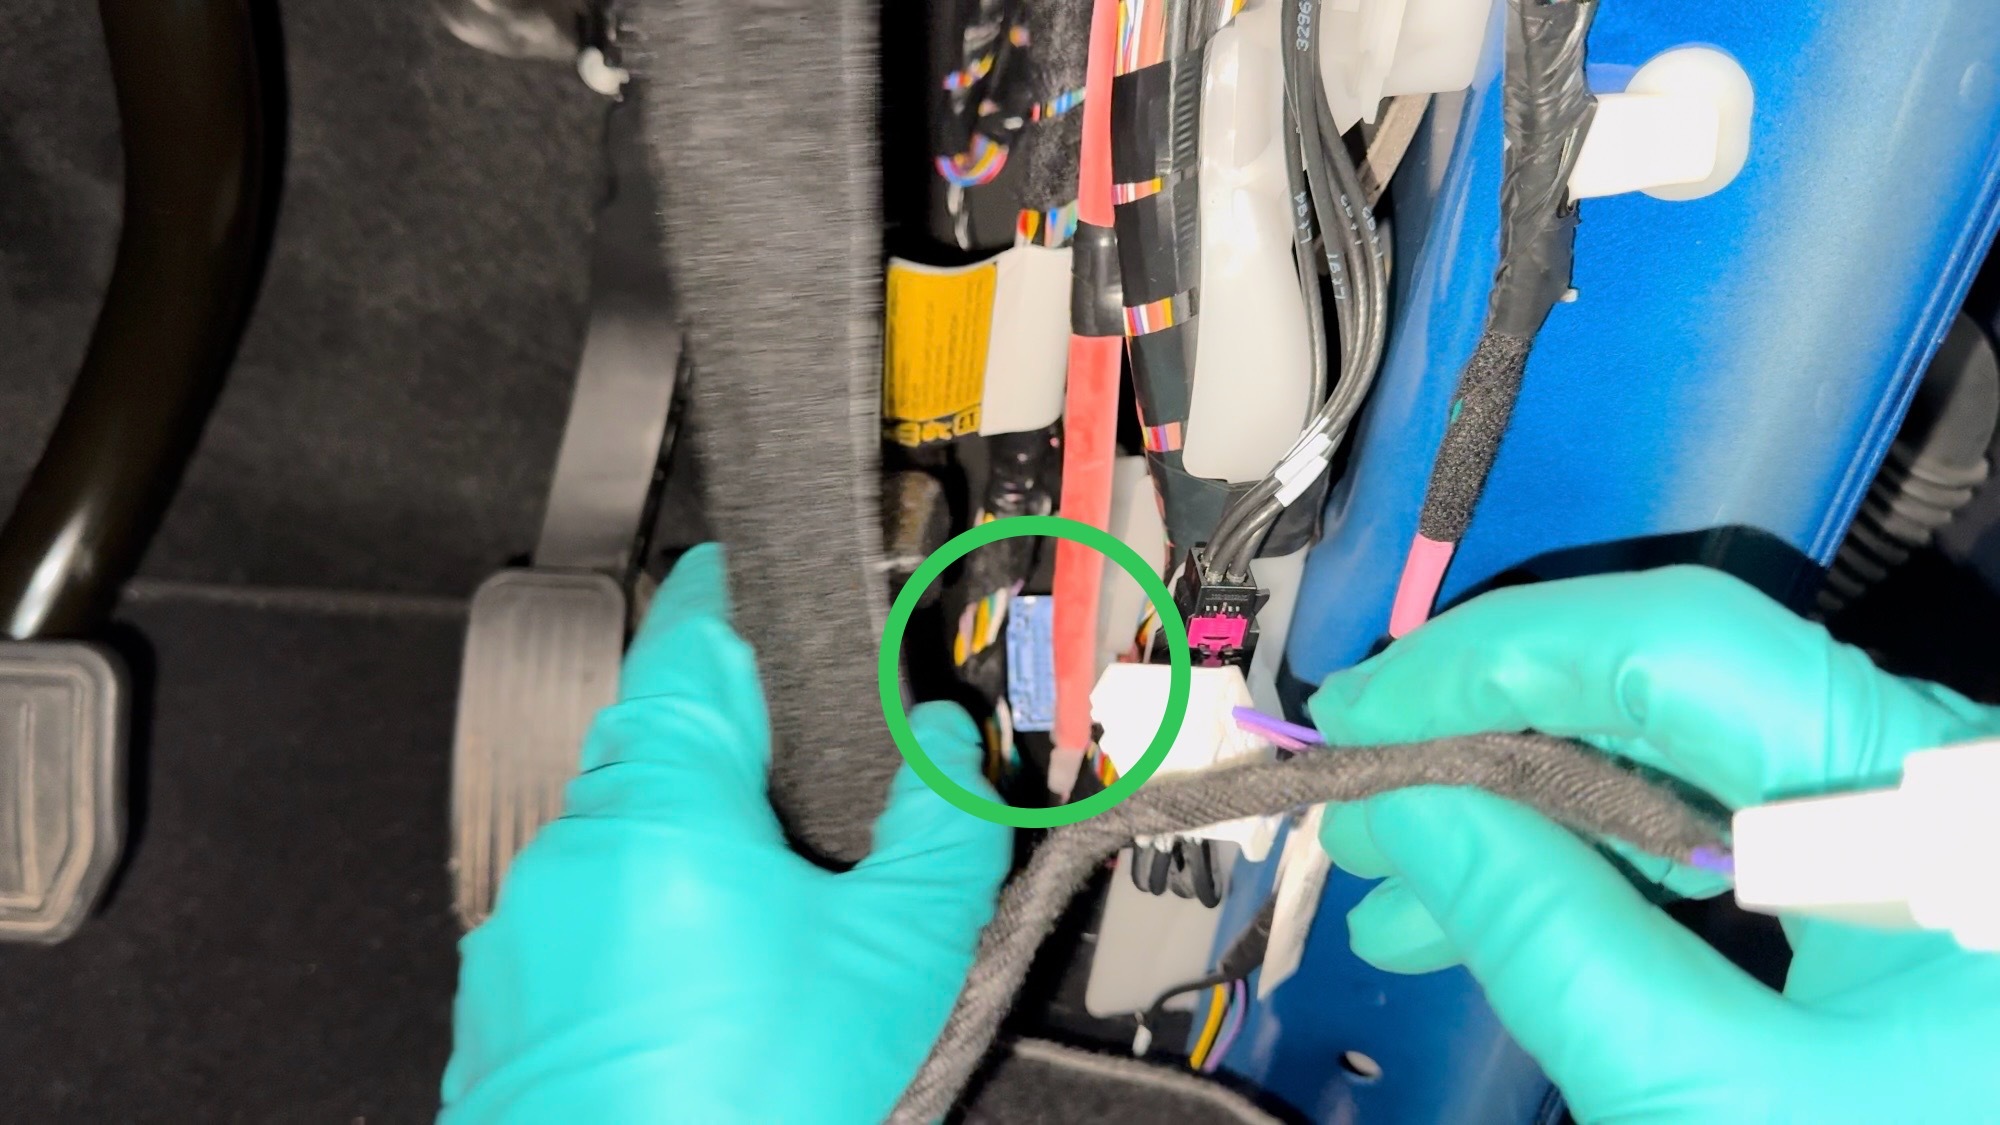
Start by peeling away the weather shield (that rubber piece keeping the rain from spilling over the cabin). Then using a plastic pry tool, remove the rectangular plastic trim just to the side of the dashboard. This is held by one locking clip and three locating pins. The plastic clip you need to release is located on the top of the trim. Once it’s undone, pull the trim to the side pivoting to the bottom, then pull it up.
You should now see circular clip. It has a two-stage lock so you first release the clip of inner circle. Pull it up (it won’t come off) and reach in to release the clip of the outer/bigger circle. From here, you should be able to start pulling the plastic trim that runs from the bottom of the A-pillar down to the door sill. Be careful not to scratch your car’s paintwork as this trim is held by a metal clip on the side. I suggest you cover it with a towel to prevent from scratching your car.
PART B - Wire Management (Coming Soon)
PART C - Install Tesery Unit (Coming Soon)
PART D - OPTIONAL: Install Front Camera (Coming Soon…)
PART E - Close (Coming Soon)
Notable Features
Here are some notable features of the product which caught me by surprise
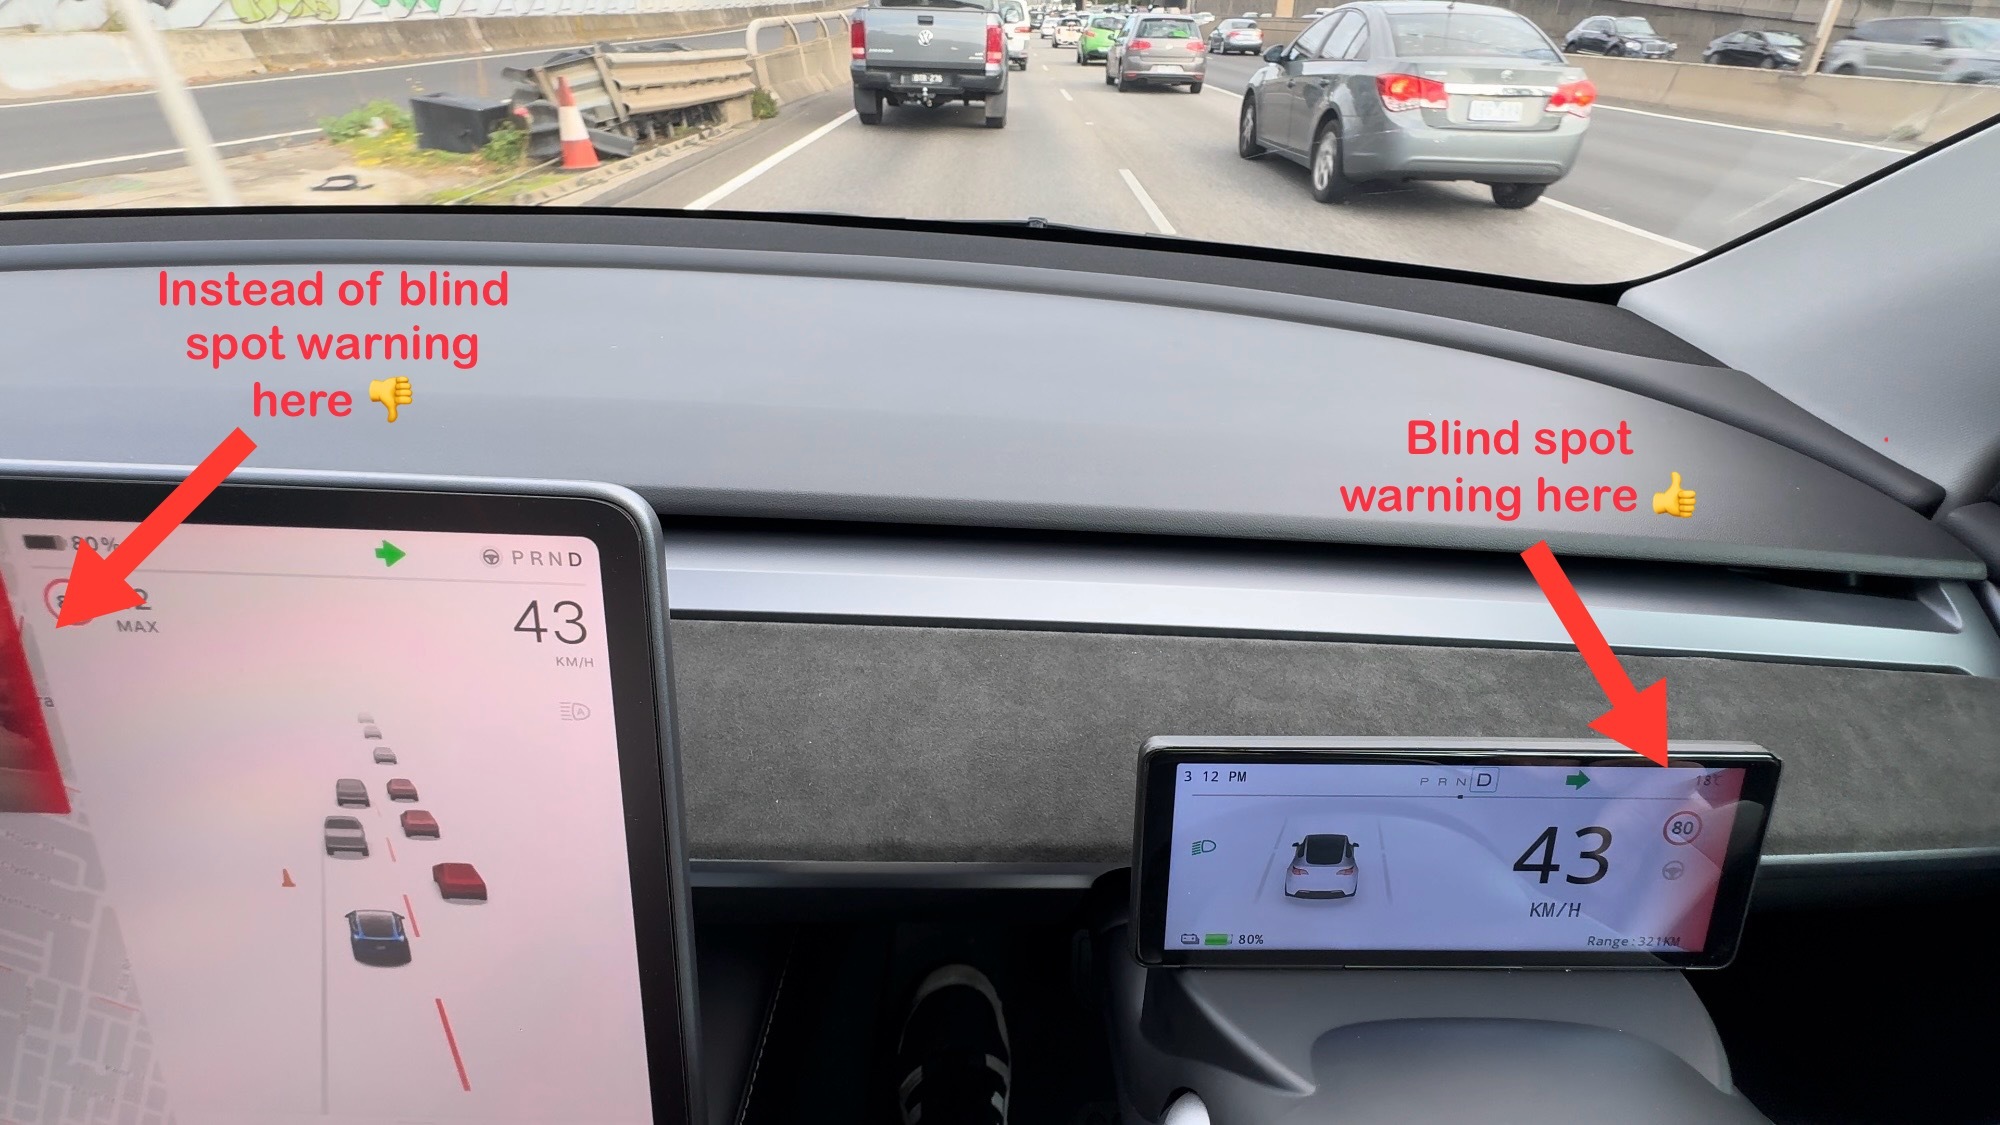
Blind spot warning - If there is one feature I would convince people to use this product, it is this blind spot warning in the digital instrument cluster. To be honest, Tesla’s implementation of the blind spot warning (which appears on the side camera projection on the main screen) is kinda useless in my opinion. I find it counter-intuitive to look at the screen when changing lanes. However, although not perfect, having the red warning light bar appear on the instrument cluster makes it visible on my peripheral vision even while looking at the side mirror.
Wireless Carplay - I don’t see Carplay that much useful on the Tesla but where I find it really helpful is when asking Siri to ring someone as this is the area where the Tesla software is terrible at (NOTE: I have all my phone contacts synched with the car). For example, if I press the right button on the steering wheel to initiate voice command and say “Ring xxx mobile”, I still need to select on the screen the phone to ring. Unlike with Siri, it just works!
Turn-by-turn navigation right in front of you - I have Carplay set to “Normal” mode which means it occupies 2/3 of the 6.2” screen while the remaining 1/3 is dedicated for Tesla instrument cluster. I love this setup because it’s very similar to an instrument cluster found in almost all cars on the road today.

System Settings
This is a mind-map representation of the product’s system settings. I’ve highlighted the options that I have for my car as reference.
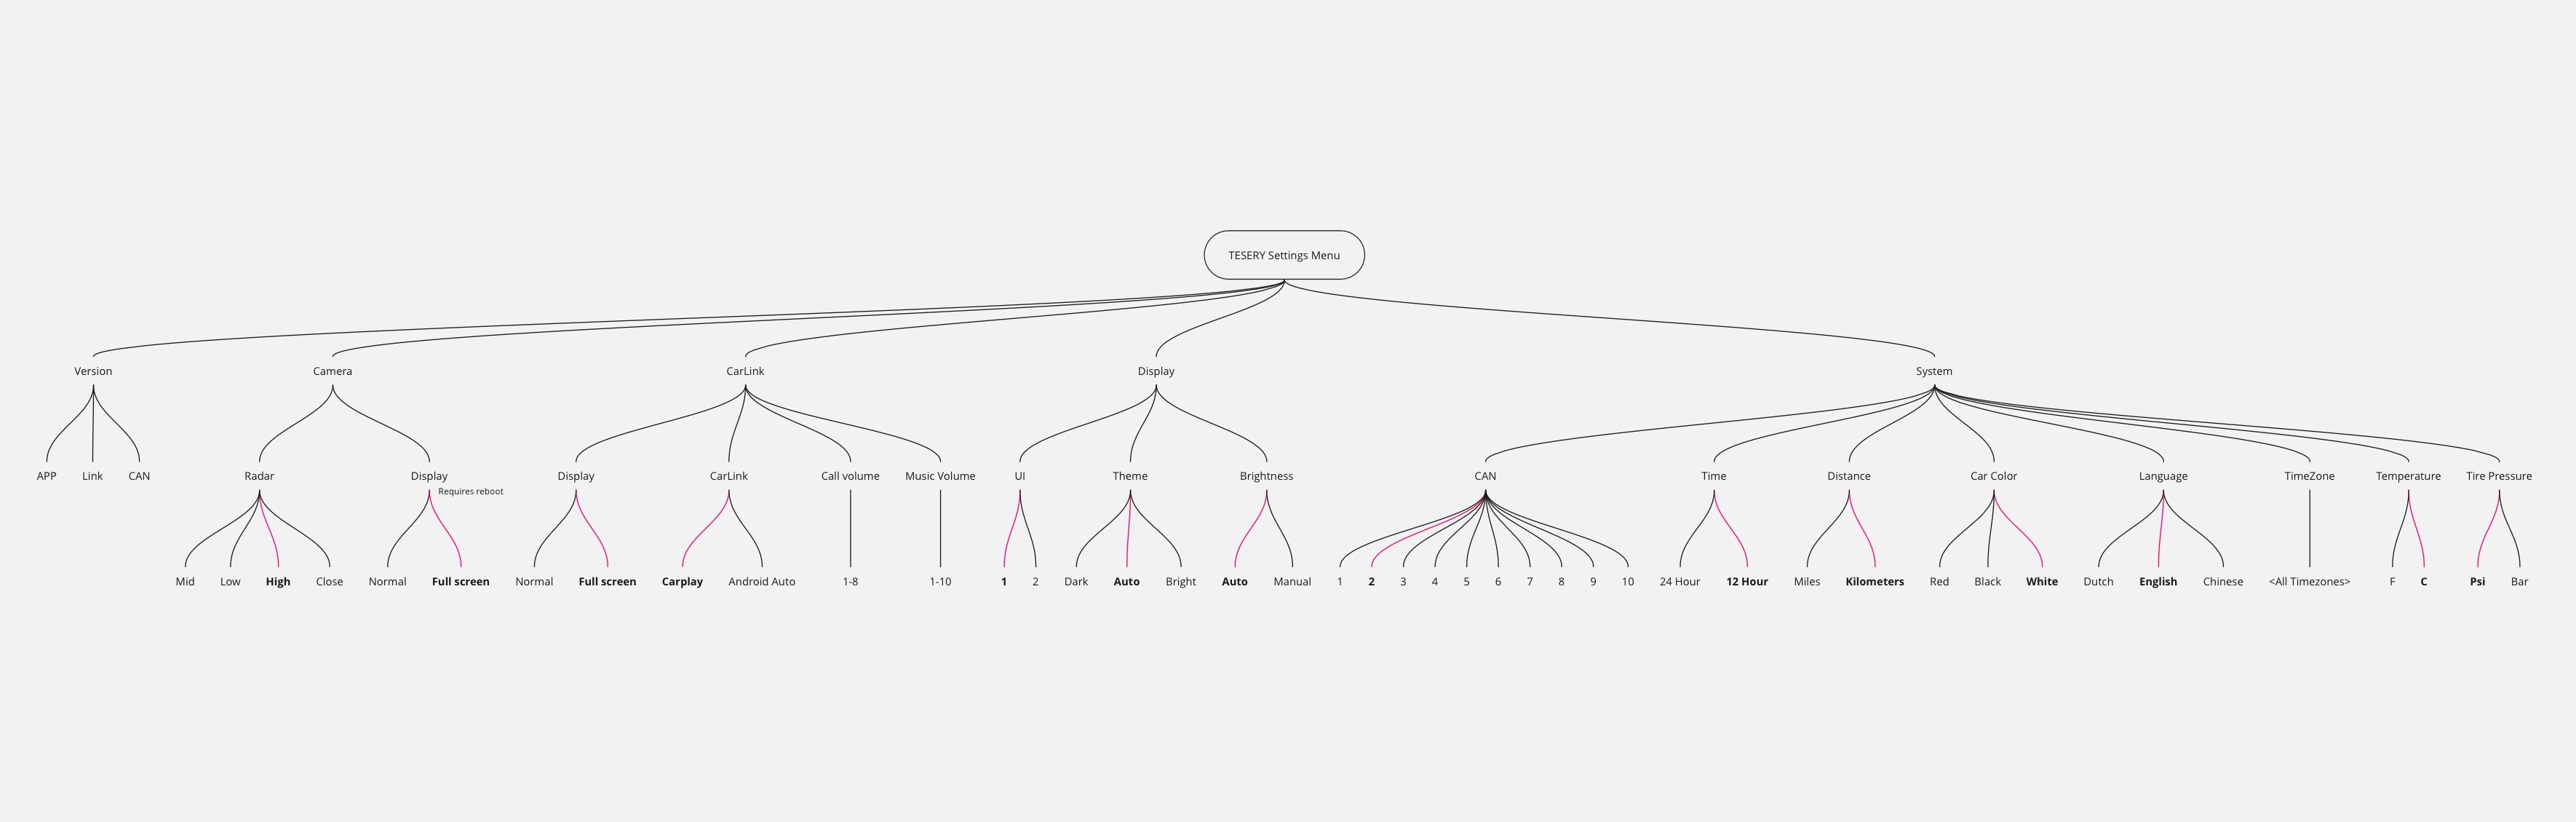
Here are a few settings worth mentioning:
When you change the Carlink display option (e.g. Full screen, Normal), the system requires a reboot
CAN settings define how it interprets signal from the CANBUS. I notice that with Tesla software 2024..8.9, CAN=2 is able to interpret the data better. The other settings seems to have an issue how interprets the auto high-beam settings.
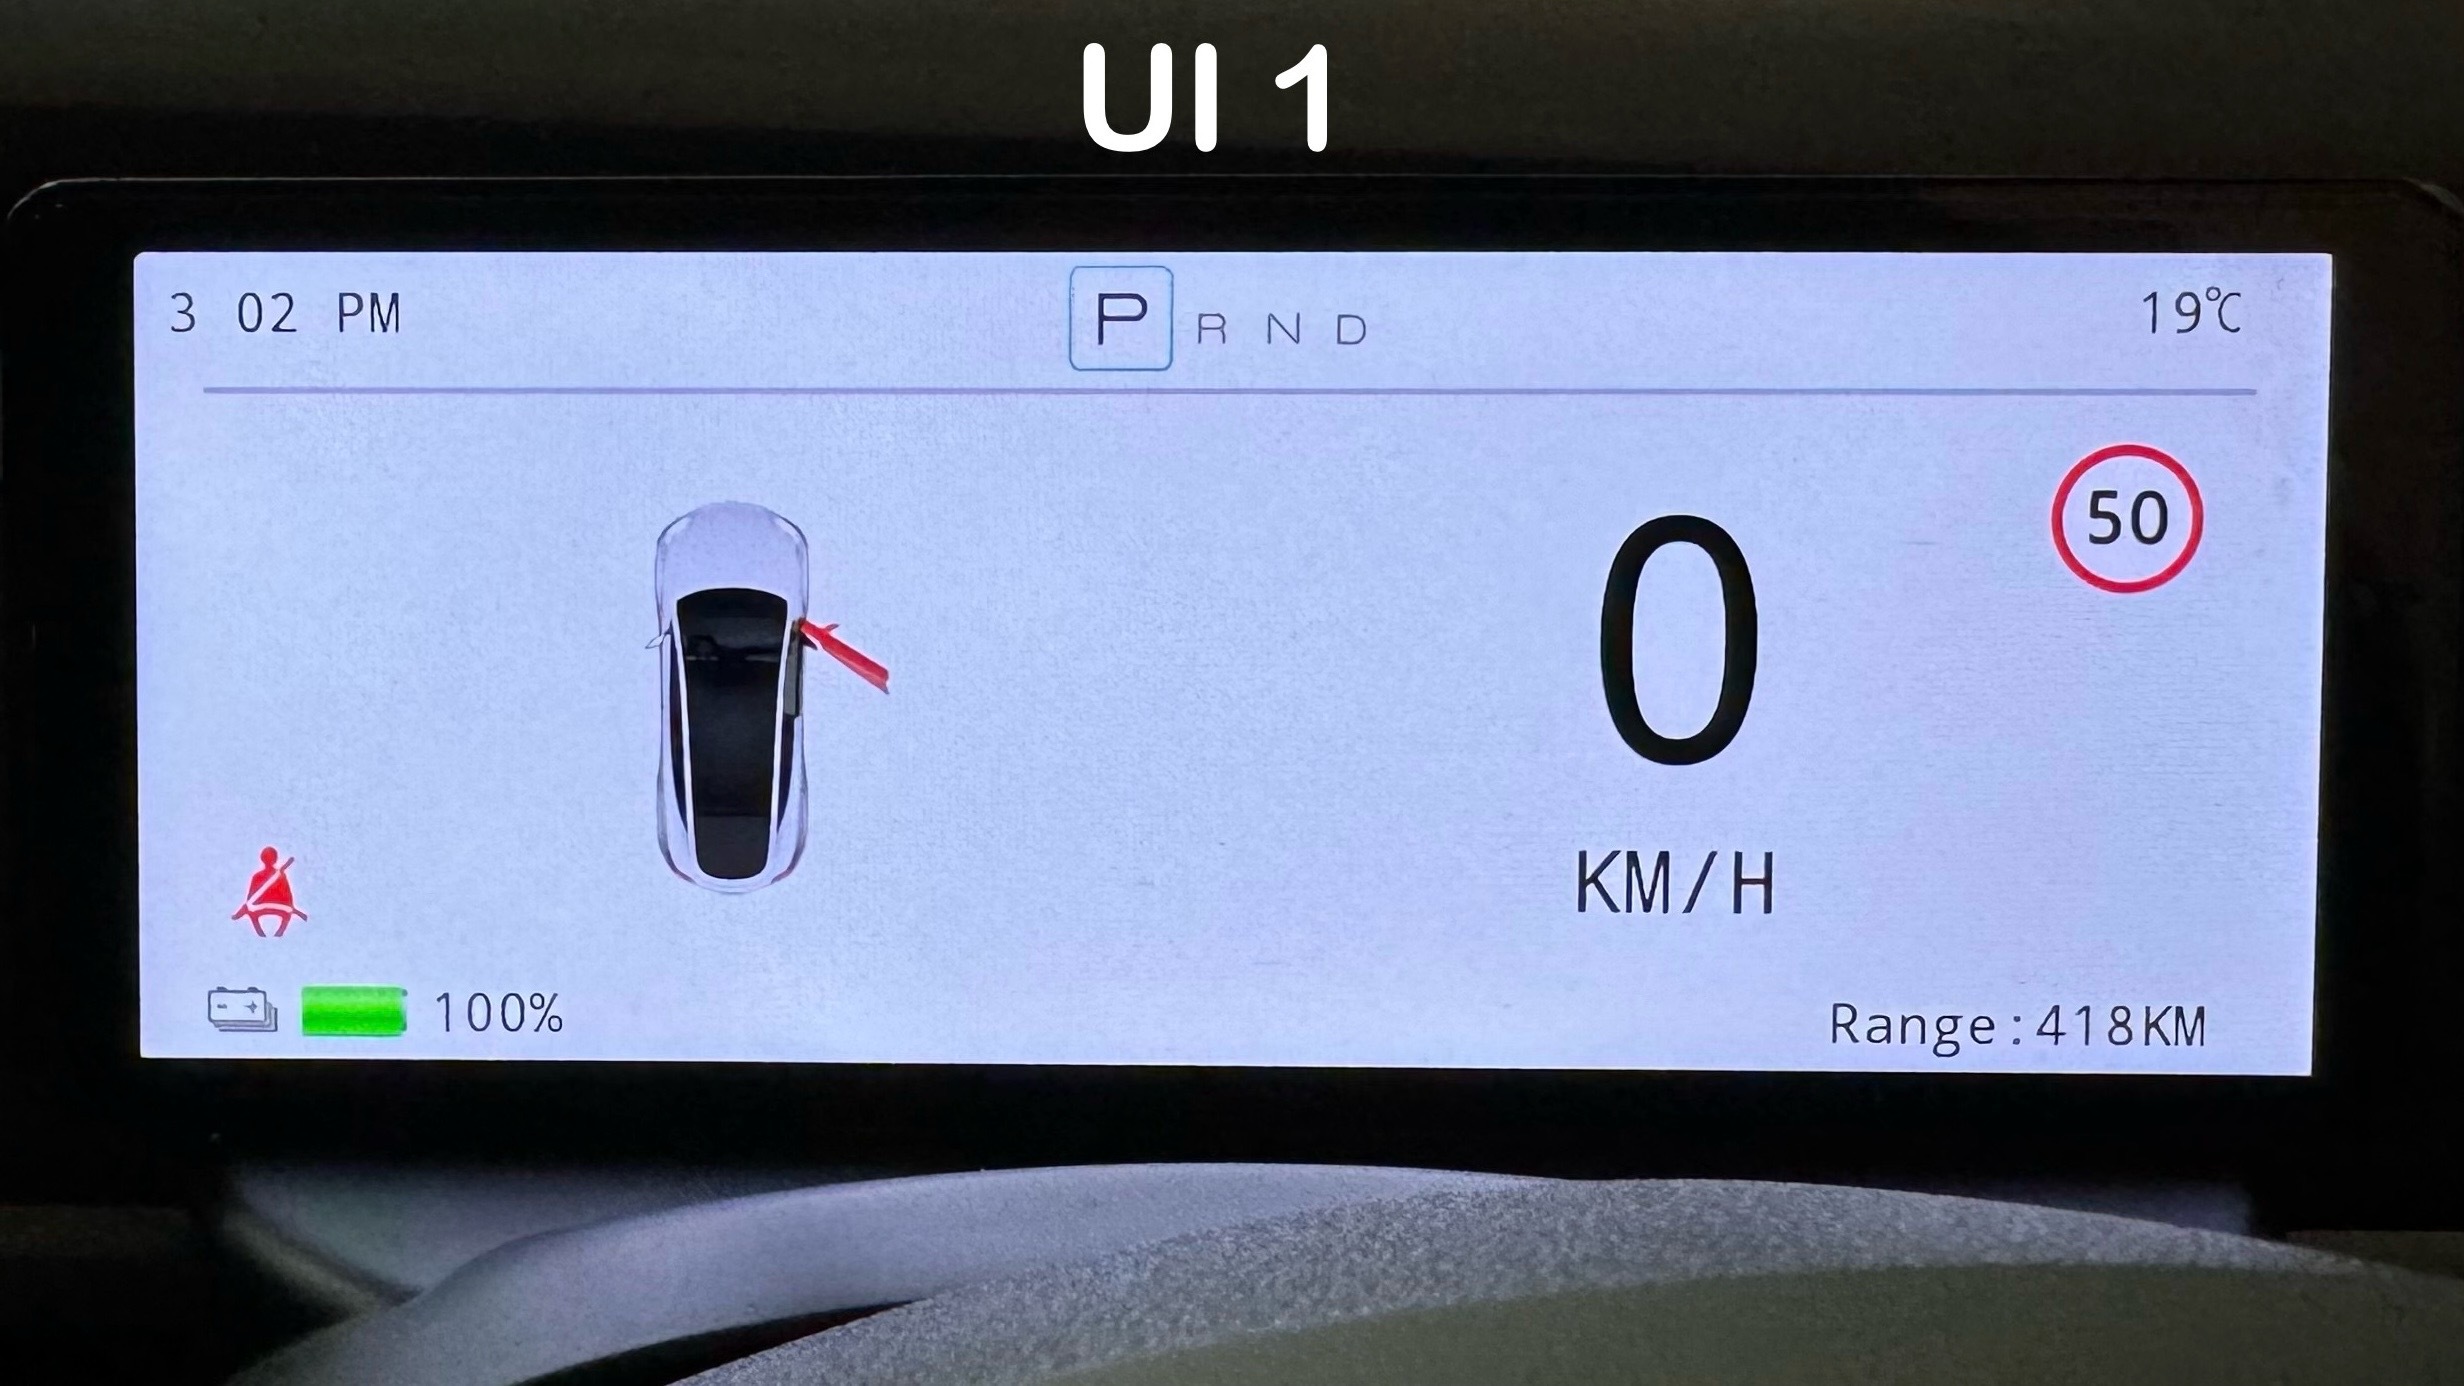
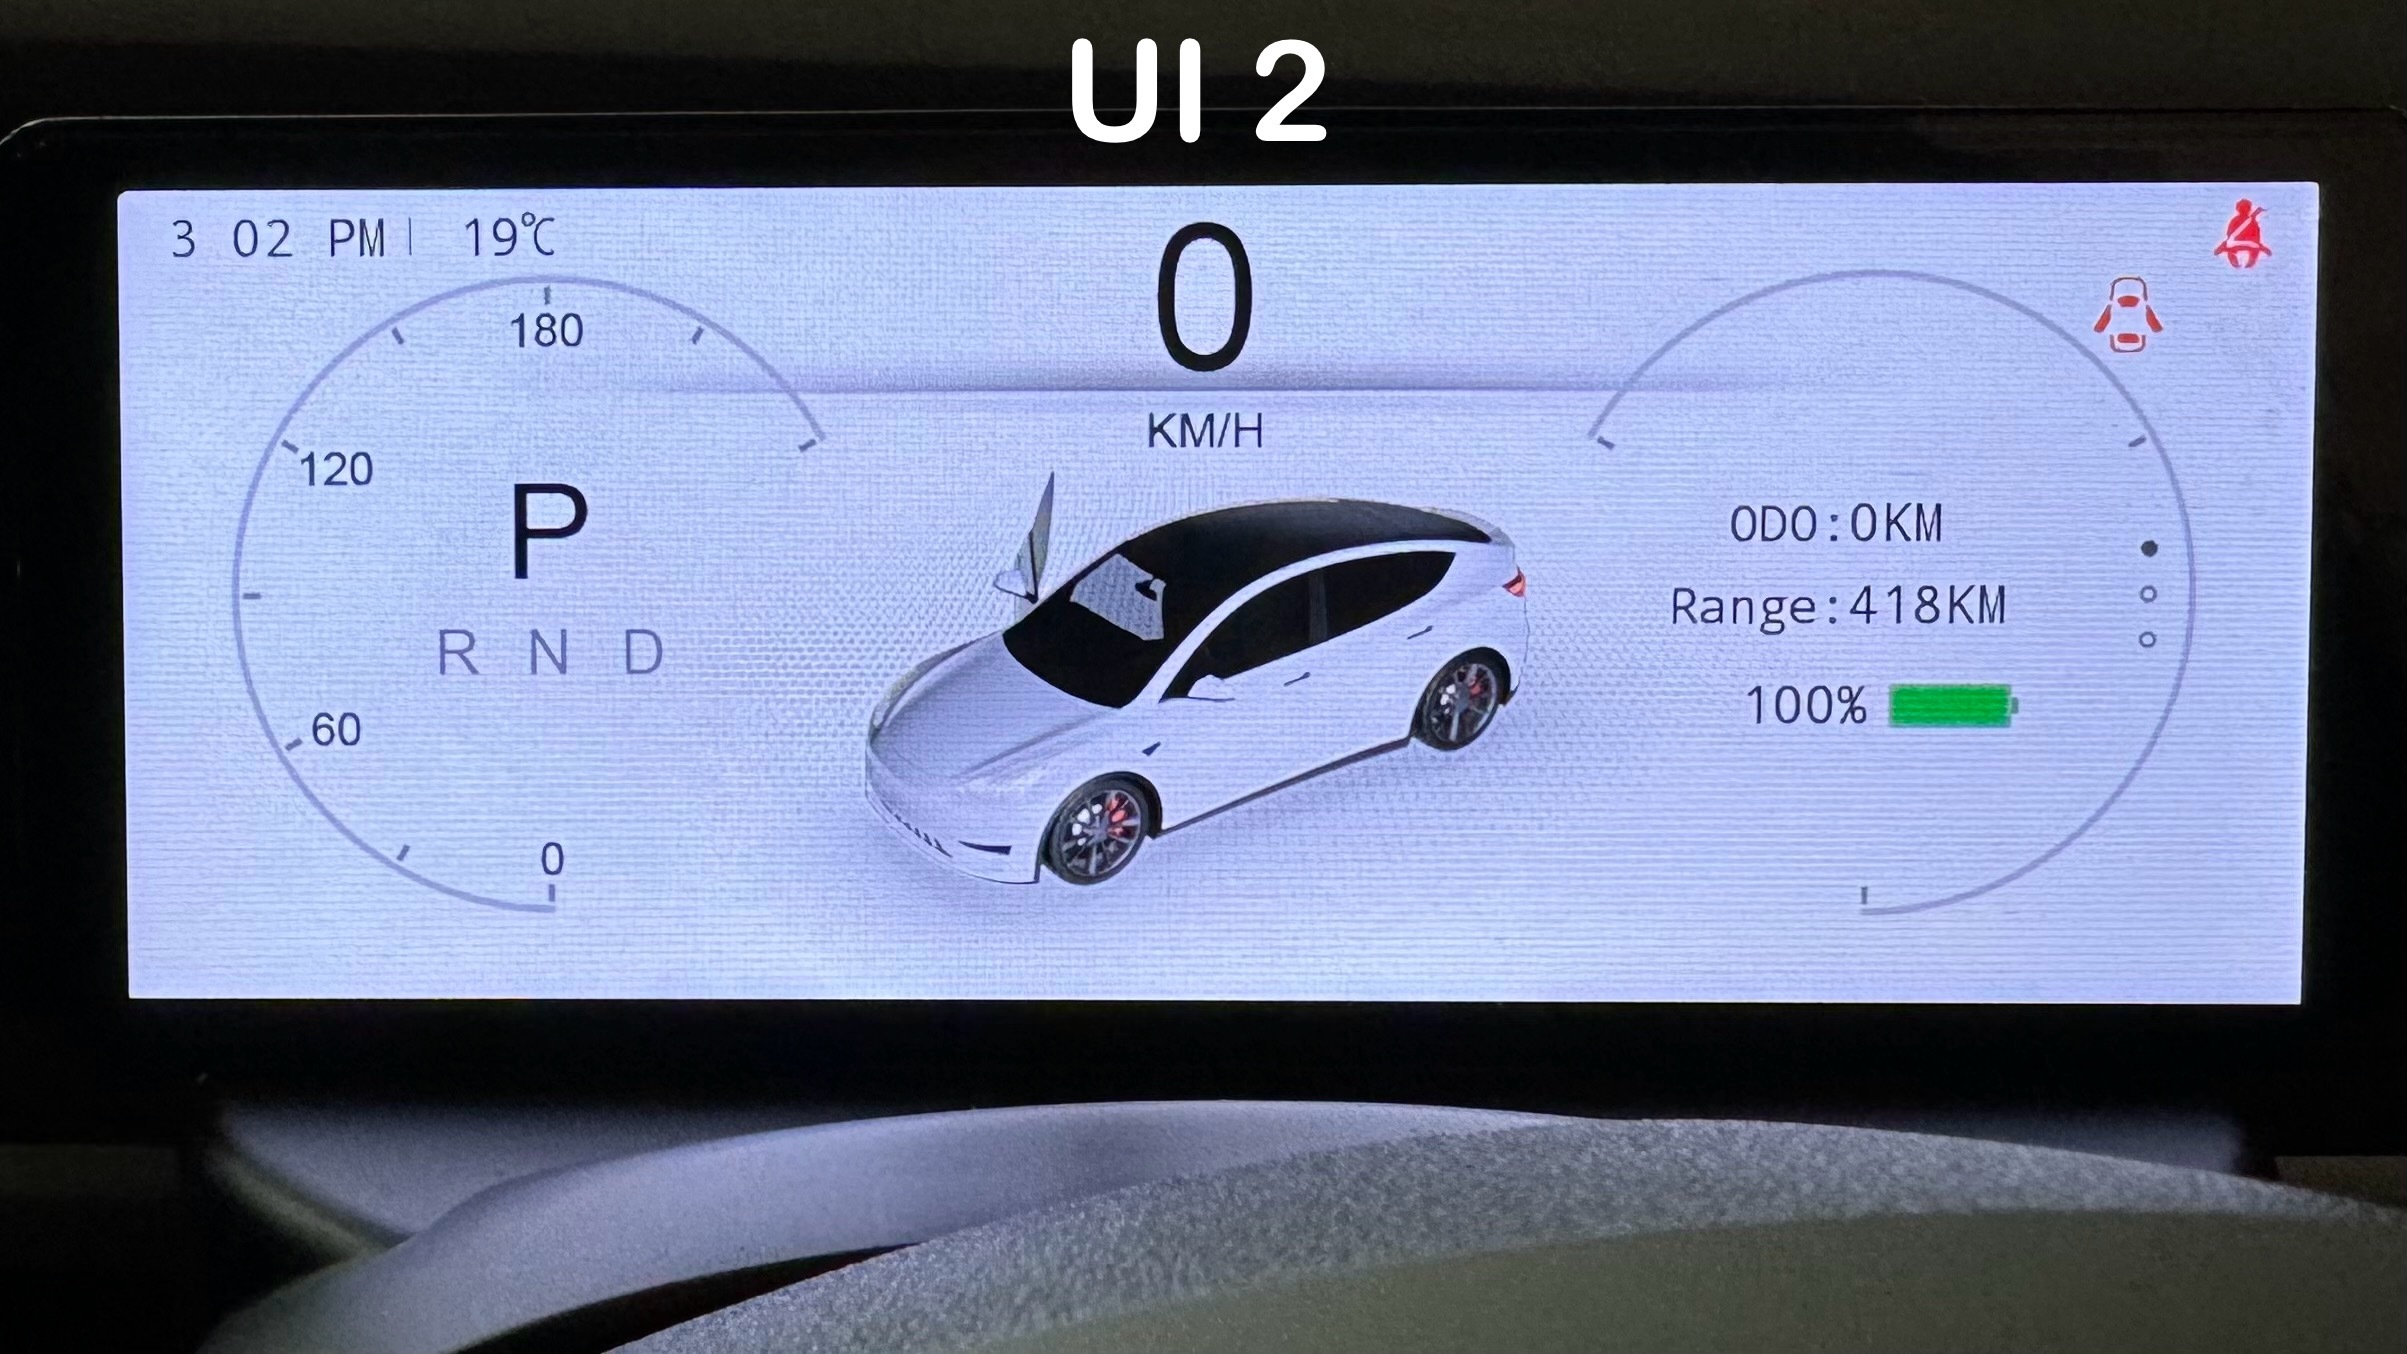
There are two types of UI in this product. I prefer the simple layout of UI=1
My Verdict
The 6.2” Smart LCD Dashboard from Tesery offers improved driving experience without breaking the bank. It is not too small that Carplay or Android Auto is still useable especially when navigating to a destination but it is not too big either that it blocks the airflow coming out of the A/C. And plus with the added benefit of the blind spot indicator appearing on the display, all of a sudden you have an improved safety feature that the Tesla screen is unable to match. I used to be a fan of the vent-mounted mini instrument clusters because I like the minimalistic look. However after using this product for two weeks, this Tesery product has a permanent place in my Tesla ❤️